Fill a PDF Form using PDF.co Web API in Python
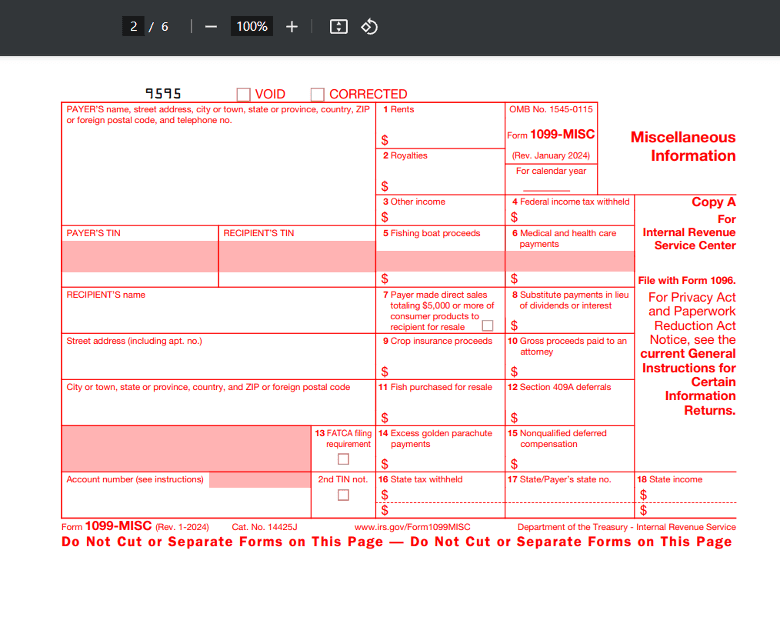
This tutorial will guide you through the process of filling a PDF form using the PDF.co Form Filler Web API with Python. The tutorial provides a step-by-step approach, including a sample source code for demonstration. In this demo, we will fill out fields on the second page of a sample IRS PDF form.
Step 1: Install the requests Library
Before starting, you need to install the requests library. This library allows you to make HTTP requests to the PDF.co API.
- Open your terminal or command line interface. Run the following command to install the requests module:
python -m pip install requests - This will install the requests library, enabling you to interact with the PDF.co Web API in your Python environment.
Step 2: Access the Source Code
Next, you need to prepare the Python script that will fill out the PDF form. You can copy the sample code from this link. Once you have the code, paste it into your preferred Python code editor, such as Visual Studio Code, PyCharm, or any other editor of your choice.
Step 3: Configure the Python Code
Now that you have the sample code, let’s configure it with your specific settings.
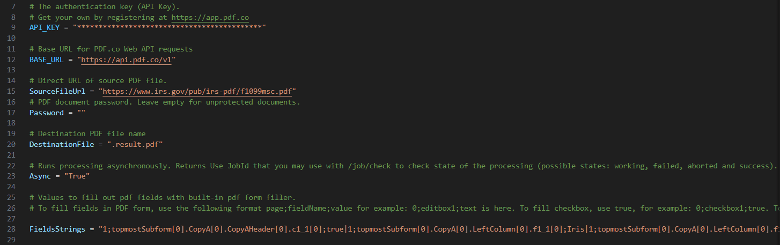
API Key:
- Obtain your API Key from your PDF.co dashboard and add it to the designated spot in the code.
Source File URL:
- Provide the URL of the PDF form you want to fill. If the PDF is stored locally on your machine, you can upload it to PDF.co’s File Storage. Once uploaded, you will receive a file token URL that you can use in the code.
Output PDF Name:
- Enter the desired name for the output PDF where the filled form will be saved.
Asynchronous Mode:
- For efficiency, we will use Asynchronous mode for conversion. This allows the PDF conversion to process in the background while the program continues executing, making it more efficient.
FieldStrings Parameters:
- To populate fillable PDF fields, use the following format:
page;fieldName;value.- The page index starts at 0 for the first page, 1 for the second page, and so on.
- The fieldName is the exact name of the form field you want to fill, which can be retrieved using the PDF.co PDF Inspector tool.
- The value is the text you want to insert into the form field.
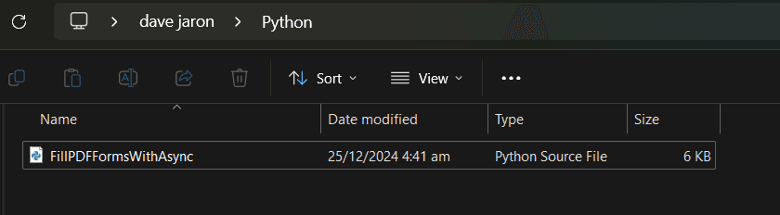
Step 4: Save Python Program
Once you have updated the code with your API Key, PDF file details, and parameter settings, save the Python program in your preferred directory.
Step 5: Run the Program
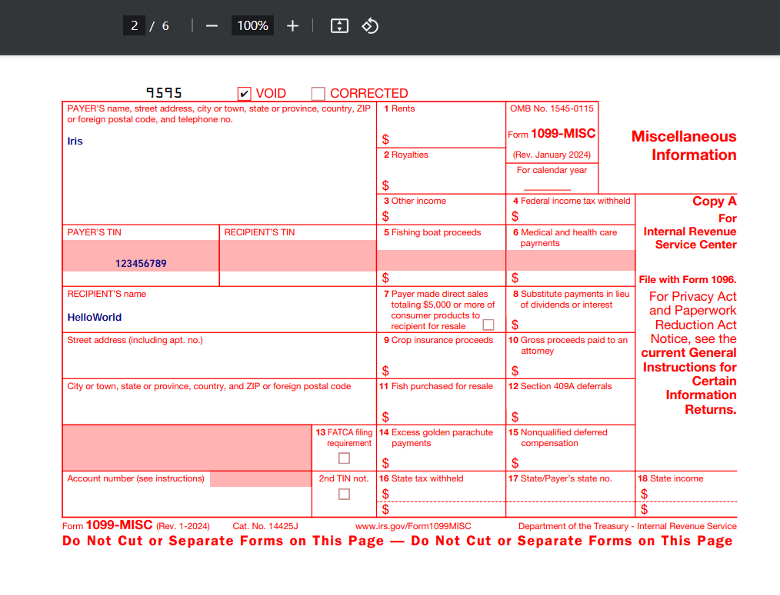
After saving the program, run the Python script. If everything is configured correctly, the program will fill out the specified fields in your PDF form.
Once the program finishes executing, you will receive a generated PDF URL. You can either:
- Copy the URL and paste it into your browser.
- Navigate to the directory where the Python script is located and find the generated filled PDF form.

Step 6: View PDF Result
Finally, open the output PDF file using your preferred PDF viewer. You should now see the PDF form filled with the values you specified in the script.
Related Tutorials
