Upload New Box Files to PDF.co using Zapier
In this tutorial, we will show you how to upload your new files in Box to PDF.co using Zapier.
IN THIS TUTORIAL
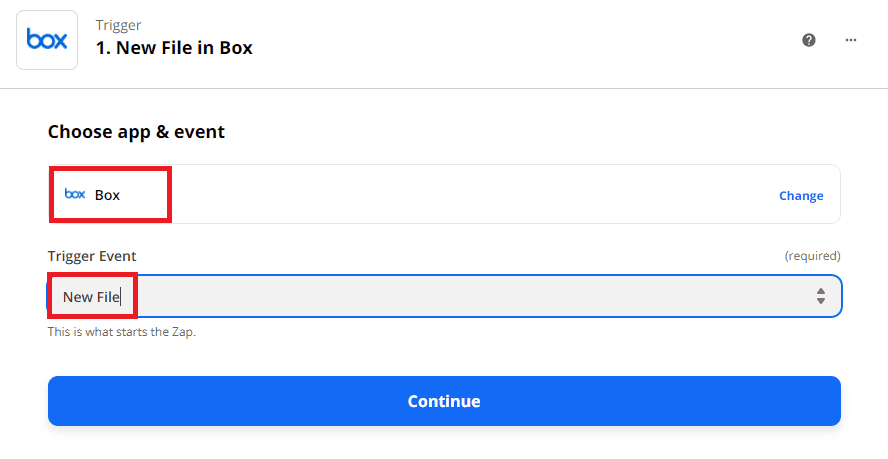
Step 1: Create a Zap
First, let’s create a Zap. Choose the Box as the App and the New File as the Trigger Event.
Step 2: Set up a Trigger
Let’s set up the New File trigger.
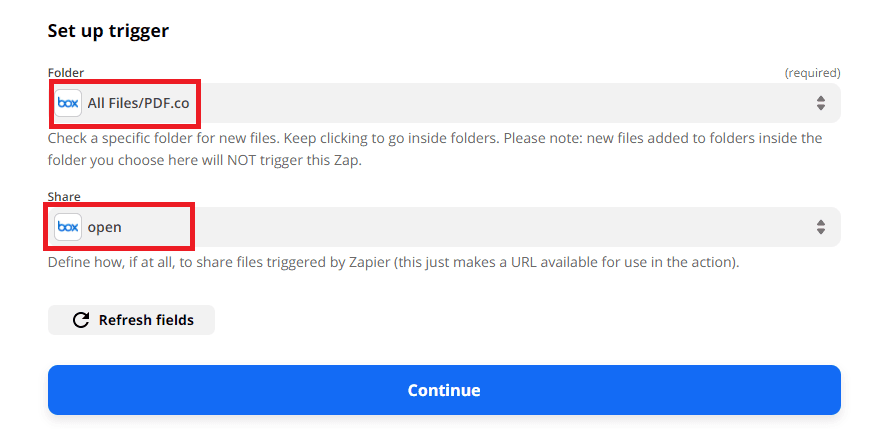
- In the Folder field, choose the Box folder where you plan to store the new files.
- In the Share field, you can choose the file sharing option for all new files.
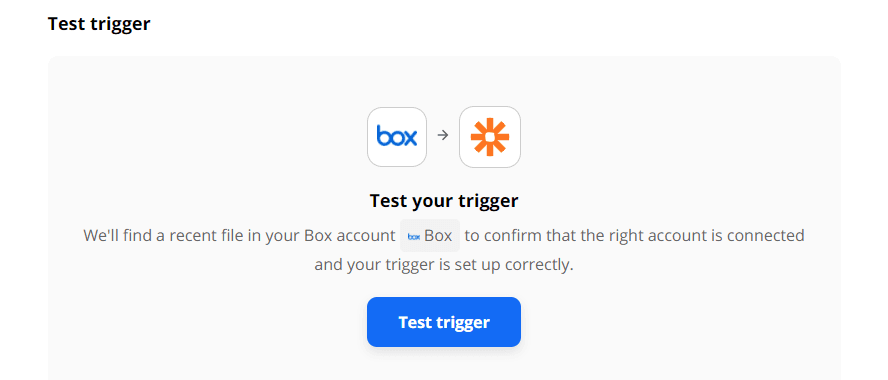
Step 3: Test the Trigger
Let’s test the trigger to make sure that we set it up correctly.
Step 4: Add a Signature to the File
Great! Box returned a file that we will use to test this feature. We are now ready to access it on PDF.co. To demonstrate it in PDF.co, we will add a sample signature in this file.

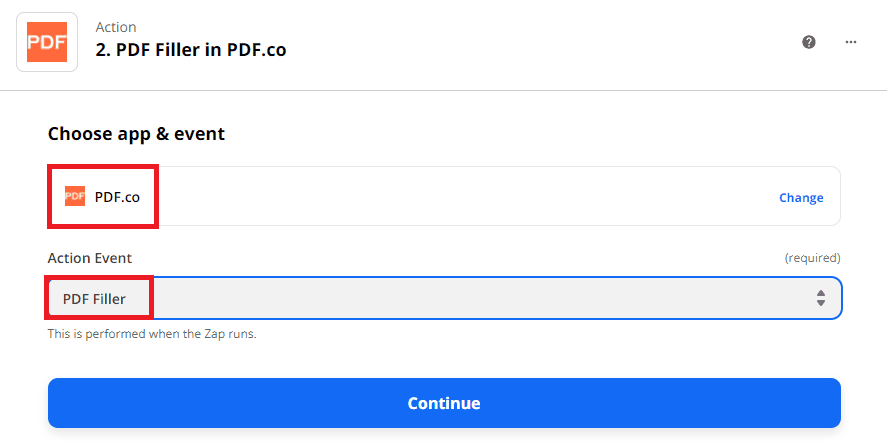
Step 5: Add a New Step in the Zap
Next, let’s add a new step in the Zap. This time let’s choose PDF.co as the App and PDF Filler as the Action Event.
Step 6: Configure the PDF Filler
Let’s configure the PDF Filler action.
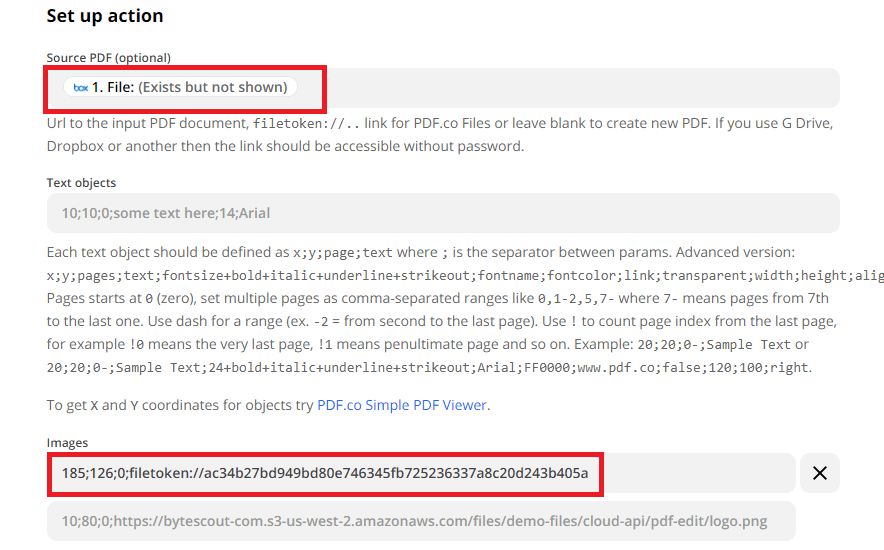
- In the Source PDF field, select the file from Box.
- In the Images field, enter the coordinates, page index, and an image of a signature to add to the PDF. In this format
x;y;pageIndex;imageURL. To learn more about adding text, images, and links to PDF, please check out this tutorial.
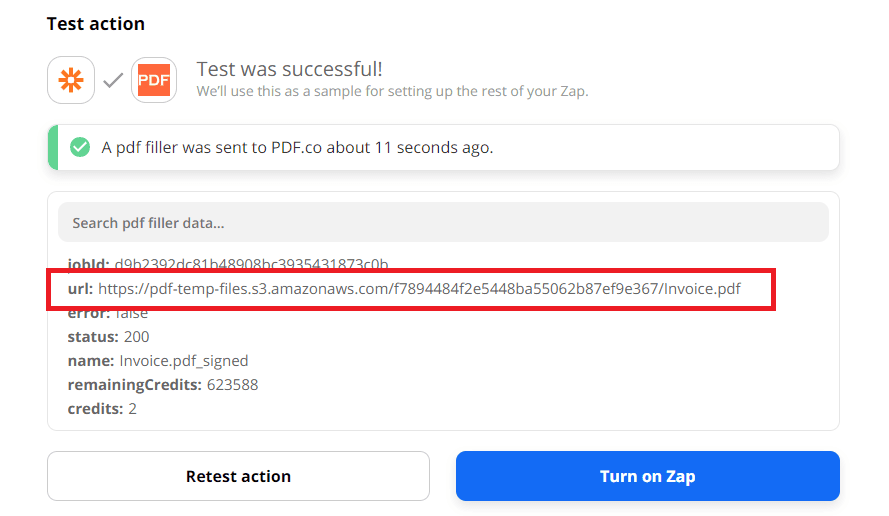
Step 7: Test the PDF Filler
Let’s test the PDF Filler by sending it to PDF.co.

Step 8: Download the Signed File
Terrific! PDF.co generated a temporary URL that we can use to view and download the signed file.
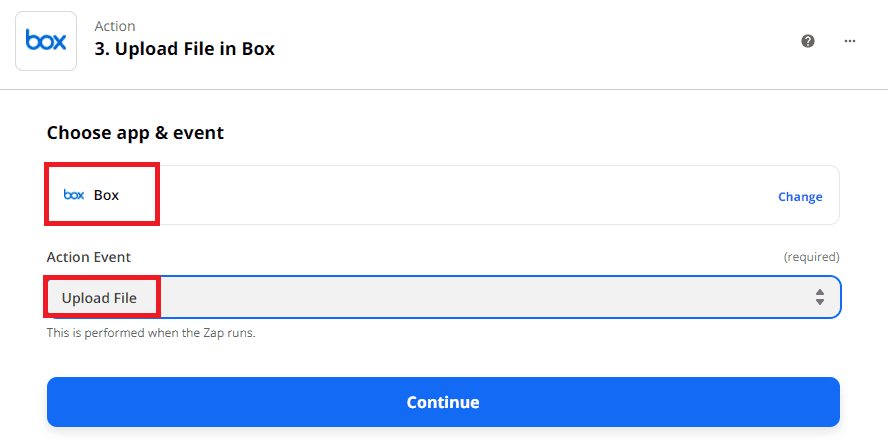
Step 9: Upload the File Back to Box
In addition to uploading new files from Box to PDF.co, we can also upload the signed file back to Box. To do that, let’s add a new step and choose the Box as the App and the Upload File as the Action Event.
Step 10: Set up the Action
Let’s set up the action.
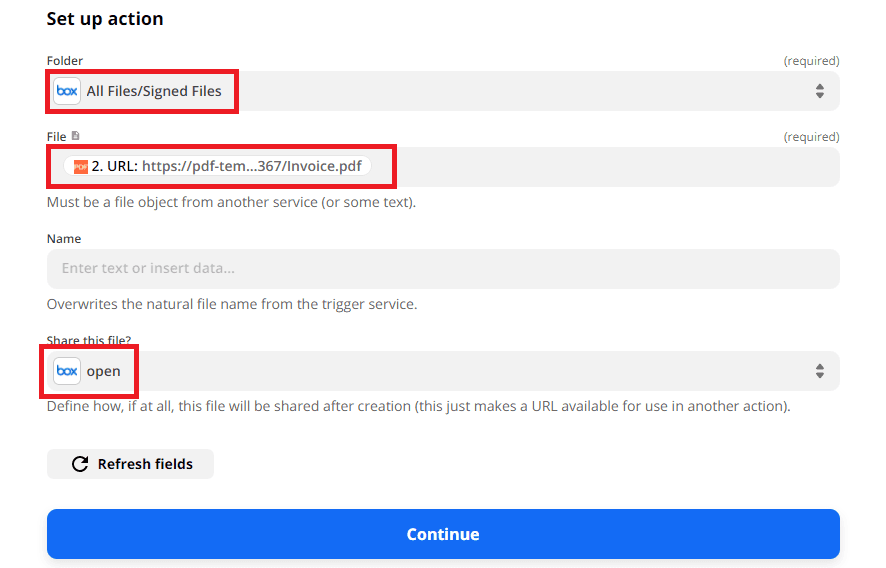
- In the Folder field, choose the name of the folder where you want to store the files.
- In the File field, select the URL generated by PDF.co.
- In the Share this file field, select the file sharing option for the files.
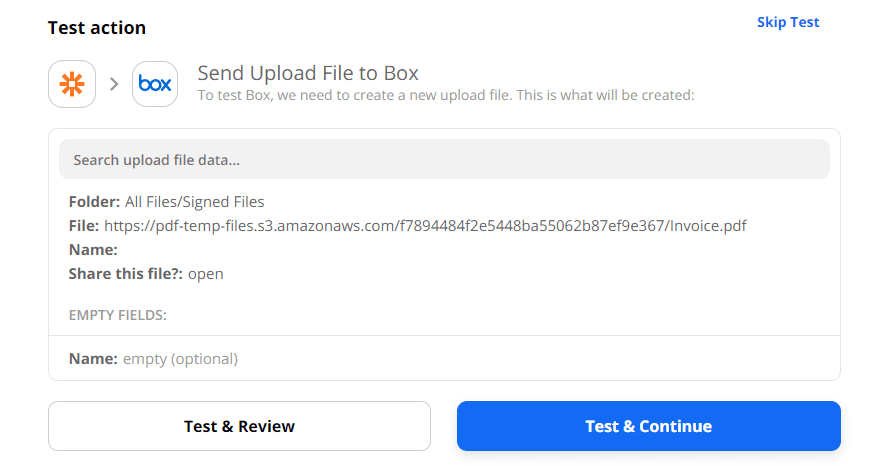
Step 11: Test & Review
It’s time to Test & Review the Upload File action.
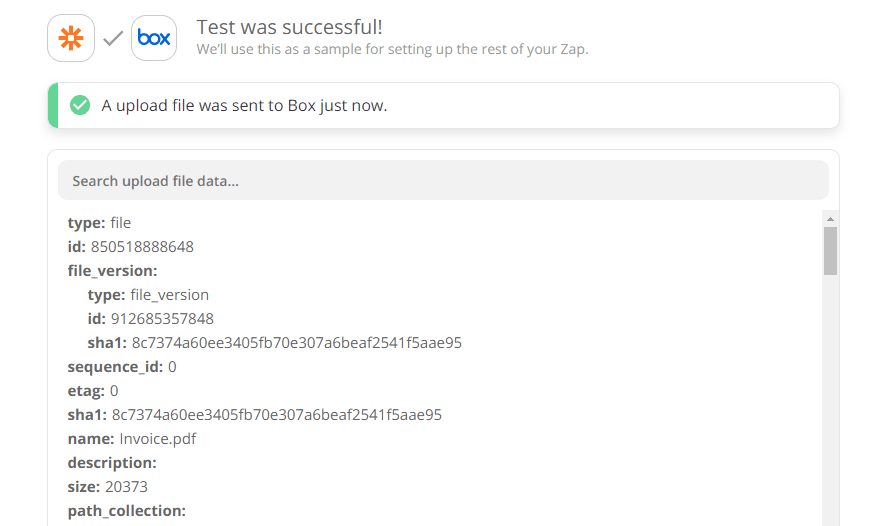
Step 12: Zap Runs Successfully
Fantastic! We have successfully uploaded the file to Box.
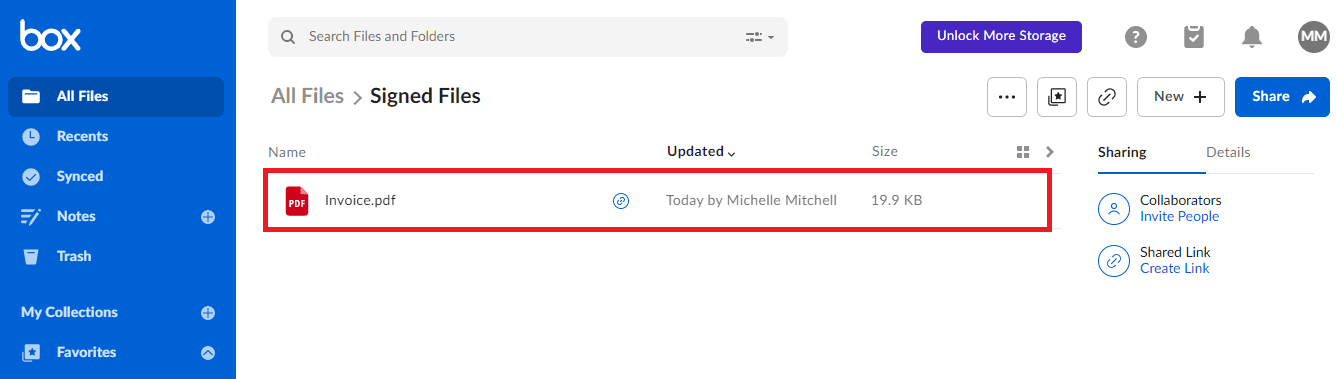
Step 13: The File is Added to the Folder
The generated file in PDF.co has been added to our selected folder.
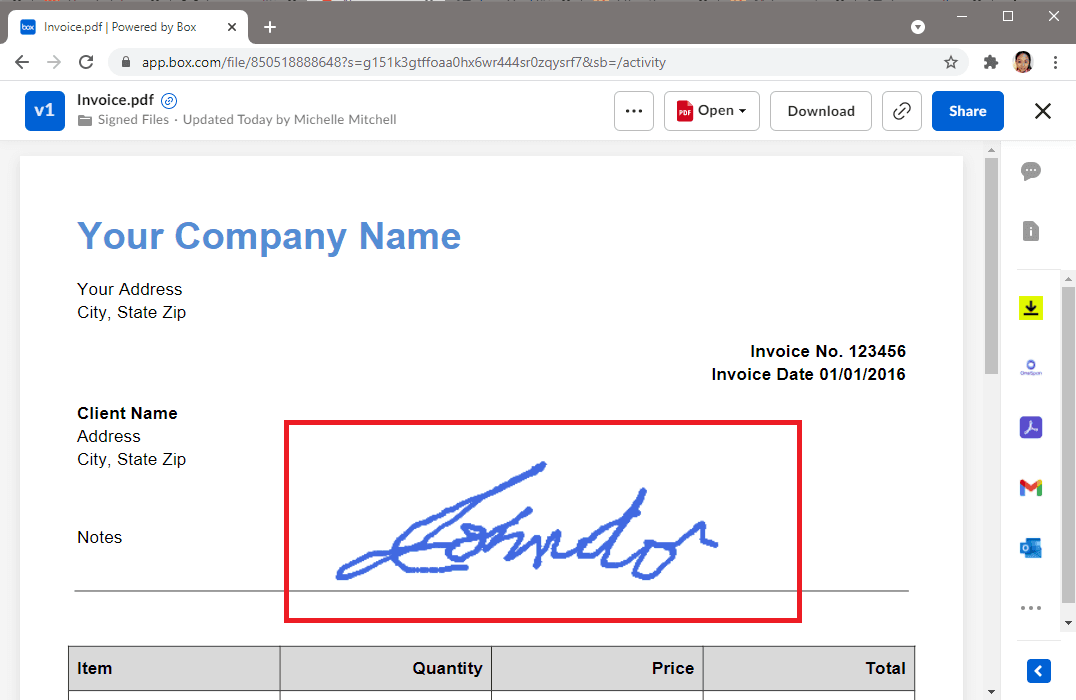
Step 14: PDF.co Generated Output
Here’s the image of the PDF.co generated output uploaded back to Box.
In this tutorial, we learned how to set up a New File trigger in Box. We also learned how to access this new file in PDF.co. And last but not the least, we learned how to upload the file back to Box.
Related Tutorials

