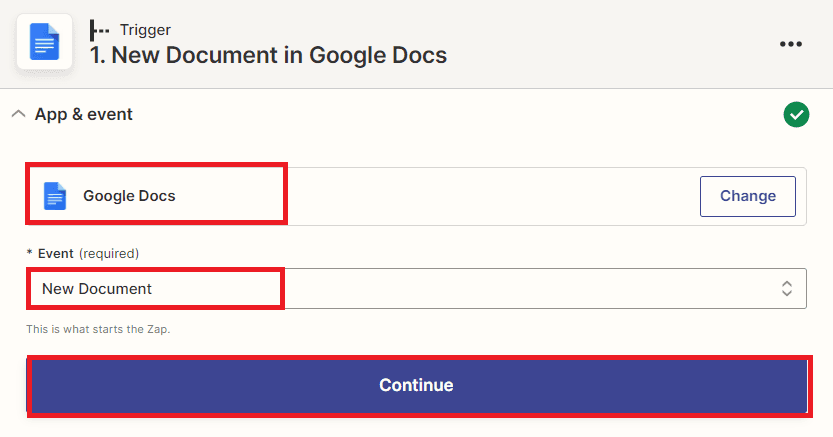
To connect your PDF.co account to Zapier, add your API Key. You can get the API Key in your PDF.co dashboard.
Effortlessly Convert Google Docs to PDF and Send to Airtable with PDF.co and Zapier
In today’s digital age, document management has become an integral part of both personal and professional workflows. As more and more businesses shift towards digital documentation, finding the right tools to streamline this process has become increasingly important.
One common task in document management is converting Google Docs to PDF. While Google Docs is an excellent word processing tool, there are times when you need to convert a document to a PDF format, either for printing or for sharing with others who may not have access to Google Docs.
The good news is that there are tools available to make this process easy and efficient. One such tool is PDF.co, an API platform that allows you to convert Google Docs to PDF automatically.
In this tutorial, we will walk you through the steps to set up a Zapier automation that integrates PDF.co and Airtable, allowing you to automatically convert Google Docs to PDF and send them directly to your Airtable account. This automation will save you time and effort, while also ensuring that your documents are properly managed and organized. So, let’s get started!
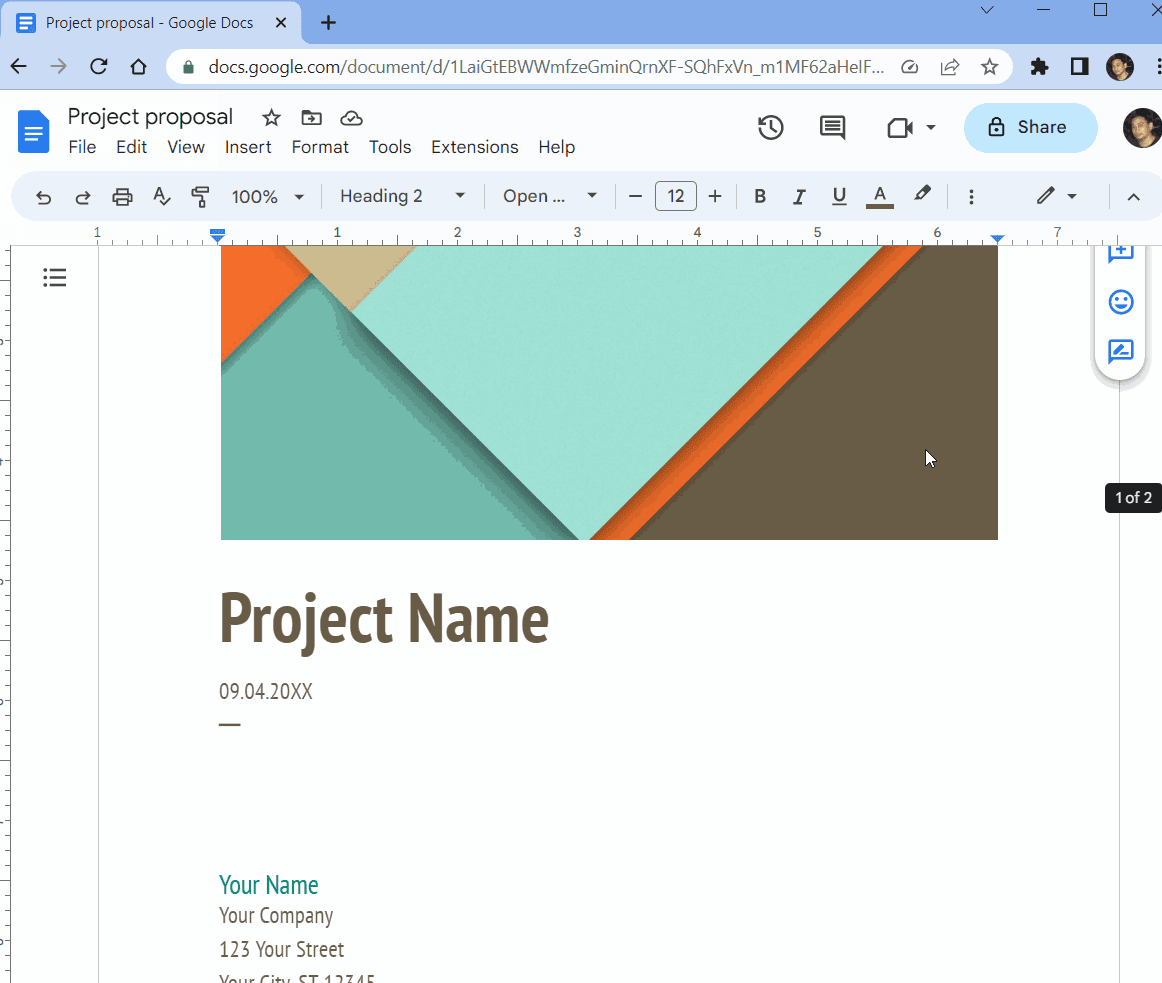
We will use this sample Google Docs document and convert it into a PDF format to save in Airtable.
Step 1: Open Zapier Account
- Let’s start by logging into your Zapier account and clicking on the Create Zap button.
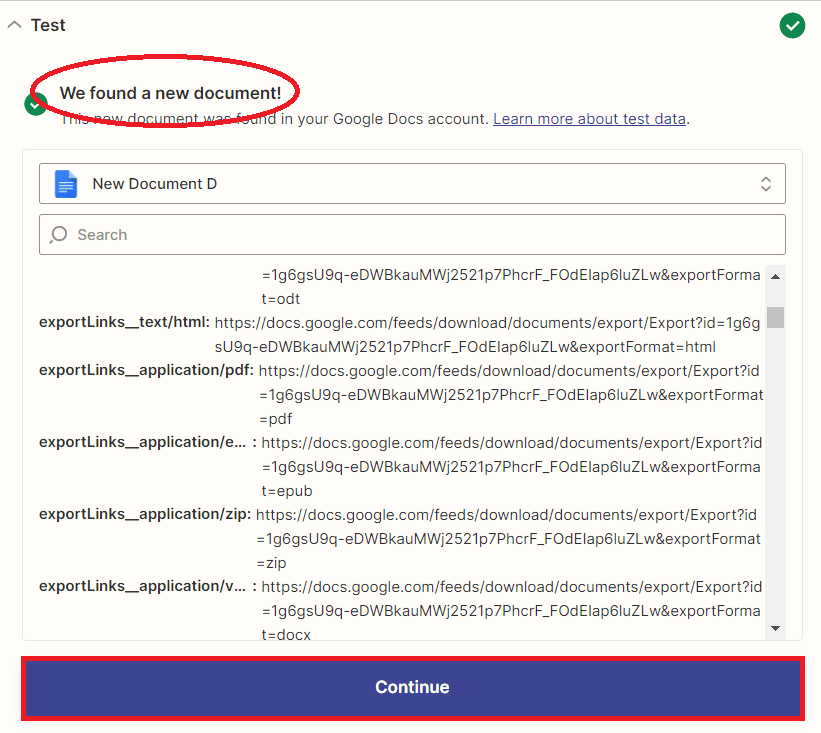
Step 3: Test Trigger Result
- Fantastic! The test trigger has been successful in detecting a newly added document to Google Docs, we can proceed with adding another application that will allow us to convert the document into a PDF format.
Step 4: Add PDF.co App
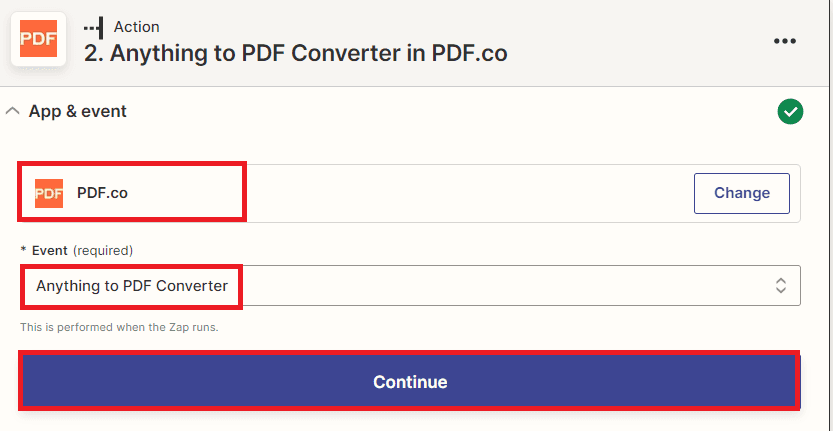
- In this step, let’s proceed to add the PDF.co app to our workflow. We can choose the “Anything to PDF Converter” option provided by the app to easily convert our document from Google Docs to a PDF format.
Step 5: Setup PDF.co Action
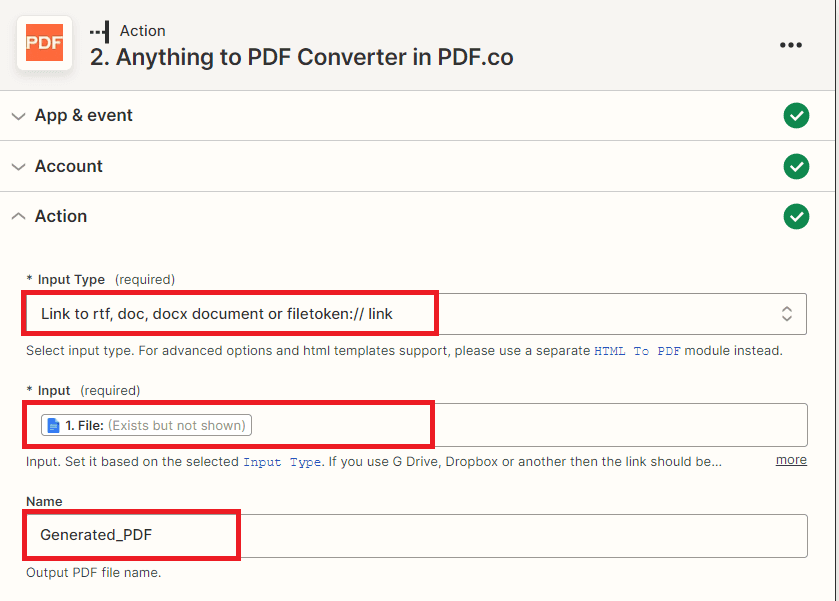
Let’s set up the action for the PDF.co app. Here are the steps you can follow:
- In the Input Type field, select “Link to rtf, doc, docx document or filetoken://link” option. This will allow us to input a link to our Google Docs document.
- In the Input field, select “File: (Exists but not shown)” option from Google Docs. This will prompt the app to look for the Google Docs file that we want to convert to PDF.
- In the Name field, enter the desired name for your output PDF file. This will be the name of the file that will be generated after the conversion process is complete.
Let’s test the action to send a request to PDF.co for processing the conversion of the Google Docs document to PDF. Once you initiate the test, the workflow will trigger the action we just set up, which will convert the Google Docs document to a PDF format using the PDF.co.
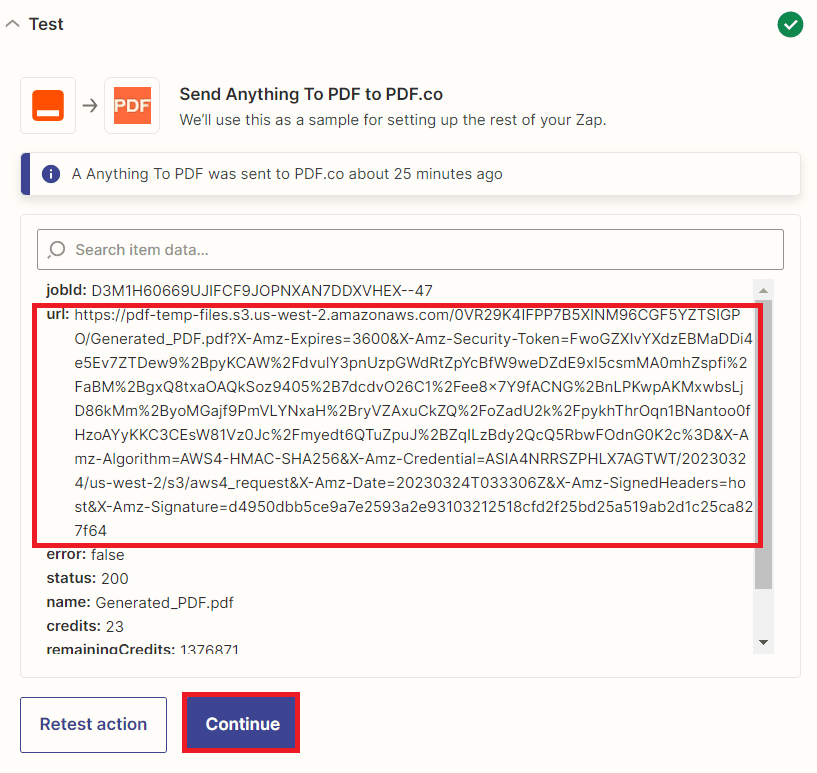
Step 6: Test Action Result
- Excellent! The test was successful and the Google Docs document was successfully converted to a PDF format. To view the generated PDF document, you can simply copy the URL of the file and paste it into your web browser. This will open up the PDF file for you to view and download if necessary.
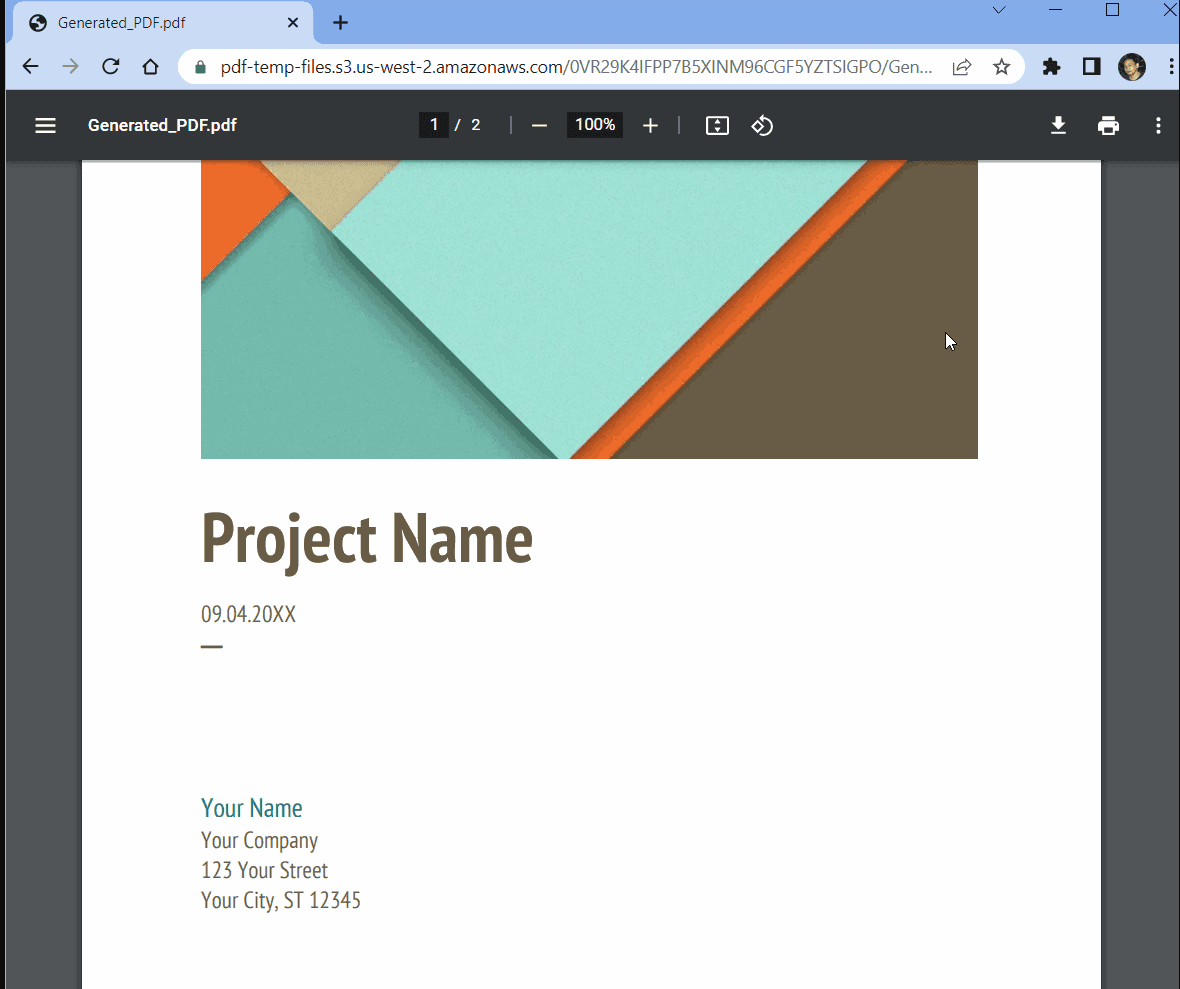
Step 7: Generated PDF Document
- Below is an example of the PDF output that is generated after converting a Google Docs document to PDF format.
Certainly, let’s proceed with adding another app to send the generated PDF document to Airtable. This will allow you to easily store and manage the converted PDF document alongside other relevant data in Airtable.
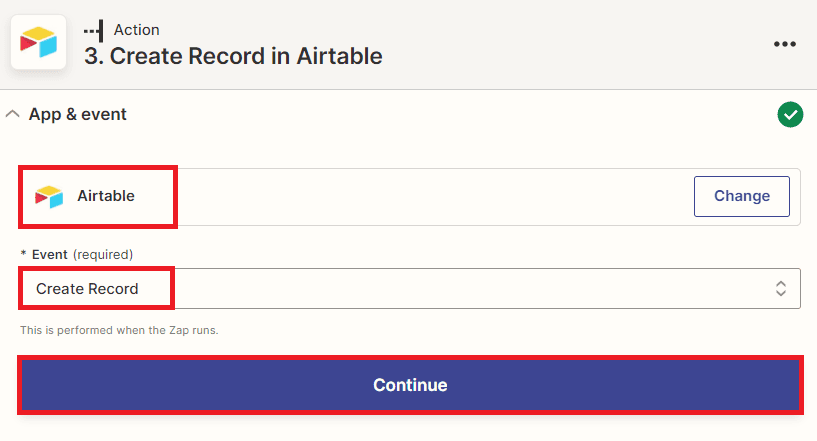
Step 8: Add Airtable App
- In this step, we will integrate the Airtable app and select the Create Record option to generate a new record in the designated Airtable table.
Step 9: Setup Airtable Action
To configure Airtable for your workflow, you can follow these steps:
- In the “Base” field, select the Airtable base in which you want to create the record.
- In the “Table” field, select the specific table within the selected base where you want to create the record.
- Add a Fields section to map the PDF Name and PDF URL data to the corresponding Airtable fields. You can do this by selecting the appropriate PDF.co output fields and matching them to the corresponding Airtable fields. This will ensure that the data is saved in the correct format and location in your Airtable Base and Table.
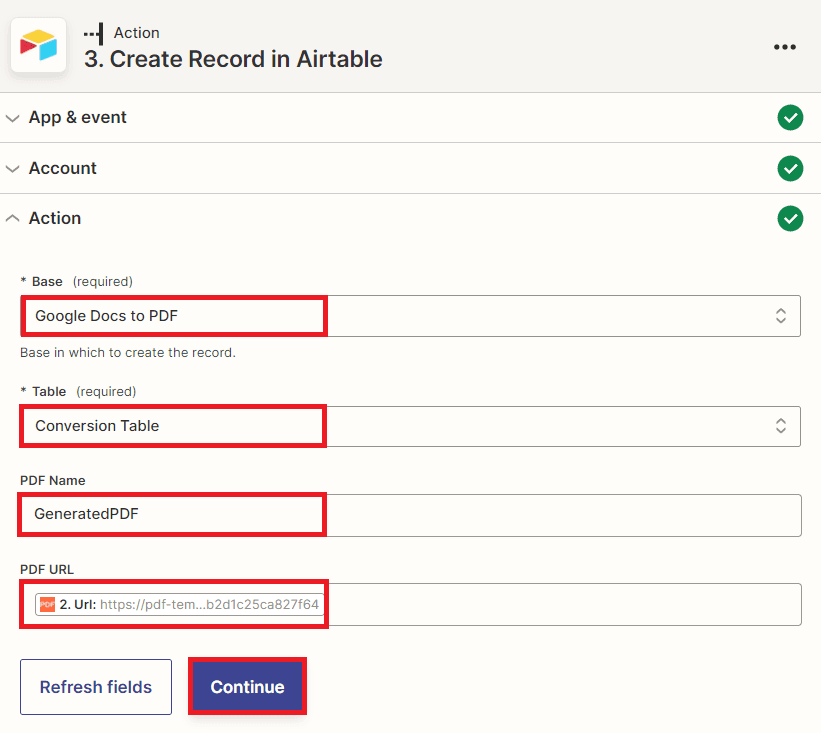
Let’s proceed with testing the Airtable action, which involves creating a new record in the designated table and sending the resulting PDF to the relevant table.
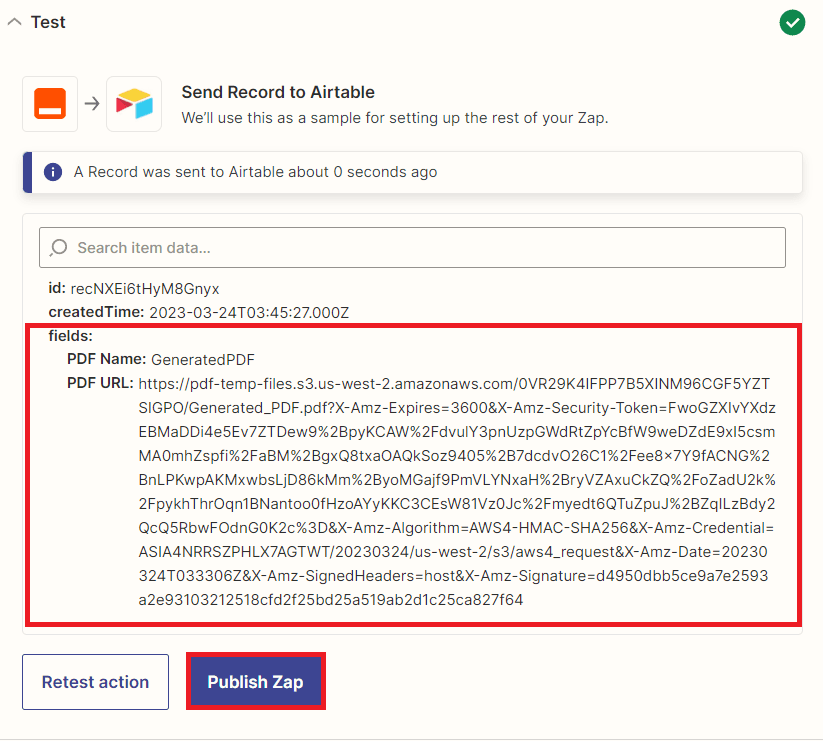
Step 10: Airtable Action Result
- Congratulations! The test was successful, and the resulting PDF was successfully sent to the designated Airtable table. Please navigate to your designated Airtable table to verify the creation of the new record containing the generated PDF file.
Step 11: New Record in Airtable
- Here is the Airtable table that contains the newly added record with the generated PDF file that resulted from converting the Google Docs document.

In this tutorial, you learned how to effortlessly convert Google Docs to PDF and send them to Airtable with PDF.co and Zapier. The tutorial outlines a streamlined process for converting Google Docs to PDFs and automatically sending them to Airtable. By automating this process, users can save time and improve their workflow efficiency. With PDF.co’s reliable and accurate conversion capabilities, users can ensure that their Google Docs are correctly converted to PDF format, without any errors or formatting issues. By automatically sending the converted PDF files to Airtable, users can easily store and manage their documents in one centralized location. This can help to improve overall organization and facilitate collaboration among team members. The tutorial provides an opportunity for users to gain a better understanding of how different tools and platforms can be integrated to create a seamless workflow. By learning how to use Zapier and PDF.co together, users can leverage these integrations to enhance their productivity and efficiency.
Overall, this tutorial offers valuable insights and practical tips for users looking to optimize their document management processes and streamline their workflow.
Video Guide
Related Tutorials


