How to Generate a PDF Invoice using PDF.co API with a Template Invoice in Postman
PDF.co supports Mustache and Handlebars templates to produce HTML to PDF. Both Mustache and Handlebars are logic-less template syntax. They can be used for source codes, config files, HTML, and more. PDF.co uses this template syntax to help generate invoices.
This Invoice Template tutorial uses PDF.co's Template Sample 3 to help generate invoices. Check out Template Sample 1 and Template Sample 2 for other template sample layouts.
You can also make a PDF Invoice from scratch by adding text and images to an empty PDF.
Select PDF.co API v. 1 from the Collections Tab
In Postman go to the Collections tab and click the PDF.co API v.1 folder.
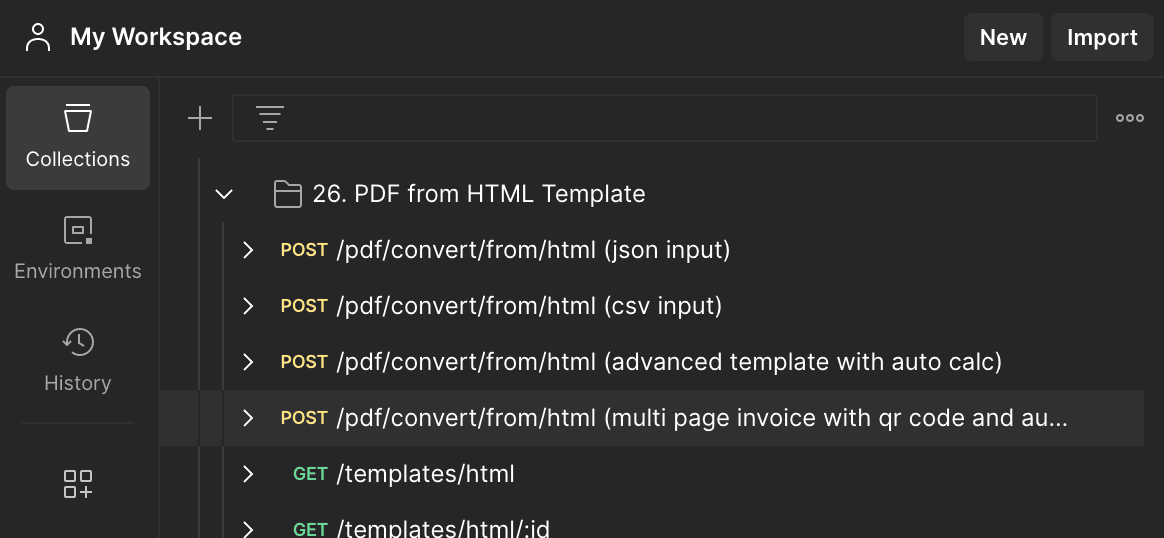
Select the /pdf/convert/from/html (multi page invoice with qr code and auto calc) sample in the list.
Use JSON Code to Create the Invoice
On the raw inside the Body menu is a JSON code that we will use to create the invoice with pre-filled invoice information.
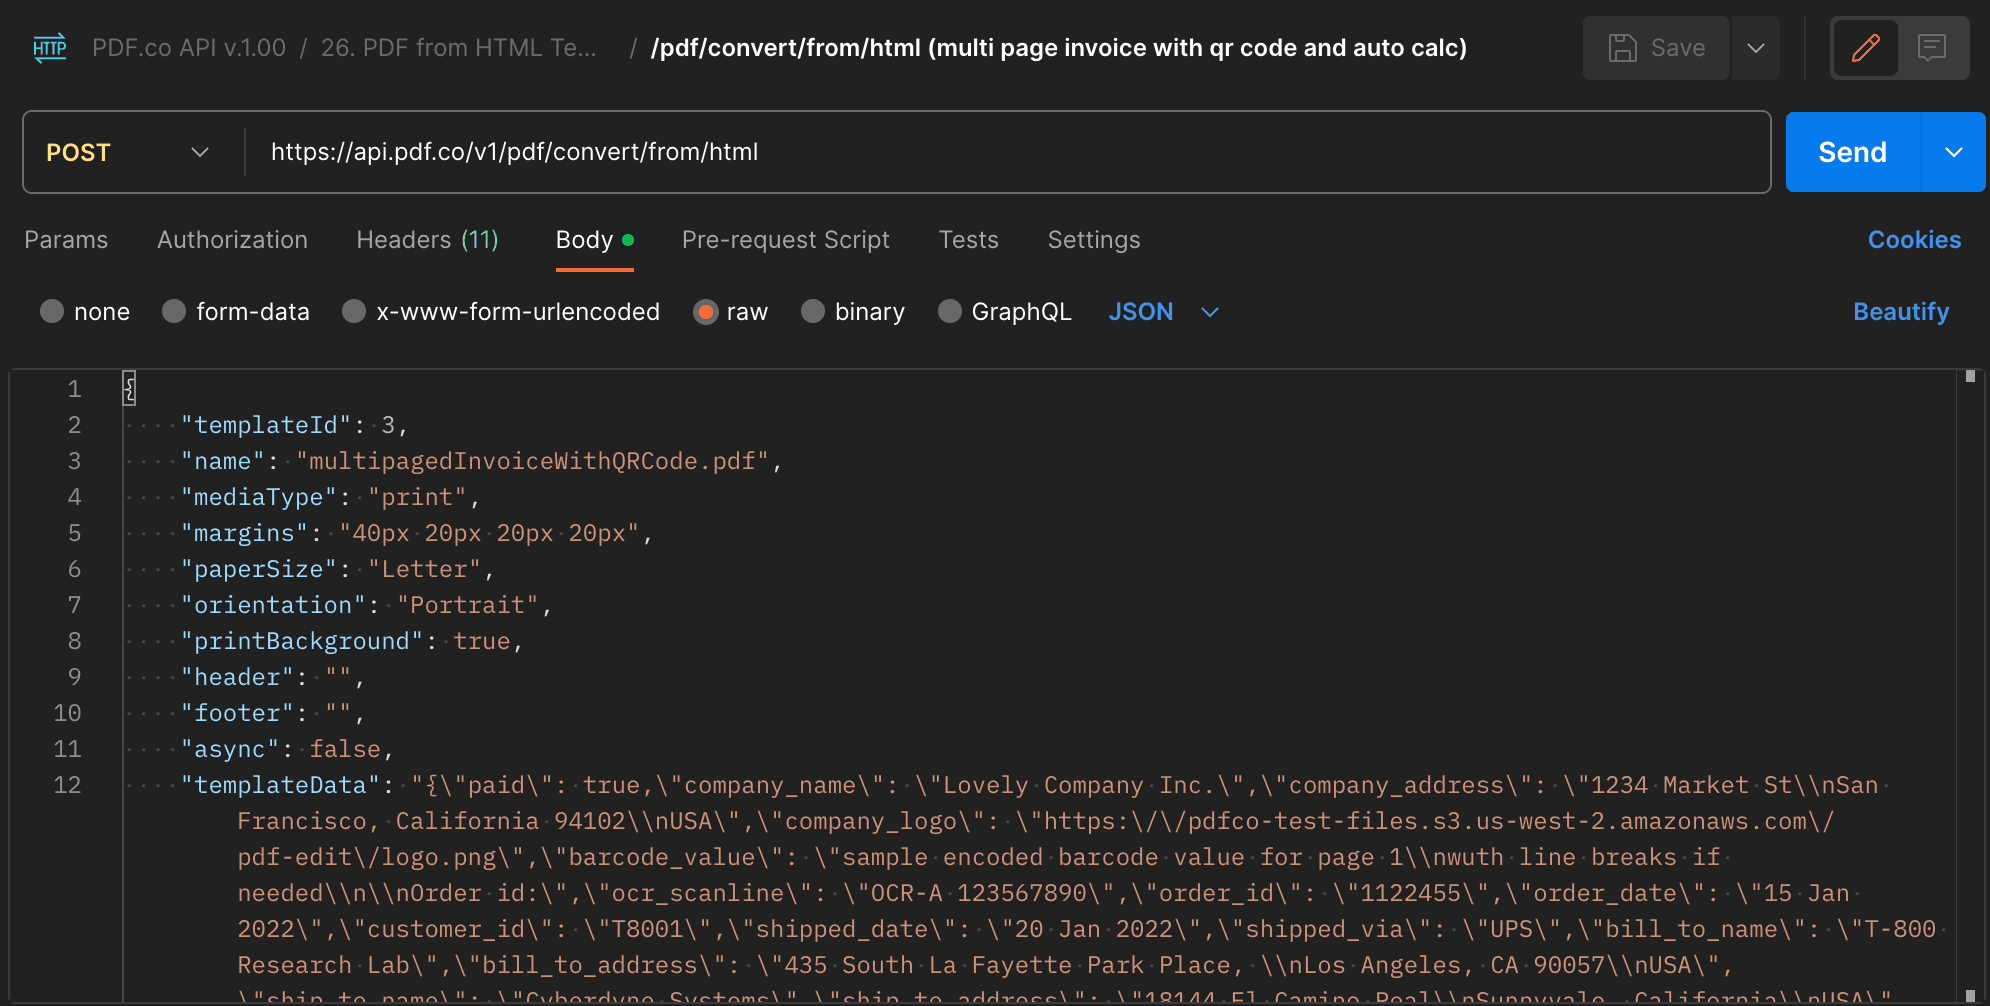
This templateData parameter shows the invoice information that has been added in the JSON code.
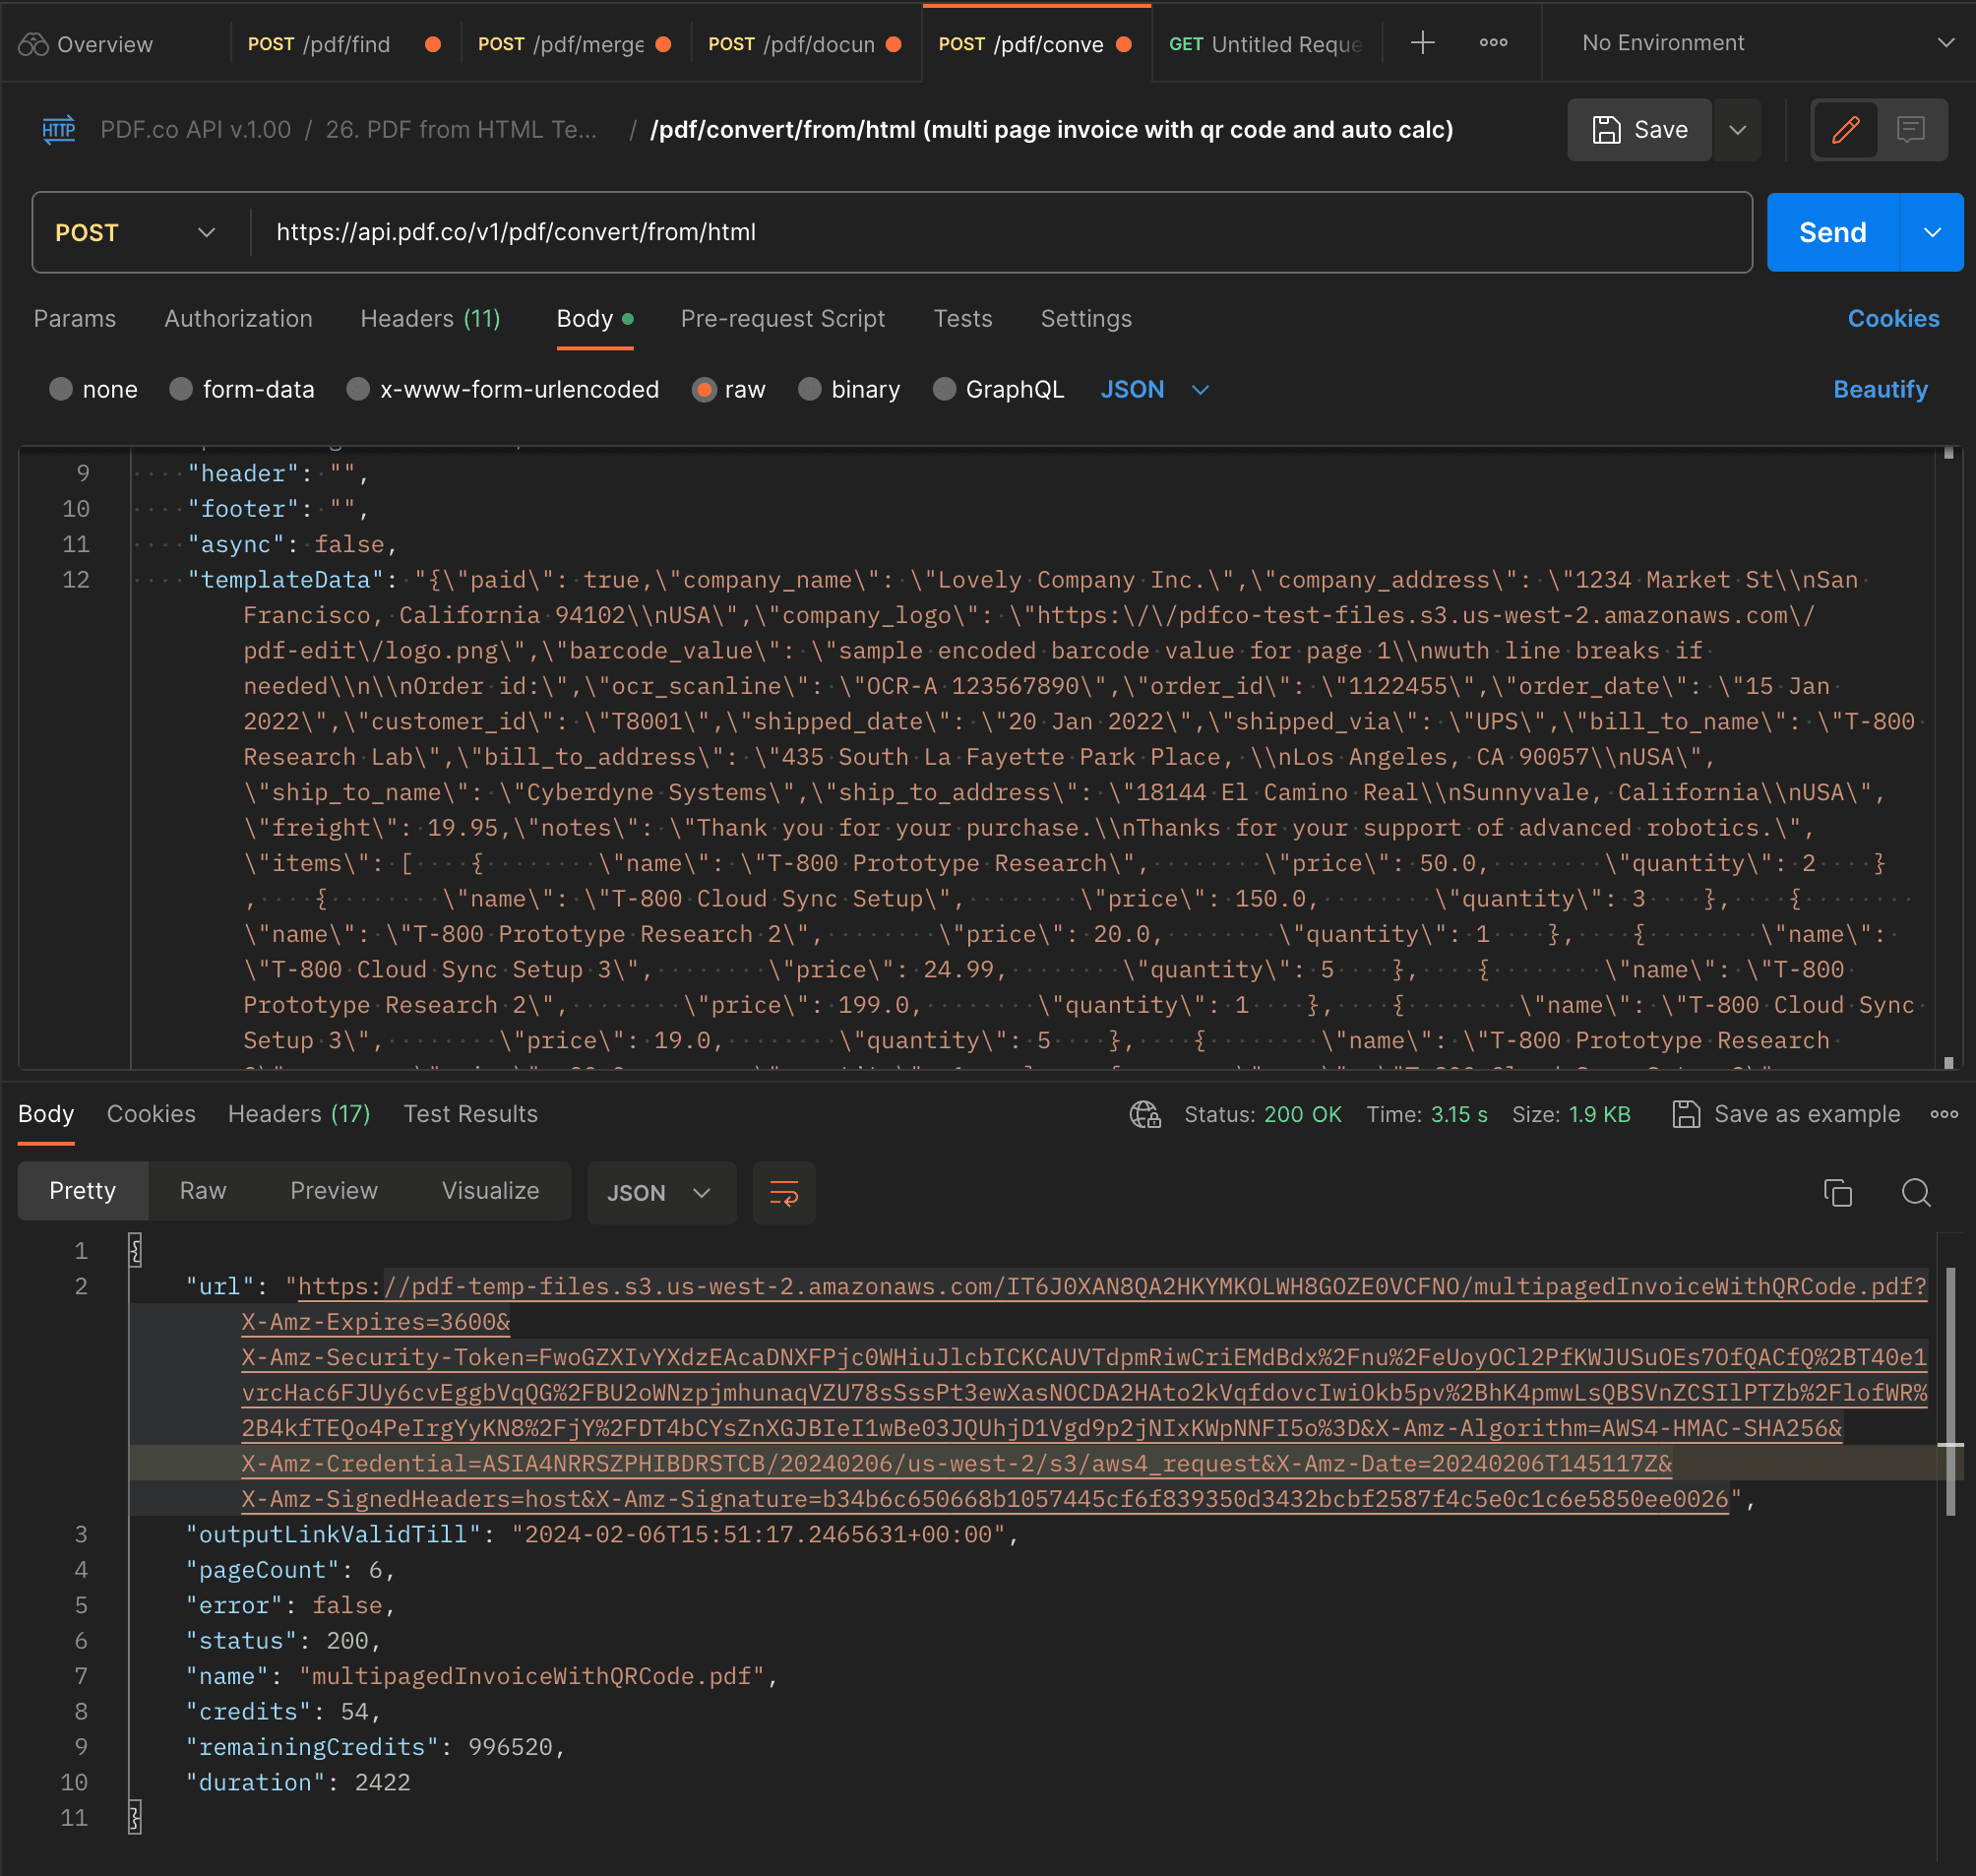
Created Invoice from TemplateData
To give you a picture of the invoice generation process. It starts from the engine that reads the HTML template. Next, the template processes the templateData parameter. Then, the invoice is created, which contains the data from templateData.
Clicking on "SEND" will send the request resulting in a URL which contains the generated invoice.
Note: Ensure that you have entered your PDF.co API key in the Headers section for the request in Postman!
You can right-click on the URL in Postman to open the resulting generated PDF invoice in your browser.
Related Tutorials
