How to Convert Excel to PDF and Save to S3 with Honeycode using PDF.co and Zapier
PDF.co Excel to PDF is a software tool that enables the conversion of Excel spreadsheets to PDF format. This software uses advanced algorithms to accurately preserve the layout, formatting, and other elements of the original Excel file while converting it to a PDF document. This tool can be used to convert Excel files in bulk, and it is ideal for businesses that need to archive, share, or distribute their Excel data in a more accessible and secure format.
In this tutorial, we will guide you on how to convert Excel files to PDF format and save them to an S3 bucket with Honeycode using PDF.co and Zapier. PDFco provides advanced algorithms to ensure that the original layout, formatting, and other elements of the Excel file are preserved during conversion to PDF. Honeycode, on the other hand, facilitates the upload of the converted PDF to an S3 bucket for archiving or distribution. With this solution, you can easily convert your Excel files to a more accessible and secure format, ideal for businesses that require efficient archiving and sharing of data.
IN THIS TUTORIAL
Log into your Zapier Account
- To begin, log in to your Zapier account and locate the Create Zap button.
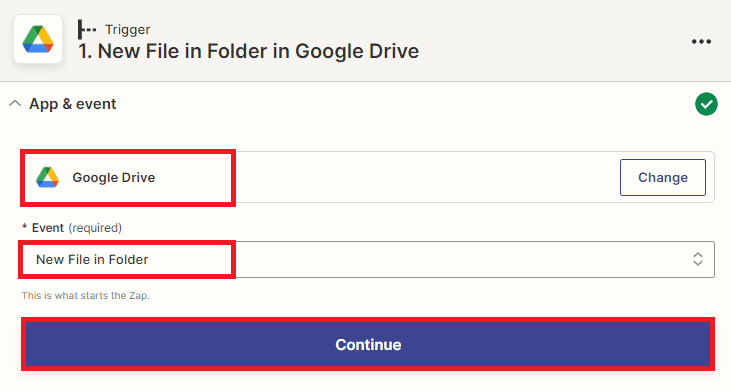
Google Drive App
- After creating Create Zap, search for the Google Drive app within Zapier and select it. Then, choose the New File in Folder trigger to activate the Zap whenever a new file is added to a specific folder in Google Drive.
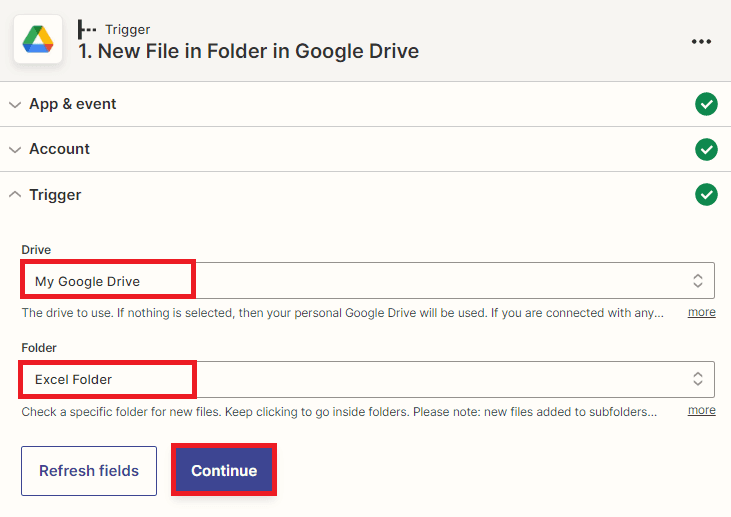
Google Drive Configuration
- In the Google Drive configuration settings, select My Google Drive in the Drive field. Then, choose the specific folder where the file you want to convert is stored in the Folder field.
Once the configuration is set up, you can test the trigger to ensure that the Zap can successfully fetch the file from the designated folder in Google Drive.
Test Trigger Result
- Great! since the trigger was successful in finding the file, we can proceed to the next step of adding an action to convert the Excel file to PDF.

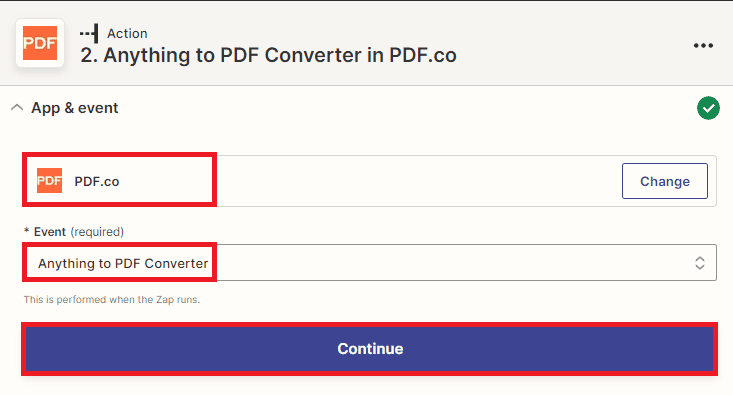
Setup PDF.co Configuration
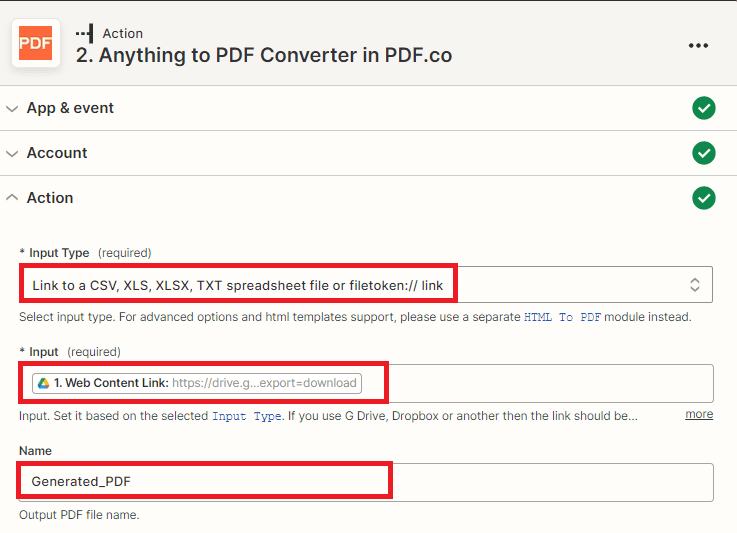
- In the PDF.co configuration, select Link to a CSV, XLS, XLSX, TXT spreadsheet file or filetoken:// option in the Input Type field to convert the Excel file to a PDF format.
- Next, in the Input field, select the Web Content Link option from Google Drive, which is the link that was fetched by the trigger in the previous step.
- Finally, in the Name field, enter your desired output PDF file name.
Once the configuration is set up, you can test the action to ensure that the Zap can successfully send a request to PDF.co and convert the Excel file to a PDF format.
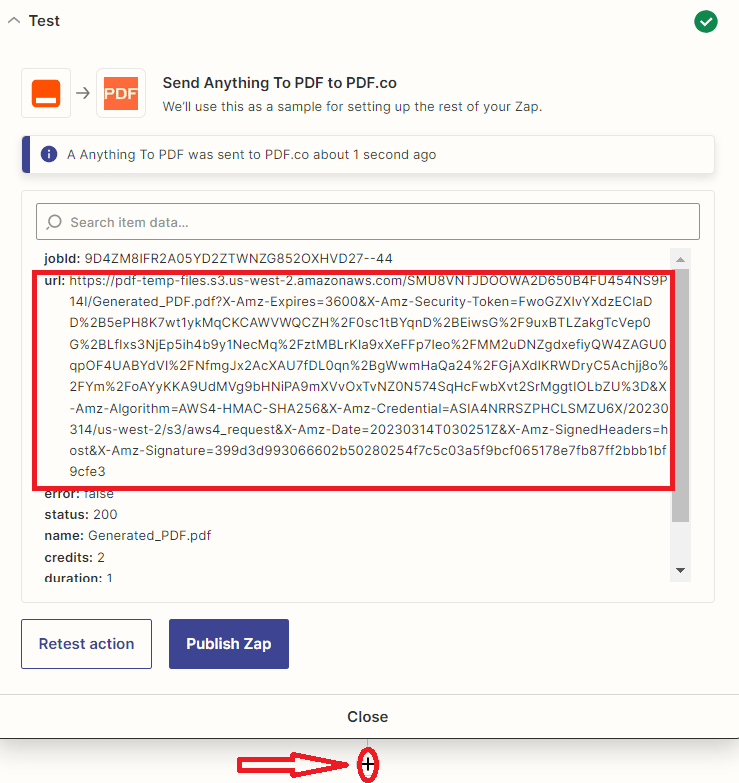
PDF.co Test Result
- Great! The test was successful and PDF.co has returned a temporary URL. You can copy the URL and paste it into your browser to view the generated PDF output.
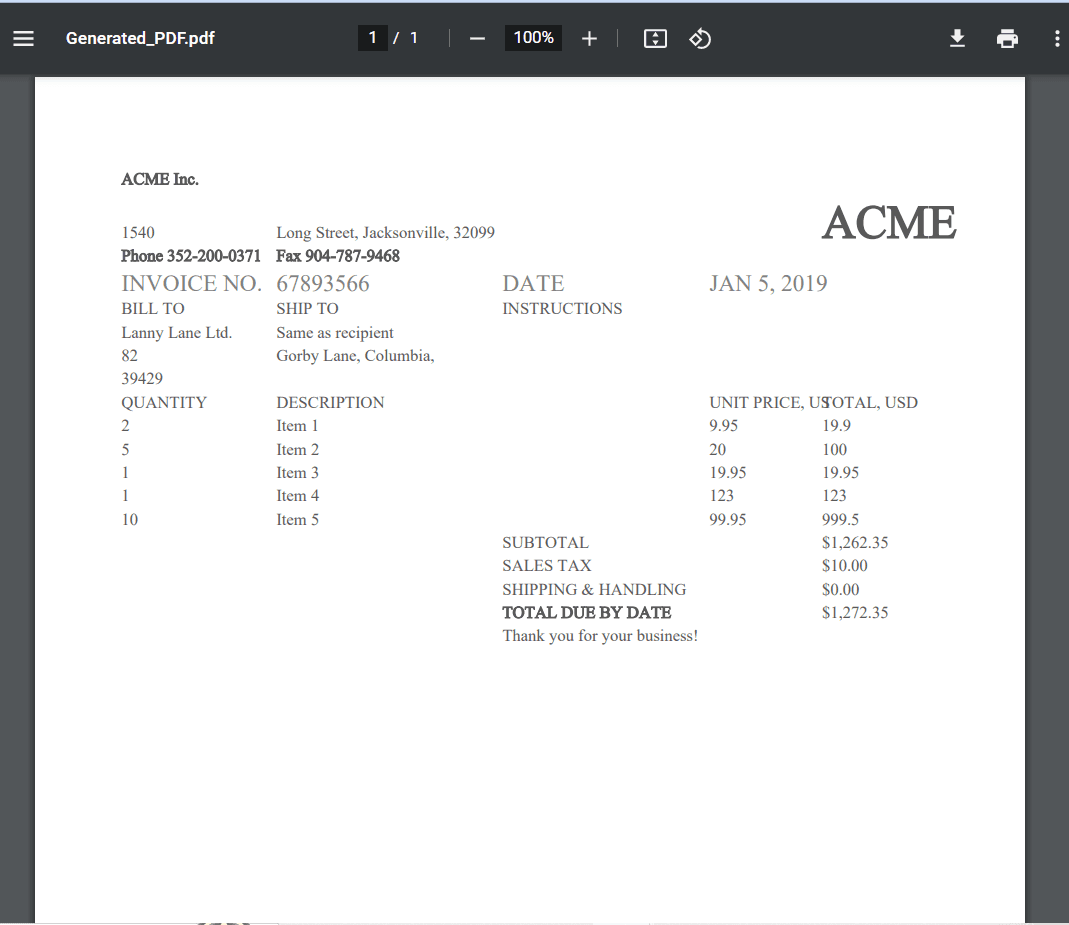
Generated PDF Output
- Here’s what the generated PDF output looks like.
Now, that we have successfully converted the Excel file to PDF using PDF.co. We will now save the generated PDF file to the S3 bucket for archiving or distribution purposes.
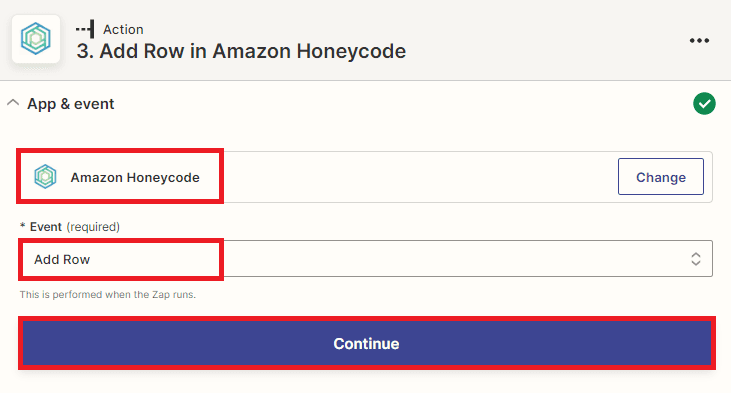
Add Honeycode App
- Let’s move on to the next step. To add the generated PDF output URL to a Honeycode table, we will need to add the Honeycode app to the Zap and select the Add Row option.
Setup Honeycode Configuration
- In the Honeycode configuration, select the desired workbook where you want to update the table in the Workbook field and choose the specific table where you want to update the data in the Table field.
- For the fields that you want to create in your Honeycode workbook, you can choose from Item, Name, Date, Contact, Status, and PDF URL. The most important field in this case is the one that will store the converted PDF URL.
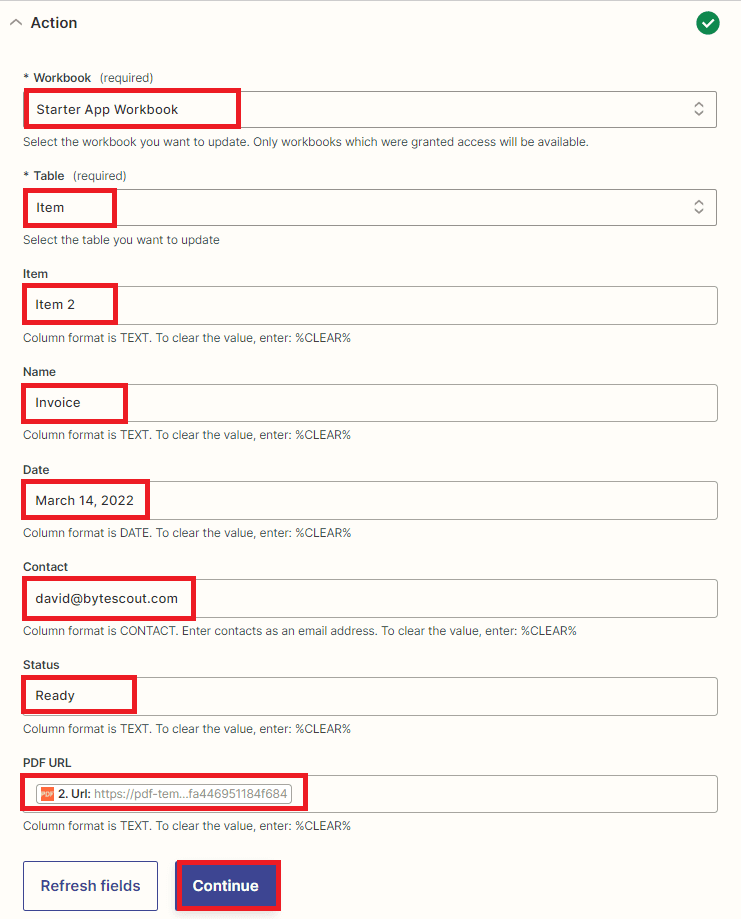
Note: To enable the storage of generated PDF files, create a new workbook in Amazon Honeycode and add a new app to the workbook. Within the app, create a table to store generated PDF file output.
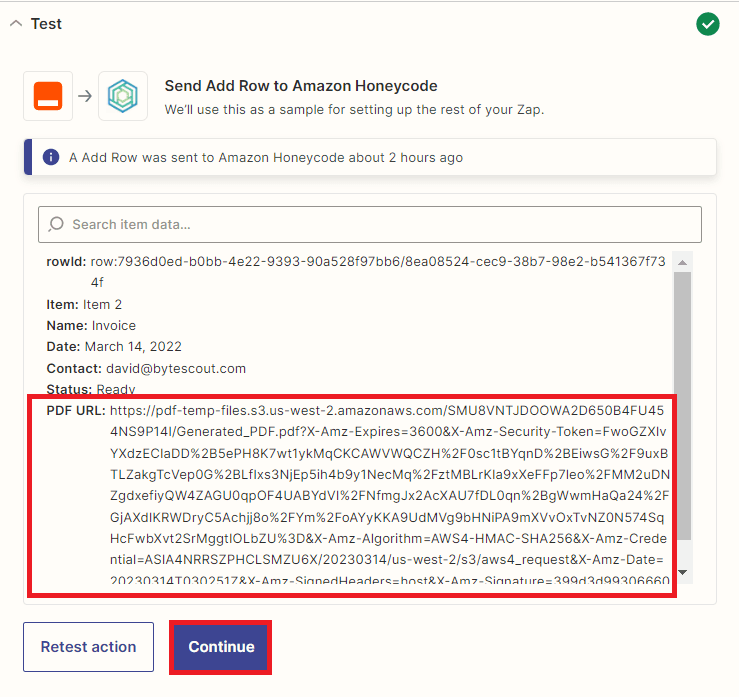
Once the Honeycode configuration is set up, you can click on the Test Action button to process the request and add a new row to the designated table with the converted PDF URL.
Honeycode Test Result
- Excellent! The Honeycode successfully processed the request and added a new row with the converted PDF URL to the designated table.
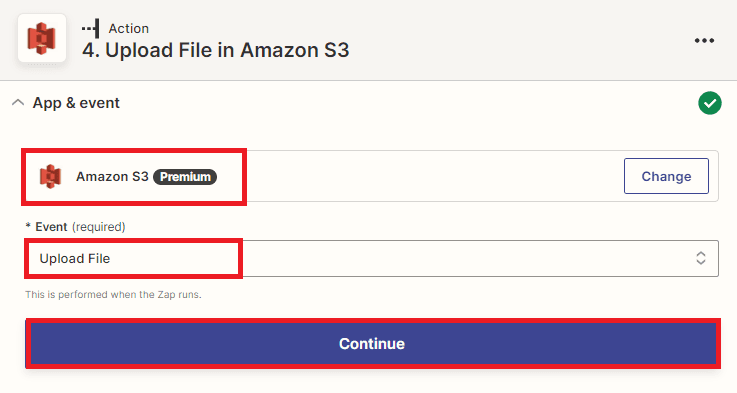
Add Amazon S3 App
- For this step, let’s add the Amazon S3 app and utilize the Upload File option to save the converted PDF file to the S3 bucket.
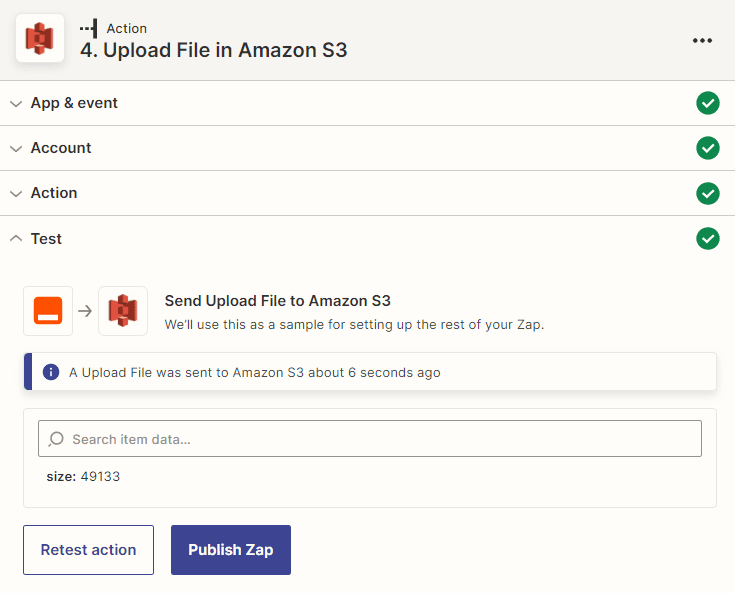
Amazon S3 Test Result
- Awesome! The test was successful, and the converted PDF file has been uploaded to the S3 bucket. Kindly check your Amazon S3 bucket to see the saved file for archiving and distribution purposes.
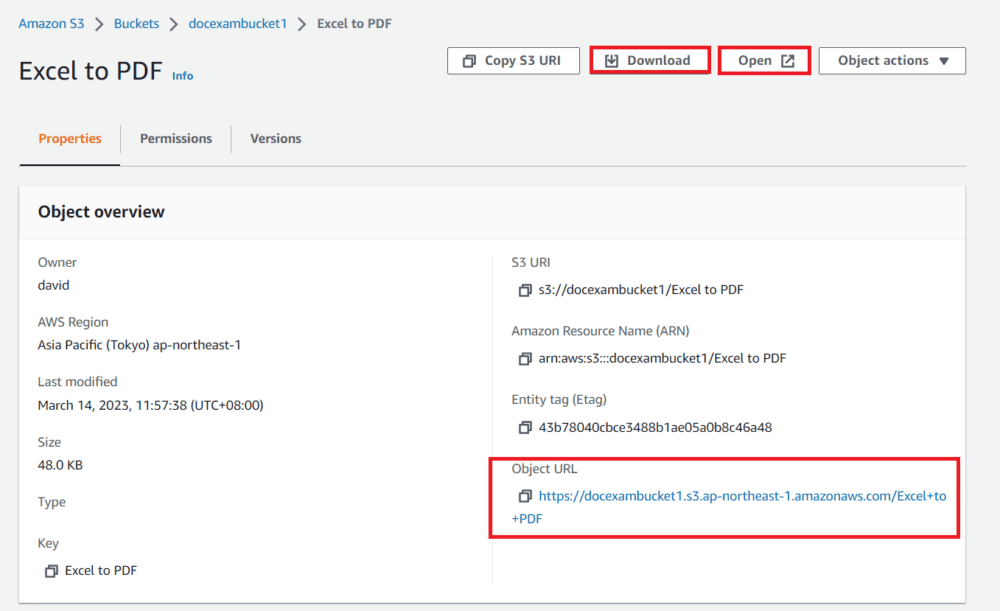
Saving File to S3 Bucket
- Here’s the S3 bucket where we saved the converted PDF file from the Honeycode workbook. Click the Open button to view the file or directly Download the save file.
In this tutorial, you learned how to convert Excel files to PDF format and save them to an S3 bucket with Honeycode using PDF.co and Zapier. You also learned how to use the PDF.co Web API to convert Excel files to PDF format.
Related Tutorials
