How to Generate a PDF from Airtable Linked Records
This tutorial shows how to combine an Airtable record with its linked product records and generate a PDF using Zapier and a PDF.co HTML template.
Airtable Structure
Create two Airtable tables.
In the Products table, add:
- Product Name
- Price
In the Invoices table, add:
- Invoice Number
- Client Name
- Invoice Date
- Products — a linked-record field connected to the Products table
- Product Names — a lookup field for Product Name
- Product Prices — a lookup field for Price
Create a sample invoice and link several products to it.
Step 1: Create the PDF.co Template
Open HTML to PDF Templates in your PDF.co dashboard and create a template. The template can use Handlebars variables and loops:
<h1>Invoice {{invoice_id}}</h1>

<p>Client: {{client_name}}</p>
<p>Date: {{invoice_date}}</p>

<table>
  <thead>
    <tr>
      <th>Product</th>
      <th>Price</th>
    </tr>
  </thead>
  <tbody>
    {{#each items}}
    <tr>
      <td>{{name}}</td>
      <td>{{price}}</td>
    </tr>
    {{/each}}
  </tbody>
</table>
Save the template and copy its template ID.
The template expects data in this format:
{
  "invoice_id": "INV-3939",
  "client_name": "Example Company",
  "invoice_date": "2026-09-14",
  "items": [
    {
      "name": "Product 1",
      "price": "122.00"
    },
    {
      "name": "Product 2",
      "price": "202.00"
    }
  ]
}
Step 2: Create the Airtable Trigger
Create a Zap and select:
- App: Airtable
- Trigger event: New Record
Sign in to Airtable and authorize Zapier. Select the appropriate base, Invoices table, and view.
Test the trigger with an invoice containing linked product records. Confirm that the result includes the Product Names and Product Prices lookup fields.
Step 3: Format the Linked Records
Add Code by Zapier and select Run JavaScript.
Create these input fields and map their Airtable values:
Invoice_NumClient_NameInvoice_DateProduct_NamesProduct_Prices
Use the following code:
const toList = (value) => {
  if (Array.isArray(value)) {
    return value;
  }

  return String(value || "")
    .split(",")
    .map((item) => item.trim())
    .filter(Boolean);
};

const productNames = toList(inputData.Product_Names);
const productPrices = toList(inputData.Product_Prices);

const items = productNames.map((name, index) => ({
  name,
  price: productPrices[index] || ""
}));

const templateData = {
  invoice_id: inputData.Invoice_Num,
  client_name: inputData.Client_Name,
  invoice_date: inputData.Invoice_Date,
  items
};

return {
  template_data: JSON.stringify(templateData)
};
Test the step and confirm that template_data contains an items array with one object for each linked product.
Step 1: Create a Trigger on Airtable New Record
- We’ll be creating a new trigger for “New Record in Airtable”.
- Next, we’ll be adding an Airtable API key to connect to our account. We’ll be configuring all trigger details like Airtable Base, Table name, etc.
- Finally, we’ll be testing Airtable Trigger and reviewing the result data.
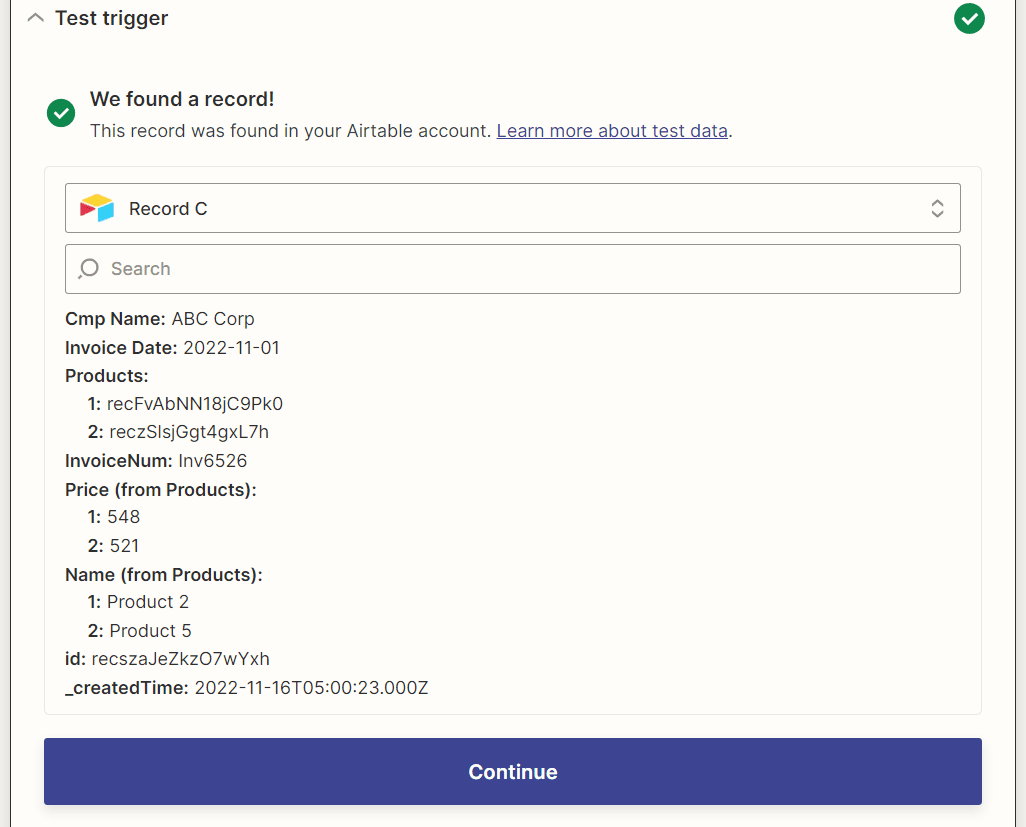
As we notice in the above screenshot, we are receiving invoice id, company name, etc. Interestingly, we are receiving different arrays for product names and prices. One drawback here is that whenever we will be using this information, we’ll have it in a comma-separated list.
Hence, we need to prepare our JSON data in the proper format prior to sending it for PDF creation. In the next step, we need to execute Javascript code to format this data.
Step 2: Add the “Code by Zapier” action as the next step
Here, we’ll be configuring the “Code by Zapier” action to run JavaScript code.
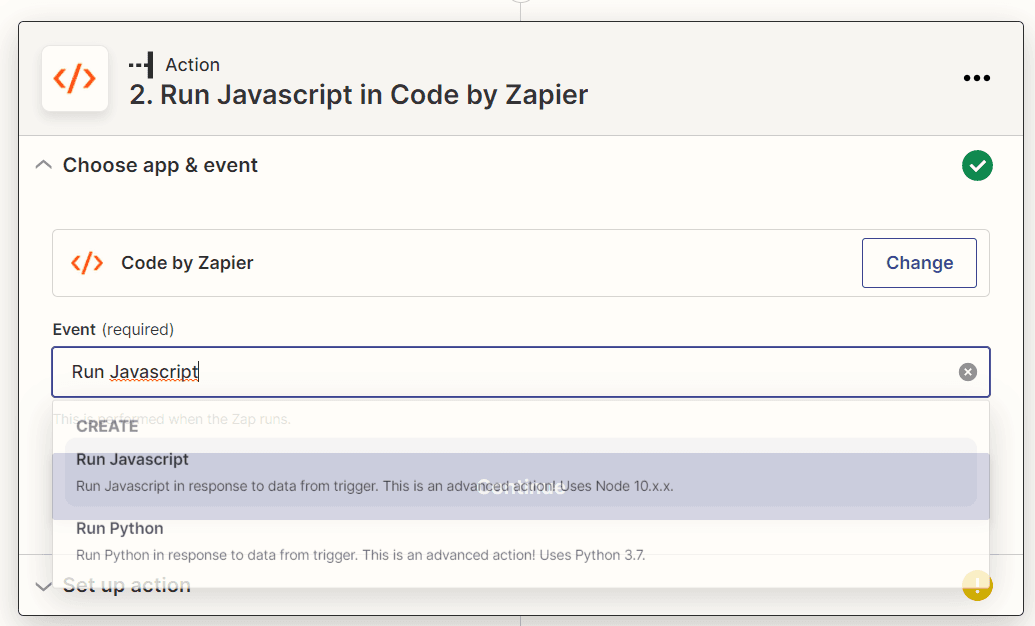
Next, we’ll be setting up action. At first, we’ll be adding Input Data for Airtable output like “Invoice_Num”, “Product_Names”, etc.
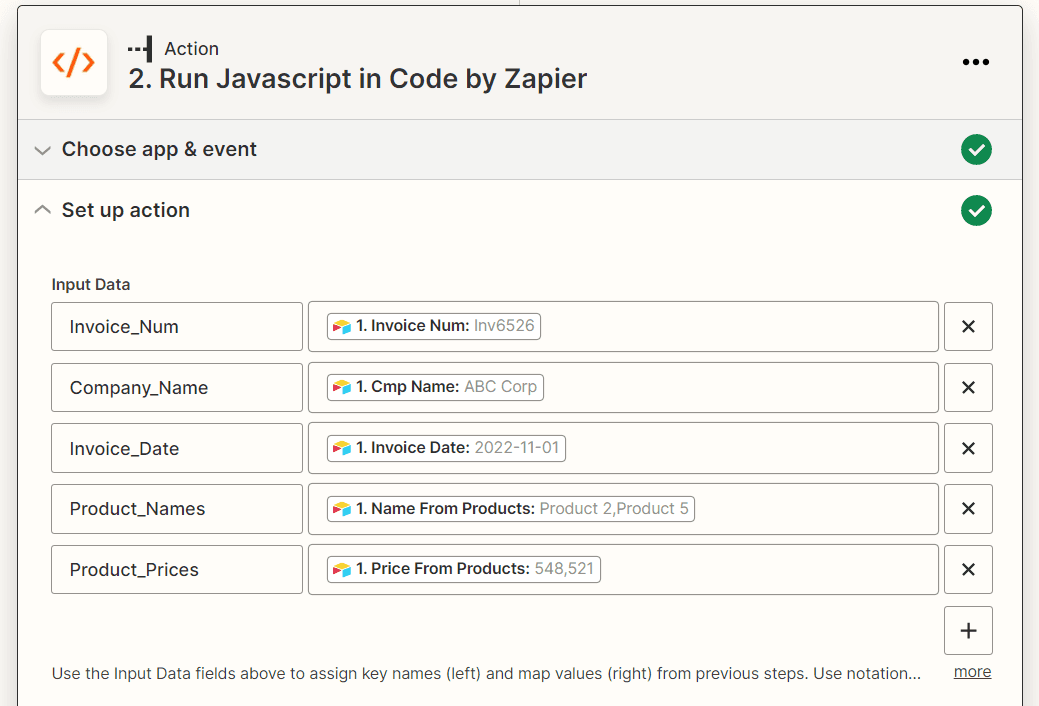
Input data will be used in JS code as shown below.
const allProducts = inputData.Product_Names.split(',');
const allPrices = inputData.Product_Prices.split(',');
const arrProducts = [];

for(let i = 0; i < allProducts.length; i++){
  arrProducts.push({"name": allProducts[i], "price": allPrices[i]});
}

const finalReturn = {
  invoice_id: inputData.Invoice_Num,
  client_name: inputData.Company_Name,
  invoice_date: inputData.Invoice_Date,
  items: arrProducts
};

output = {obj_finalReturn: finalReturn, str_finalReturn: JSON.stringify(finalReturn )};
Here, we’re simply creating JSON objects as per our requirements. This object will be used in our next PDF.co “HTML to PDF” action.
The following is the output of the JavaScript code.
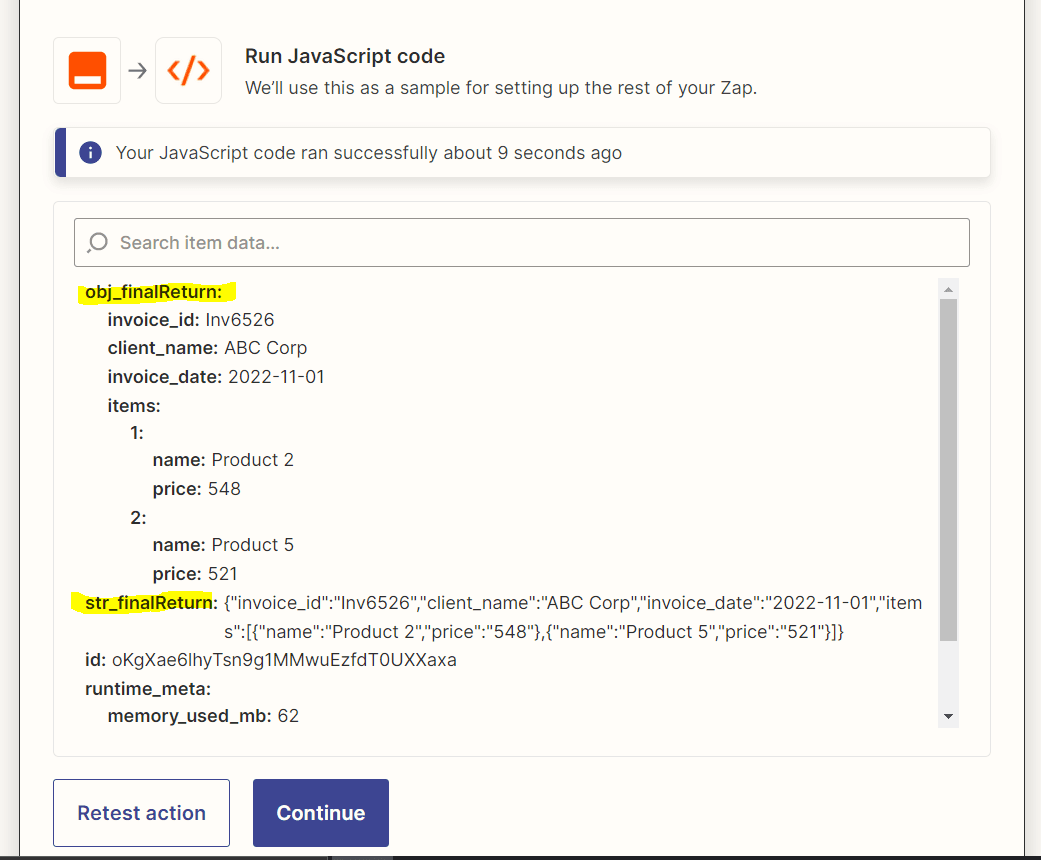
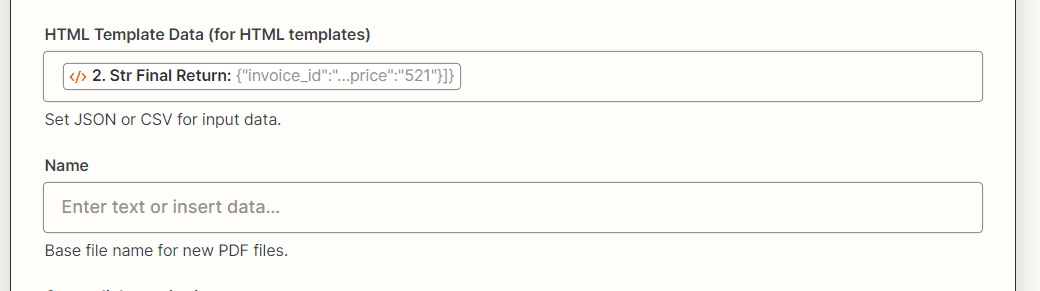
Please note the output property “str_finalReturn”. It contains all stringified JSON data that will be sent to PDF.co.
Step 3: Add PDF.co “HTML to PDF Converter” Action
In this step, we’ll be adding PDF.co “HTML to PDF Converter” action.
First, configure PDF.co HTML Template Id. This is the ID of the template we created in the PDF.co app.
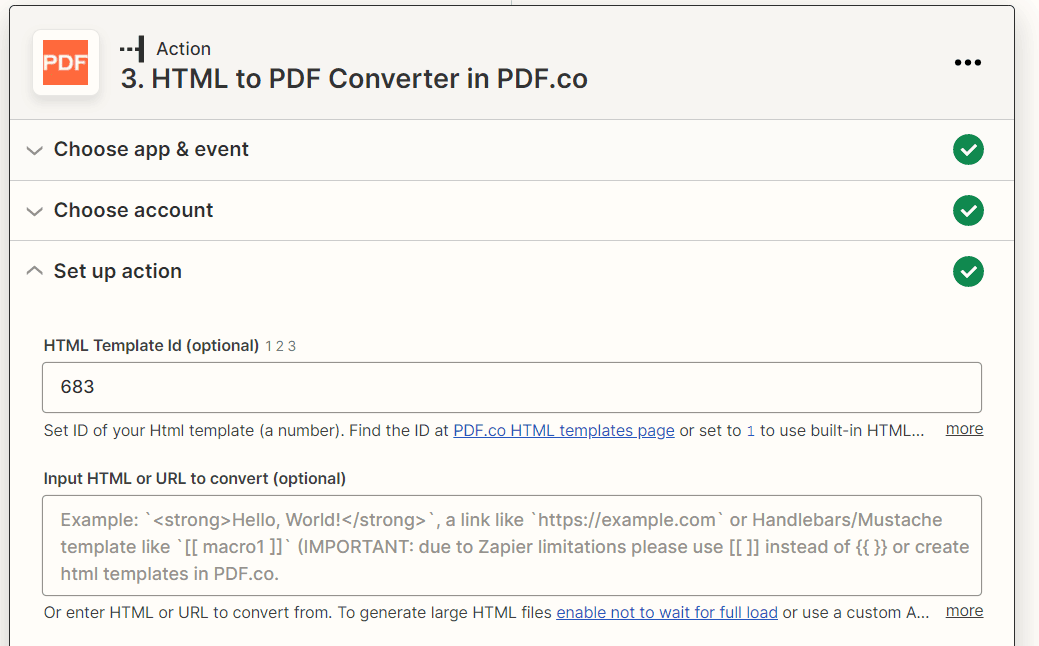
Second, we’ll be adding value to the “HTML Template Data” field from the JavaScript object we created. Since we already created all formatting there, we just need to pass only the property here.
Upon testing this action, it’s returning the URL of the output PDF.
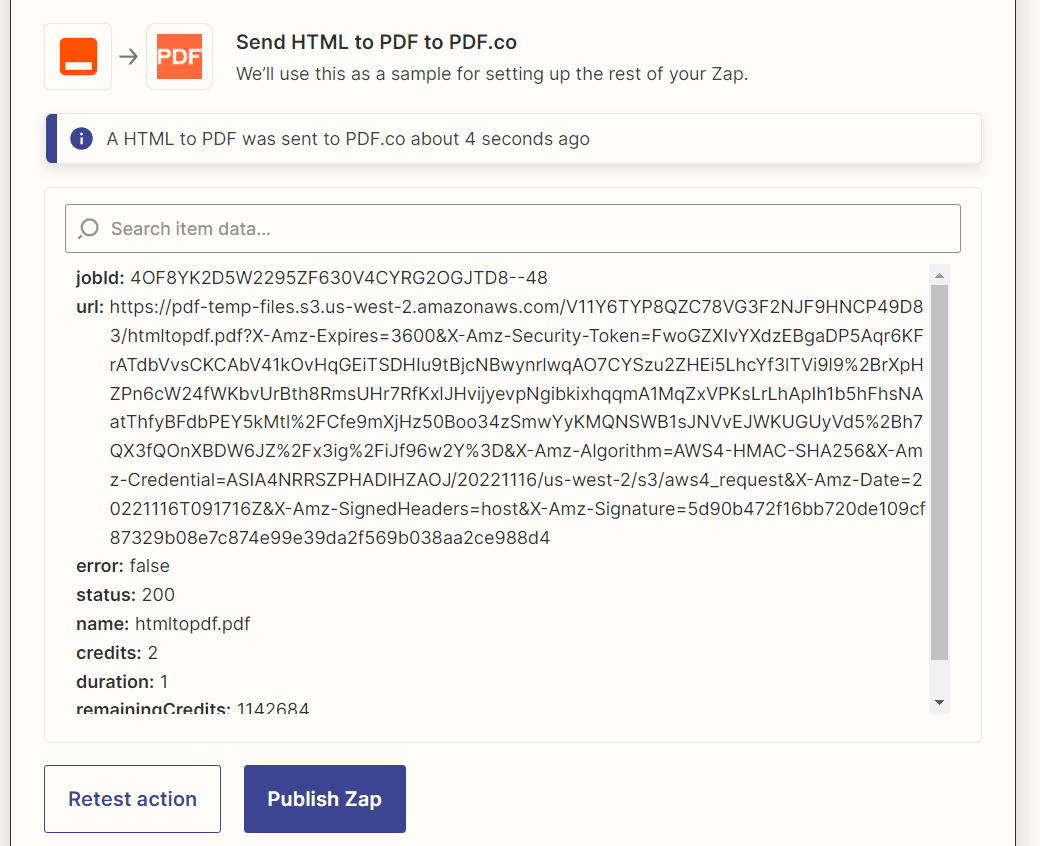
This URL points to the PDF containing all invoice information with multiple/dynamic product data.
Step 4: Generate the PDF
Add another step:
- App: PDF.co
- Action: HTML to PDF
Sign in to PDF.co and authorize Zapier.
Configure the action:
- HTML Template ID: Enter the ID of the saved PDF.co template.
- HTML Template Data: Map
template_datafrom the Code by Zapier step. - Output PDF Name: Enter a name such as
invoice.pdf. - Paper Size: Select
LetterorA4. - Orientation: Select
Portrait. - Print Background: Enable this if the template uses background colors or images.
For template syntax and supported settings, see the PDF.co HTML Template documentation.
Step 5: Test and Save the PDF
Test the PDF.co action. Open the returned URL and confirm that the invoice contains all linked products.
Because the PDF.co output URL is temporary, add another action to save the PDF to Google Drive, Dropbox, OneDrive, or another permanent destination.
Conclusion
The Zap now collects an Airtable invoice and its linked product information, converts the lookup values into structured template data, and generates a PDF containing a dynamic row for every linked product.
Related Tutorials
