How to Generate PDF from JotForm Submission using PDF.co and Make
Generating PDFs is an important task for many businesses, especially those that deal with large amounts of data on a regular basis. One popular platform for collecting data is Jotform, which provides a user-friendly interface for creating online forms and surveys. However, once data is collected, it’s often necessary to convert it into a more professional format, such as a PDF.
With PDF.co’s advanced technology and Make, you can create professional-looking PDFs that will customize your business needs.
In this article, we will guide you through integrating your Jotform with PDF.co and Make to generate high-quality PDFs from your Jotform submissions.
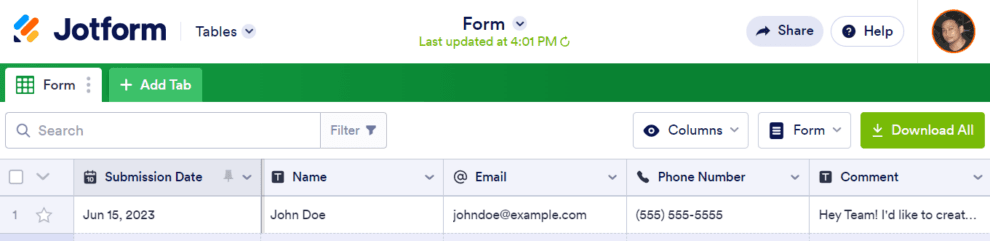
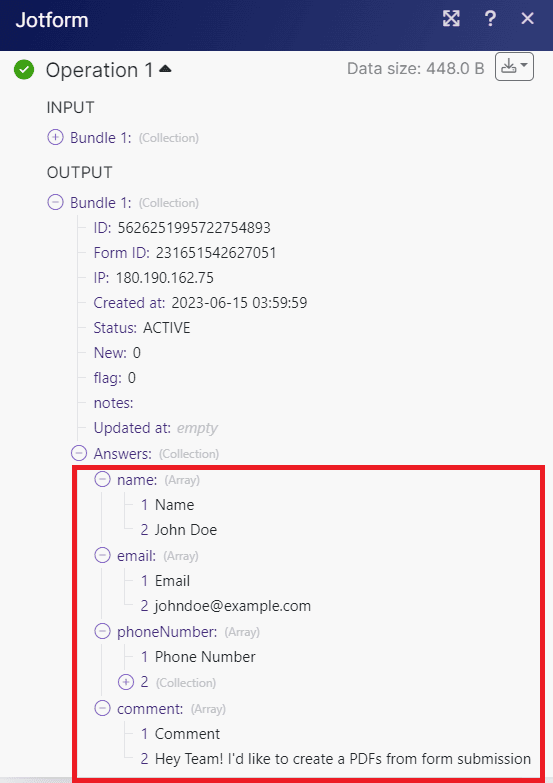
We will use this sample Jotform submission and will convert it into a PDF format.
Step 1: Create a New Scenario
- To begin, log into your Make account and click on the Create a New Scenario button.
Step 2: Add Jotform Module
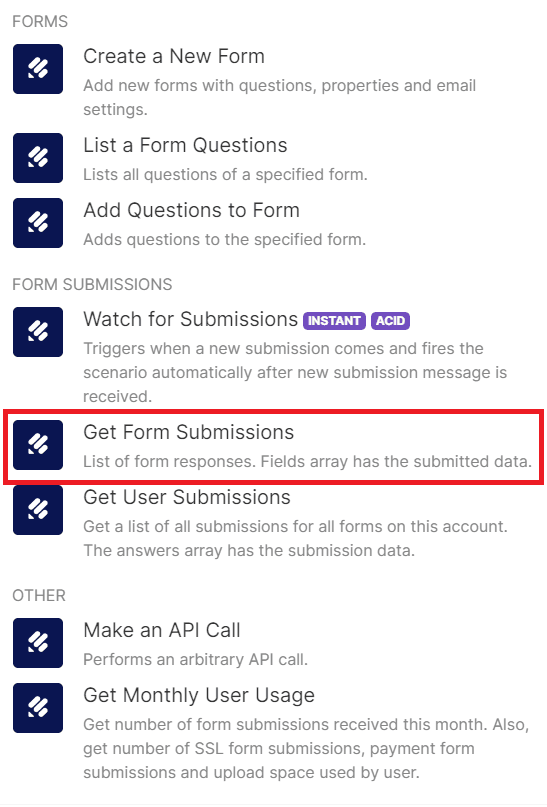
- After logging in, navigate and search for the JotForm app. Then, choose the Get Form Submissions option to retrieve the lists of form responses. This will allow you to easily generate PDFs from your JotForm submissions.
Step 3: Setup Jotform Configuration
Let’s set up the Jotform configuration.
- Start by connecting your JotForm account to Make. This will allow Make to authorize access to your JotForm account and retrieve your form data.
- Navigate to the Form ID where your submitted data is stored. This will ensure that Make retrieves the correct data from the correct form.
- Next, set the limit for the number of submissions you want to receive. This is useful if you only want to generate PDFs for a specific number of submissions, or if you want to limit the amount of data that Make retrieves.
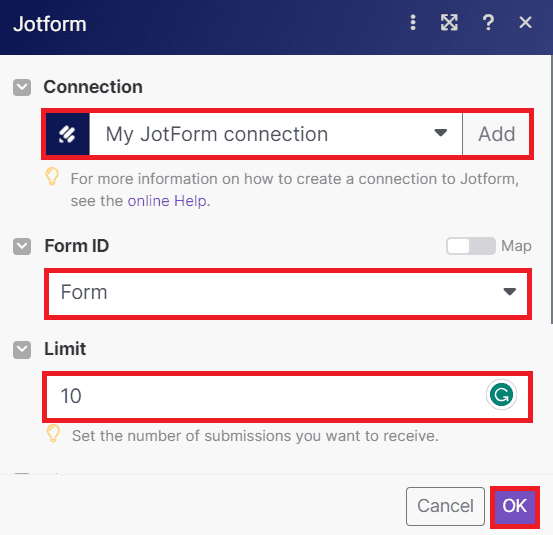
Once you have finished setting up your JotForm configuration, you can run the scenario to retrieve the data from your submitted form. This will allow you to generate PDFs from your JotForm submissions using the data that you have collected.
Step 4: Run Jotform Result
- Excellent! We have successfully executed the scenario and obtained the data from form submissions. Now, we will proceed to incorporate an additional module that will enable us to generate a PDF document using the retrieved data.
Step 5: Add PDF.co Module
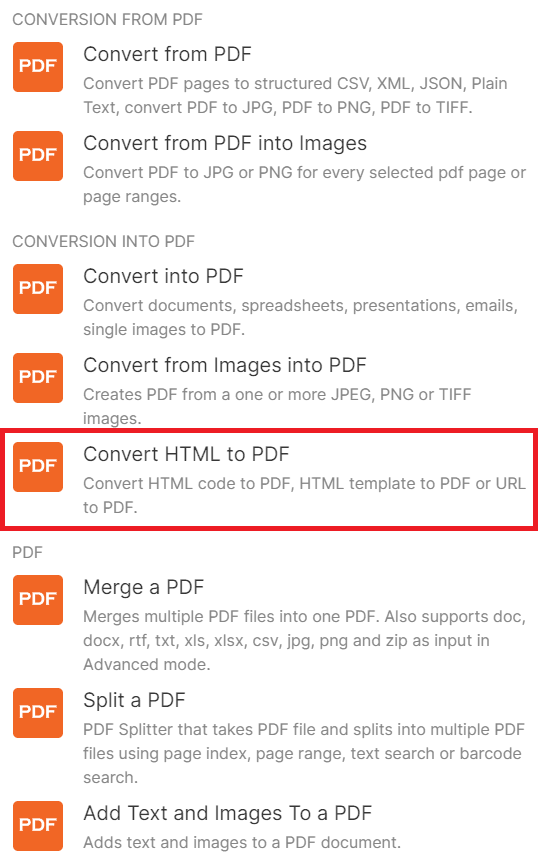
- For this step, we will incorporate the PDF.co app and select the Convert HTML to PDF module. This module allows us to convert both raw HTML code and data from form submissions into PDF format.
Step 6: Configure PDF.co and Map the Submission
Create or select your PDF.co connection using OAuth or your API key. Under Convert Options, select HTML to PDF.
In Input HTML Code, paste this complete example:
<!doctype html>
<html lang="en">
<head>
  <meta charset="utf-8">
  <title>Submission summary</title>
</head>
<body>
  <h1>Submission summary</h1>
  <p>Submission reference: DEMO-001</p>
  <p>Name: Example Customer</p>
  <p>Requested service: Document review</p>
</body>
</html>
These are sample values. Generate a PDF with the fixed example first, then replace the values with mapped data.
Map Your Jotform Fields
Set the Jotform Get Form Submissions limit to 1 and run it once to make a submission available for mapping.
In the HTML input, replace:
- DEMO-001: Insert the submission ID from the Jotform output.
- Example Customer: Insert the submitted name.
- Document review: Insert the submitted service or request description.
Click where each example value appears and select the corresponding value from Make’s mapping panel. Field names and answer structures depend on your form. Select the actual answer values, not question labels or an entire answer collection. If a name contains separate first-name and last-name values, map both with a space between them.
Keep the HTML tags in place. Encode special characters in submitted text before inserting it—for example, Example & Company becomes Example & Company. Encode the incoming values, not the complete HTML document.
Name and Save the PDF
In Output File Name, type submission-, insert the mapped submission ID, and finish with .pdf.
Choose your paper size, orientation, and margins. Set Export Type to Download a File if your next module will upload the PDF to storage.
Run the scenario with one submission. Open the PDF and check every mapped value before increasing the limit. Map the PDF.co output Data into your storage module’s file-content field, or add your preferred delivery step.
For recurring runs, check each submission ID against a persistent list of processed submissions before generating the PDF. Record the ID only after the PDF has been successfully stored or delivered. This helps prevent the same retrieved submission from producing duplicate documents.
Save or deliver the PDF before its temporary download URL expires.
Step 7: Generated PDF Document
- Here is the PDF document that has been generated, containing the retrieved data from the Jotform submissions.
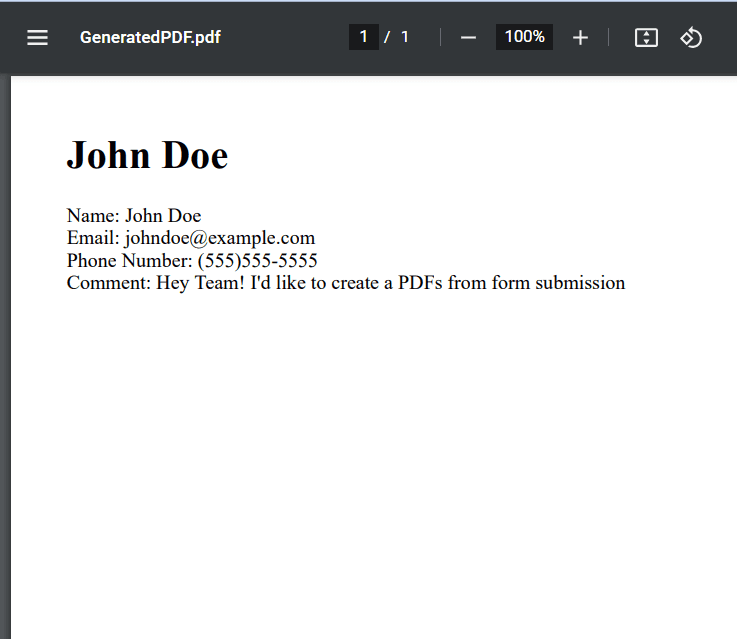
In this article, you learned how to generate PDF from Jotform submissions using PDF.co and Make. You also learned how to use PDF.co HTML to PDF API to convert raw HTML code along with the data from Jotform submissions into a PDF format.
Video Guide
Related Tutorials