How to Create Fillable Form using PDF.co and Zapier
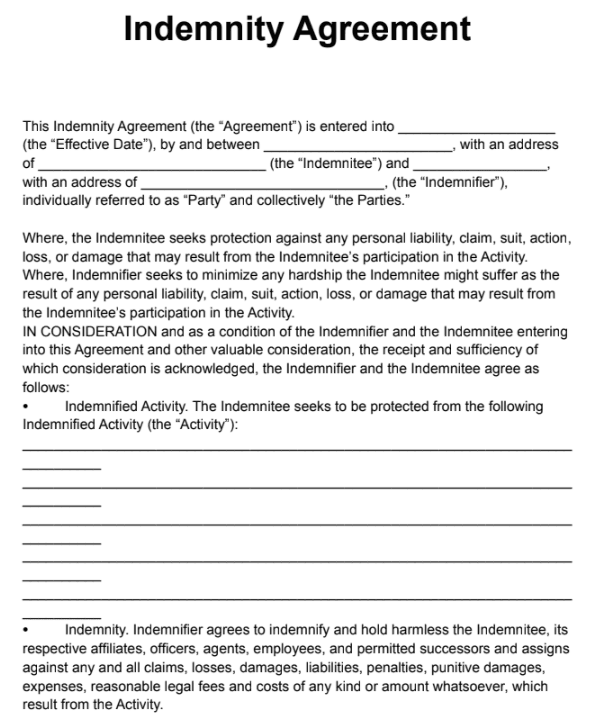
In this tutorial, we will show you how to create a Fillable Form using PDF.co and Zapier. We will use this Non-fillable sample form and turn this into an interactive fillable form.
Step 1: Make a Zap
For the first step, click the Make Zap button at the upper-left corner of your dashboard.
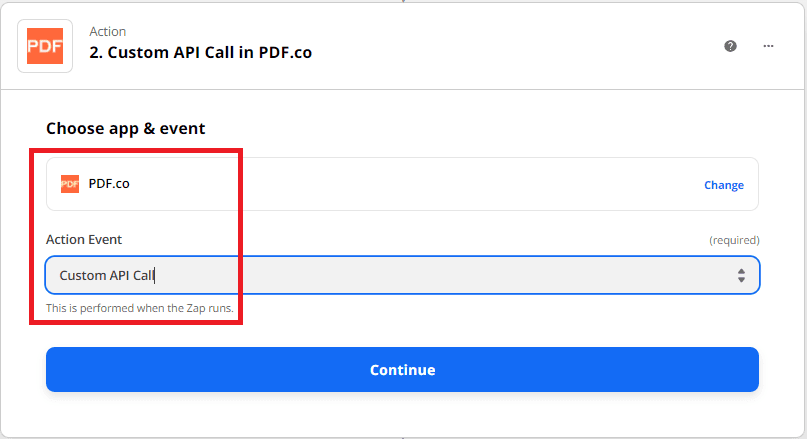
Step 2: Select PDF.co App and Make an API Call
Next, select the PDF.co app for the App Event and choose the Custom API Call as the Action Event. The Custom API Call will allow us to use PDF.co endpoints that are not currently listed in the action event.
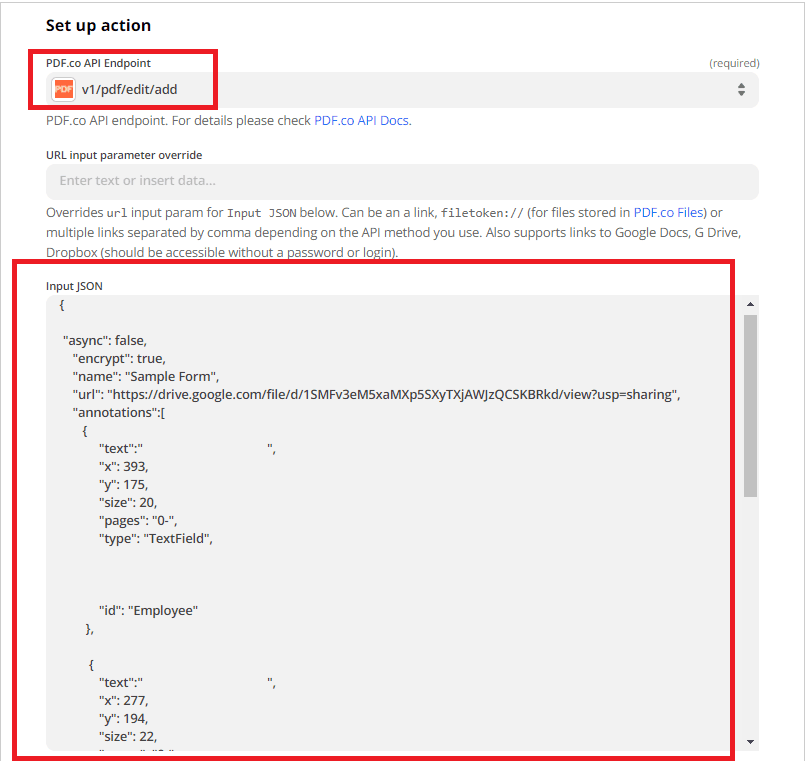
Step 3: Custom API Call Configuration
Now, let’s set up the Custom API Call configuration.
- In the PDF.co API Endpoint field, select the
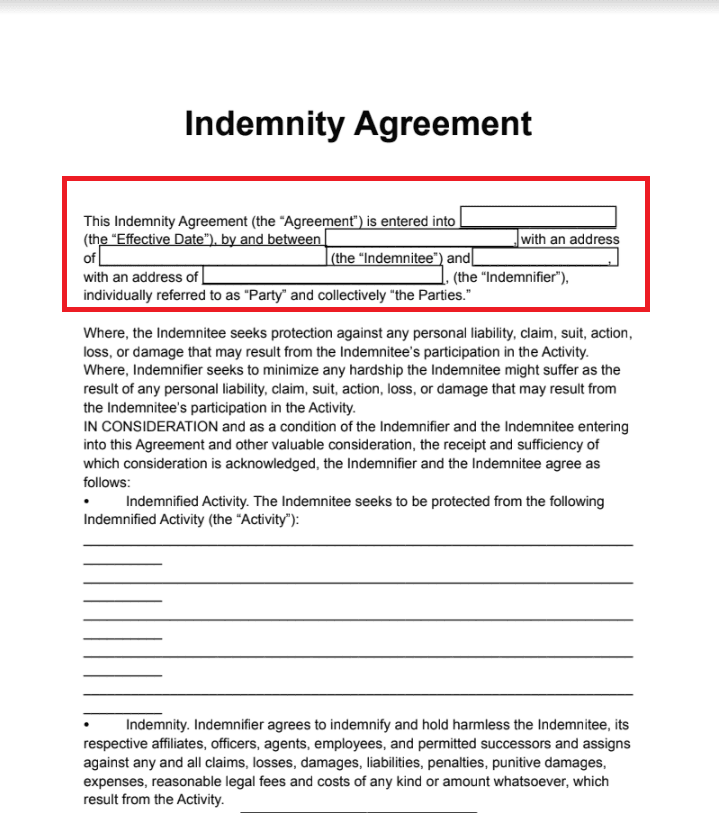
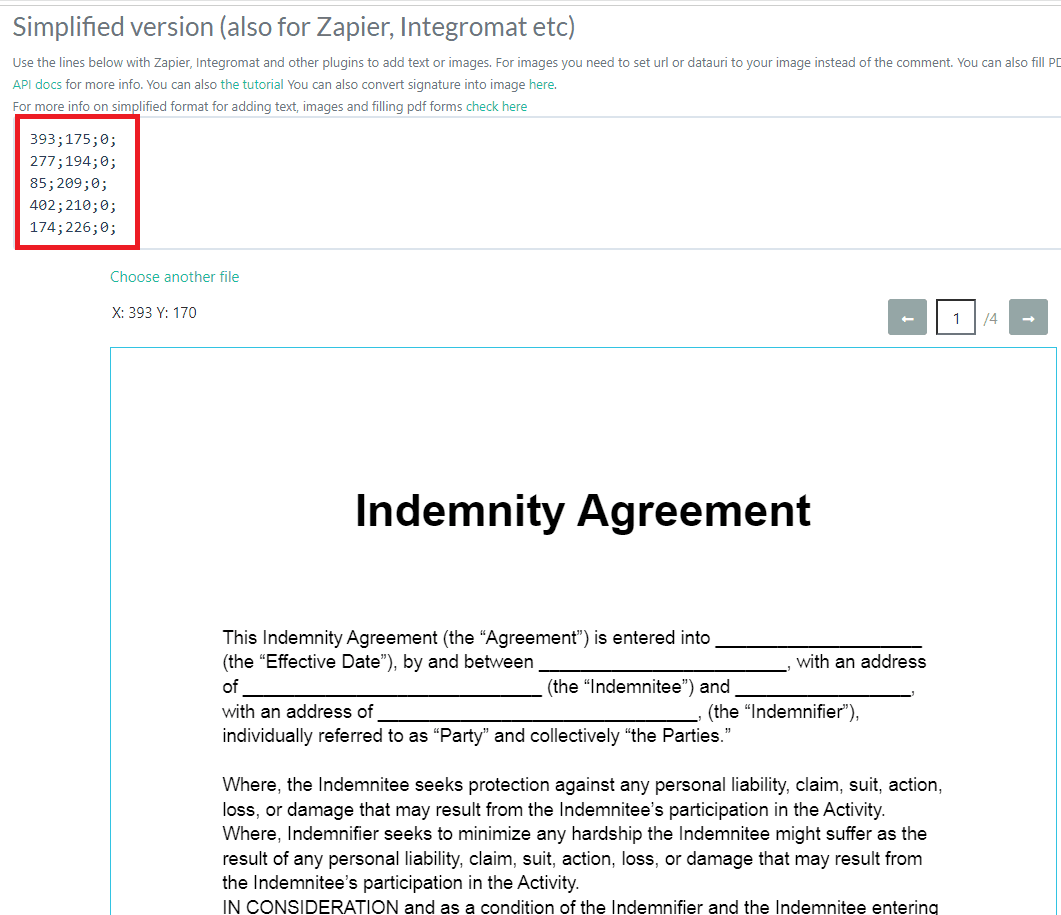
/v1/pdf/edit/add. You can create a fillable PDF form from the existing PDF by adding editable text boxes. For more details, check our API Docs. - In the Input JSON field, type the API code of the body payload. The body payload is composed of the async, encrypt, name, URL, and annotations. To get the x and y coordinates, you can use the PDF Edit Add Helper.
Here’s the Create a Fillable Form cURL Code Snippet.
curl --location --request POST 'https://api.pdf.co/v1/pdf/edit/add' \
--header 'Content-Type: application/json' \
--header 'x-api-key: your-api-key' \
--data-raw '{
"async": false,
"encrypt": true,
"name": "Sample Form",
"url": "https://drive.google.com/file/d/1SMFv3eM5xaMXp5SXyTXjAWJzQCSKBRkd/view?usp=sharing",
"annotations":[
{
"text":" ",
"x": 393,
"y": 175,
"size": 20,
"pages": "0-",
"type": "TextField",
"id": "Employee"
},
{
"text":" ",
"x": 277,
"y": 194,
"size": 22,
"pages": "0-",
"type": "TextField",
"id": "Date"
},
{
"text":" ",
"x": 85,
"y": 209,
"size": 20,
"pages": "0-",
"type": "TextField",
"id": "Employer"
},
{
"text":" ",
"x": 402,
"y": 210,
"size": 14,
"pages": "0-",
"type": "TextField",
"id": "Company"
},
{
"text":" ",
"x": 174,
"y": 226,
"size": 20,
"pages": "0-",
"type": "TextField",
"id": "Address"
}
]
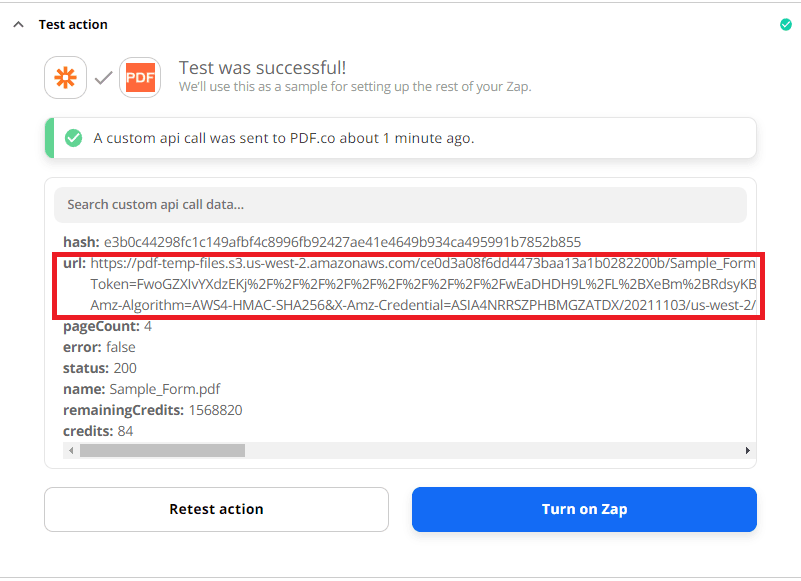
}'Now, let’s send the Custom API Call to PDF.co to make sure there are no errors in the setup.
Step 4: PDF.co Test Result
Excellent! PDF.co processed our request successfully. You can copy and paste the URL to view the output.
Step 5: Created Fillable Form
Here’s the Fillable Form that we successfully created.
Step 6: How to get the x and y coordinates using the PDF.co PDF/Edit/Add Helper
- First, open the PDF.co dashboard.
- Navigate to API Tools tab and choose the PDF/Edit/Add Helper.
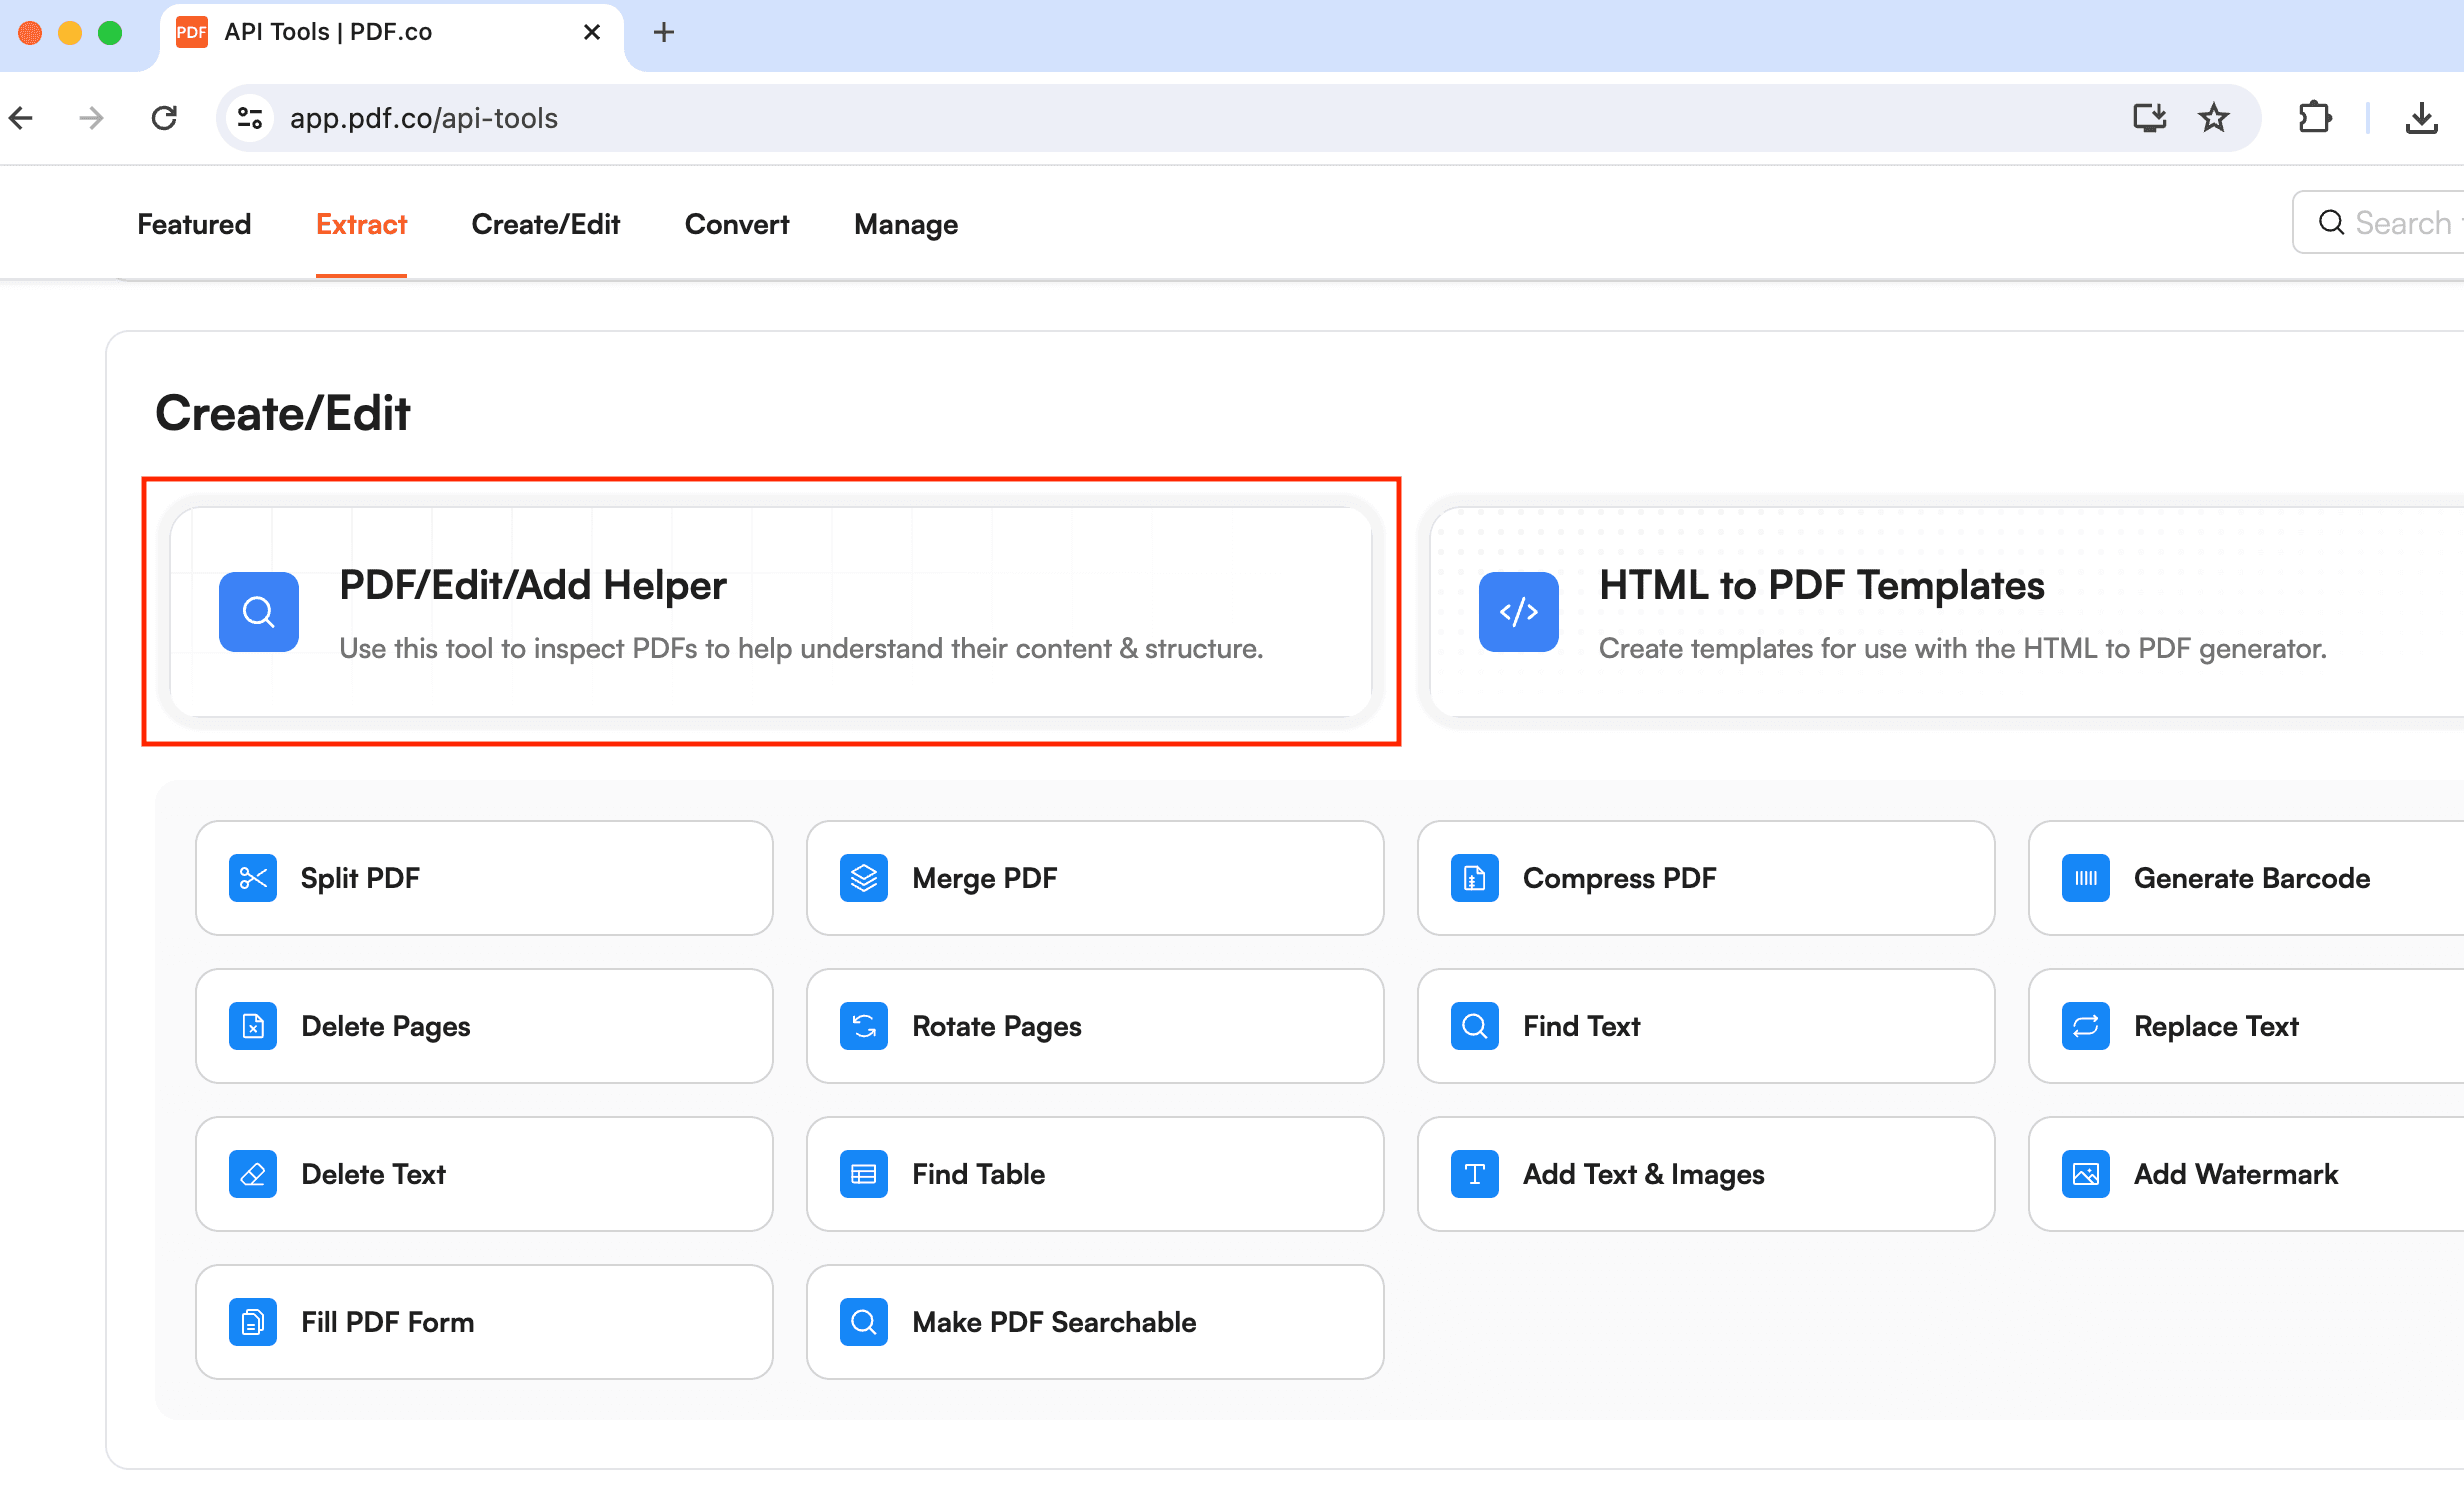
- Next, open your PDF document and click on the area where you want to add text field. Give the area a unique name to easily identify it from the rest. You will find all the coordinates just above your document.
In this tutorial, you learned how to create a Fillable Form using PDF.co and Zapier. You learned how to set up the Custom API Call to make PDF.co requests using the endpoint and input JSON. You also learned how to use the PDF Simple Viewer to get the x and y coordinates.
Related Tutorials
