Convert PDF to PNG using PDF.co and Bubble API Connector
Converting PDF to PNG involves transforming PDF files into PNG image format. This conversion process allows you to extract the content of the PDF document and save it as an image, suitable for various applications like web development, image processing, and more. The conversion can be achieved using specialized software or online tools, and one such option is utilizing PDF.co API with Bubble API Connector. PDF.co is a cloud-based platform that provides a range of APIs for PDF processing, including PDF to PNG conversion.
By integrating PDF.co with Bubble API Connector in your Bubble application, you can convert PDF documents into PNG images smoothly. This can be especially useful for scenarios where users need to extract specific pages or elements from a PDF and work with them as images.
In this guide, the focus is on converting PDF to PNG using the PDF.co API with Bubble API Connector. This process involves transforming a PDF document into a PNG image format, allowing you to extract the content of the PDF and save it as an image. By following the integration steps provided in this guide, you can easily enable users of your Bubble application to perform PDF to PNG conversions, expanding the functionality and usability of your app.
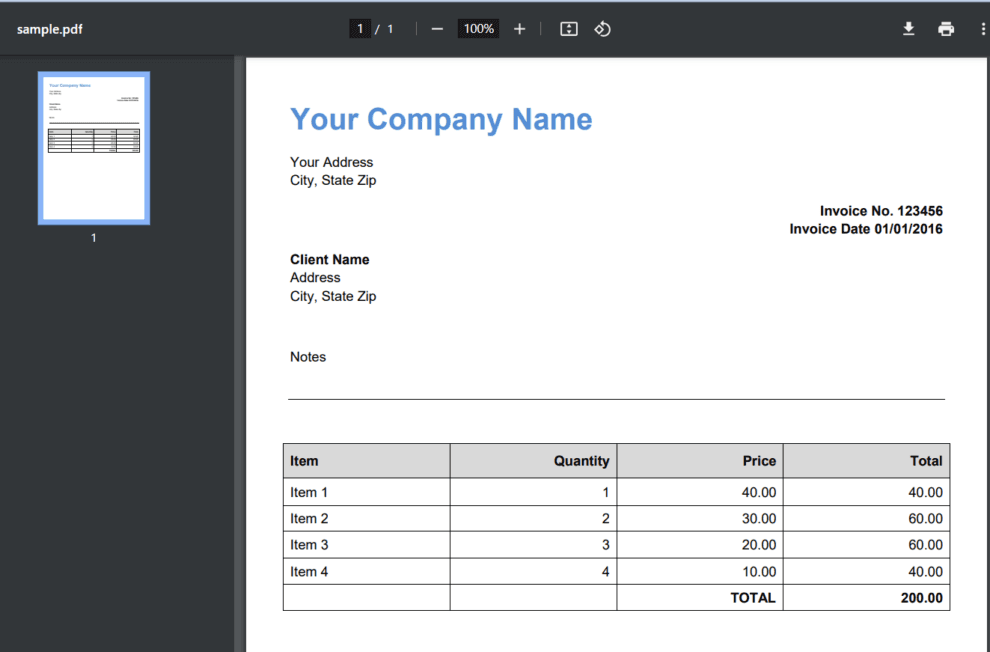
We will use this sample PDF document and will convert it into a PNG format using Bubble API Connector.
Kindly follow this simple step-by-step guide to convert PDF into a PNG format. So, let’s get started!
IN THIS TUTORIAL
Step 1: Create an App
- Let’s start by opening your Bubble account and clicking on the Create an app button.

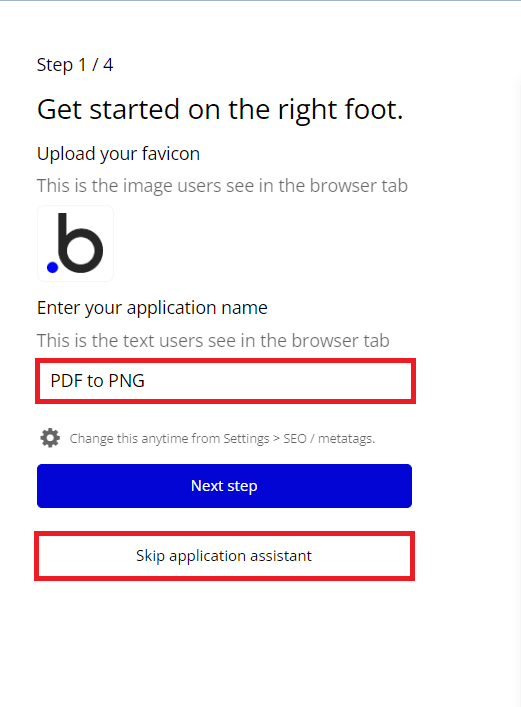
Step 2: Enter your Application Name
- Next, provide your application name, which will be displayed in the browser tab for your users. After that, you have two options: you can either proceed to the next step, or you may choose to skip the application assistant and go directly to the Bubble UI builder.
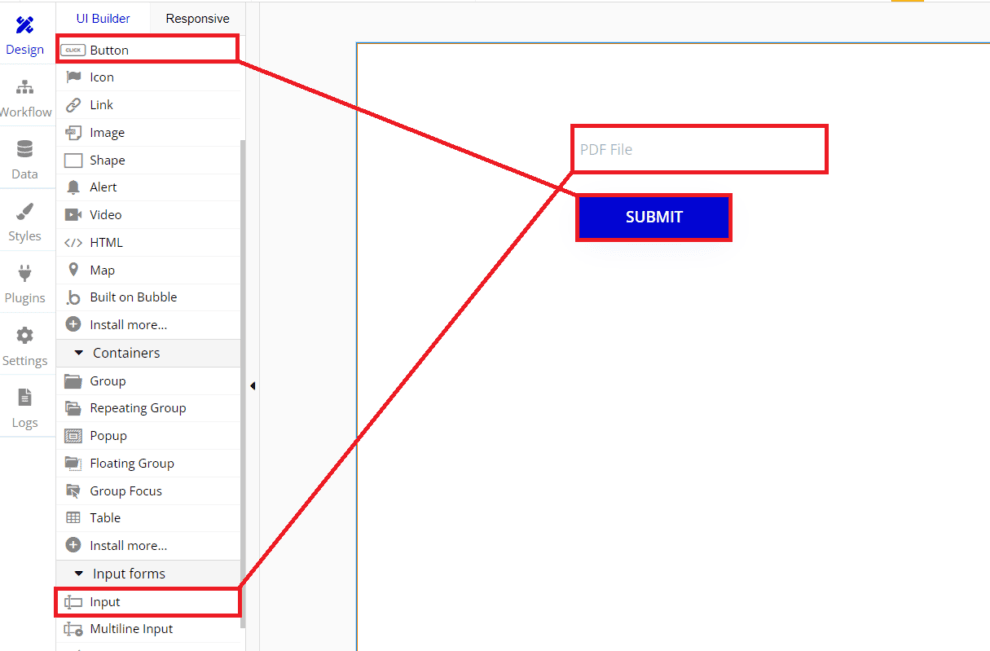
Step 3: Add Design Elements
- Let’s create a design for converting PDF files to image format. We’ll include an Input area where users can upload their PDF files, and a Button to initiate the conversion process.
Step 4: Navigate the Plugins Tab
- Then, navigate to the Plugins tab and click on the Add Plugins button.

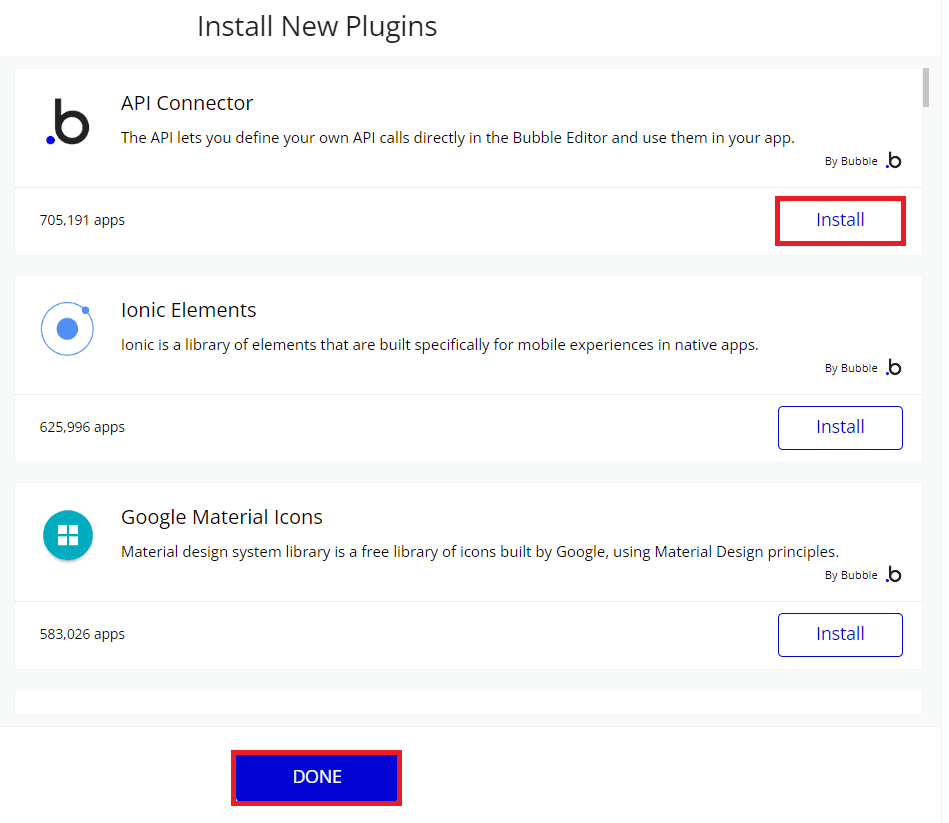
Step 5: Install New Plugins
- To utilize the Bubble API Connector, simply search for it within the plugins section of your Bubble development environment, and then Install it as a new plugin. This will enable you to access and use the API Connector in your project smoothly.
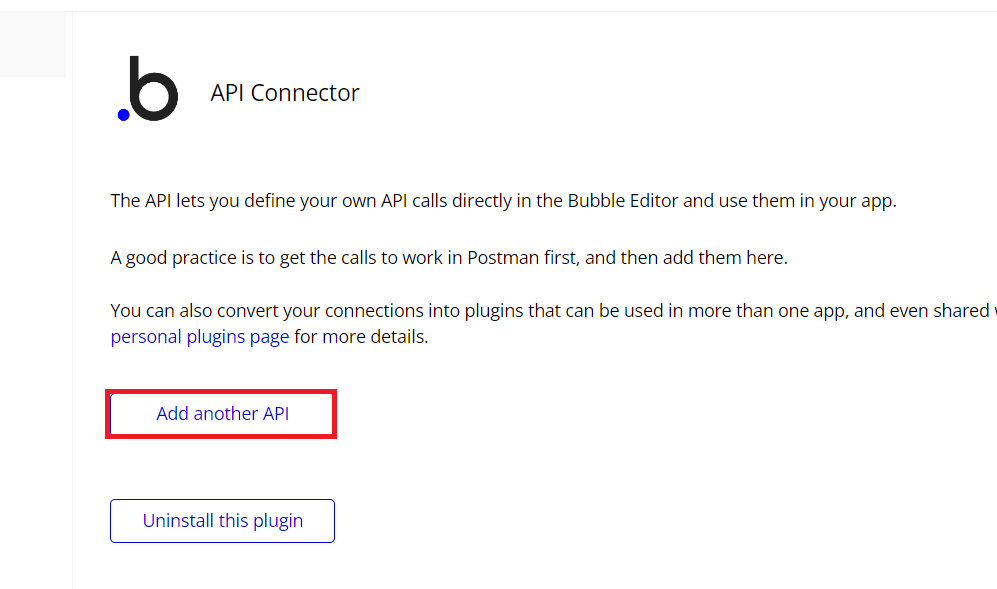
Step 6: Add Another API
- After successfully installing the API Connector plugin, you can proceed by clicking on the Add another API button. This will allow you to add additional APIs and further enhance the functionality of your Bubble project.
Step 7: Setup API Connector
Let’s configure the API Connector with the following settings:
- In the API Name field, enter your preferred name for the API.
- In the Name field, specify a name for this particular configuration.
- From the Use as dropdown, select the Action option.
- Choose your desired Data Type from the dropdown options.
- For the method, select Post and input the PDF.co PDF to PNG API endpoint:
https://api.pdf.co/v1/pdf/convert/to/png. - Under Headers, add the following keys and values: For the 1st Key, use x-api-key and enter your PDF.co API Key as the value. You can find the API Key in your PDF.co dashboard. For the 2nd Key, use accept and set the value as application/json.

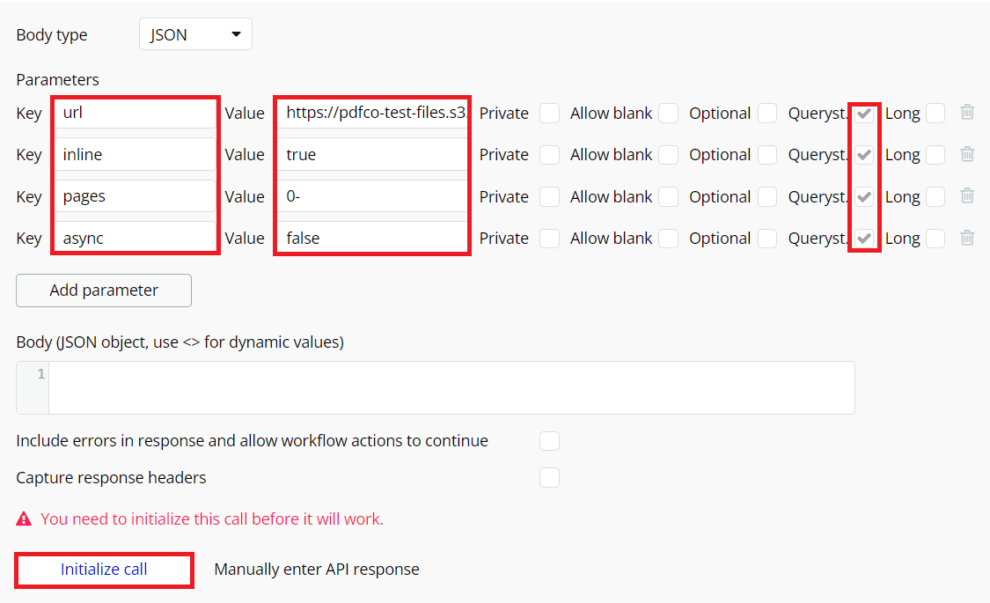
- Under the Parameters section, enter the URL as the key, and input the source file URL as the value.
- Add inline as the key, and set the value as true.
- Specify pages as the key, and input the list of pages you want to convert into a PNG.
- Enter async as the key, and set the value as false.
- Check the Queryst checkboxes.
- Click on the Initialize Call button to see the result.
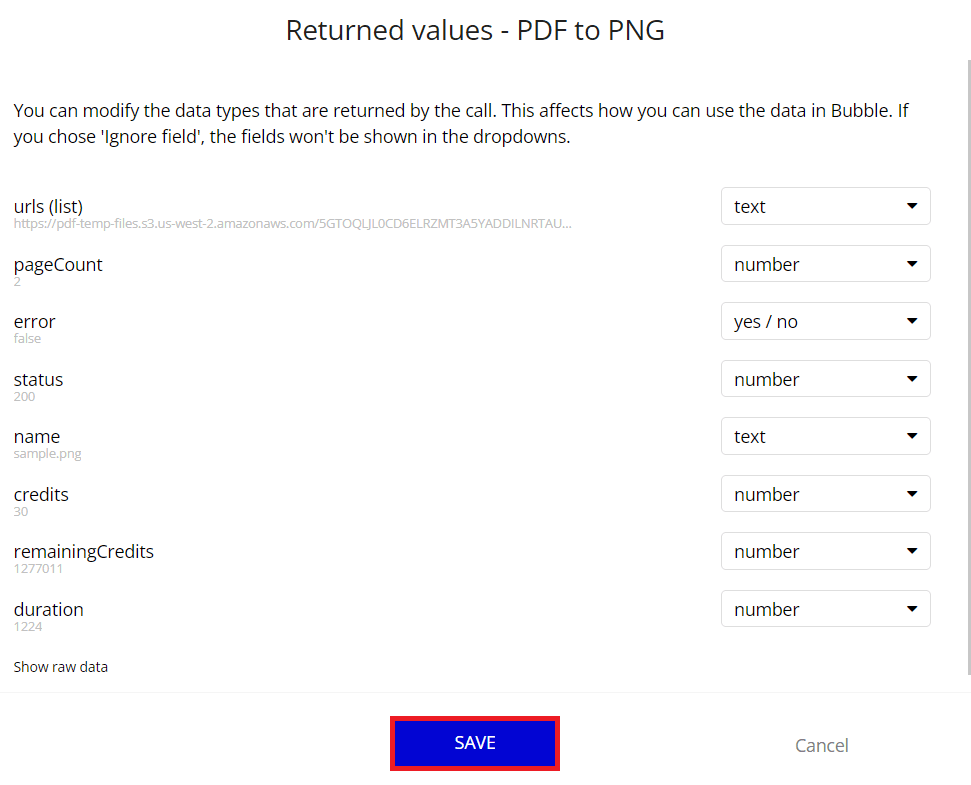
Step 8: Initialize Call Result
- Once the API Connector was set up correctly, it will return the PDF to PNG value.
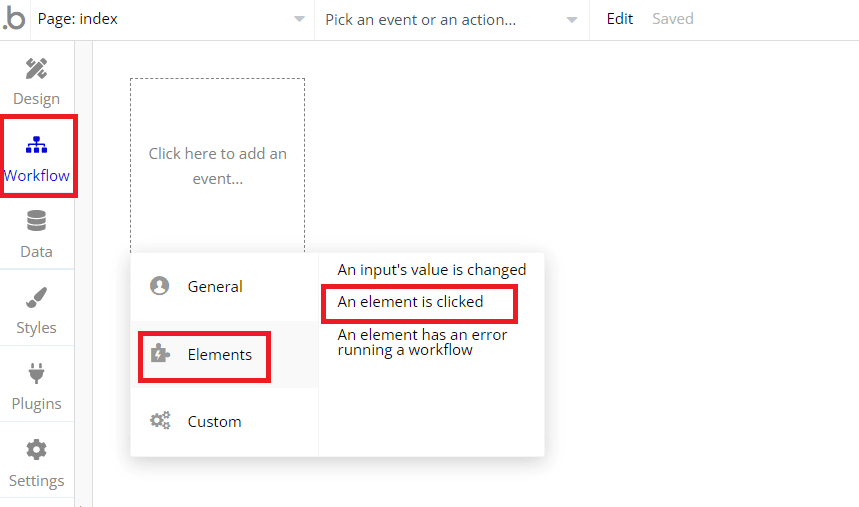
Step 9: Navigate the Workflow Tab
- Navigate to the Workflow tab, and click on the box to add an event. From the options, select Elements and then choose An element is clicked. This will allow you to set up the workflow to trigger actions when the specified element is clicked by users.
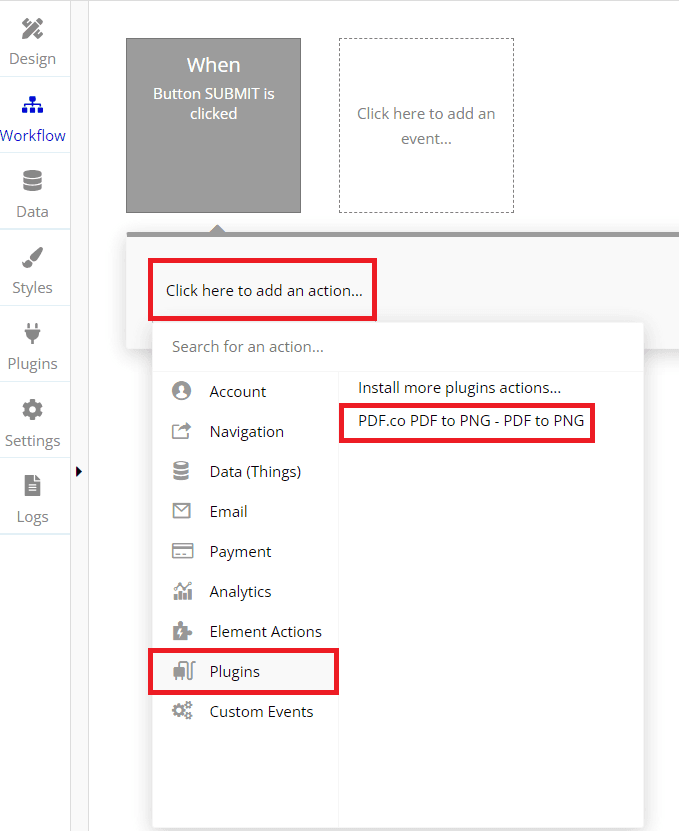
Step 10: Add an Action Event
- Click on the add an action box, and then go to the Plugins section. From there, select PDF.co PDF to PNG – PDF to PNG plugin. This will enable you to access and utilize the PDF to PNG conversion functionality provided by the plugin in your Bubble project.
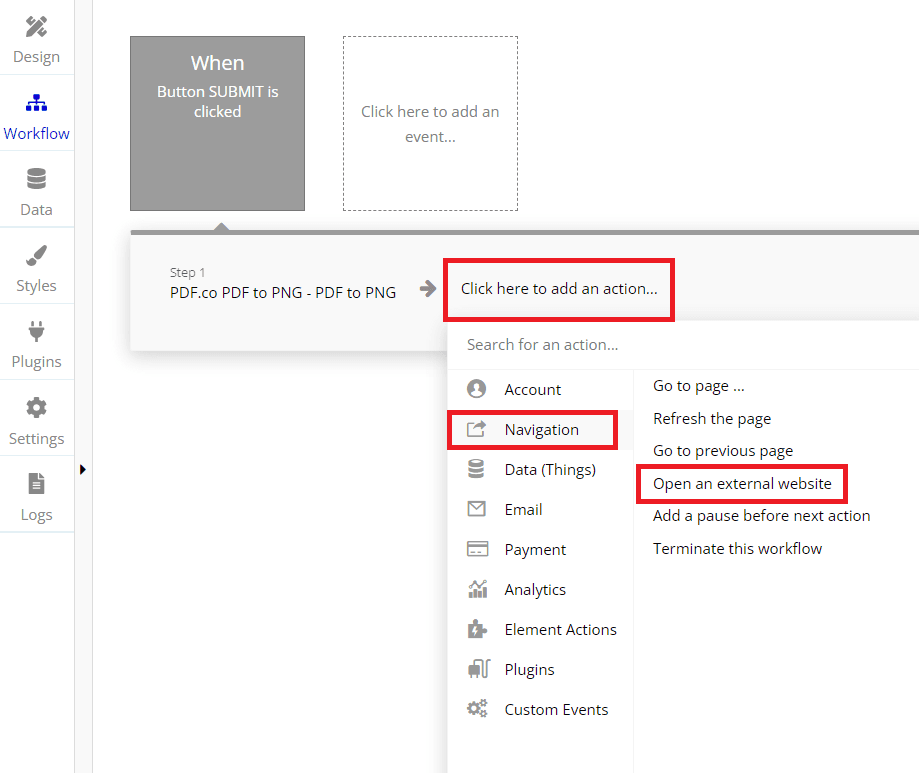
Step 11: Add Another Action
- Let’s add another action and locate the Navigation section. Then, choose Open an external website option. This action will allow you to direct users to an external website from within your Bubble project.
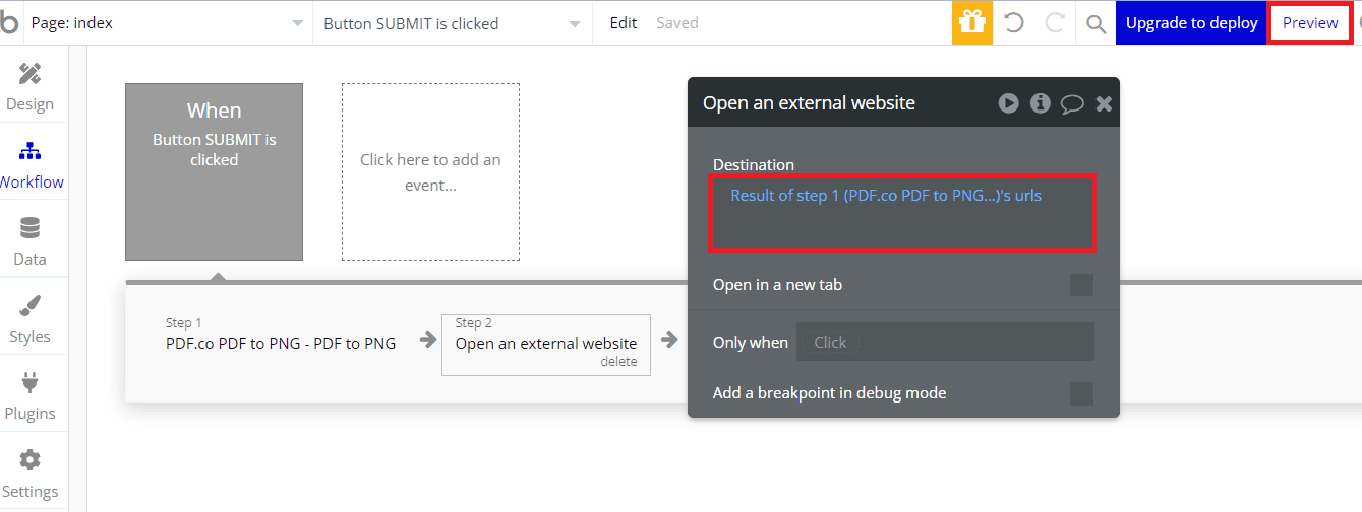
Step 12: Insert Dynamic Data
- We will now insert the result of the PDF.co PDF to PNG URLs, and then click the Preview button. This will enable you to visualize and verify the mapped URLs, ensuring that the PDF to PNG conversion is functioning correctly within your project.
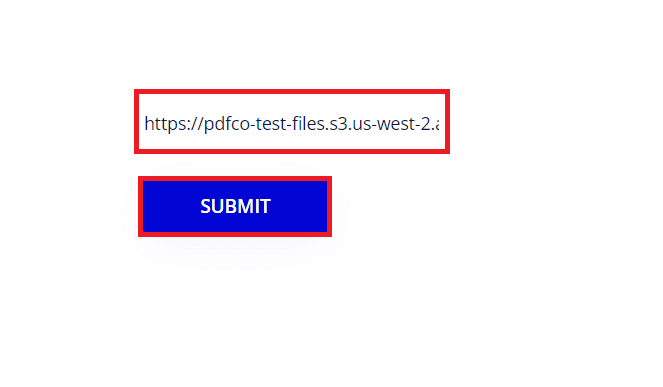
Step 13: Initiate the Conversion Process
- To begin the conversion process, input the source PDF file that you wish to convert into a PNG format. Afterward, click on the Submit button to send the request and initiate the PDF to PNG conversion. This will trigger the API call and generate the PNG image from the provided PDF file.
Step 14: PDF to PNG Output
- Here is the PNG document that has been converted from a PDF file.

In this tutorial, you learned how to convert PDF to PNG format using PDF.co and Bubble API Connector. You learned how to use the PDF.co PDF to PNG API to convert PDF files to PNG format. You learned how to set up the Bubble API Connector and learned how to configure the Workflow to obtain the converted value. You also learned how to utilize the API Connector and incorporate its functionalities into your Bubble project effectively.
Video Guide
Related Tutorials
