If you are not a Google Drive user, you can use a different cloud storage service such as Dropbox, OneDrive, etc., and look for a similar Trigger Event.
How to Add Rows to Google Sheets with Data Parsed from PDF Documents using PDF.co and Zapier
We prepared this step-by-step tutorial with screenshots to teach you how to add rows on Google Sheets with data parsed from PDF documents using PDF.co and Zapier. This is to automatically send your parsed data into your Google Sheets.
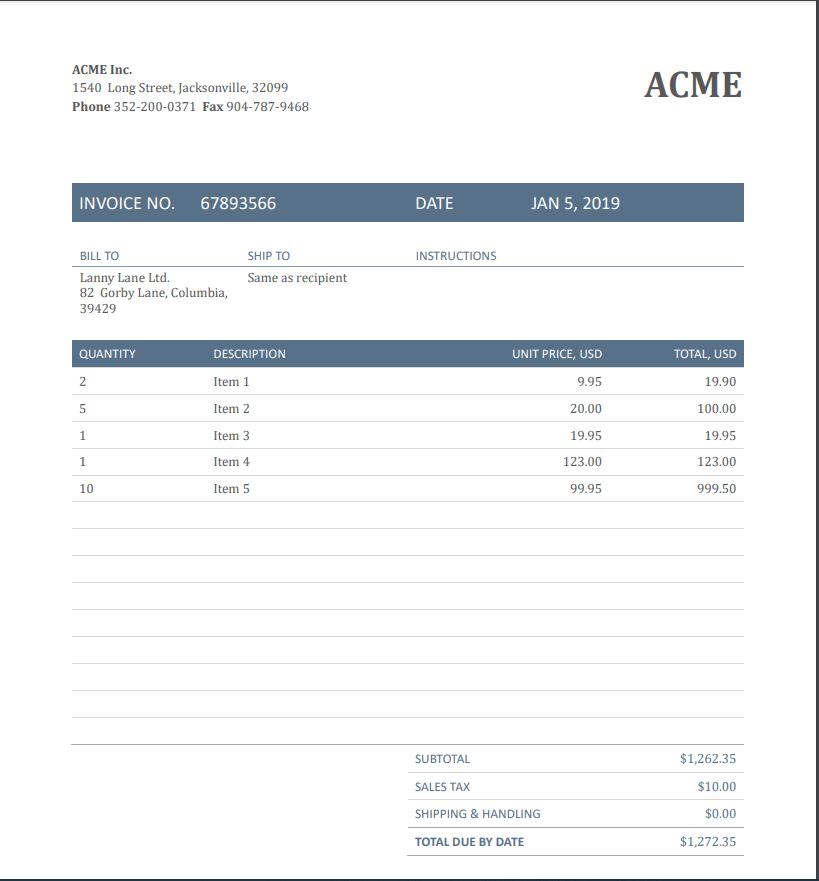
We will use this sample PDF to parse the table and send some parsed data to create new rows on Google Sheets.
IN THIS TUTORIAL
Step 1: Create a New Zap
Start by clicking on Make a Zap! at the upper-left corner of your Zapier dashboard
Step 2: Set App Event
We will now set up our Trigger. Search and select Google drive as the App event.
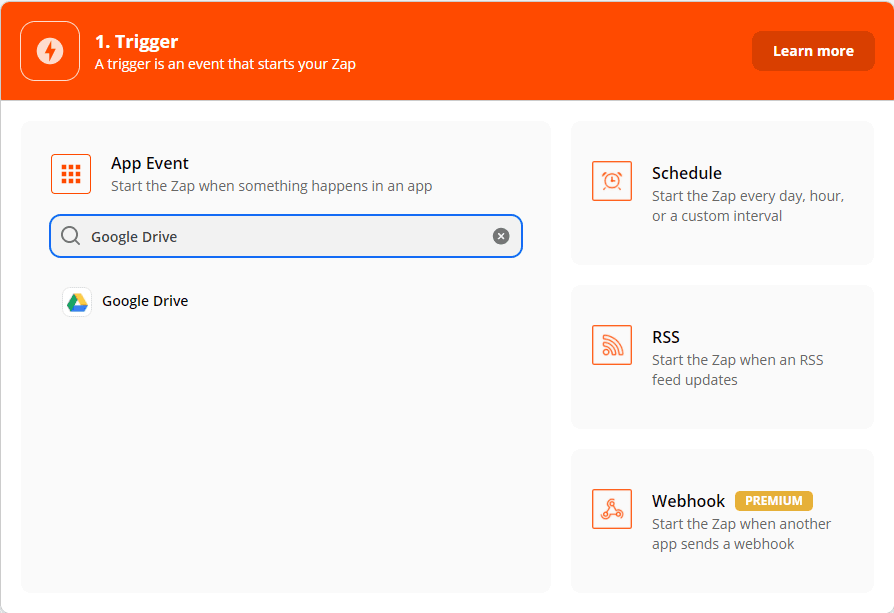
Step 3: Set Trigger Event
As for our Trigger Event go ahead and choose New File in Folder. In this case, whenever there’s a new file added to your specific folder, it will trigger this zap.
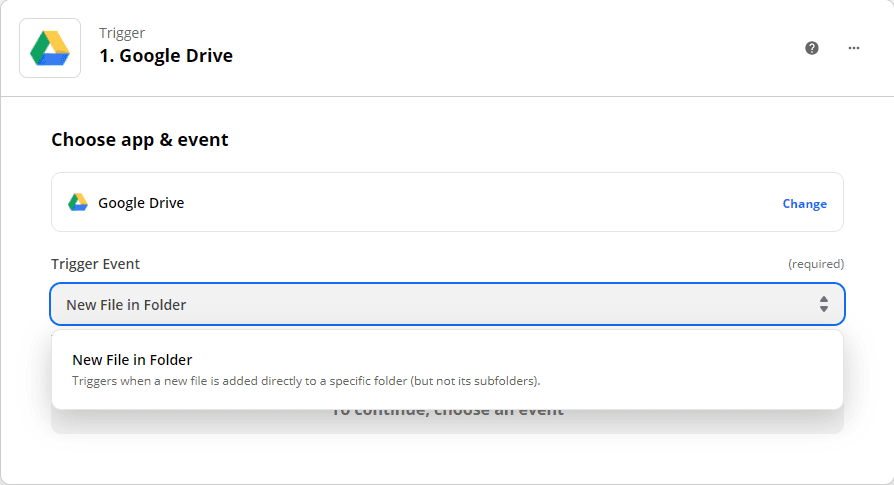
Step 4: Connect Google Drive Account
Select or connect your Google Drive account which you will be using with Zapier
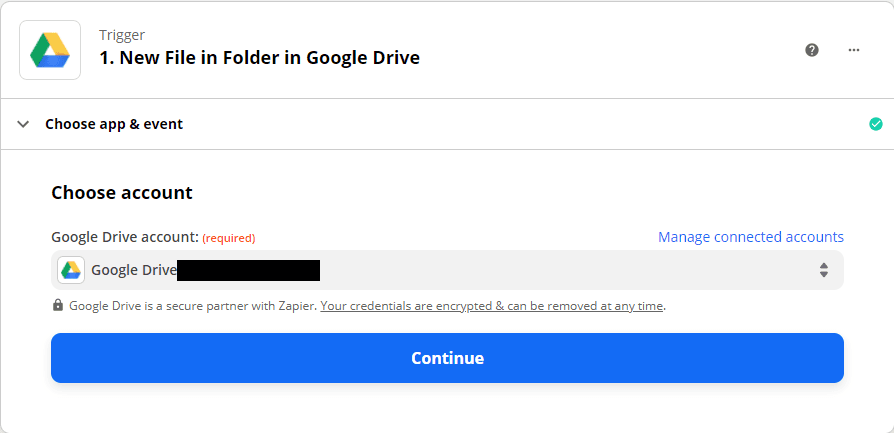
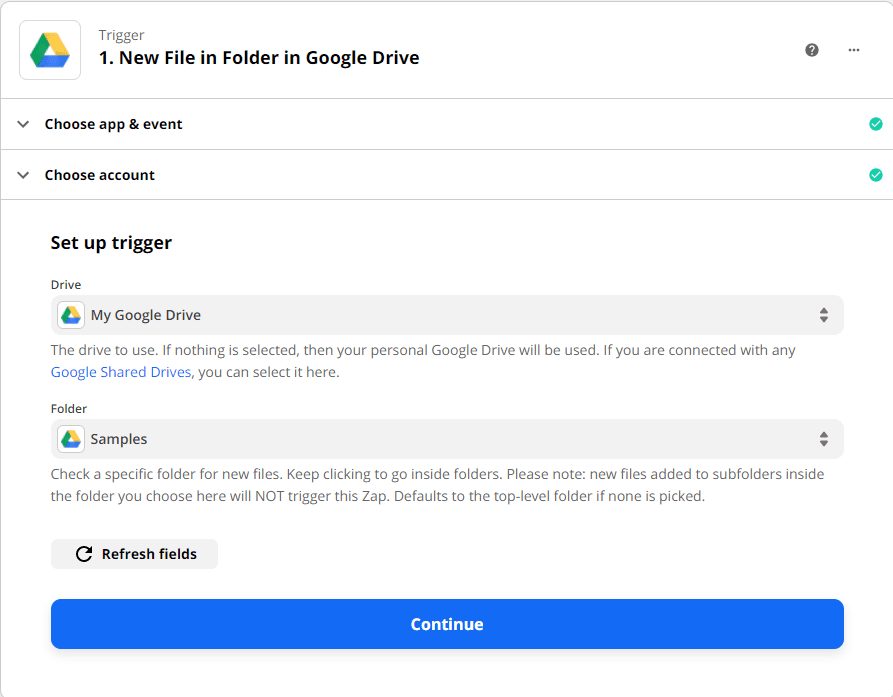
Step 5: Choose Folder Location
Select My Google Drive as the drive to be used and select the specific folder where the zip files are located. In my case, I put the sample PDF in the Samples folder
Step 6: Test Trigger
We will then Test the trigger to see if there are any errors or none.
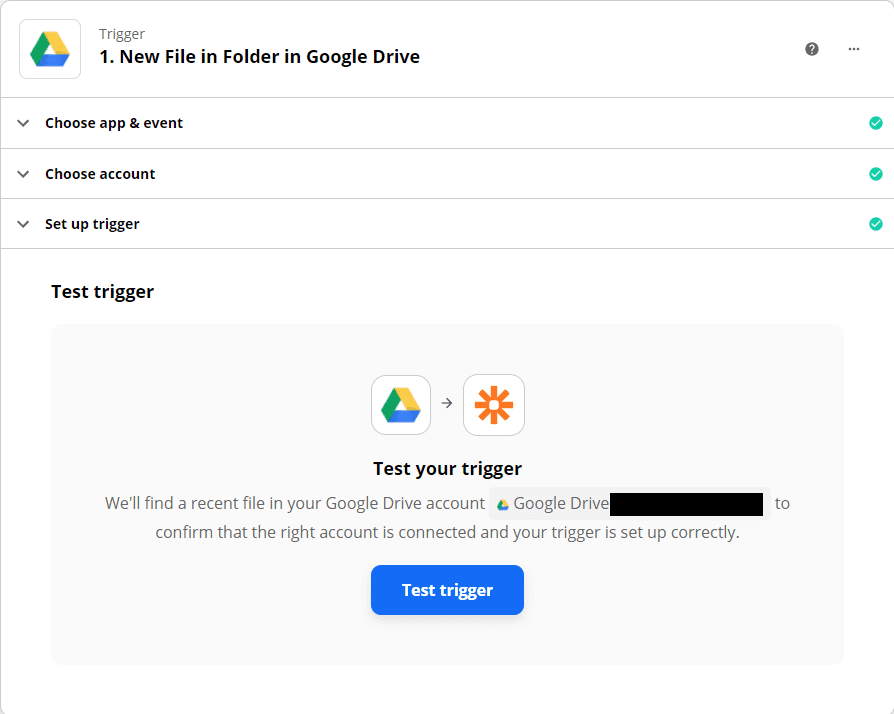
So we’re done setting up the Trigger. We will now set up the Action.
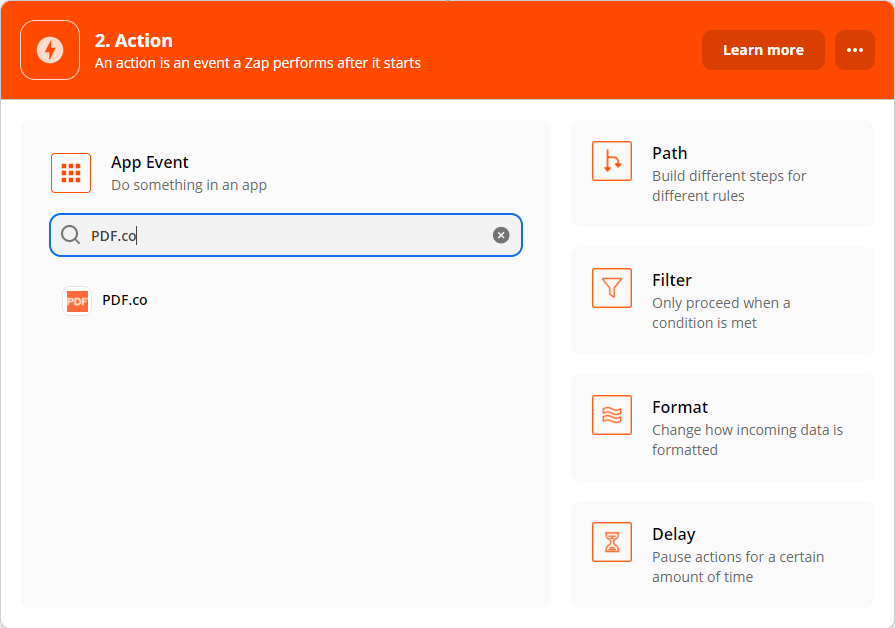
Step 7: Select Another App Event
Search and select PDF.co as our App event
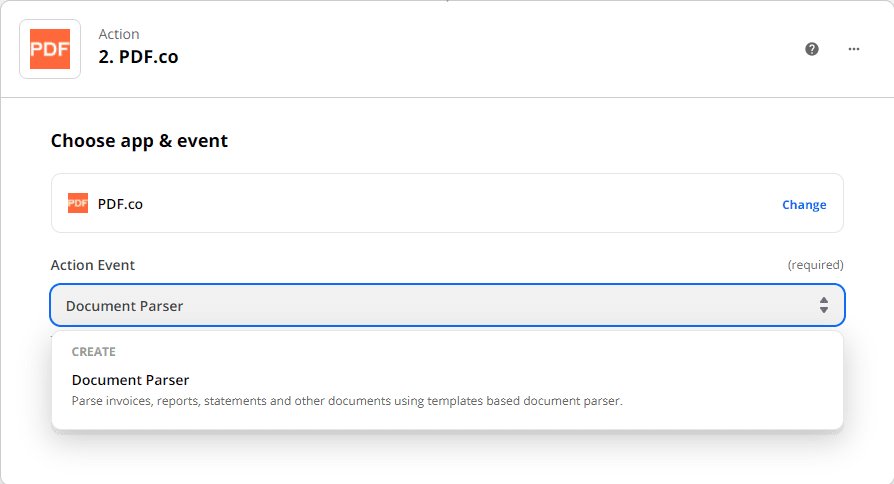
Step 8: Select Document Parser
Select Document Parser as our Action event. Document Parser can parse data in your PDF.
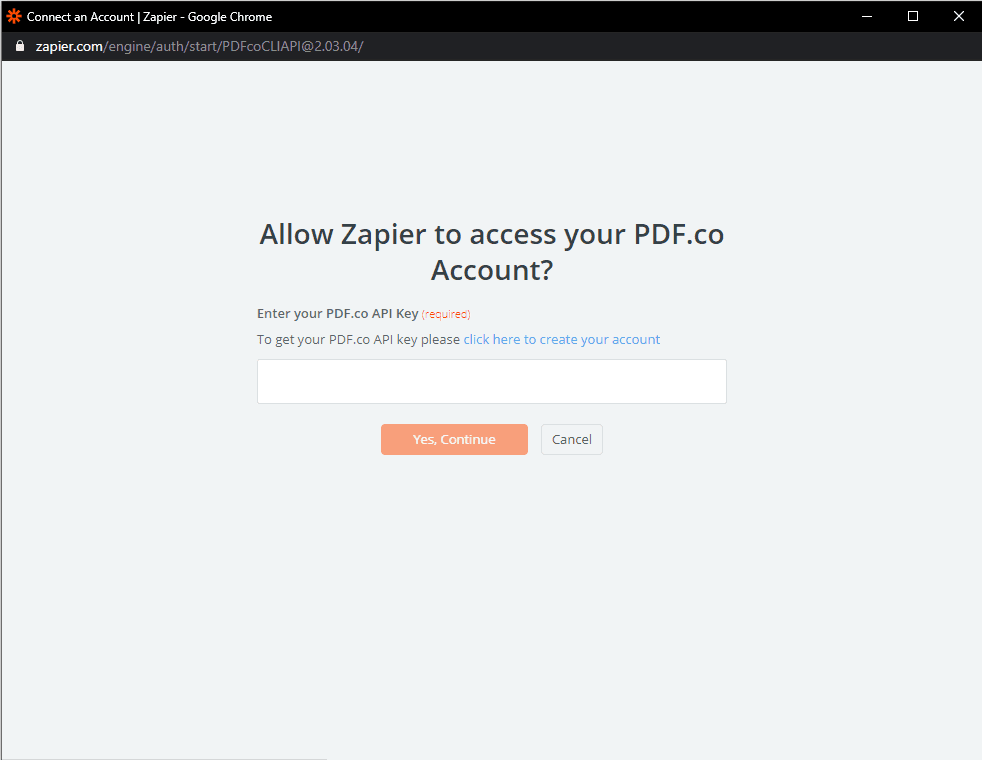
Step 9: Connect PDF.co Account
Select or connect your PDF.co account which you will be using with Zapier. You can get your API key from the PDF.co dashboard.
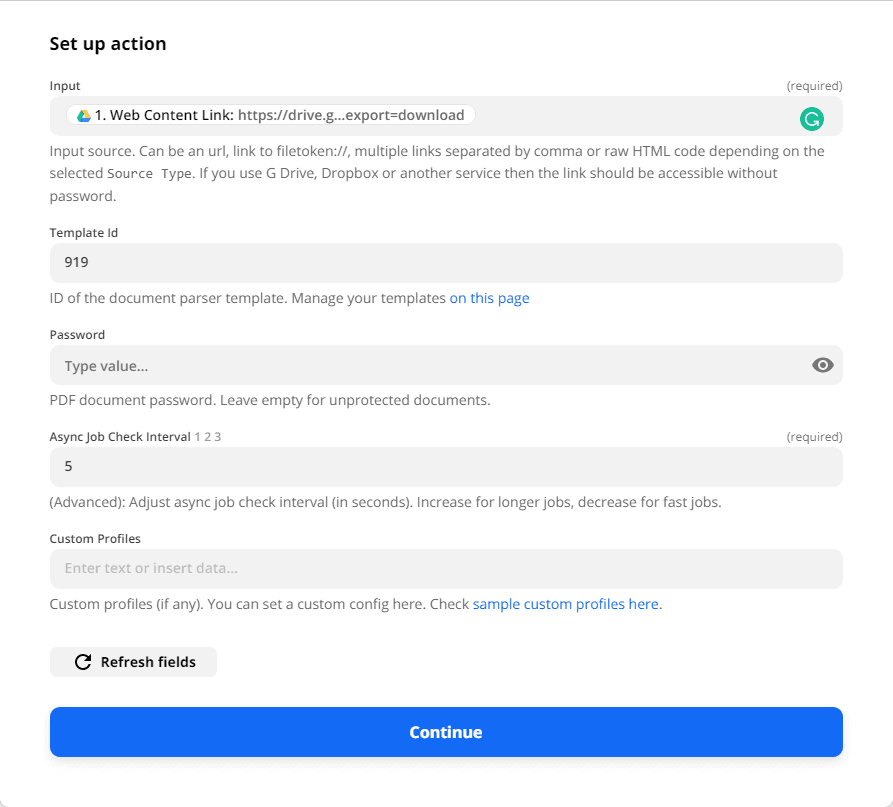
Step 10: Setup Action
Under Setup Action set the Input into Web Content Link and set the Template ID into the template that you want to use with Document Parser. You can create templates here.
Step 11: Test Action
We will now Test the action. Click on Test & Review to see if there are any errors or none.
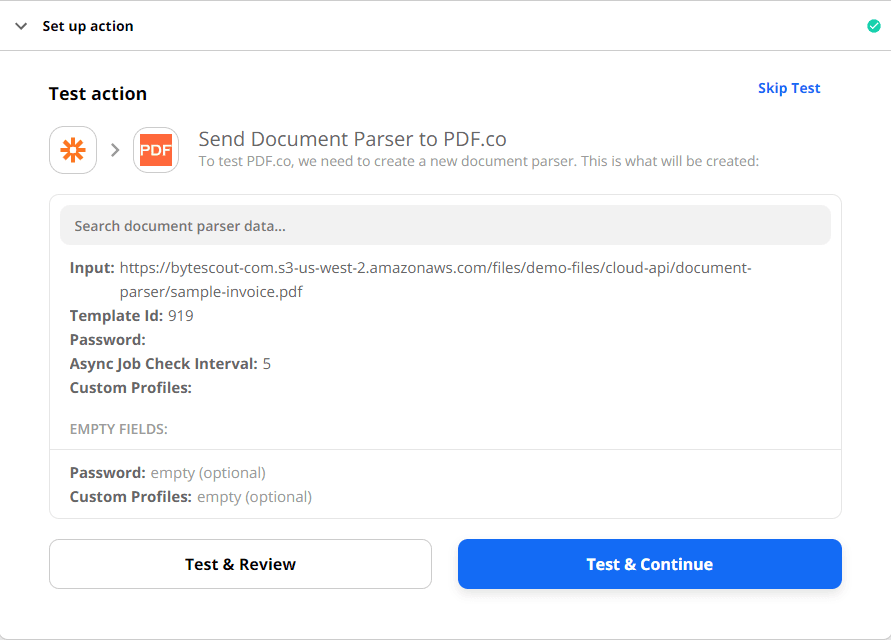
So we’re done with setting up the PDF.co action. Now let’s create an action for Google Sheets.
Step 12: Add Another Action
Add another Action. Search and select Google Sheets as our App event.
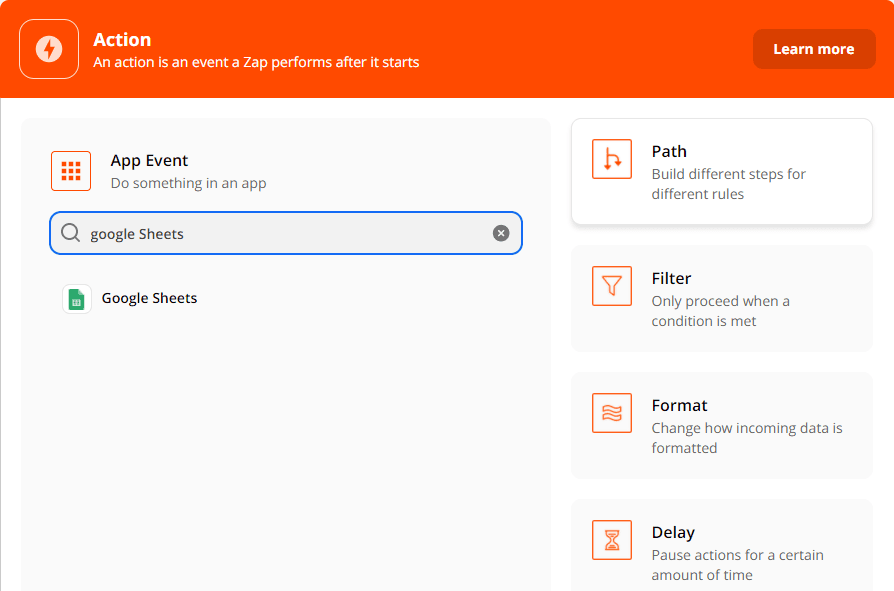
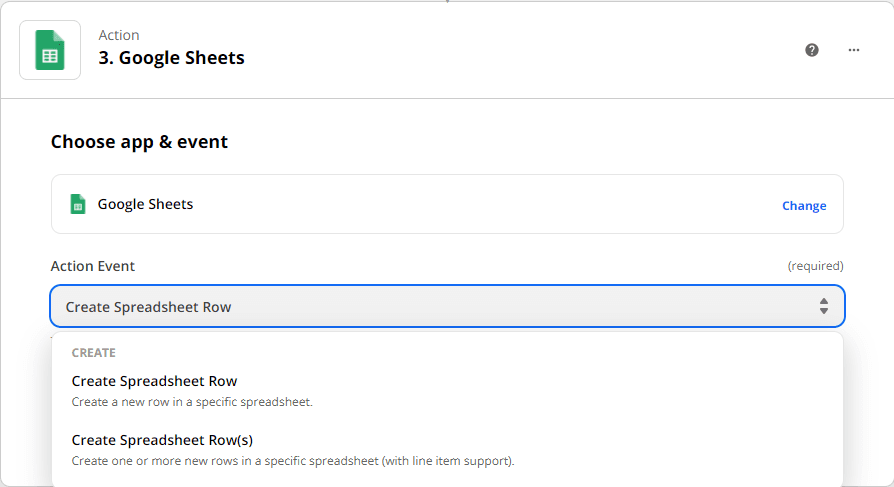
Step 13: Set Action Event
Select Create Spreadsheet Row as our Action event. This way we can create a new row through the parsed data from the sample PDF.
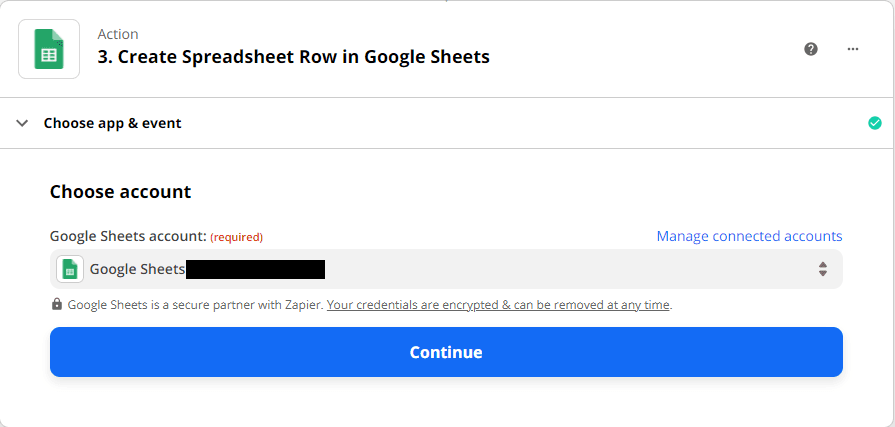
Step 14: Connect Google Sheets Account
Select or connect your Google Sheets account which you will be using with Zapier.
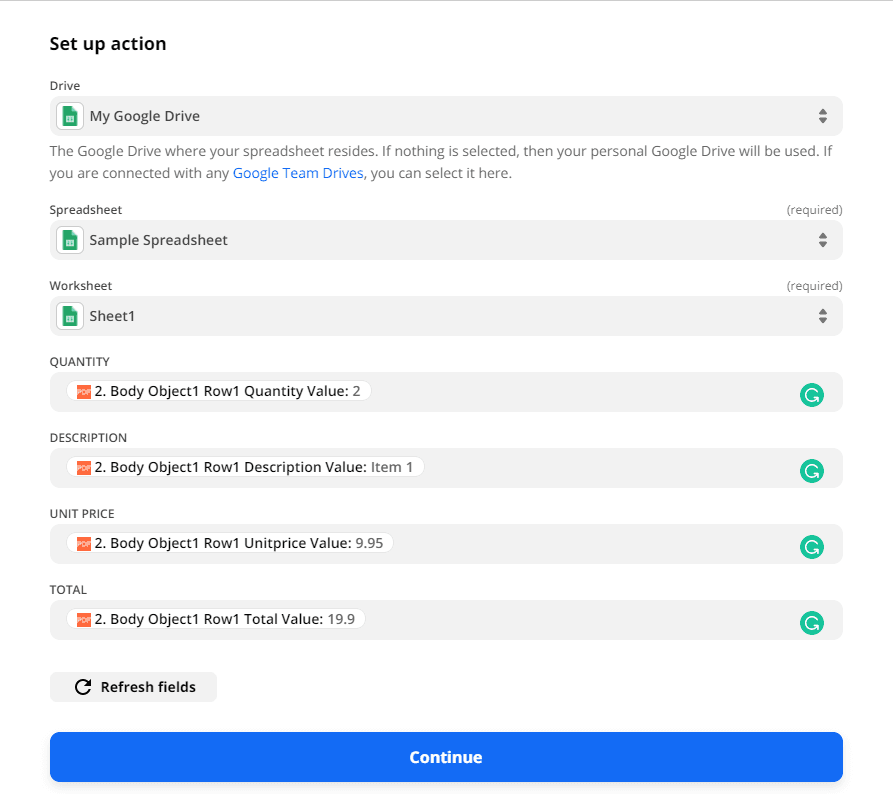
Step 15: Setup Action
Under Setup Action select the Drive that you want to use, select the Spreadsheet that you’ll be using, select which Worksheet you’ll want to add the new row, and set the Value of the row that you want to add.
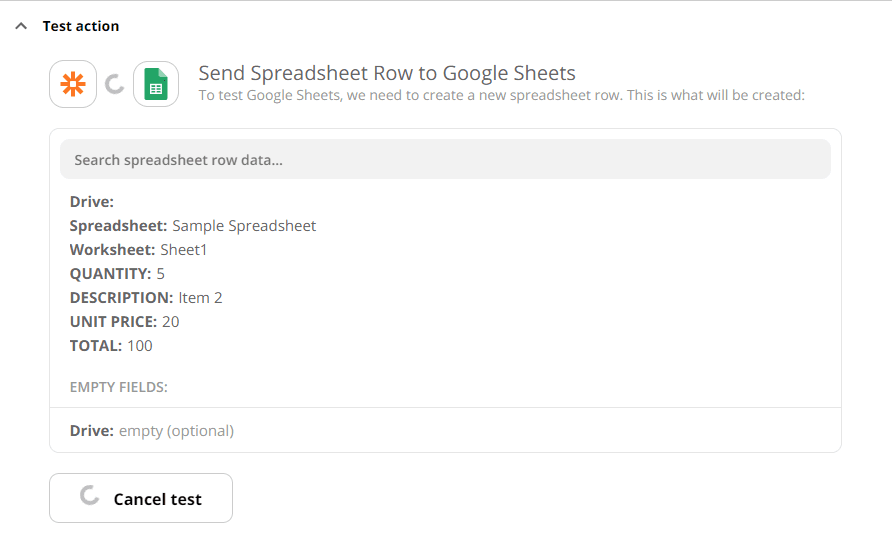
Step 16: Test & Review
Click on Test & Review to see if there are any errors or none.
Step 17: Output
Once the test returns as successful. You can then turn the zap on.
Just follow those steps to add rows on Google Sheets with data parsed from PDF documents using PDF.co and Zapier. Here’s what it looks like once a new row has been added.
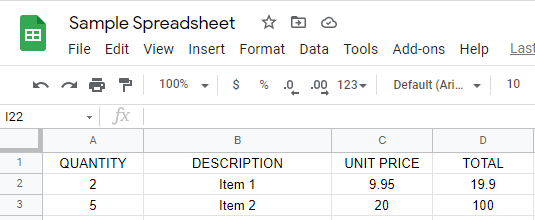
In this tutorial, you’ve learned how to add rows to Google Sheets with data parsed from PDF documents using PDF.co and Zapier.
Related Tutorials


