PDF to JSON with Bubble API Connector
In this tutorial, we will show you how to use Bubble API Connector to convert PDF into JSON format.
IN THIS TUTORIAL
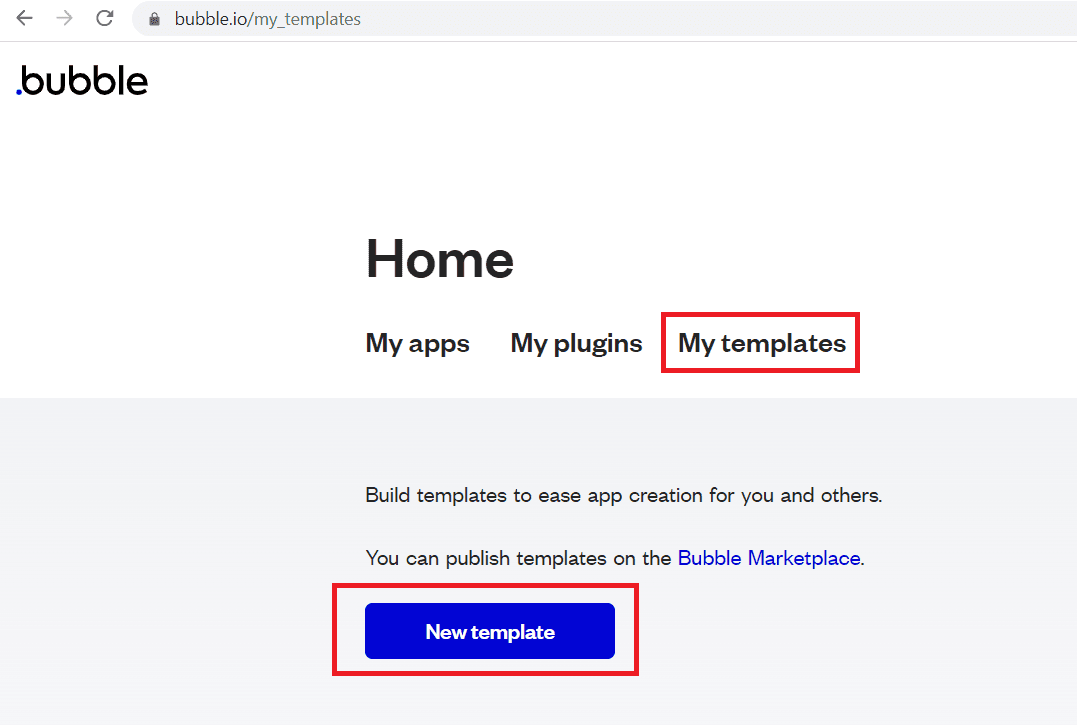
Step 1: My Template
To begin, log in to your Bubble account and click My Templates.
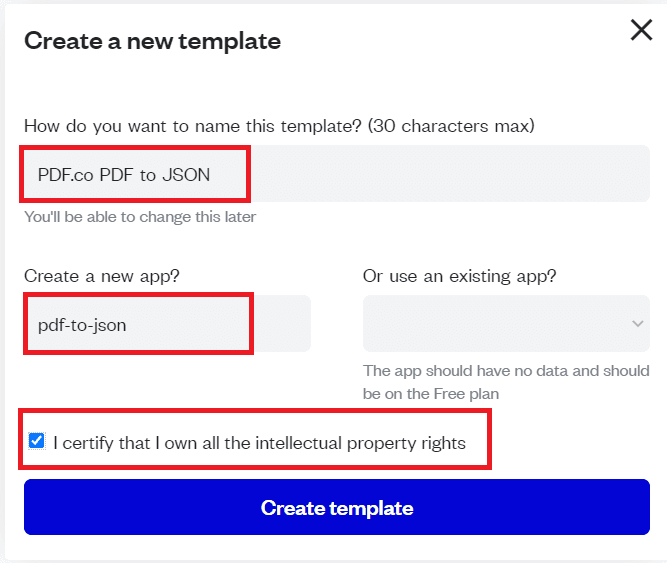
Step 2: Create New Template
Next, fill out the template form to create a new template.
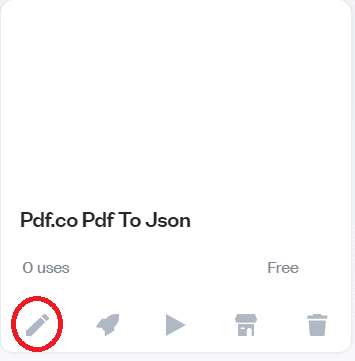
Step 3: Open New Template
Click on the Edit icon to open a new template.
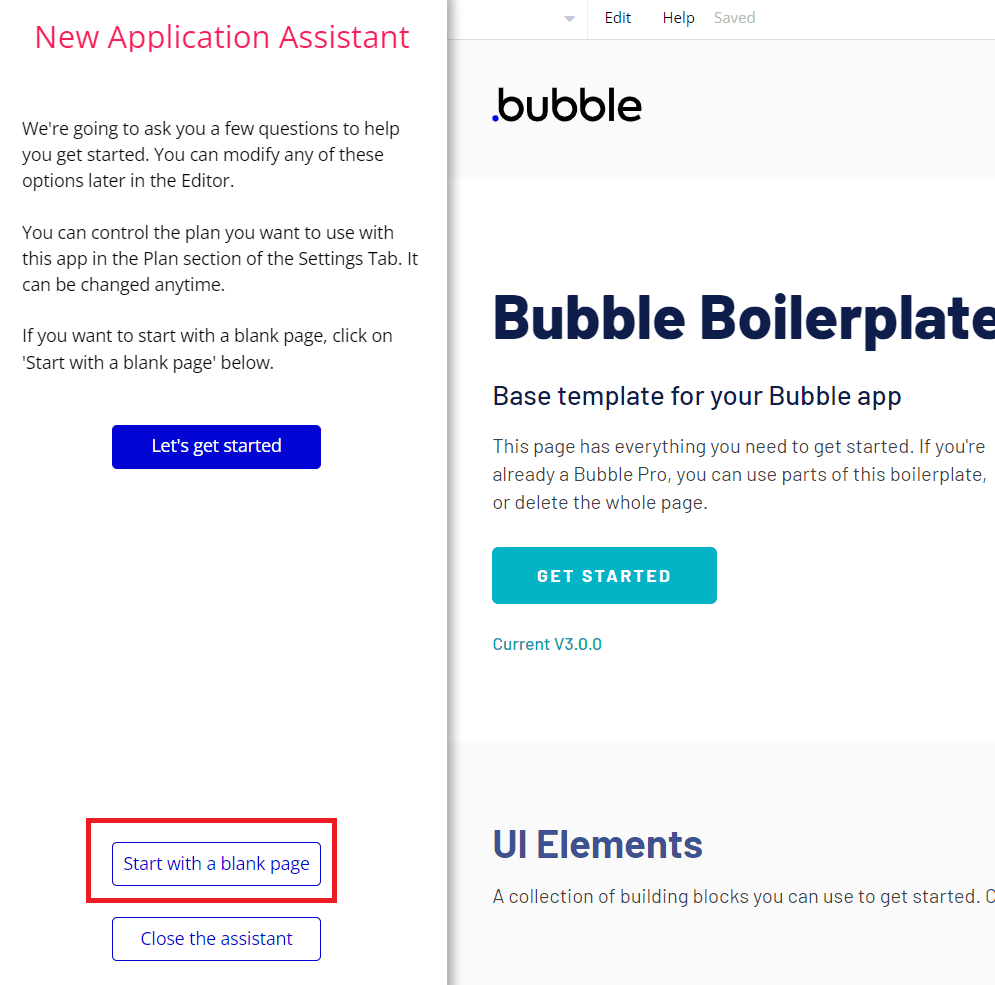
Step 4: Start with a Blank Page
Next, click on the Start with a blank page button and close the assistant.
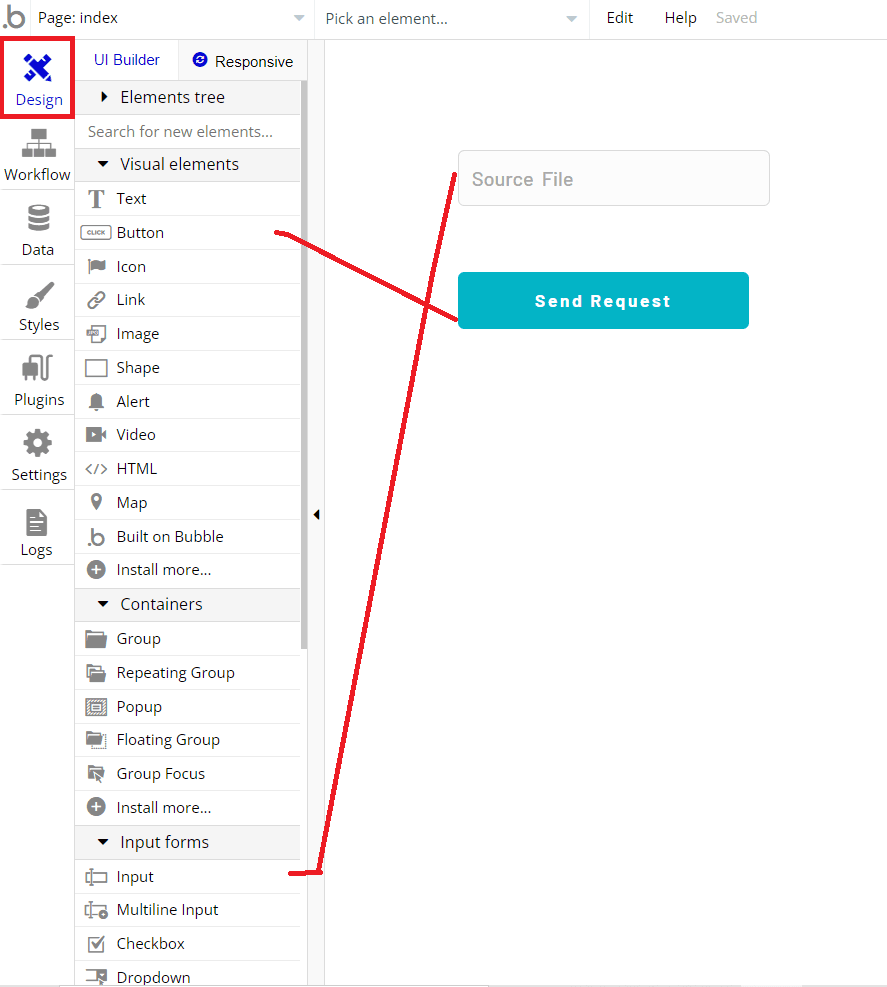
Step 5: Add Design
Let’s add two elements, Input for the source file and a Button to send a request.
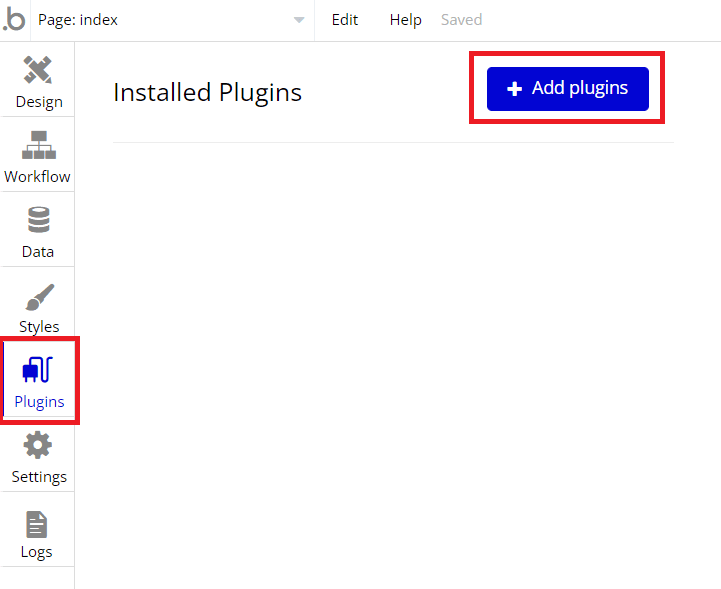
Step 6: Add Plugins
Then, click on the Plugins tab and add plugins.
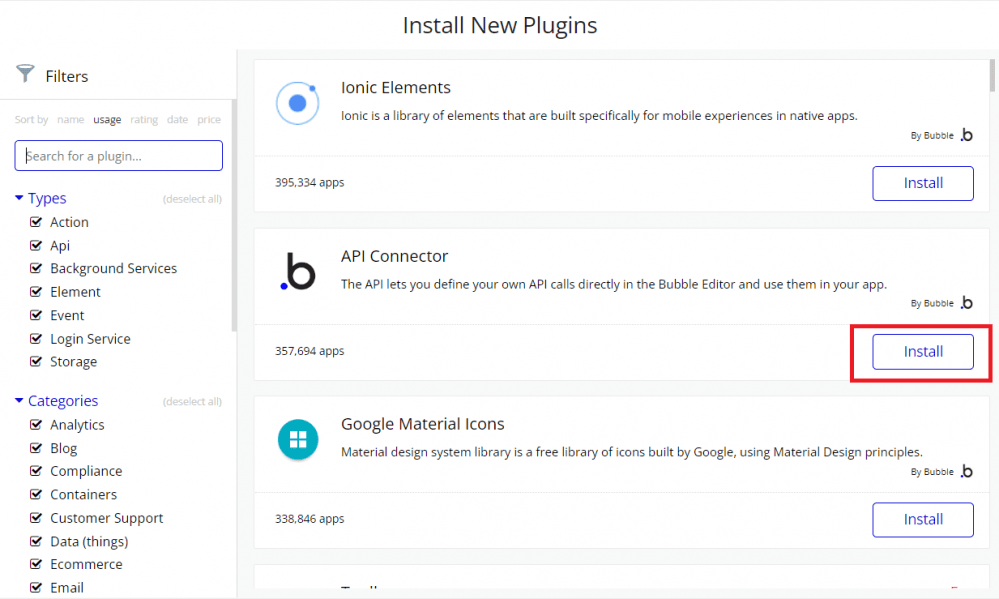
Step 7: Install API Connector
Look for API Connector and click on the Install button.
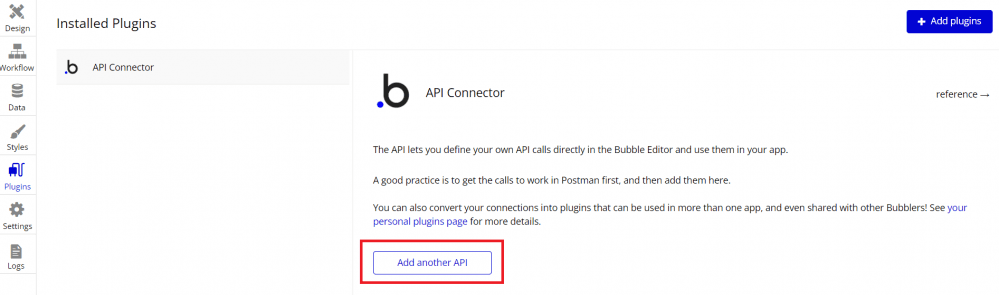
Step 8: Add Another API
After installing the API Connector, click on the Add another API button.
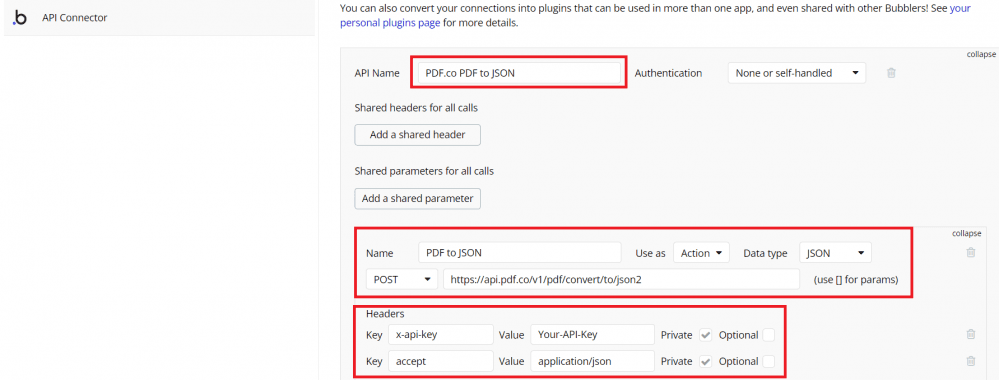
Step 9: API Connector Configuration
Let’s set up the API Connector configuration.
- In the API Name field, type in your desired API name.
- In the Name field, type in your preferred name.
- In the Use as dropdown box, select the Action option.
- For the Data Type dropdown box, select your preferred Data type.
- Then, select POST for the method and enter the PDF.co PDF to JSON API endpoint
https://api.pdf.co/v1/pdf/convert/to/json2. You can get the PDF.co PDF to JSON API endpoint. - For the Headers, add x-api-key for the Key and enter your PDF.co API Key for the Value. You can get API Key in your PDF.co dashboard.
- For the 2nd Key under Headers, add accept and application/json for the Value.
Step 10: Add Parameters
Let’s add the PDF.co PDF to JSON parameters.
- For the Key field, enter the URL parameter and input the source file URL for the Value. Then, tick on the Queryst checkbox and click on the Initialize Call button.
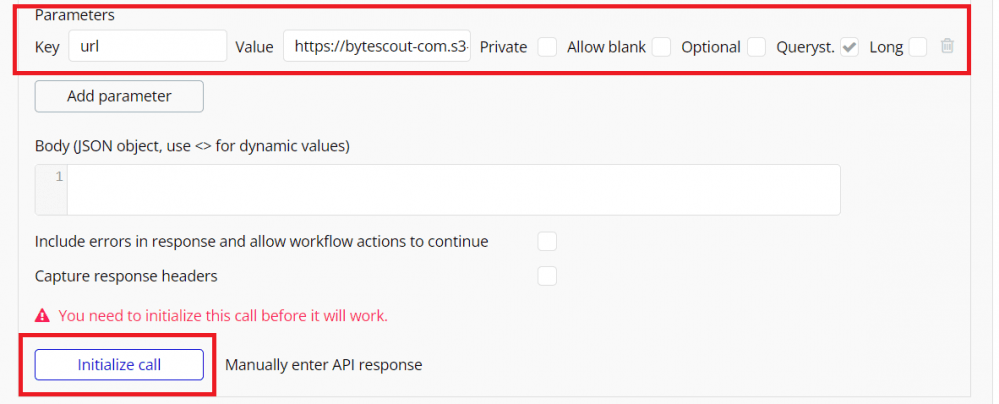
Step 11: Initialize Call Result
Once the API Connector was set up correctly, PDF.co PDF to JSON will return a sample value.

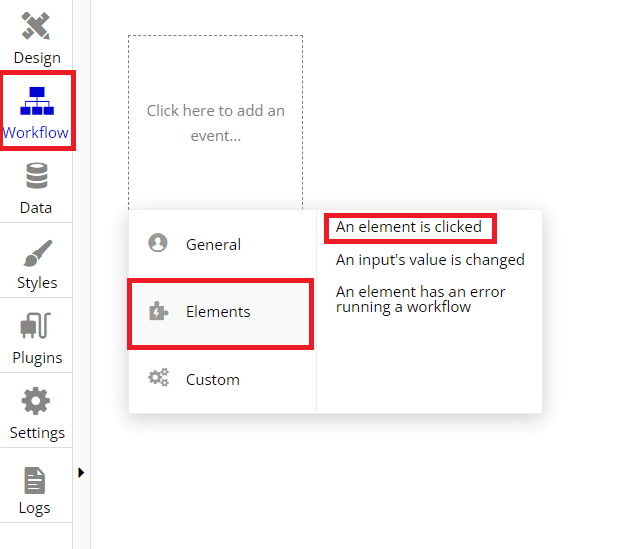
Step 12: Add Events
After saving the returned values, go to the Workflow tab and click on the box to add an event. Then, select the Elements and An element is clicked option.
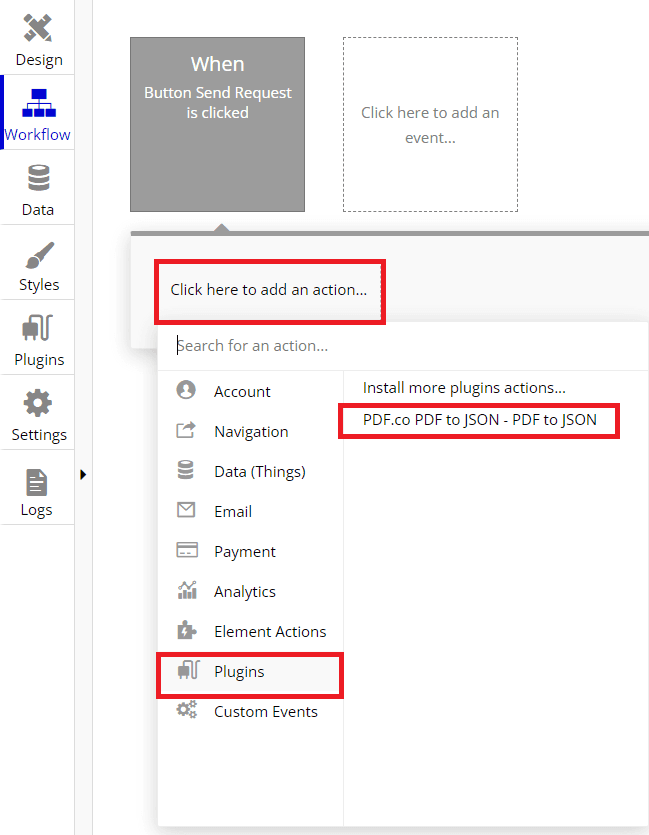
Step 13: Add Actions
Click on the add an action button and select the PDF.co PDF to JSON – PDF to JSON plugins.
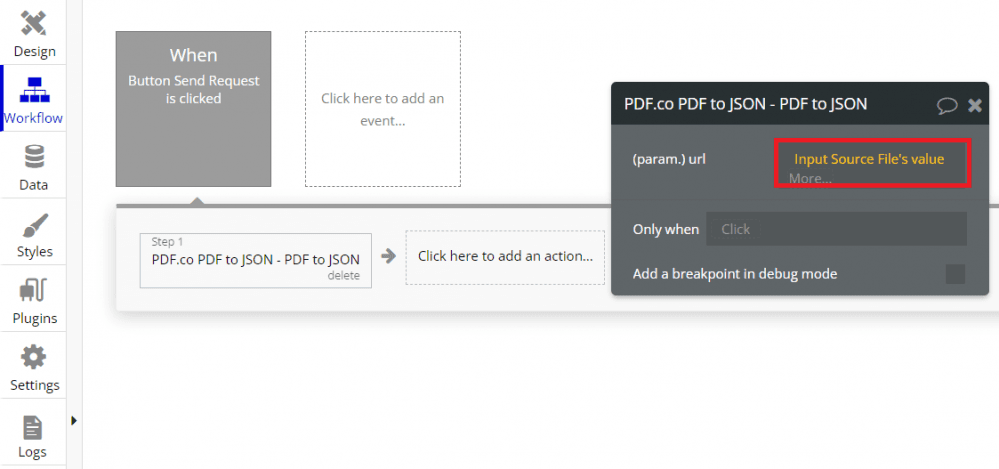
Step 14: Insert Dynamic Data
Let’s insert the Dynamic Data value.
- In the URL param, select the Input Source File’s value.
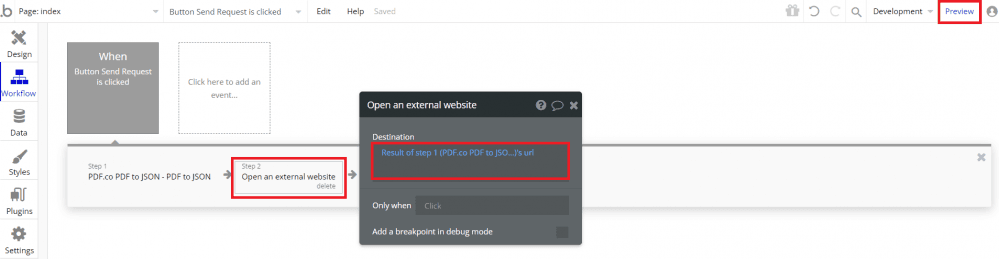
Step 15: Set Destination
Let’s add another action and choose the Open an external website. Then, choose the result of PDF to JSON’s body URL for the Destination field and click the Preview button.
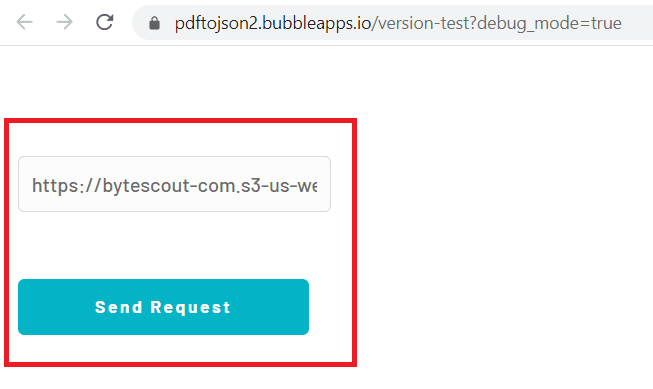
Step 16: Add Source URL
Enter the Source File URL and click the send request button.
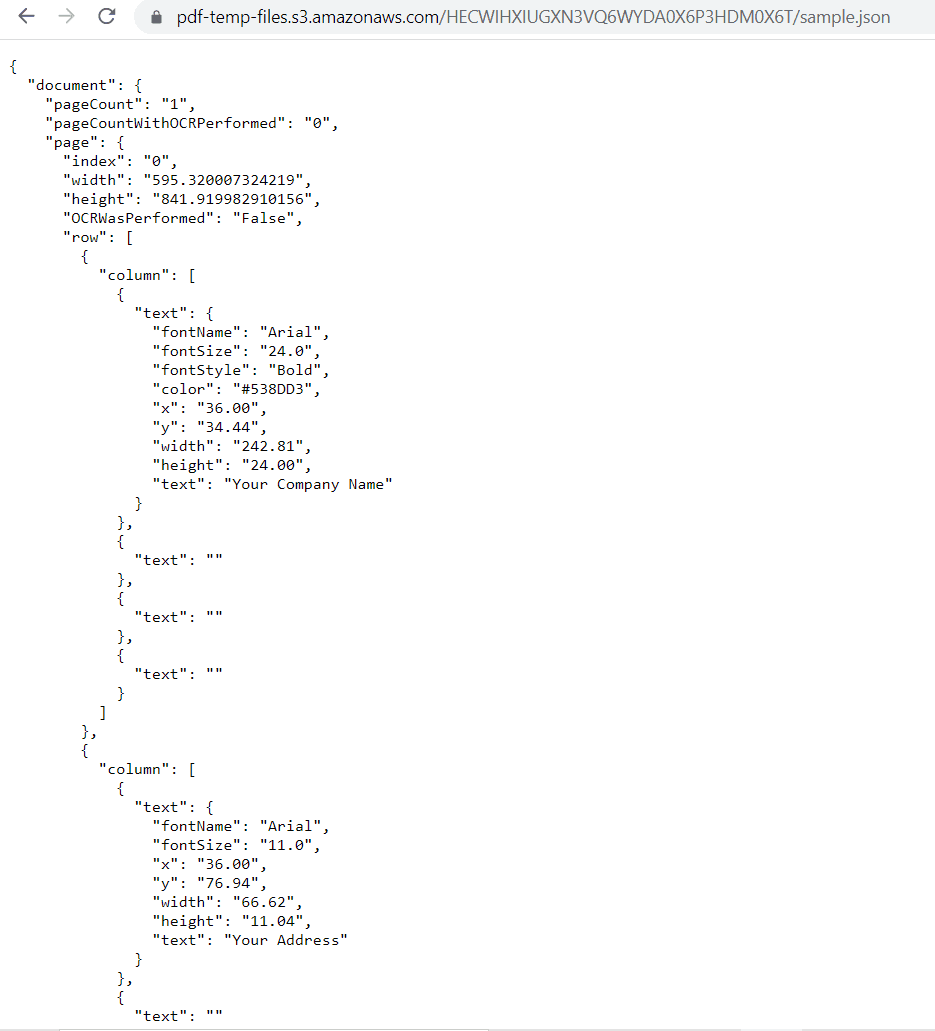
Step 17: Converted JSON Output
And we got output as shown in the start of tutorial.
In this tutorial, you learned how to convert PDF to JSON format. You learned how to set up the API Connector to use the PDF.co PDF to JSON Web API in Bubble. You also learned how to configure the Workflow to get dynamic values for conversion.
Video Guide
Related Tutorials
