How to Generate PDF using Airtable Linked Records
Normally creation of Zap in Zapier is an easy task. Zapier has an excellent generic data mapping feature. But its data usage gets tricky in some cases due to its generic nature. A good example of it is Airtable linked records.
In this article, we’ll be demonstrating how to create PDFs using PDF.co and Airtable linked records in Zapier.
Airtable Structure
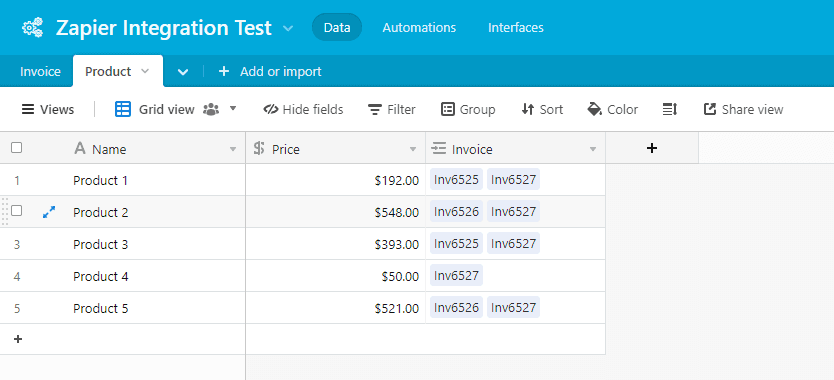
First of all, let’s review the Airtable table structure. We have two tables, Invoice, and Product. Within the invoice table, we are using product-linked records as shown in the following screenshots.

PDF.co Template
PDF generation will be handled by PDF.co action “HTML to PDF Converter”. This action can be used in many ways, but we’ll be using it via PDF.co Templates.
In the PDF.co app, we’ll be creating a new HTML template. Upon template creation, it’ll generate a unique TemplateId. This TemplateId is used for further processing.
NOTE: HTML Templates created in the PDF.co app can be useful for many things other than this particular purpose.
This template is in HTML format and data is passed using Handlebar JS format.
This template expects the following data.
{
  invoice_id: "Inv3939",
  client_name: "Client Name",
  invoice_date: "04/10/2022",
  items: [
  	{"name": "Product 1", "price": 122},
  	{"name": "Product 2", "price": 202},
  	{"name": "Product 3", "price": 320}
  ]
}
Each item in the “items” array will create a new row in the output PDF. Our main challenge here is to pass these data from Zapier. Let’s head to the Zapier configuration.
Zapier Configuration
We already have Airtable tables and PDF.co templates. Let’s connect these services in the new Zap.
Create a Trigger on Airtable New Record
- We’ll be creating a new trigger for “New Record in Airtable”.
- Next, we’ll be adding an Airtable API key to connect to our account. We’ll be configuring all trigger details like Airtable Base, Table name, etc.
- Finally, we’ll be testing Airtable Trigger and reviewing the result data.
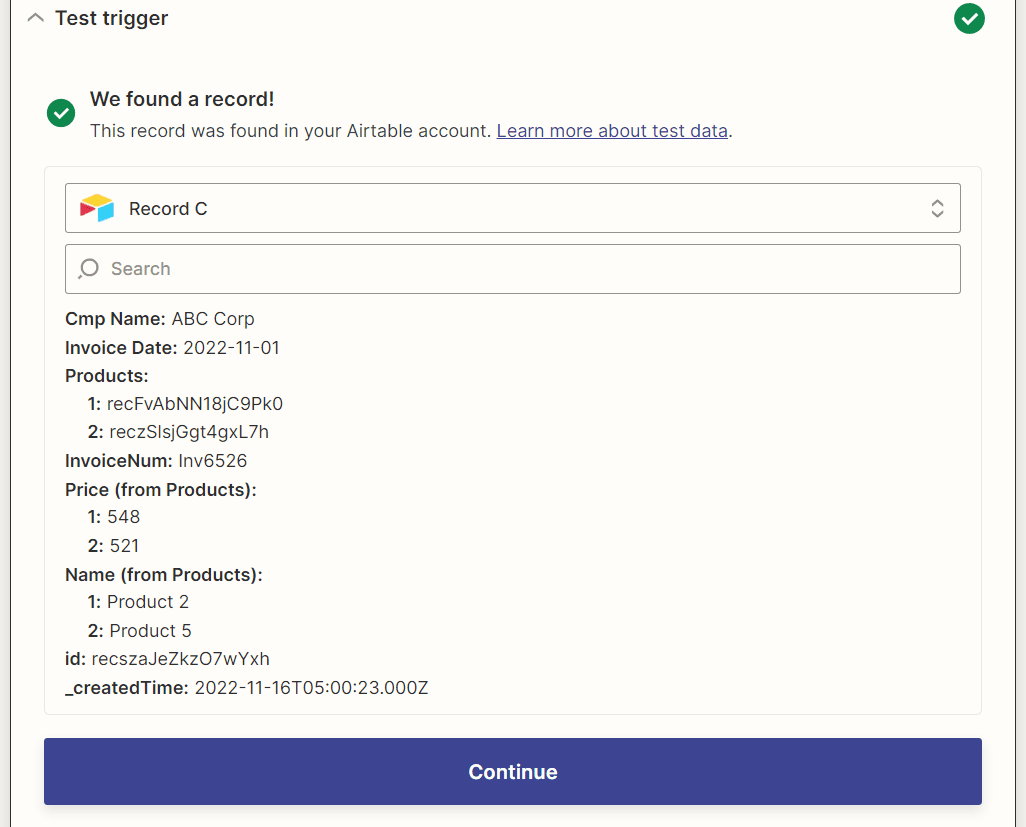
As we notice in the above screenshot, we are receiving invoice id, company name, etc. Interestingly, we are receiving different arrays for product names and prices. One drawback here is that whenever we will be using this information, we’ll have it in a comma-separated list.
Hence, we need to prepare our JSON data in the proper format prior to sending it for PDF creation. In the next step, we need to execute Javascript code to format this data.
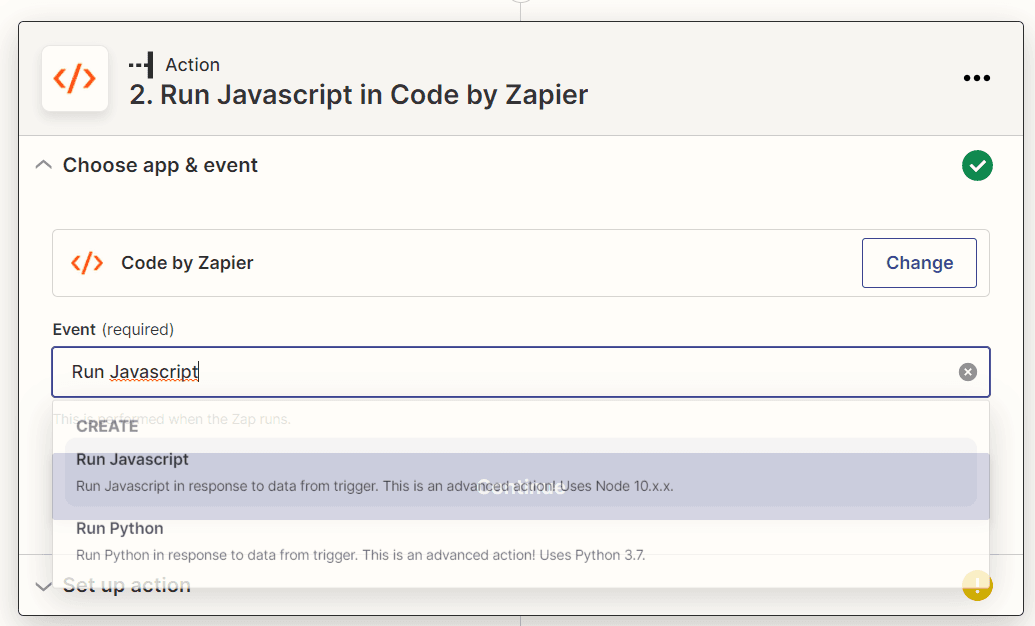
Add the “Code by Zapier” action as the next step
Here, we’ll be configuring the “Code by Zapier” action to run JavaScript code.
Next, we’ll be setting up action. At first, we’ll be adding Input Data for Airtable output like “Invoice_Num”, “Product_Names”, etc.
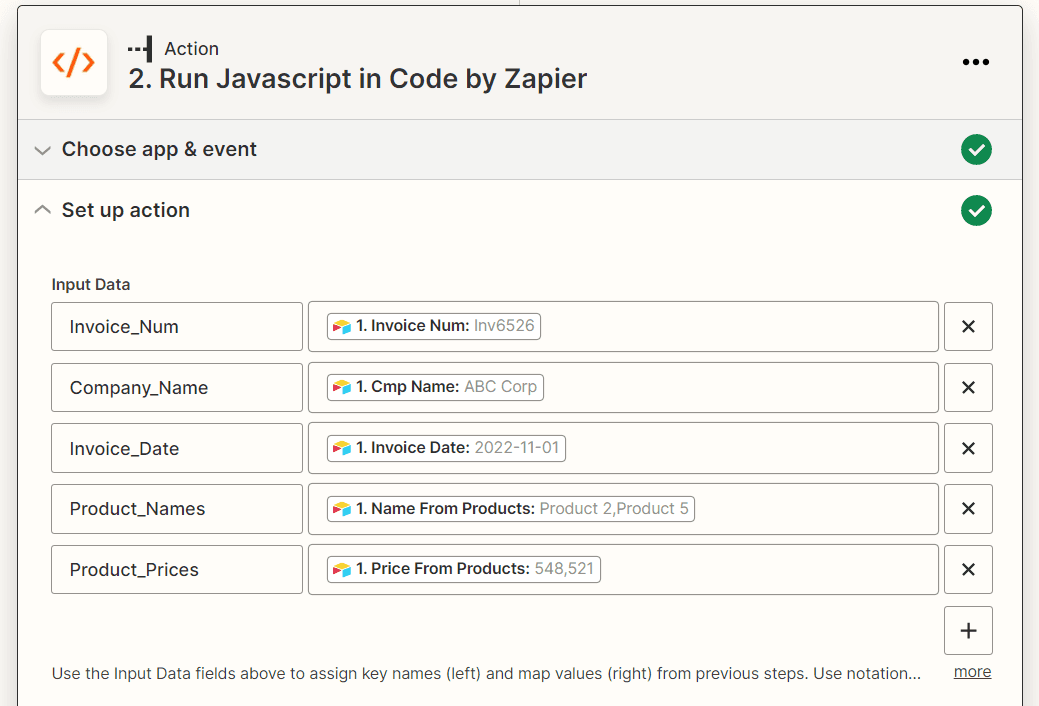
Input data will be used in JS code as shown below.
const allProducts = inputData.Product_Names.split(',');
const allPrices = inputData.Product_Prices.split(',');
const arrProducts = [];

for(let i = 0; i < allProducts.length; i++){
  arrProducts.push({"name": allProducts[i], "price": allPrices[i]});
}

const finalReturn = {
  invoice_id: inputData.Invoice_Num,
  client_name: inputData.Company_Name,
  invoice_date: inputData.Invoice_Date,
  items: arrProducts
};

output = {obj_finalReturn: finalReturn, str_finalReturn: JSON.stringify(finalReturn )};
Here, we’re simply creating JSON objects as per our requirements. This object will be used in our next PDF.co “HTML to PDF” action.
The following is the output of the JavaScript code.
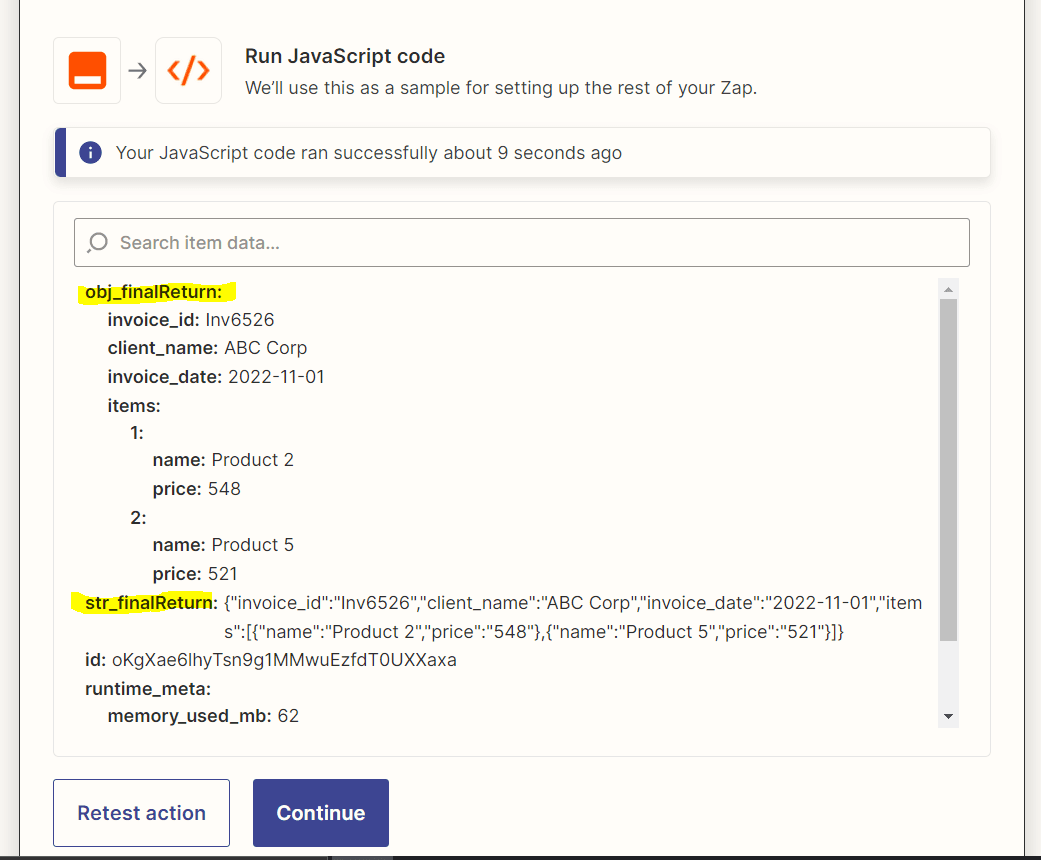
Please note the output property “str_finalReturn”. It contains all stringified JSON data that will be sent to PDF.co.
Add PDF.co “HTML to PDF Converter” Action
In this step, we’ll be adding PDF.co “HTML to PDF Converter” action.
First, configure PDF.co HTML Template Id. This is the ID of the template we created in the PDF.co app.
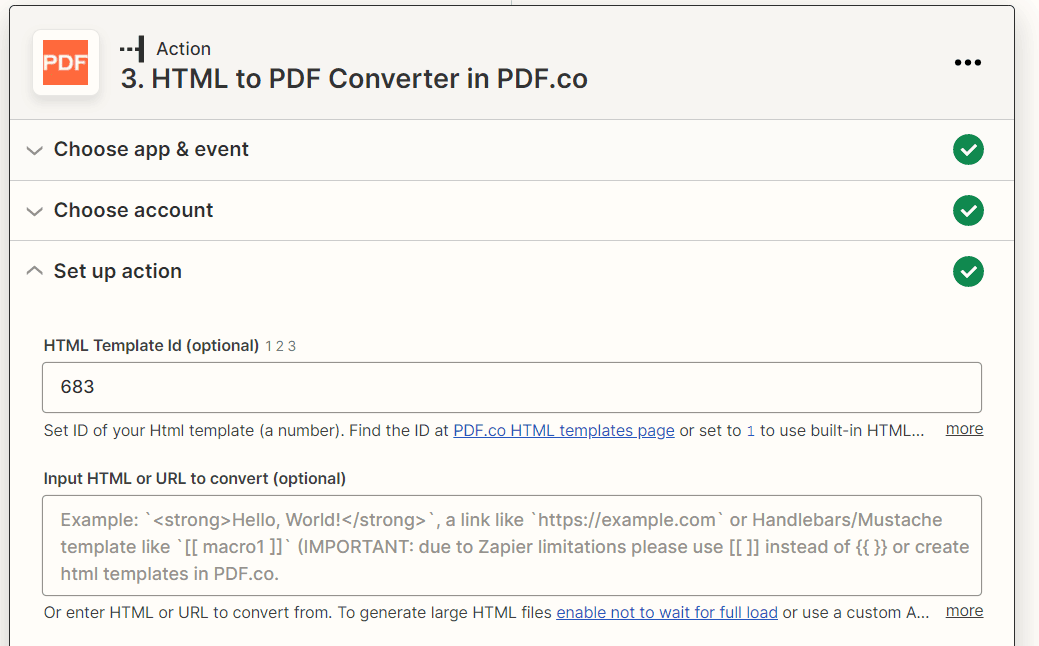
Second, we’ll be adding value to the “HTML Template Data” field from the JavaScript object we created. Since we already created all formatting there, we just need to pass only the property here.

Upon testing this action, it’s returning the URL of the output PDF.
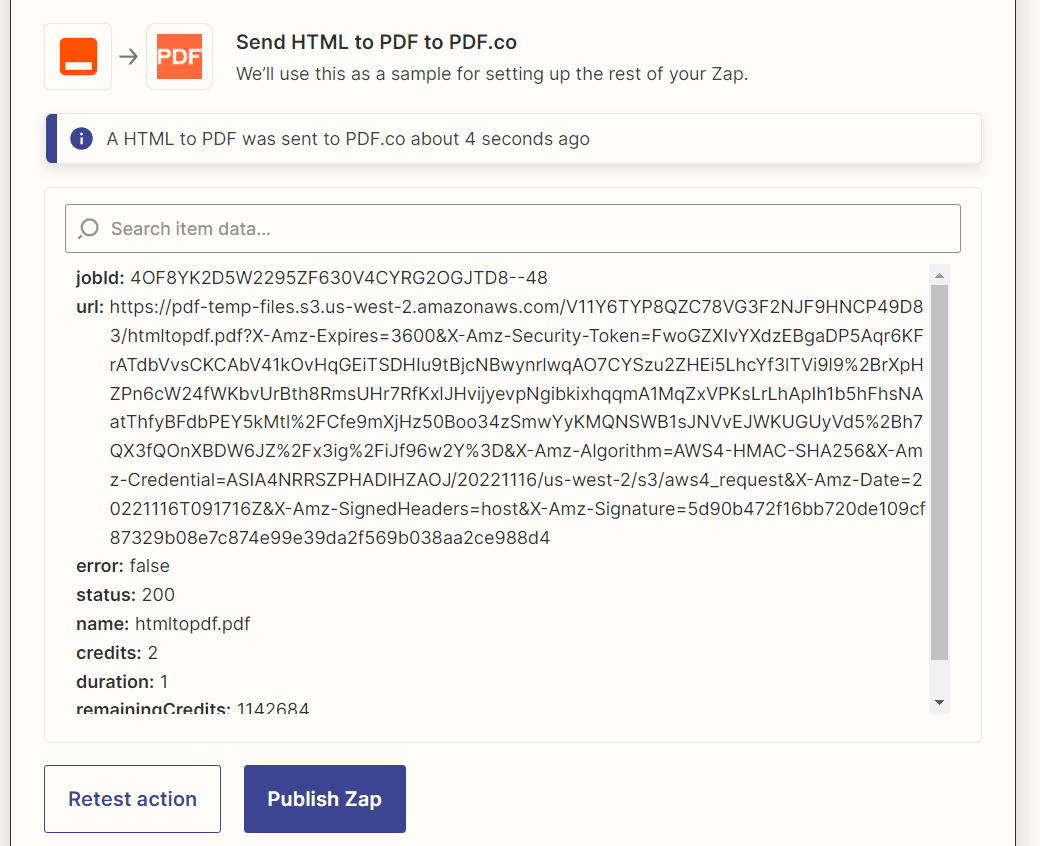
This URL points to the PDF containing all invoice information with multiple/dynamic product data.
Video Guide
Related Tutorials
