Generate PDF from Webflow form using PDF.co and Zapier
In this tutorial, we will generate a PDF that contains Webflow form submission using PDF.co and Zapier. We will use the PDF.co HTML to PDF Web API and map the Webflow data to our PDF text.
Step 1: Making a Zap
First, let’s start by creating a zap.
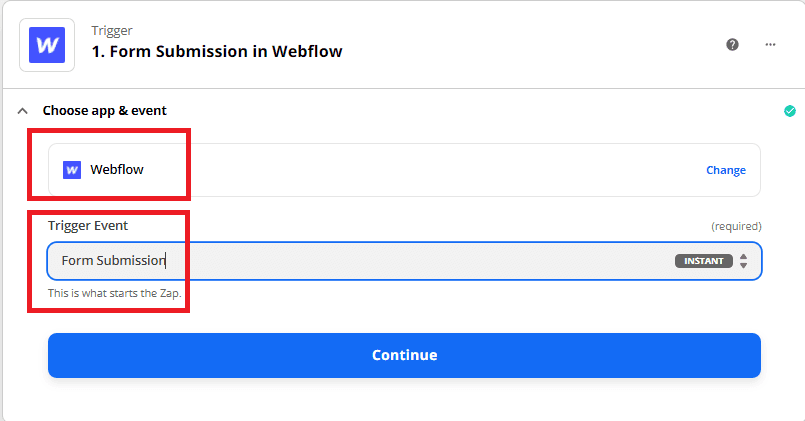
Step 2: Select Webflow App and Choose Submission Form
Next, select the Webflow app from the lists of the apps and choose the Submission Form to trigger when a new form submission occurs.
Step 3: Submission Form in Webflow Configuration
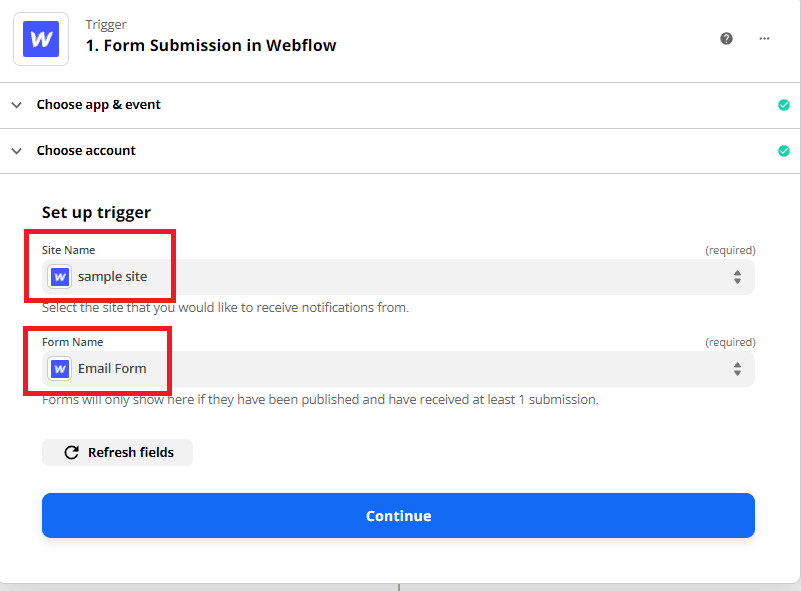
Now, let’s configure the Submission Form.
- In the Site Name field, select the site that you would like to receive notifications from.
- In the Form Name field, enter the form you have published.
Step 4: Test Trigger
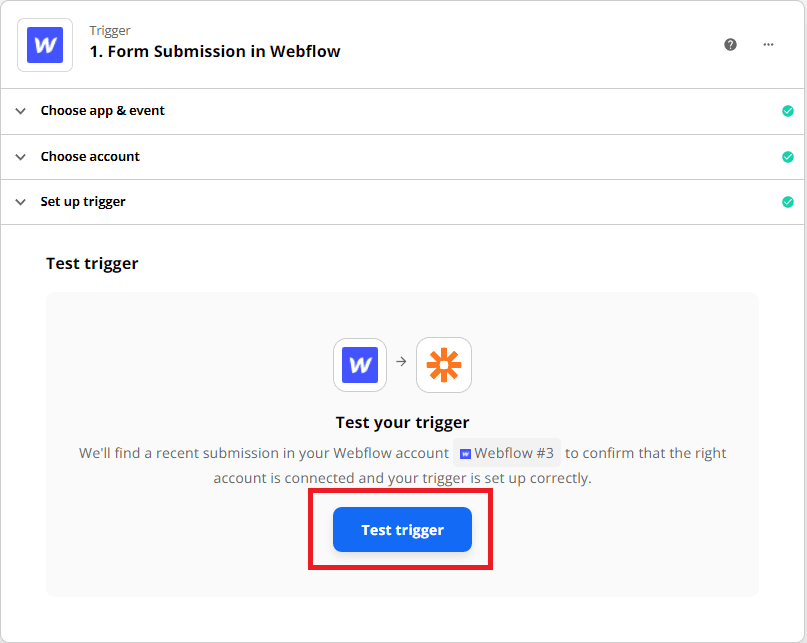
Let’s click the test trigger button to make sure that there are no errors in the setup.
Step 5: Add PDF.co App and Choose Anything to PDF Converter
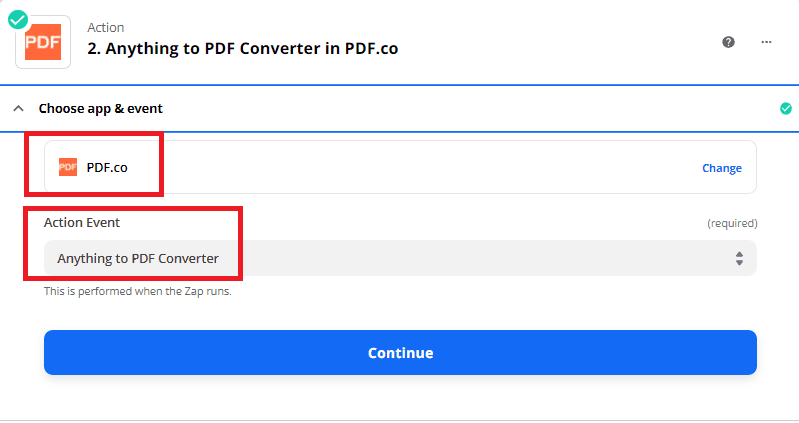
In this step, we will add another app. Kindly select the PDF.co app for the App Event and choose the Anything to PDF Converter for the Action Event.
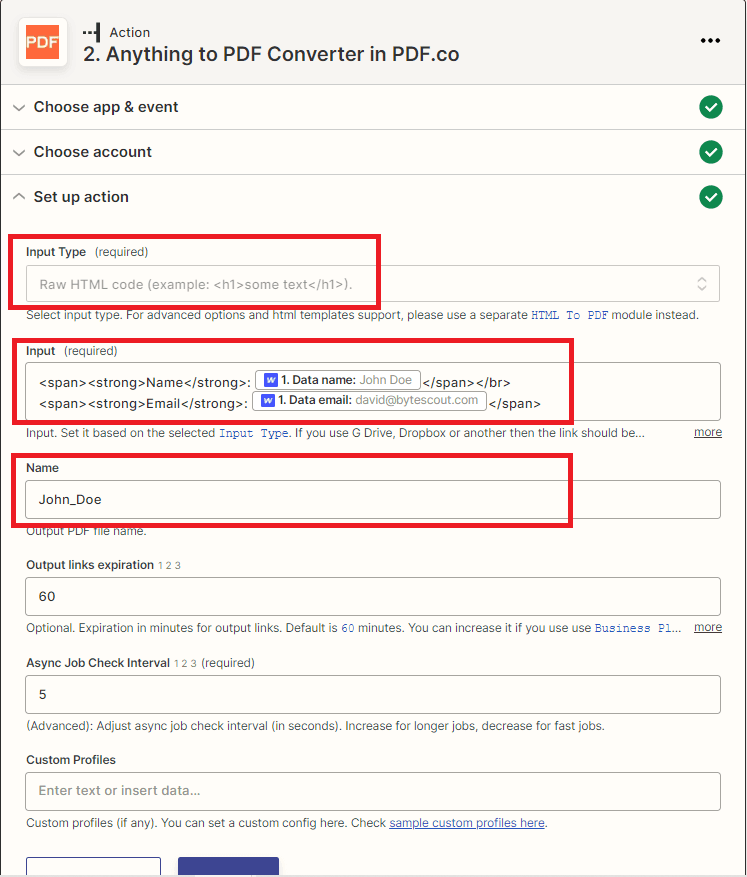
Step 6: Anything to PDF Converter Configuration
Now, let’s set up the Anything to PDF Converter module.
- In the Input Type field, select the action type you’d like to use to perform the zap.
- In the Input field, type in the raw HTML code.
- In the Name field, select the file name of your PDF output.
You can now send the request to PDF.co to test our configuration.
Step 7: Test Result
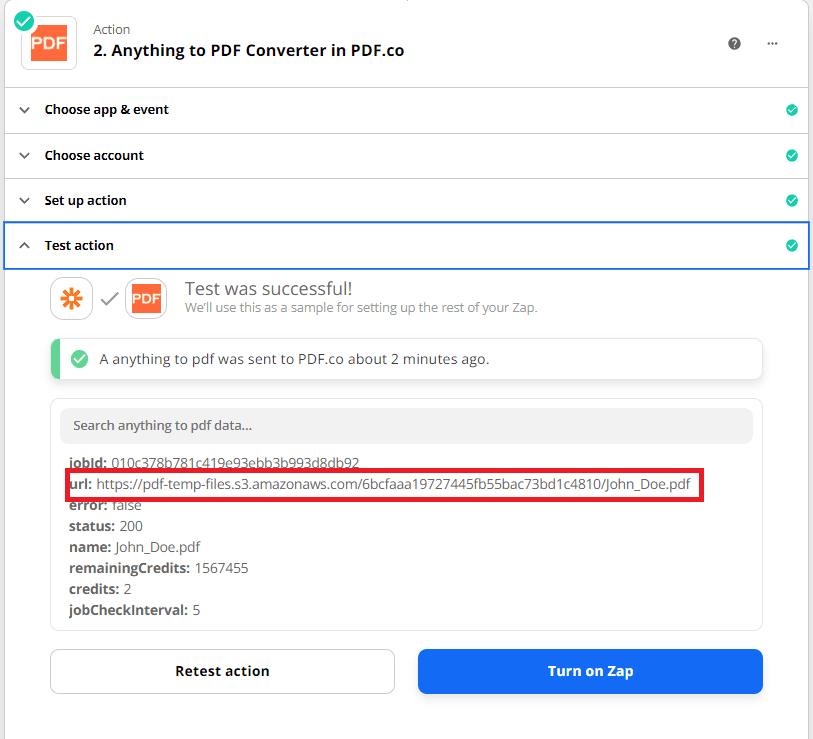
Excellent! PDF.co processed our request successfully. You can copy and paste the URL to view the output.
Step 8: Generated PDF from Webflow Form
Here’s the PDF we generated using the HTML to Web API and Webflow form submission data.

In this tutorial, you learned how to generate PDF from Webflow form using PDF.co and Zapier. You learned how to set up the Anything to PDF Converter to convert HTML code to PDF. You also learned how to use the Anything to PDF Converter to generate PDF forms.
Video Guide
Related Tutorials


