You may use different cloud storage for your trigger app.
How to Remove a Password from PDF using API Integration with Zapier
2 Minutes Read
Have you ever wanted to automate removing a password to your PDF files? So that you can share them with your colleagues or other people without the need to provide them with a password to open the PDF file? PDF.co and Zapier can help you automate the process of removing a password to a PDF file.
Here’s a step-by-step guide with screenshots:
Step 1: Create a Zap!
- Click Create Zap on the upper-left corner of your Zapier dashboard.
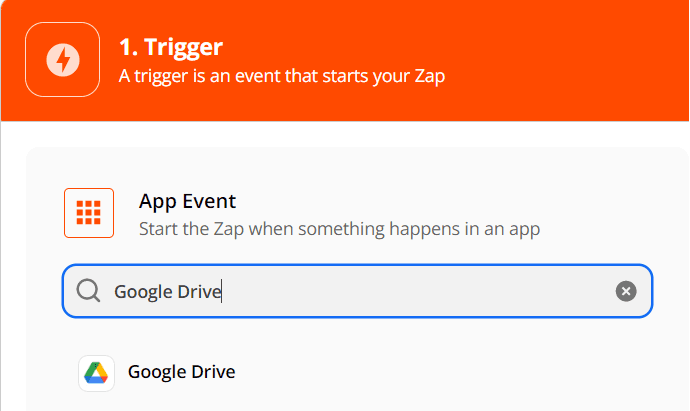
Step 2: Select a Trigger App
- For this tutorial, we will be using Google Drive as our Trigger App
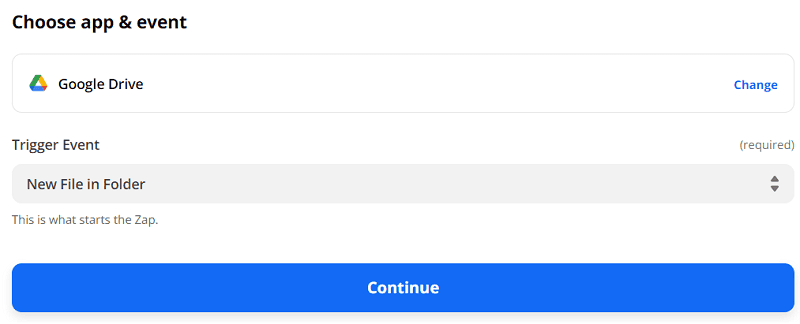
Step 3: Select a Trigger Event
- For the trigger event, we will set it to New File in Folder. This way every time there’s a new file added to your Google Drive folder, it will trigger this zap.
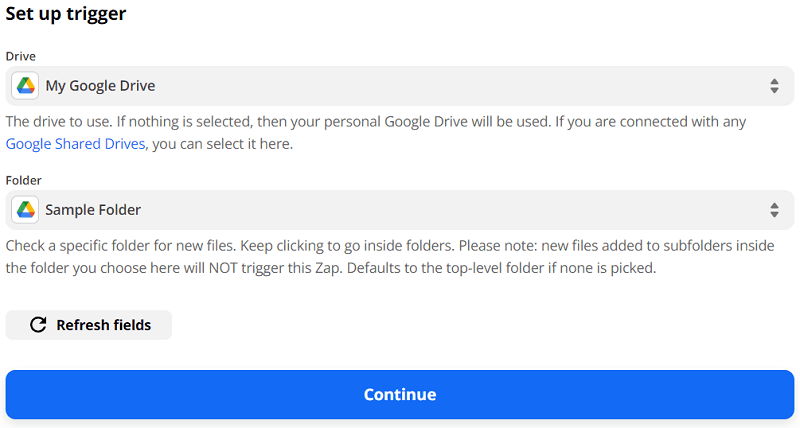
Step 4: Setup Trigger
- Select the Drive and Folder that you’re going to use.
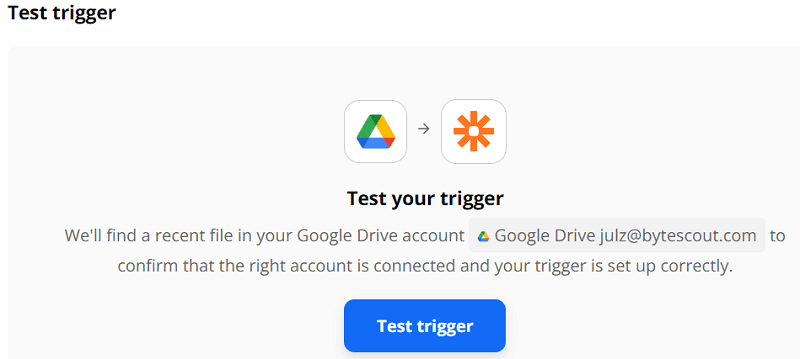
Step 5: Test Trigger
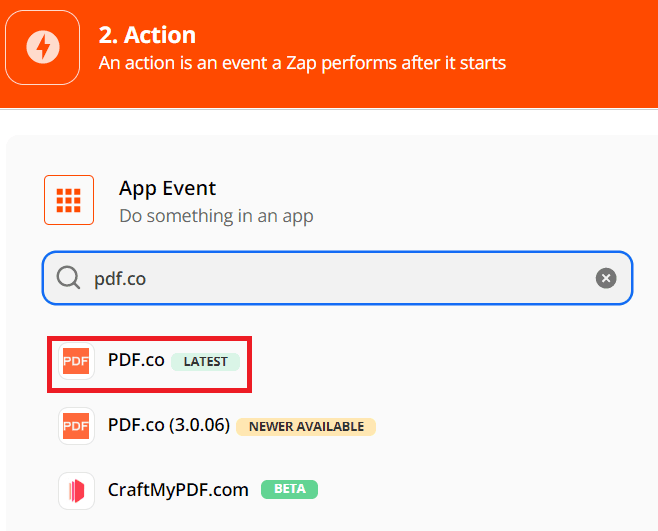
Step 6: Select an Action App
- Search and select PDF.co as your Action App.
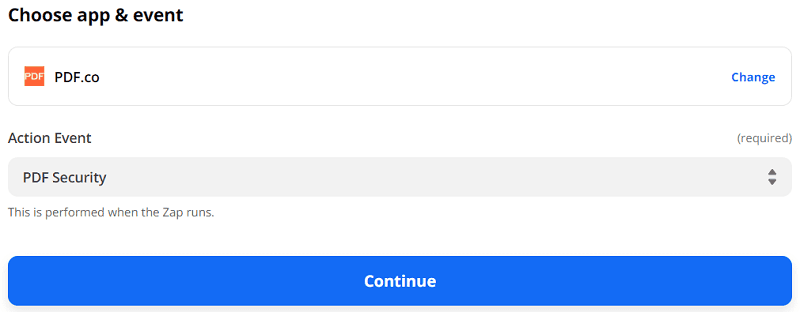
Step 7: Select an Action Event
- We will use PDF Security as the action event. This API can be used to both add or remove a password to a PDF.
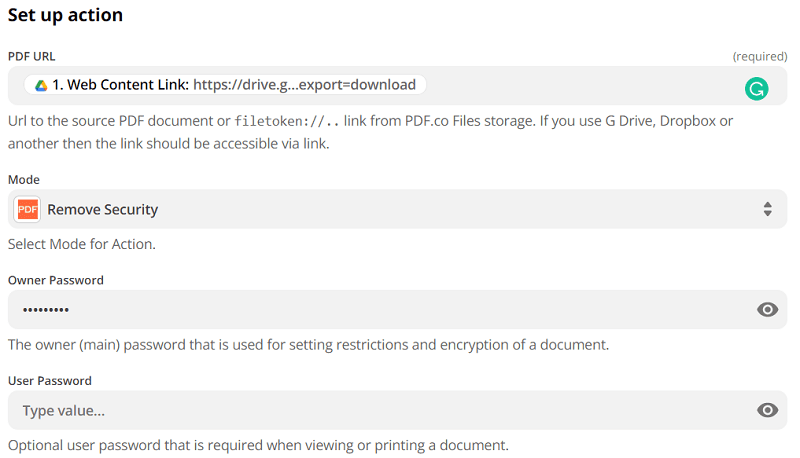
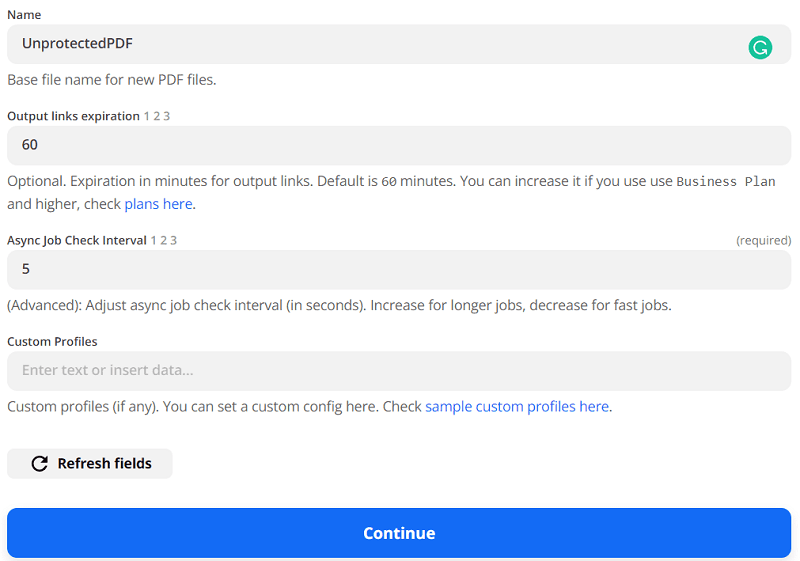
Step 8: Setup Action
- In the PDF URL, insert the URL to your PDF file.
- Select Remove Security, in Mode.
- Add the Password of your PDF file in the Owner Password field.
- You may set the Name of your output PDF
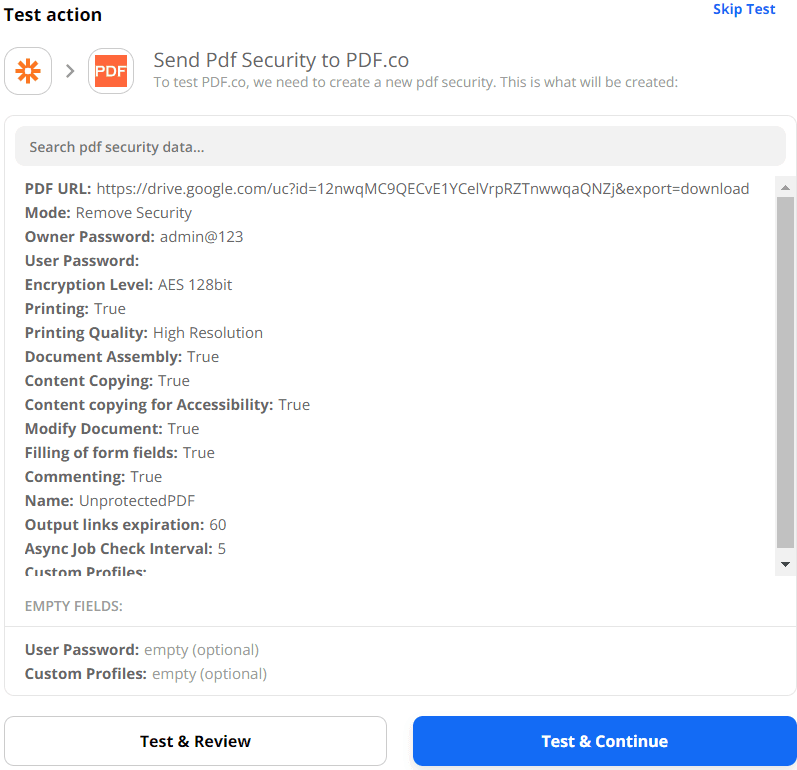
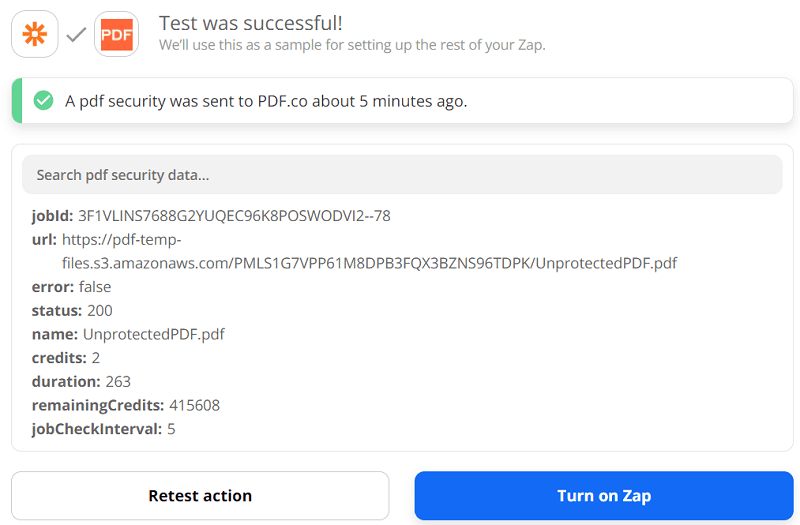
Step 9: Test Action
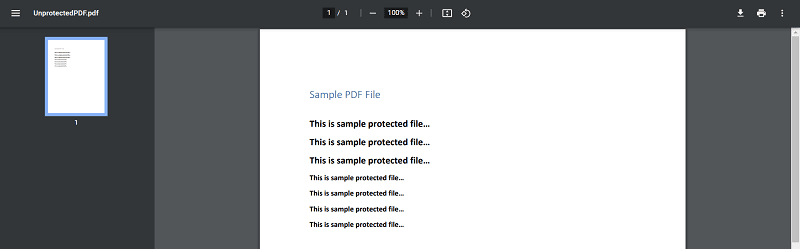
Step 10: Result
- Here’s the output PDF.
In this tutorial, you’ve learned how to remove a password from a PDF file using an API integration with Zapier.
Related Tutorials

