How to Merge Secured PDF Files using PDF.co and Zapier
Merging secured PDF files can be accomplished easily using PDF.co and Zapier, a popular web automation tool. PDF.co is an online platform that provides a wide range of PDF-related functionalities, including merging PDF files. You can automate the process of merging secured PDF files using PDF.co and Zapier, saving time and effort in manually performing the task.
With PDF.co you can ensure the confidentiality and integrity of your sensitive information, whether you are a business professional dealing with confidential documents or an individual looking for a secure way to merge personal PDF files, this guide will provide you with a detailed overview of how to merge secured PDF files using PDF.co and Zapier.
In this tutorial, we will walk you through the process to merge secured PDF files using PDF.co and Zapier. So let’s get started!
IN THIS TUTORIAL
Step 1: Log into Zapier Account
- First, log into your Zapier account and click on the Create Zap button.
Step 2: Looping by Zapier
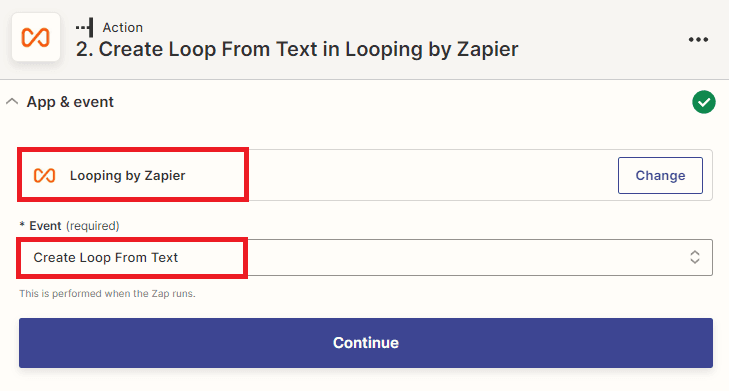
- Next, search and select the Looping by Zapier to allow users to create repeating workflows that can loop through a set of actions multiple times, based on specified conditions.
- Then, let’s choose the Create Loop From Text option to allow us to iterate a list of URLs for individual purposes.
Step 3: Setup Looping Configuration
Let’s configure the Looping settings.
- First, enter the value name along with the corresponding value data, which will be in the form of URLs.
- Next, for the other parameters such as Delimiter, Trim Whitespaces, and Loop Iteration, we will keep the default values.
- Then, specify the maximum number of loops you would like to perform. This will determine the number of times the loop iterates over the values.
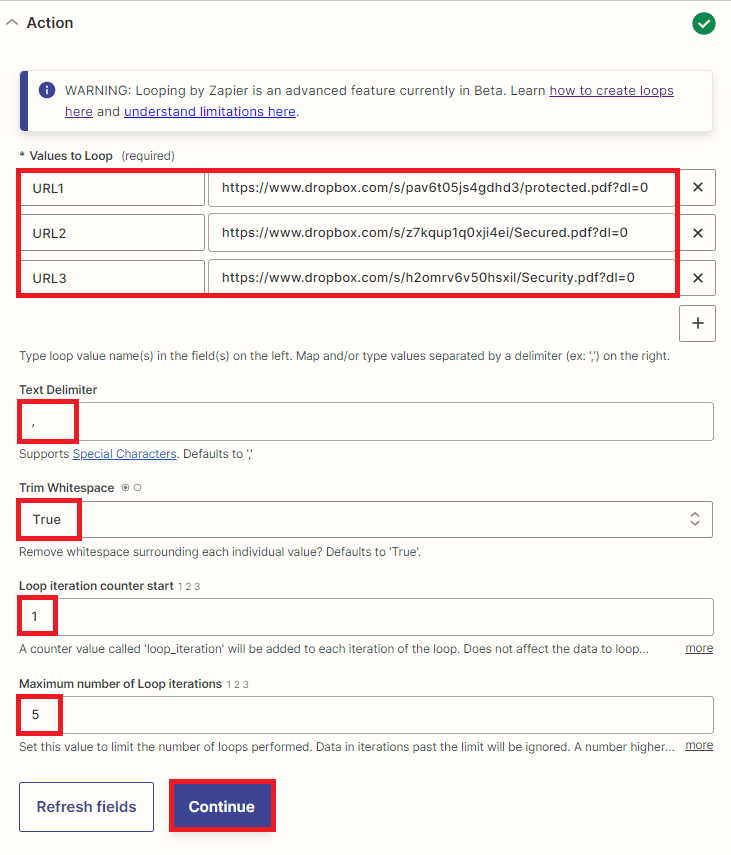
After setting up the configuration, test the action to see the result.
Step 4: Looping Test Result
- Great! The test was successful and received the loop values from Zapier. Now, we can proceed to add another app to the workflow.
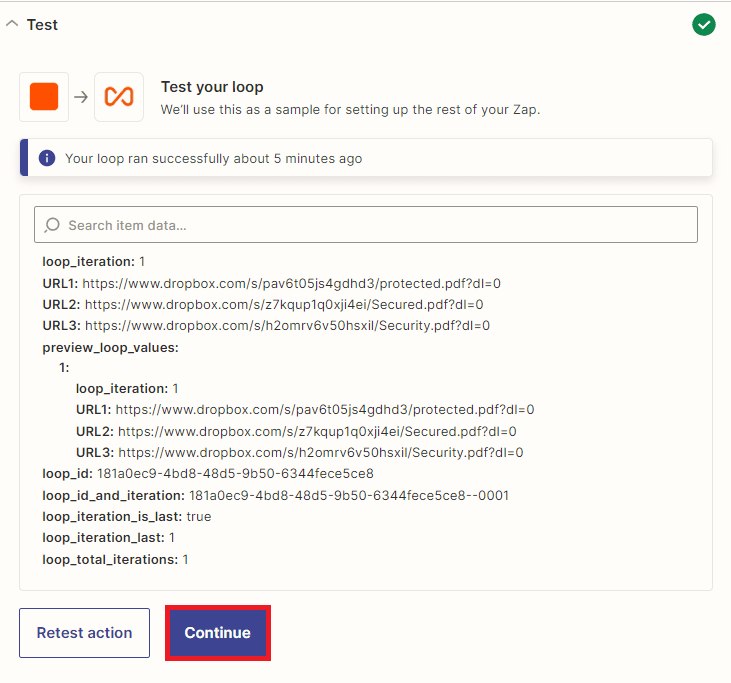
After completing the loop for the URL value, we can now proceed to remove the PDF security from the PDF documents. This will enable us to easily merge them into a single PDF file.
Step 5: Add PDF.co App
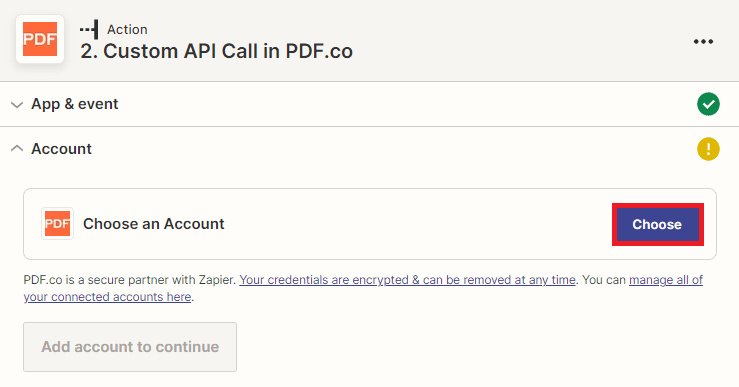
- In this step, we will be adding the PDF.co app and selecting the Custom API Call option. This will allow us to utilize the PDF.co Remove Security endpoints to effectively remove the security password from our PDF documents.
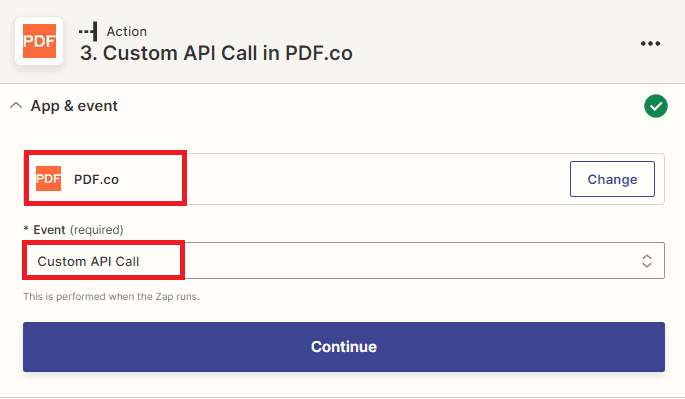
Step 7: Setup Action
Let’s set up the Action.
- First, enter the endpoint for PDF.co Remove Security to remove password protection from PDF documents.
- Next, select the first URL value from the looping response.
- Then, input the JSON code that contains the password of the document, output name, and async setup.
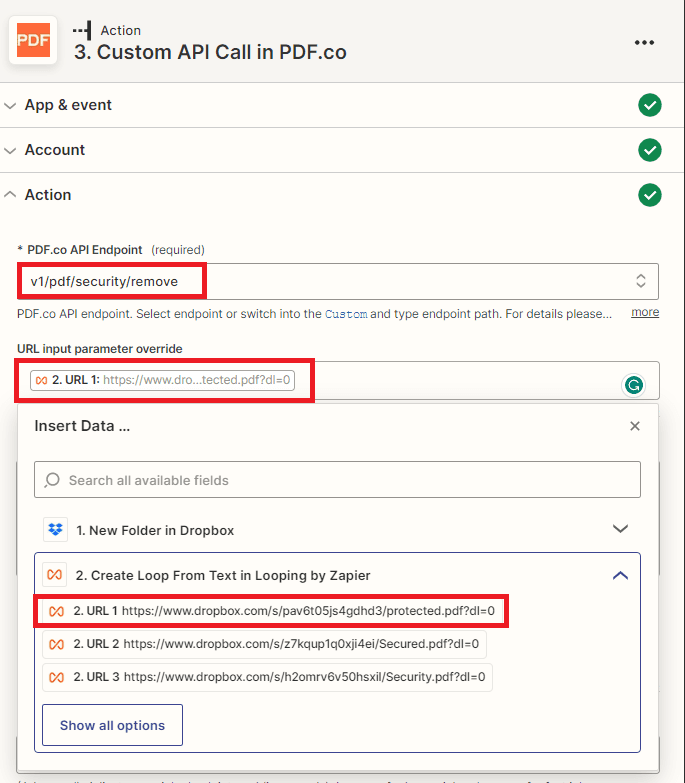
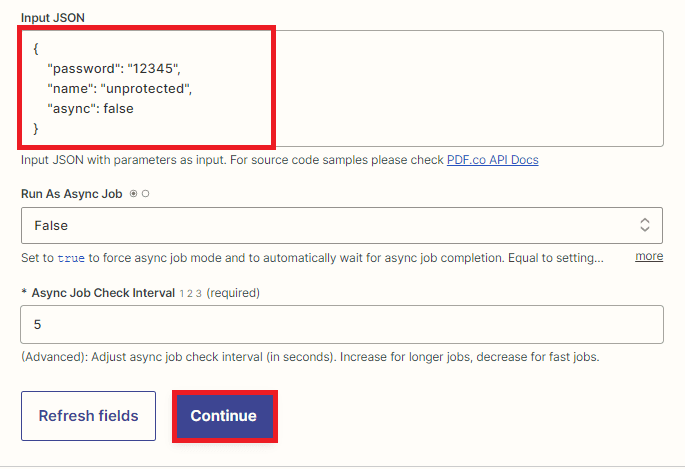
After completing the setup, proceed to test the action to remove the security password from the PDF document.
Step 8: Test Result
- Awesome! The security password has been successfully removed from the PDF document. You can copy the URL provided and paste it into your browser to confirm that the PDF document no longer requires a password for access.
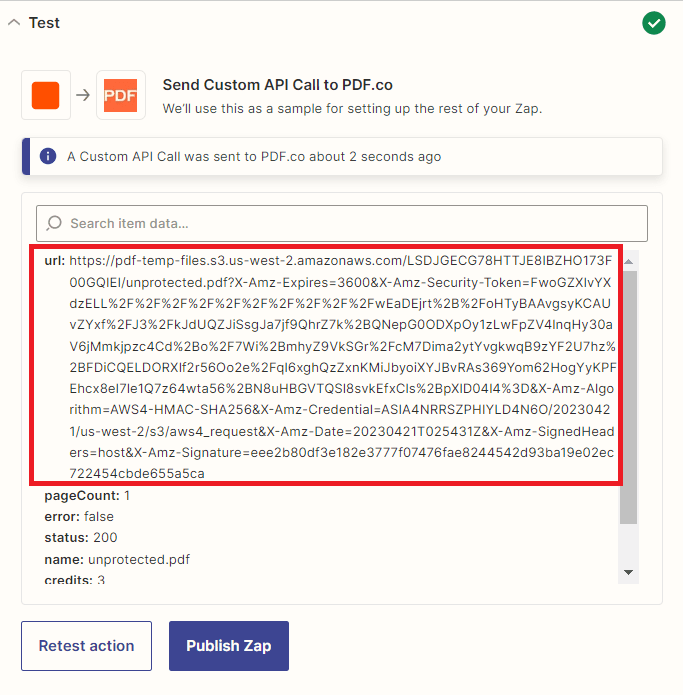
Since we are dealing with multiple secured PDF documents, we will need to repeat the task for each document individually to remove the security password. This will require manual effort as you cannot remove all the passwords simultaneously in a single scenario. Please ensure to follow the necessary steps for each PDF document to remove its security password.
Step 9: PDF.co and Custom API Call
- Let’s add another app and select PDF.co. Then, choose the Custom API Call option.

Step 10: Setup Custom API Call
Let’s set up the Custom API Call configuration.
- First, enter the endpoint for the PDF.co Remove Security to remove password protection from PDF documents.
- Next, select the second URL value from the looping response.
- Then, input the JSON code that contains the password of the document, output name, and async setup.
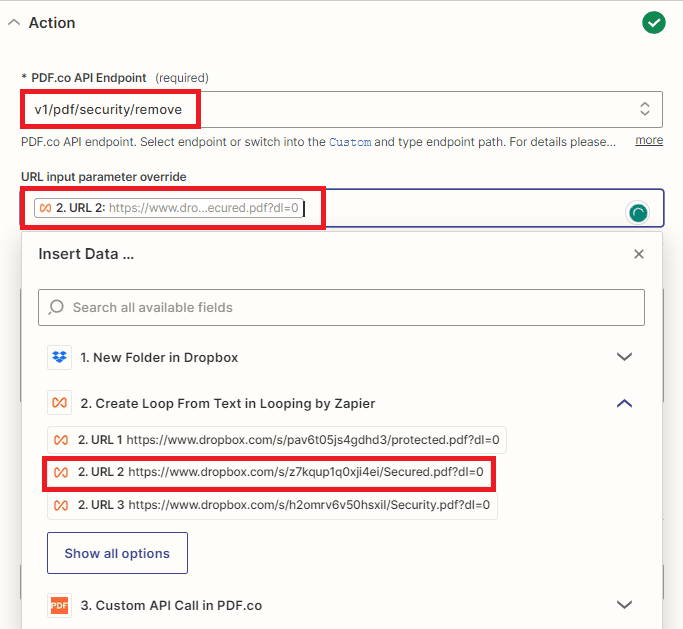
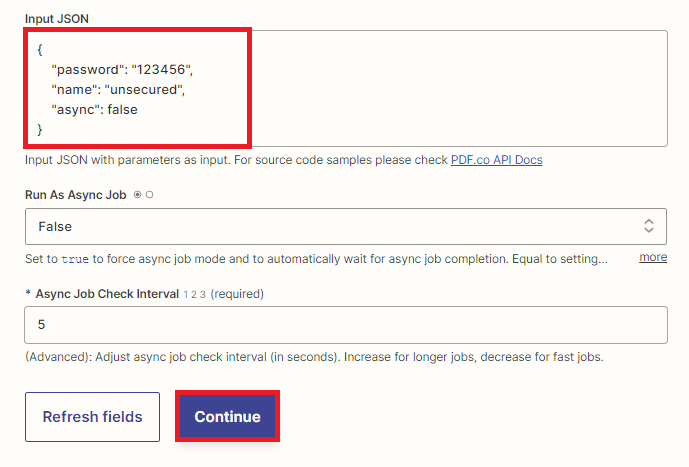
Now, let’s proceed with testing the action to remove the security password from the PDF document.
Step 11: Custom API Call Result
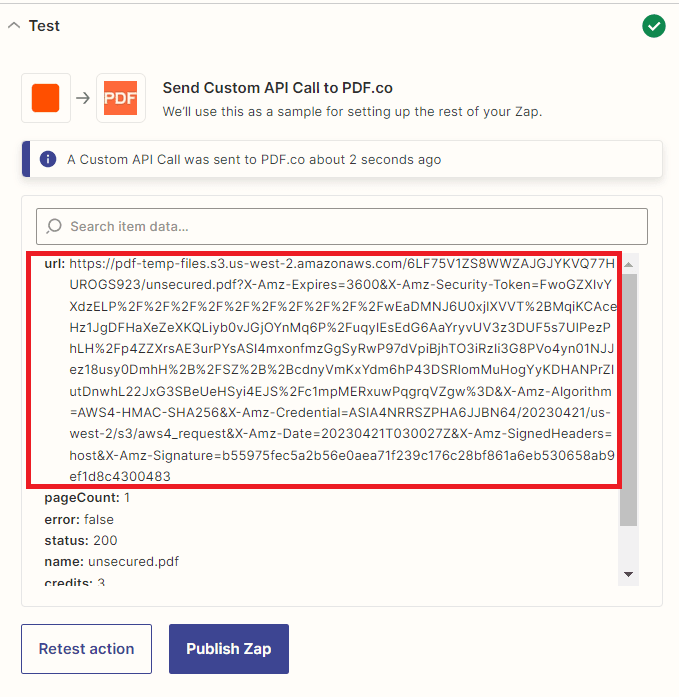
- Amazing! The security password has been successfully removed from the PDF document. You can verify this by copying the URL provided and pasting it into your browser, confirming that the PDF document no longer requires a password for access.
Step 12: Add Another PDF.co App
- Let’s add another PDF.co app and choose the Custom API Call option.

Step 13: Setup Remove Password
Let’s configure the remove password settings.
- First, enter the endpoint for the PDF.co Remove Security to remove password protection from PDF documents.
- Next, select the third URL value from the looping response.
- Then, input the JSON code that contains the password of the document, output name, and async setup.
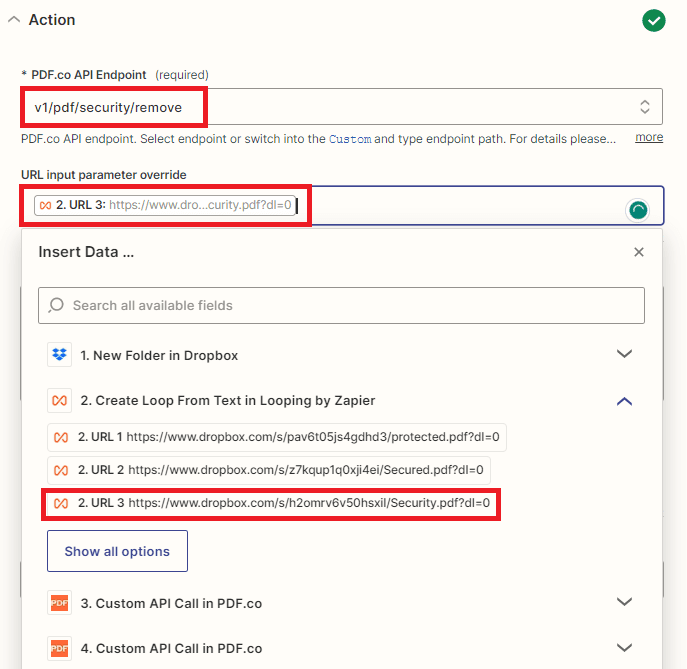
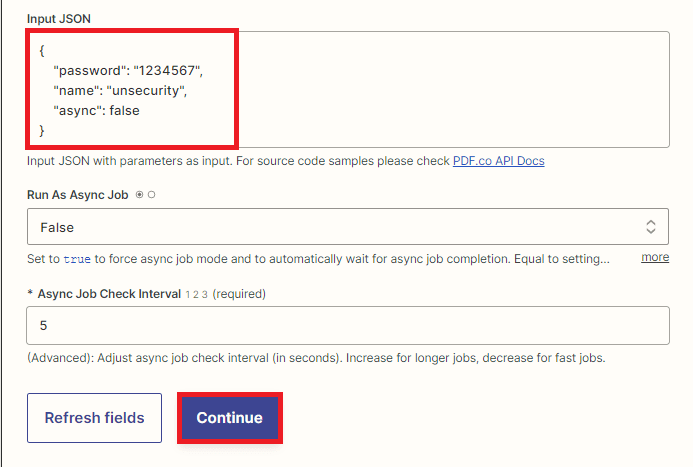
Once you have completed the setup for the PDF.co Remove Security endpoint, you can proceed with testing the action to remove the security password from the PDF document.
Step 14: Remove the Password Result
- Excellent! The security password has been successfully removed from the PDF document, ensuring that it is no longer protected. To confirm this, you can copy the URL provided and paste it into your browser.
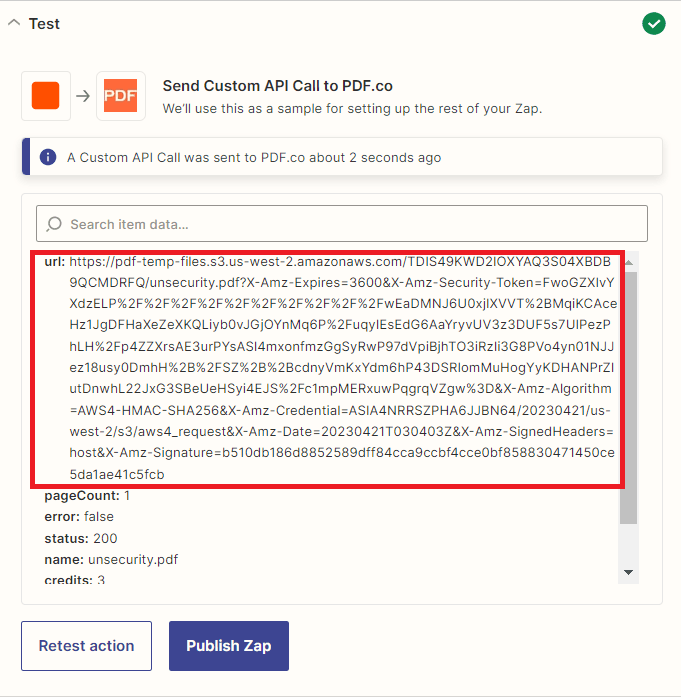
Now that all the passwords have been successfully removed from the PDF documents, we can proceed to merge them into a single PDF document.
Step 15: PDF.co and PDF Merger
- In this step, we will add the PDF.co app and select the PDF Merger option to combine multiple PDFs into a single PDF document.
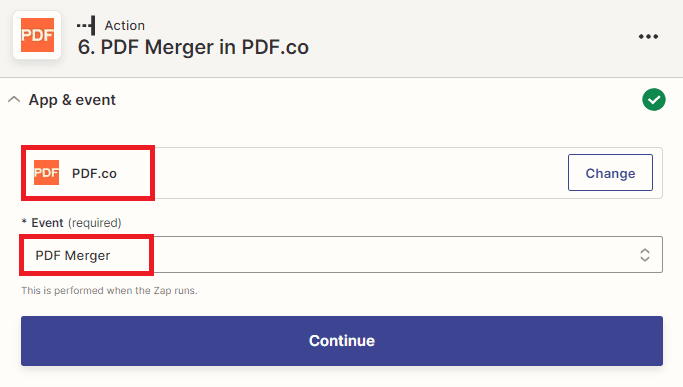
Step 16: Setup PDF Merger
Let’s configure the PDF Merger settings.
- First, input the list of links obtained from the PDF.co Remove Password responses, which correspond to the PDF documents to be merged.
- Next, specify the desired output name for the merged PDF file.
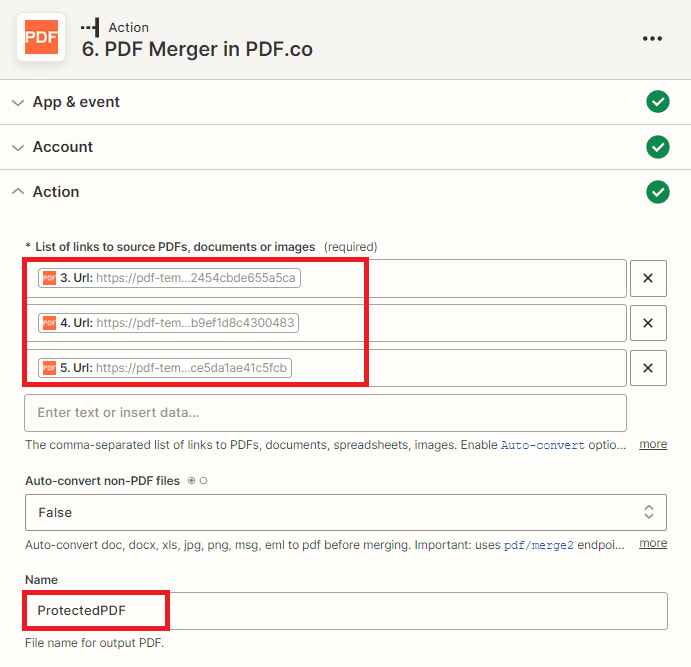
After setting up the PDF Merger configuration, test the action to merge the PDF documents into a single PDF.
Step 17: PDF Merger Result
- Fantastic! The multiple PDF documents have been successfully merged into a single PDF document. You can copy the URL provided and paste it into your browser to view the merged PDF document.
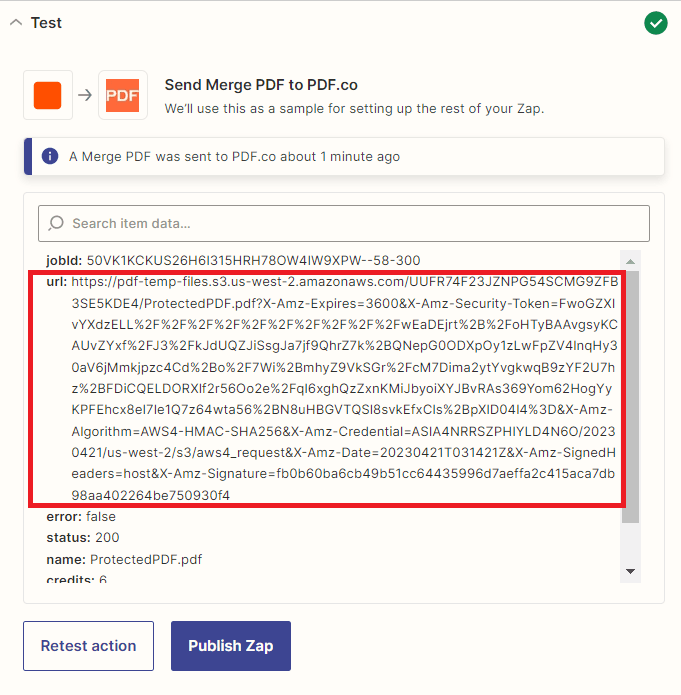
Step 18: Merged PDF Document Output
- Below is the merged PDF document that has been successfully created by merging multiple PDF documents into a single file.
Now that the multiple PDF documents have been successfully merged into a single PDF document, we can proceed with adding a security password to ensure the file is protected and secure.
Step 19: PDF.co and Add Security
- In this step, we will add the PDF.co app and choose the Custom API Call option so we can use the PDF.co Add Security endpoint.

Step 20: Setup Add Security
Let’s set up the Add Security configuration.
- First, enter the PDF.co Add a Security endpoint to add a security password to the PDF document and ensure the file is protected and secure.
- Next, select the output URL of the PDF.co PDF Merger response.
- Then, input the JSON code containing the Owner and User password, EncryptionAlgorithm, AllowPrintDocument, AllowFillForms, AllowModifyDocument, AllowContentExtraction, AllowModifyAnnotations, and PrintQuality. Check out this link to see the setup for the JSON code.
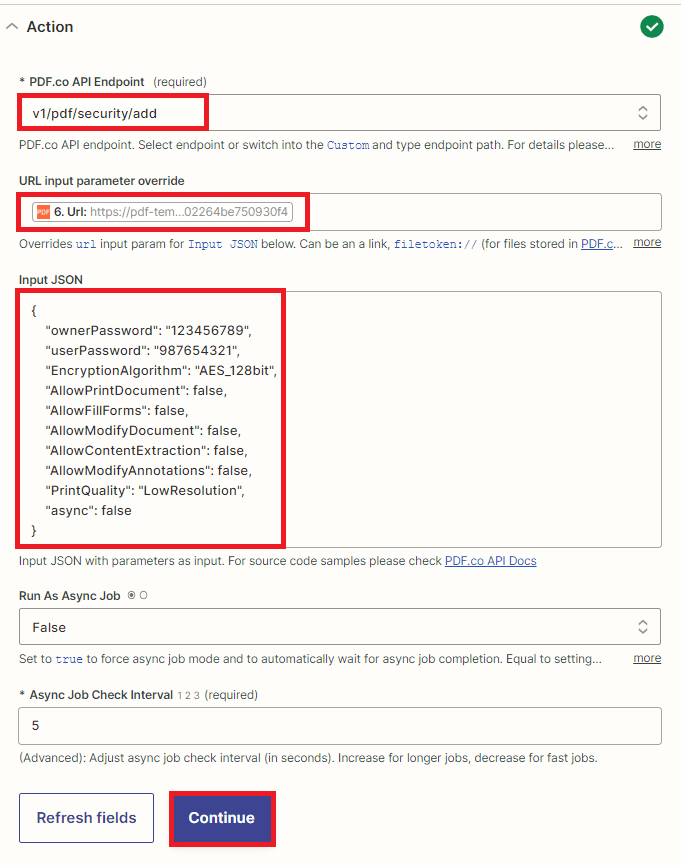
After setting up the security and password configuration for the PDF document, you can proceed with testing the action to add security and a password.
Step 21: Add Security Result
- Congratulations! It appears that the security settings and password have been successfully added to the PDF document. You can copy the URL provided and paste it into your browser to confirm that the PDF file now requires a password to access the document.
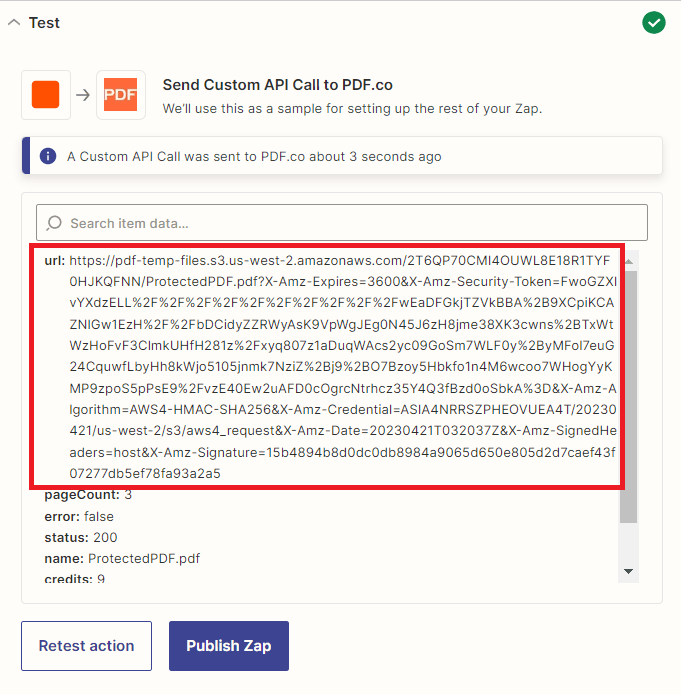
Step 22: Secured PDF Document Output
- Below is the protected PDF document that has been successfully secured with a password and security settings added.
In this tutorial, you have learned how to merge multiple secured PDF files into a single PDF document using PDF.co and Zapier. Additionally, you have learned how to remove password protection from PDF documents, add password protection to PDF documents, and configure security settings for PDF documents. You have successfully merged, removed, and added password protection to PDF documents, and implemented security measures to ensure the confidentiality and security of your files.
