How to Save Web Traffic for Users Viewing your Documents using WebP
In this tutorial, we will show you how you can save storage and web traffic using the WebP image file format. The WebP is an image file format smaller than JPEG with comparable quality. To follow along, you can download the sample file.
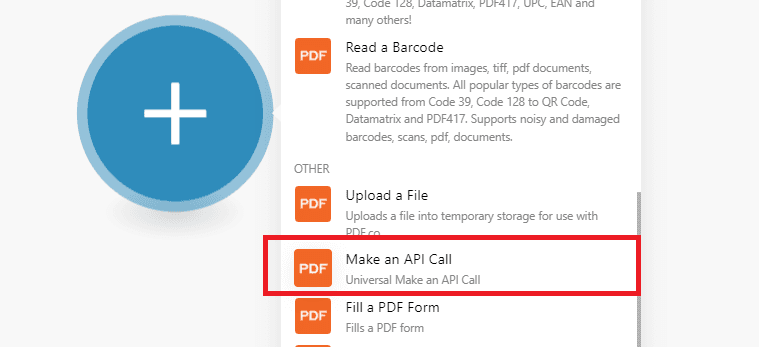
Step 1: Create Scenario
To get started, let’s create a Scenario and choose the PDF.co Make an API Call module.
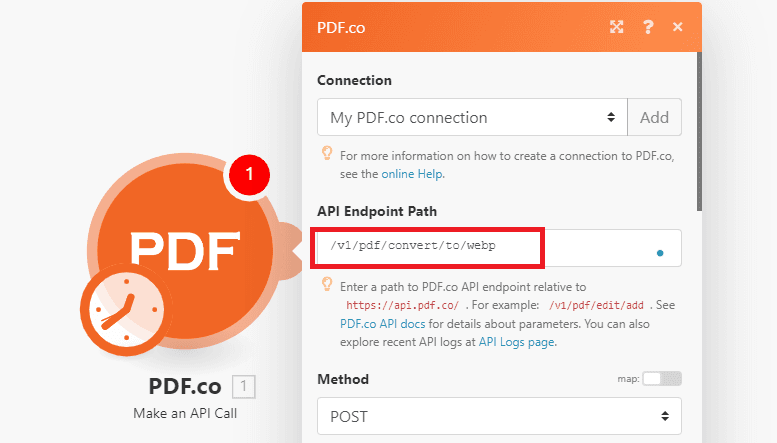
Step 2: Add WebP Endpoint
In the API Endpoint Path field, enter the /v1/pdf/convert/to/webp endpoint. You can learn more about the endpoint at the API Documentation.
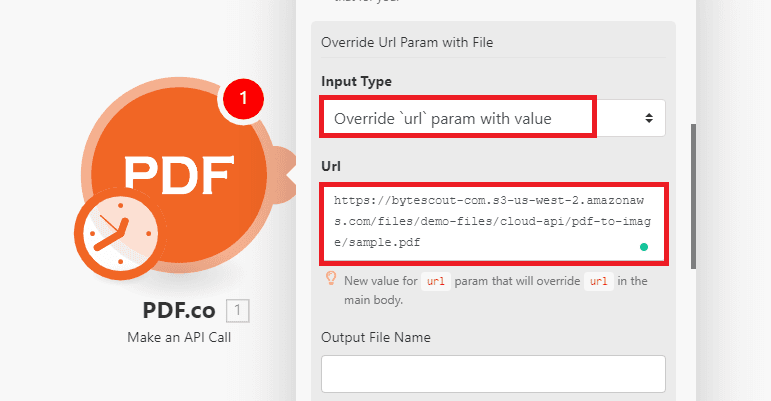
Step 3: Add Source File
In the Input Type field, let’s select the Override URL param with the value option. This will allow us to manually enter the sample file link. Then, enter the file link in the Url field. Here is the link to the sample file.
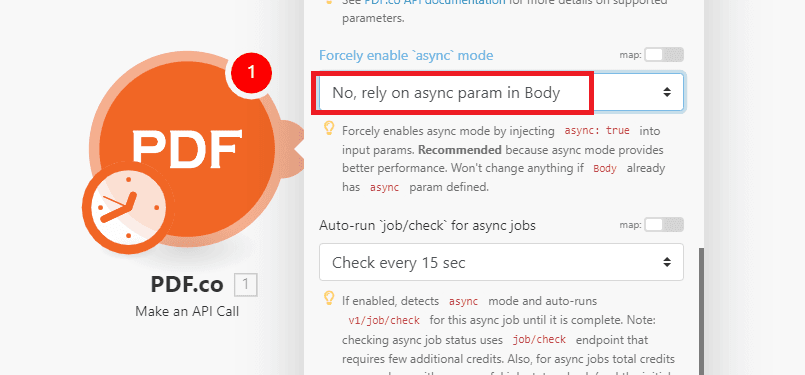
Step 4: Disable Async Mode
In the Forcely enable async mode field, choose the No, rely on the async param in the Body option. Our sample file is only 329 KB which can be processed instantaneously.
Step 5: Run Scenario
Now, let’s Run the Scenario.
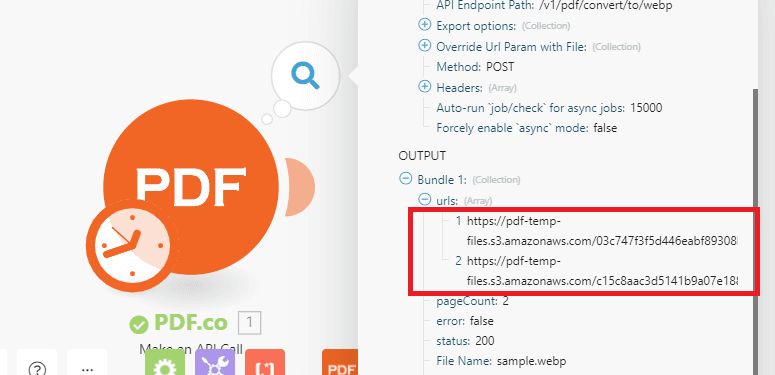
Step 6: Output Files
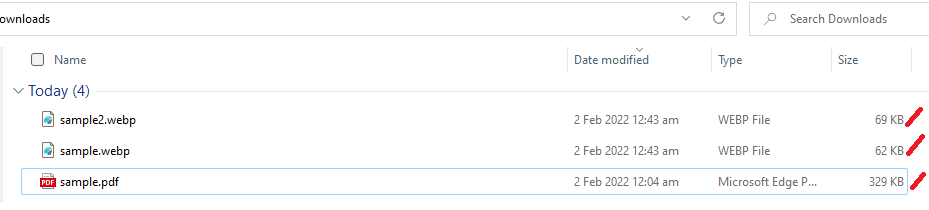
Great! We converted the PDF to WebP files successfully. The 2-page 329KB PDF file has been reduced to 2 separate WebP files with 62KB and 69KB sizes.
In this tutorial, you learned how to save web traffic for users viewing your documents using WebP. You also learned how to use the PDF.co Make an API Call module to convert a PDF document to WebP.
Related Tutorials
