The PNG file is stored temporarily in the cloud and expires in an hour. Be sure to download/move it to permanent storage before the time elapse.
How to Generate Barcode with PDF.co API and Postman
4 Minutes Read
IMPORTANT: You need to set up Postman first. Use our guide to set up PDF.co for Postman.
In these guidelines, we will learn the basic process of generating barcodes or QR codes with PDF.co using Postman.
IN THIS TUTORIAL
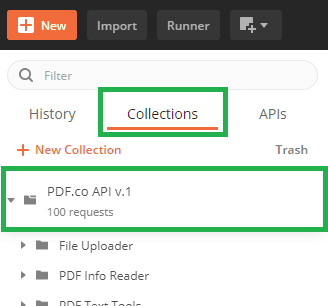
Step 1: Go to Collections Tab and Click on PDF.co API v.1 Folder
First of all, go to Collections Tab and pick the API v.1 folder.
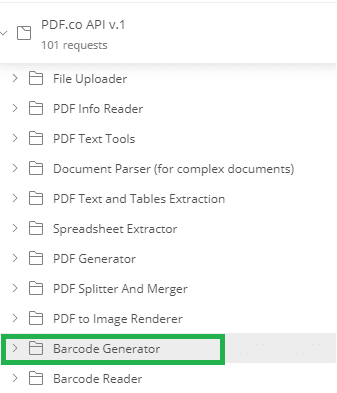
Step 2: Look for and Click on Barcode Generator Folder
After accessing that folder, click on the following Barcode Generator folder.
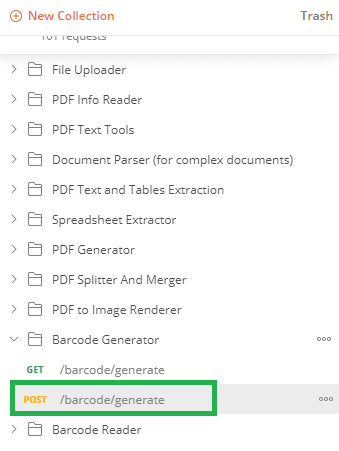
Step 3: Click on POST /barcode/generate endpoint
The next step would be to click on the endpoint named POST/barcode/generate.
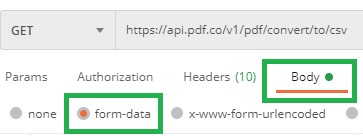
Step 4: You May Opt to Send Request with cURL or by Postman
Take a look at the cURL request you may use for the next step.
For cURL Option:
curl --location --request POST 'https://api.pdf.co/v1/barcode/generate' \
--header 'Content-Type: application/json' \
--header 'x-api-key: {{x-api-key}}' \
--data-raw '{
"name": "barcode.png",
"value": "abcdef123456",
"type": "QRCode",
"inline": false,
"decorationImage": "https://bytescout-com.s3-us-west-2.amazonaws.com/files/demo-files/cloud-api/barcode-generator/logo.png"
}'
For Postman Option: – Go to Body tab and select Form-Data
Step 5: Enter Desired Barcode Name on “Name” Key’s Value
Now, it’s time to enter the appropriate Barcode Name and to proceed.
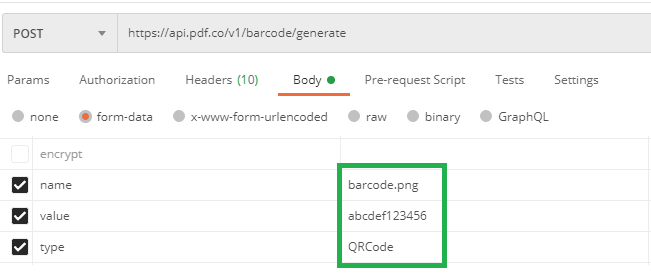
Step 6: Set Barcode Input Parameters
Barcode Input parameters can be customized on this step.
- Enter your barcode value on value key
- Enter the barcode type on type value
- You can find the supported barcode types in column 3

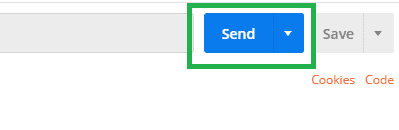
Step 7: Click on Send Button
At the next step, just click the button to send the information.
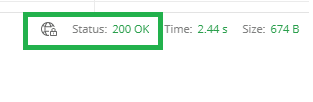
Step 8: Scroll Down and Make Sure that the Status is 200 OK
It’s time to check if the status is OK (Status 200).
Step 9: Copy the URL and Paste to Browser to See the Generated Barcode
To view your barcode, just copy and paste the URL into your browser.

Video Guide
Related Tutorials
