How to Convert Google Forms to PDF with PDF.co Using Zapier
Automated Google Forms to PDF conversion can be a useful functionality if you have loads of forms to process by generating nice and structured PDFs.
Let’s dive into the most comprehensive guide to PDF generation on the entire Internet.
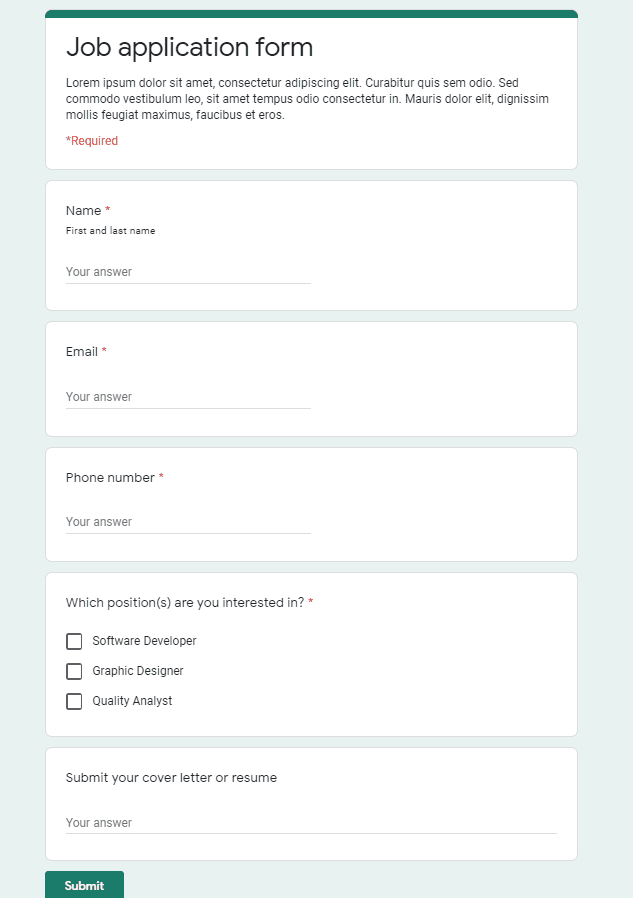
Step 1: View Job Application on Google Form
In this demonstration, we are using the Job application Google form, as shown below.
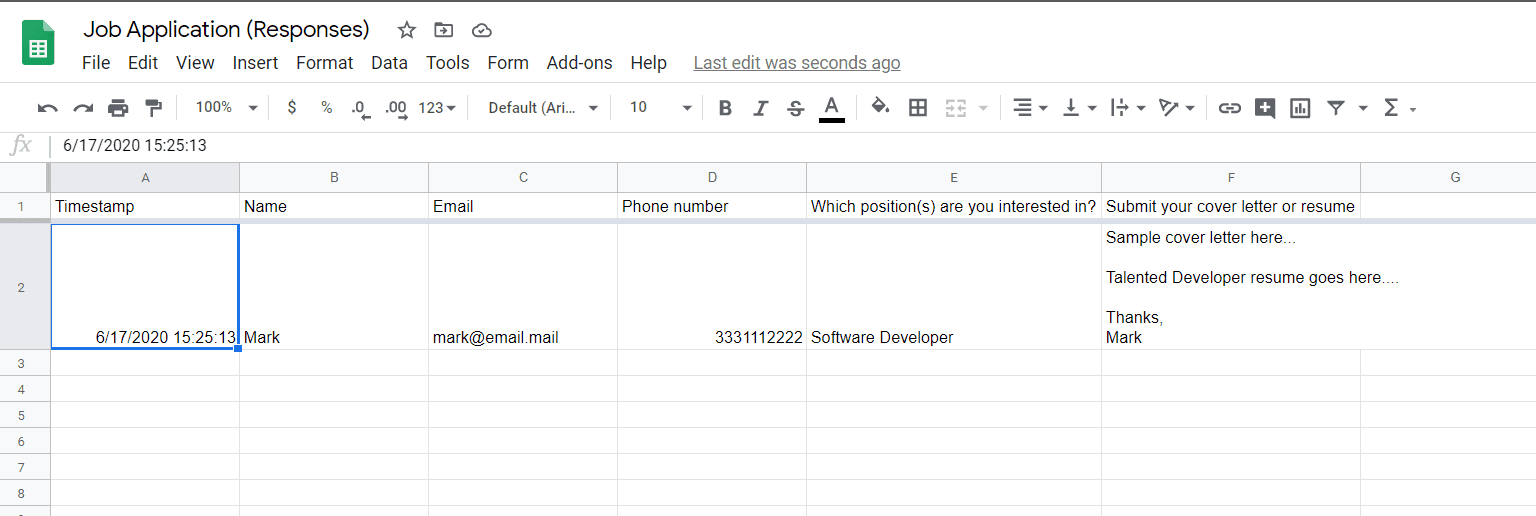
Step 2: Google Form Associated with a Spreadsheet
Google Forms can be associated with a spreadsheet in the backend to hold all data. In this guide, we’ll walk you through the entire process of PDF generation from Google Forms. We’ll use this spreadsheet data to generate the output PDF. All new rows in the spreadsheet serve as a trigger to process further action.
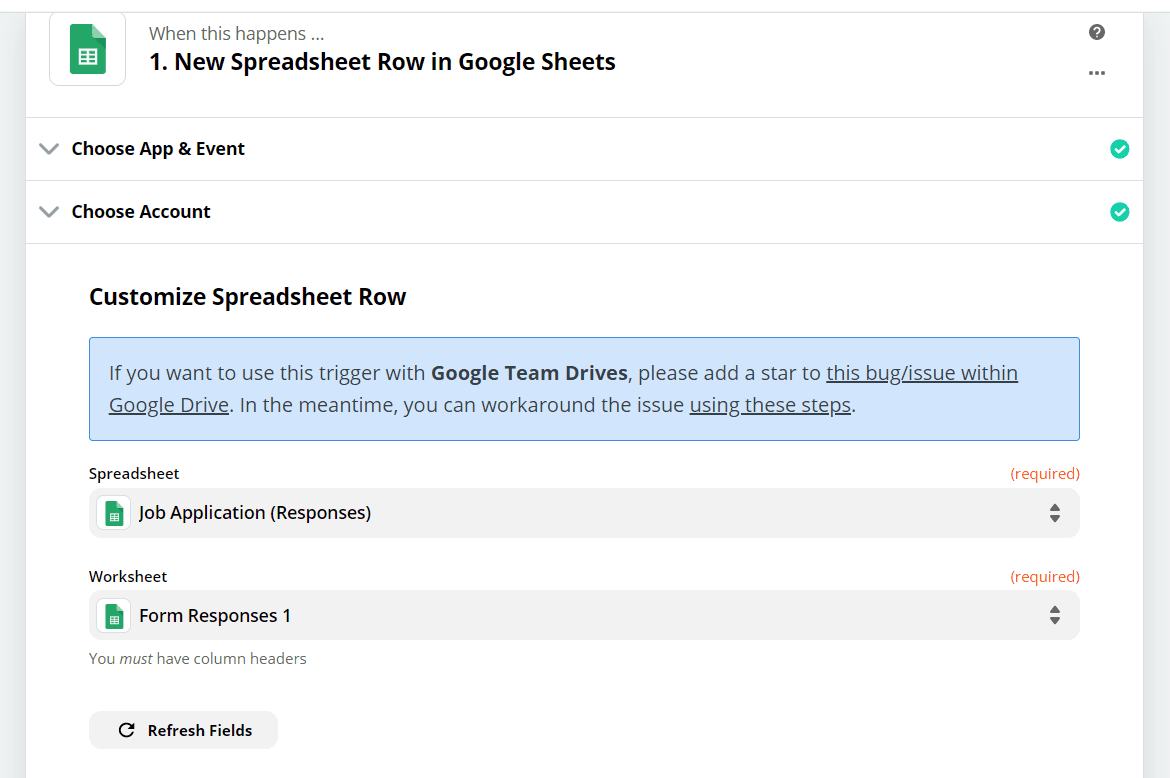
Step 3: Create a New Zap
First, create a new zap. We have provided Google Sheets as the input app and New Spreadsheet Row as the trigger. Select Spreadsheet and Worksheet names.
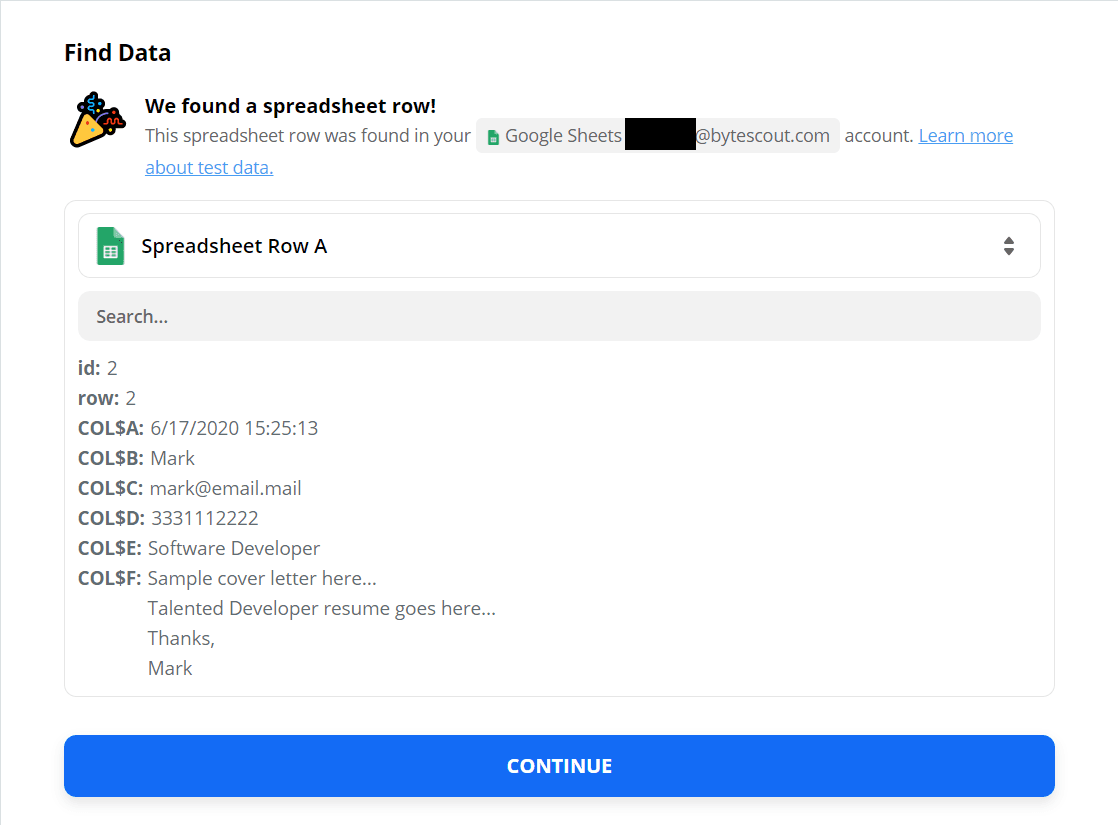
Step 4: Test Trigger and Analyze Output
Now, it is time to Test the Trigger and analyze the output data. Before testing, do add a new Google form input. This new input will add a new row in the spreadsheet that we have configured as a trigger for this zap. The data will look like below.
Step 5: Proceed with PDF Creation
Now, let’s move on to the next step, where we proceed with PDF creation. Let’s select PDF.co as the App and Anything to PDF Converter as the Event.
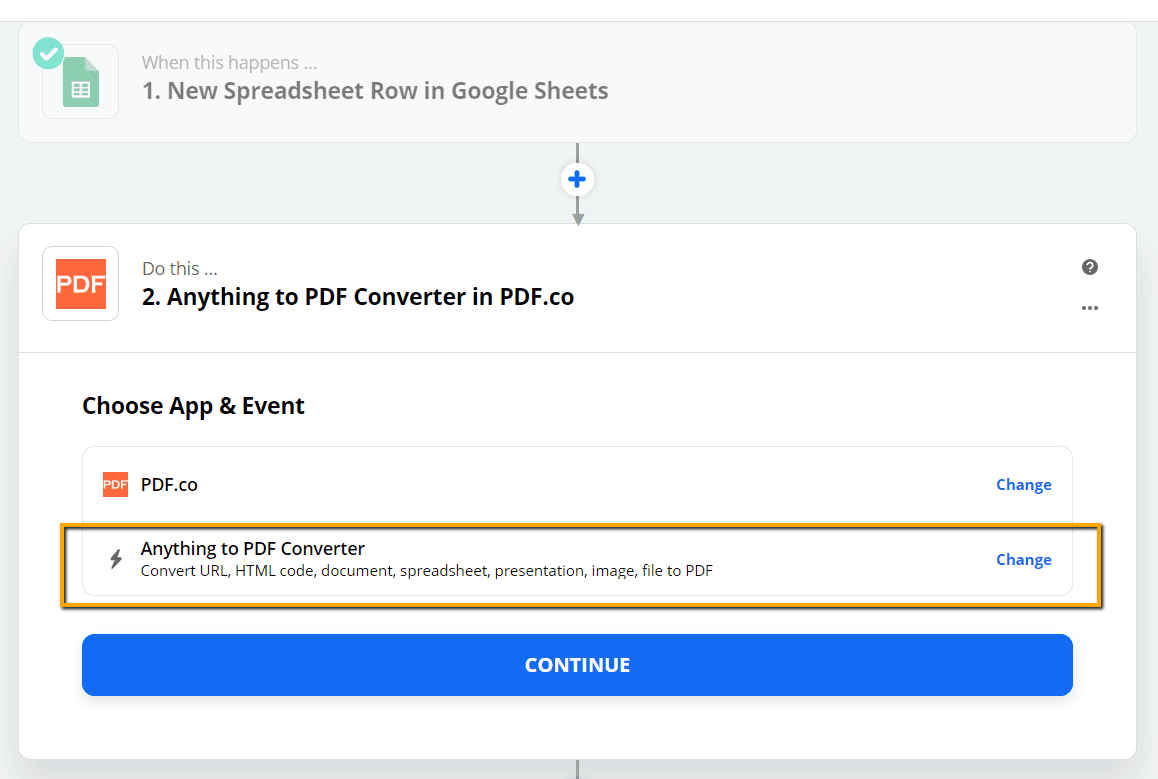
Step 6: Configure Anything to PDF
Let’s configure Anything to PDF and fill out the details below:
- In the Source Type field, the parameter value should be Raw HTML code to convert to PDF.
- In the Input field, enter an HTML code. It should contain data fields from the spreadsheet such as Name, Email, Phone Number, etc.
- Finally, provide some meaningful output PDF names in the Name field.
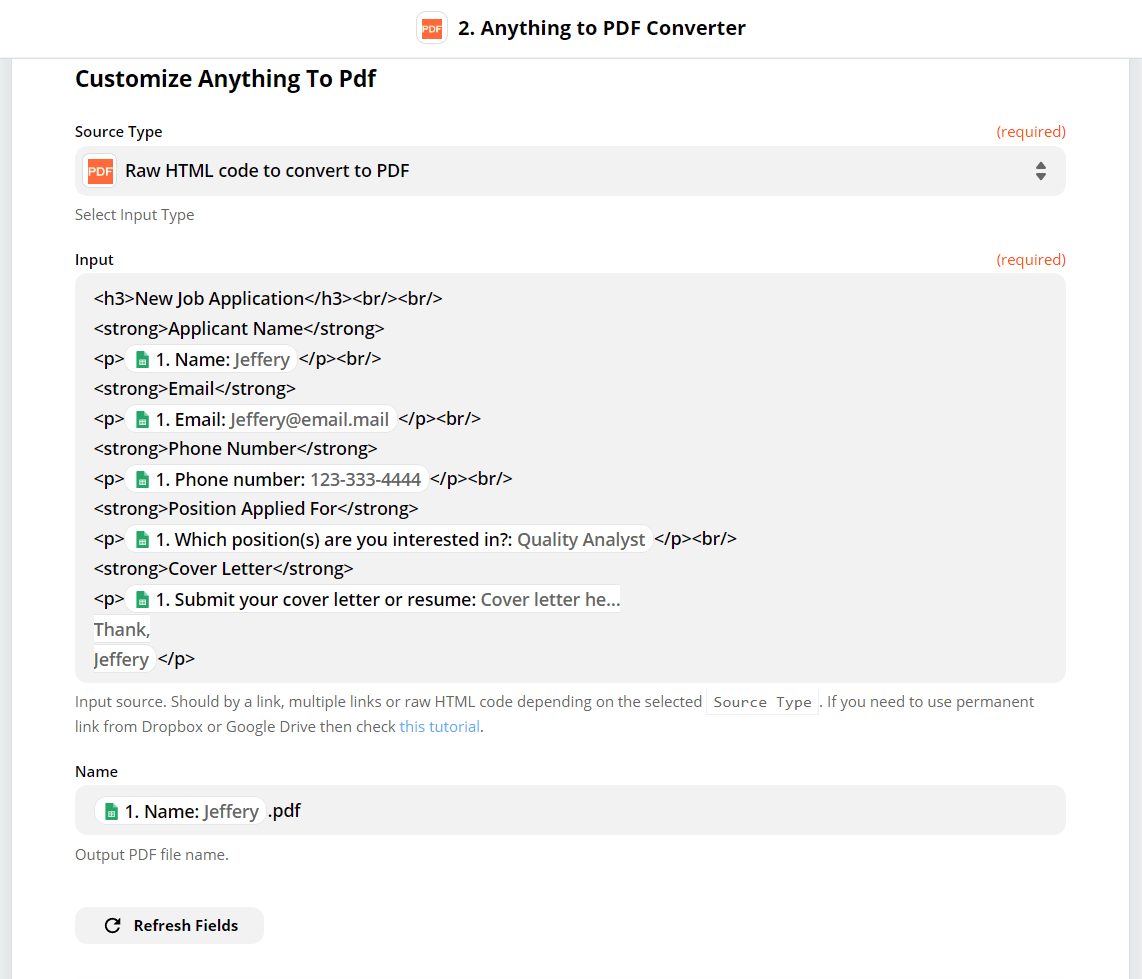
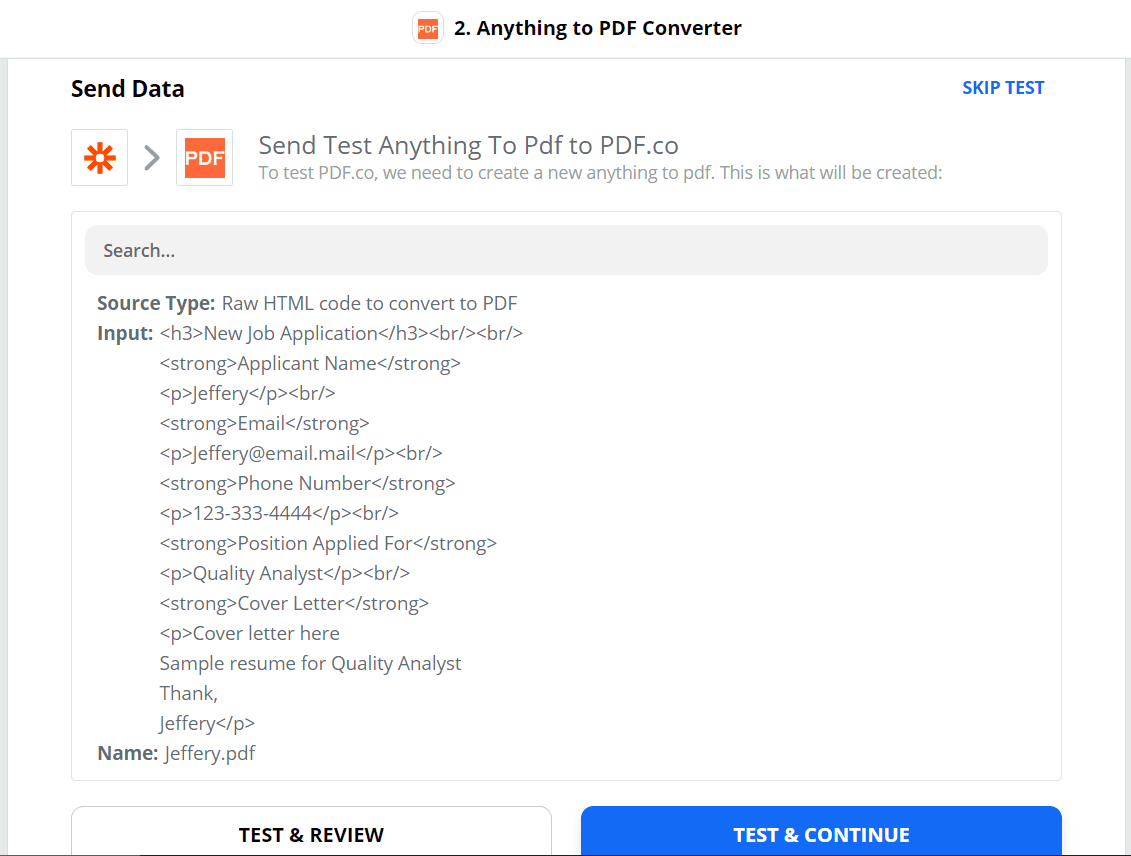
Step 7: Review the Input HTML
Before sending the data to PDF.co, let’s review the generated input HTML along with the target PDF file name.
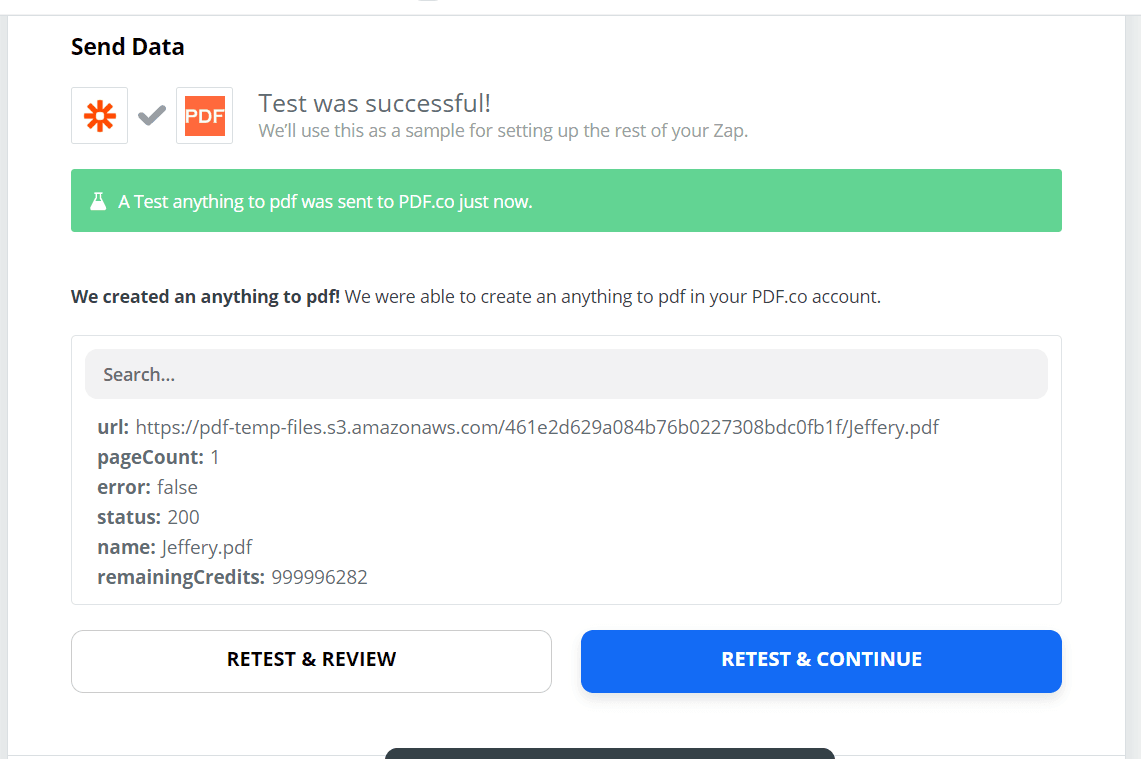
Step 8: PDF.co response
Here’s the response from PDF.co. It contains fields such as the URL of the output PDF, the total page count of the generated document, etc.
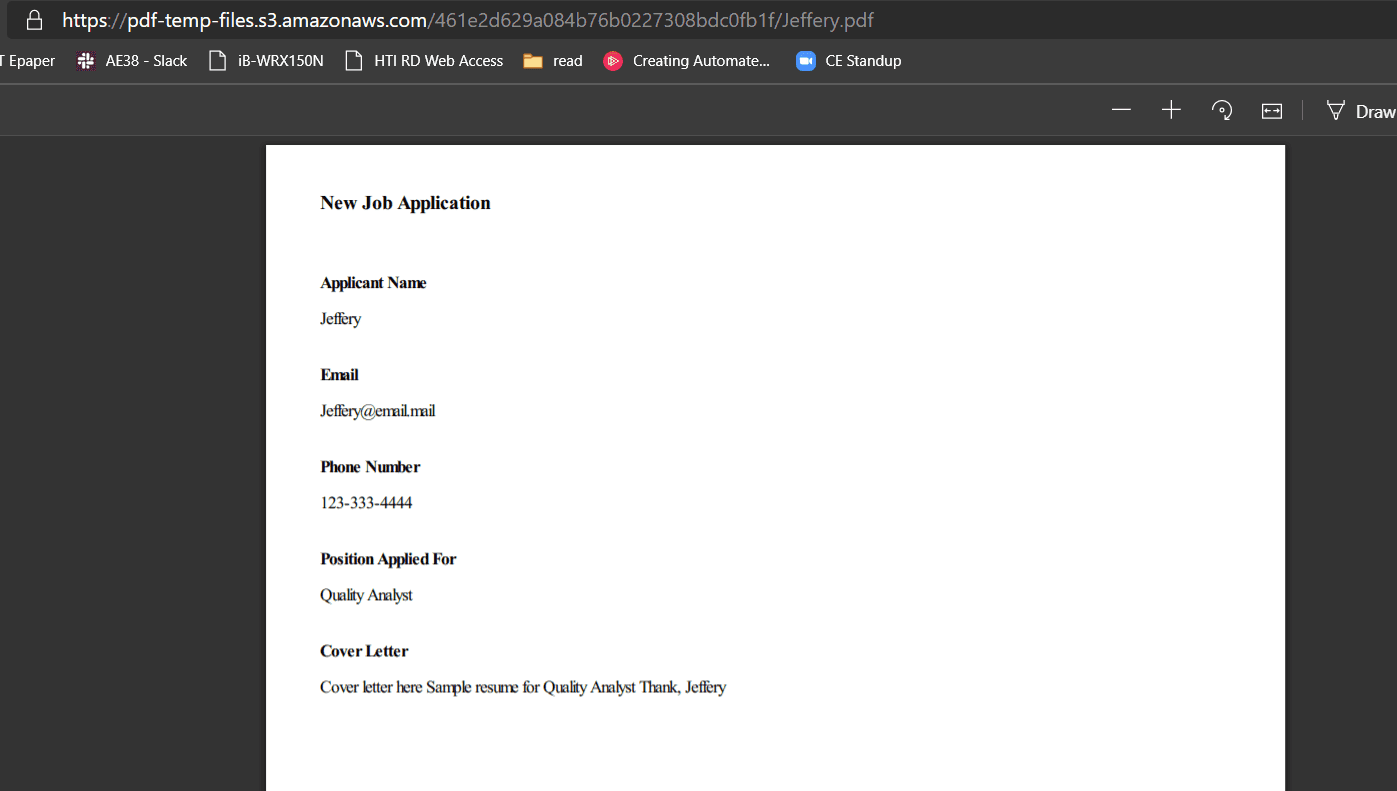
Step 9: Generated PDF File from Google Forms
The generated PDF file will look something like this:
NOTE: You can set up the next step to save the generated file in Google Drive or Dropbox depending on your requirement.
Video Guide
Related Tutorials
