In addition to Google Drive, there are several other cloud storage options that you can use based on your preference, such as OneDrive, Dropbox, iCloud, Box, and many more. These cloud storage services allow you to store and access your files from anywhere with an internet connection, making it easier to share and collaborate on your documents with others. By using the cloud storage service that works best for you, you can seamlessly integrate it into your document management and conversion workflow using tools like PDF.co and Honeycode.
How to Convert PDF to HTML and Publish to AWS with Honeycode using PDF.co and Zapier
17 Minutes Read
Are you tired of manually copying and pasting content from PDF documents to your website? Or struggling to find an efficient way to share important documents with your audience? If so, you’re not alone. Many individuals and businesses face similar challenges when it comes to converting PDF documents to HTML format and publishing them to a website. Luckily, there’s a solution that can help streamline your website publishing process and save you time: PDF.co, Honeycode, and Zapier.
PDF.co HTML to PDF is an online tool that allows you to convert PDF documents to HTML format quickly and easily. With just a few clicks, you can turn your PDFs into web-ready HTML files, with all the formatting, images, and text intact. And the best part? You don’t need any coding knowledge or technical expertise to use PDF.co. It’s simple and user-friendly, making it accessible to anyone.
Once you’ve converted your PDFs to HTML format with PDF.co, you can use Honeycode to publish the converted HTML to a website hosted on AWS. Honeycode is a low-code app development platform enabling you to create web and mobile apps without coding. It’s an intuitive platform that allows you to create dynamic websites and web applications quickly and easily.
In this tutorial, we will walk you through the process of converting a PDF file to HTML format and publishing them to a website hosted on AWS. This tutorial is ideal for anyone who needs to share document content on the web, whether it’s a report, brochure, or presentation.
So, if you’re ready to learn how to convert your PDFs to HTML and publish them to a website on AWS, let’s get started!
We will use a sample PDF document to demonstrate how to convert it into HTML format and publish it on a website hosted on AWS. This hands-on tutorial will walk you through the steps required to transform your PDF content into a web-friendly format and make it accessible to your audience online.

IN THIS TUTORIAL
Step 1: Open Zapier Account
- First, log into your Zapier account and click on the Create Zap button.
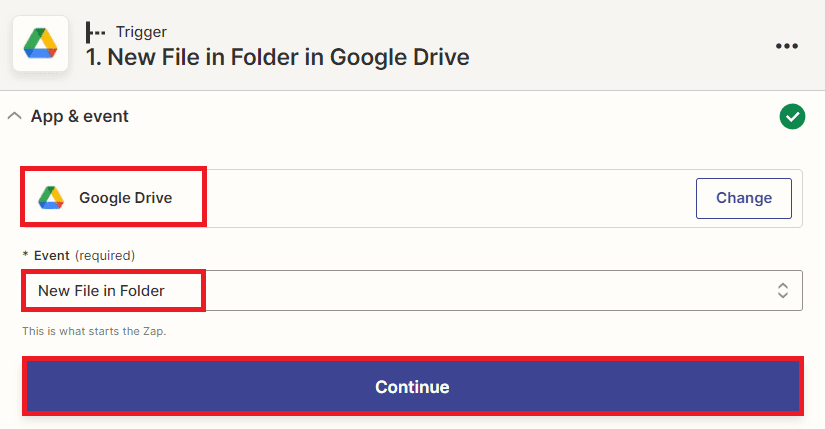
Step 2: Google Drive App
- Next, search and select the Google Drive app and choose the New File in Folder to trigger when a new file is added to a folder.
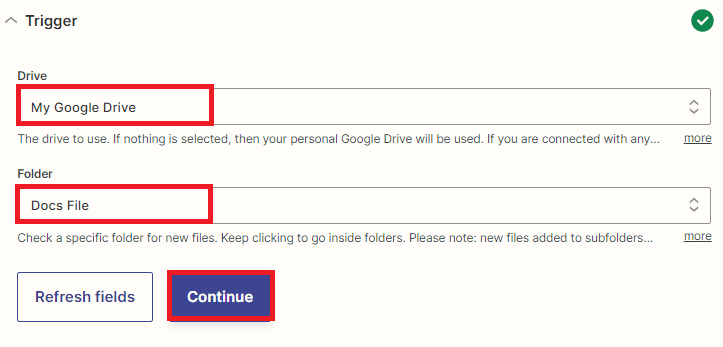
Step 3: Setup Trigger
- To set up the trigger for our PDF to HTML conversion, we need to first select “My Google Drive” in the Drive field. This ensures that the PDF document we want to convert is located in our personal Google Drive account.
- Next, we need to specify the specific folder where the PDF file resides in the Folder field. This is important to ensure that we are converting the correct file and that we have access to it.
To ensure that our trigger has been set up correctly and our PDF to HTML conversion process will run smoothly, it’s important to conduct a test trigger. This will allow us to confirm that the trigger is working as intended and that our PDF file is being converted to HTML format without any issues.
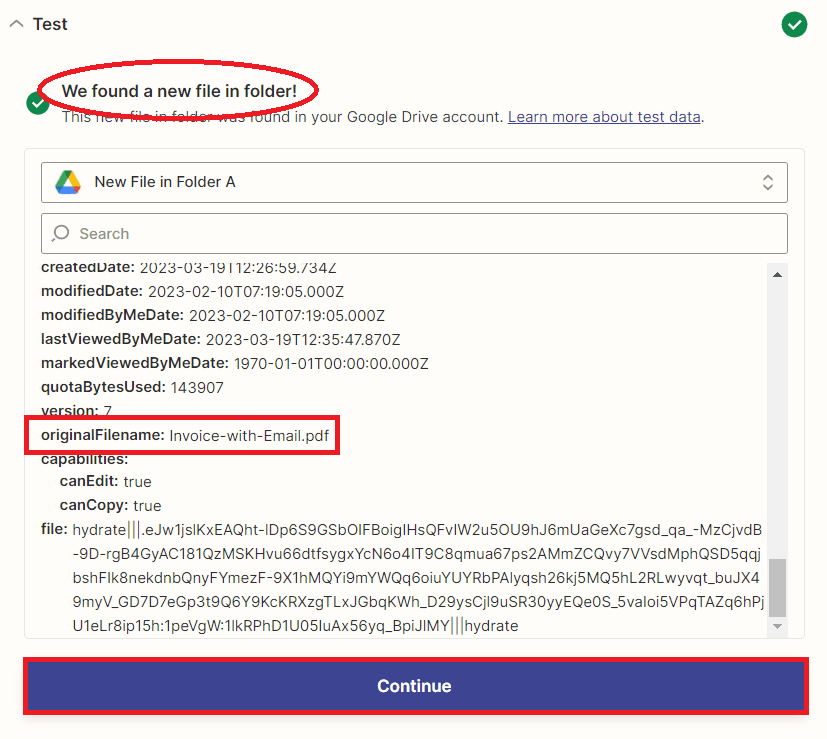
Step 4: Test Trigger Result
- Great! The test trigger was successful and returned the PDF file from the designated folder in Google drive. Let’s add another app to process the PDF to HTML conversion.
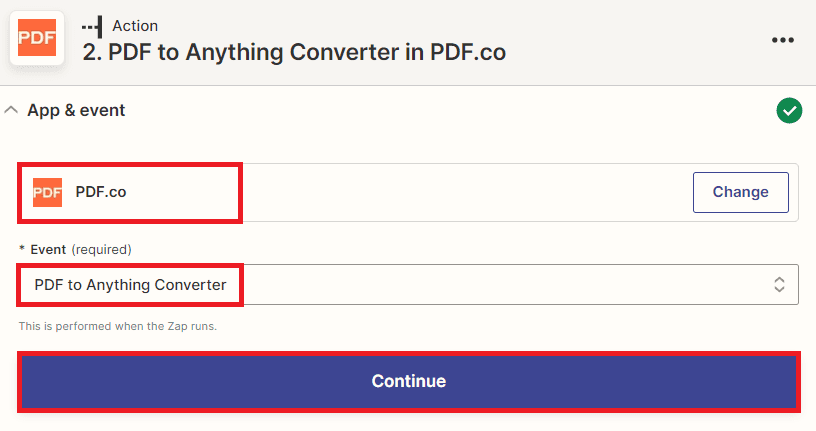
Step 5: Add PDF.co App
- In this step, we will add the PDF.co app to our workflow and select the “PDF to Anything” converter to convert our PDF document into HTML format.
To connect your PDF.co account to Zapier, add your API Key. You can obtain the API Key in your PDF.co dashboard.
Step 6: Setup PDF.co Action
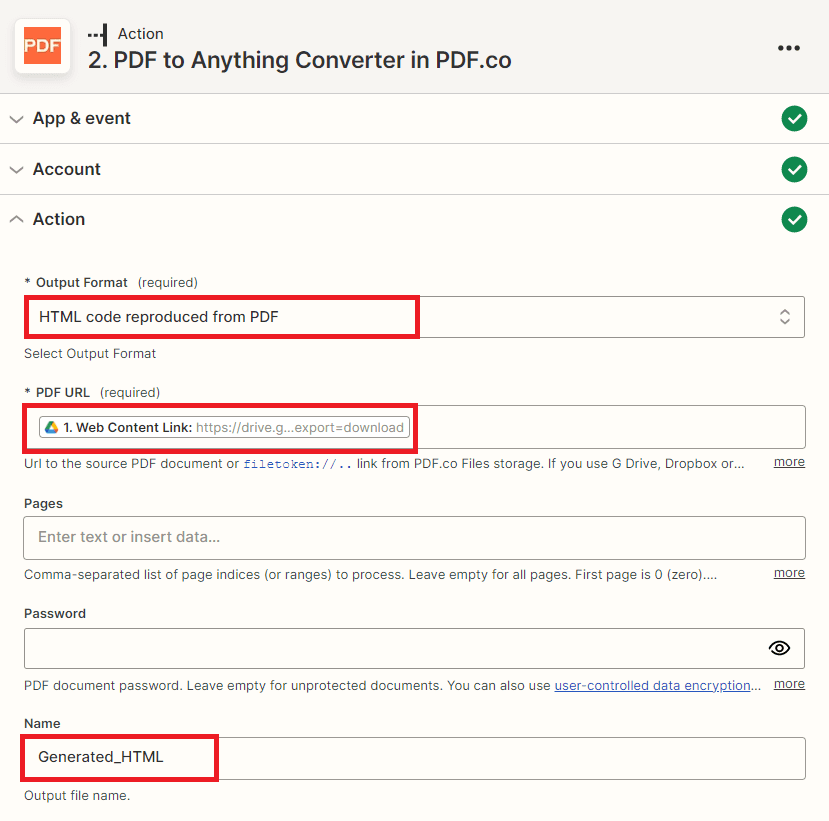
To set up the PDF.co action for our PDF to HTML conversion, we need to follow these steps:
- In the Output Format field, select the “HTML code reproduce from PDF” option to generate an HTML output.
- In the PDF URL field, select the “Web Content Link” option from your Google Drive account. This will allow PDF.co to access the PDF file that we want to convert.
- In the Name field, enter the desired name for your generated HTML file. This will be the name of the file that you will be publishing on your website hosted on AWS.
Once we have set up the configuration for our PDF.co action, we need to test the action to ensure that it is working correctly.
Step 7: PDF.co Test Result
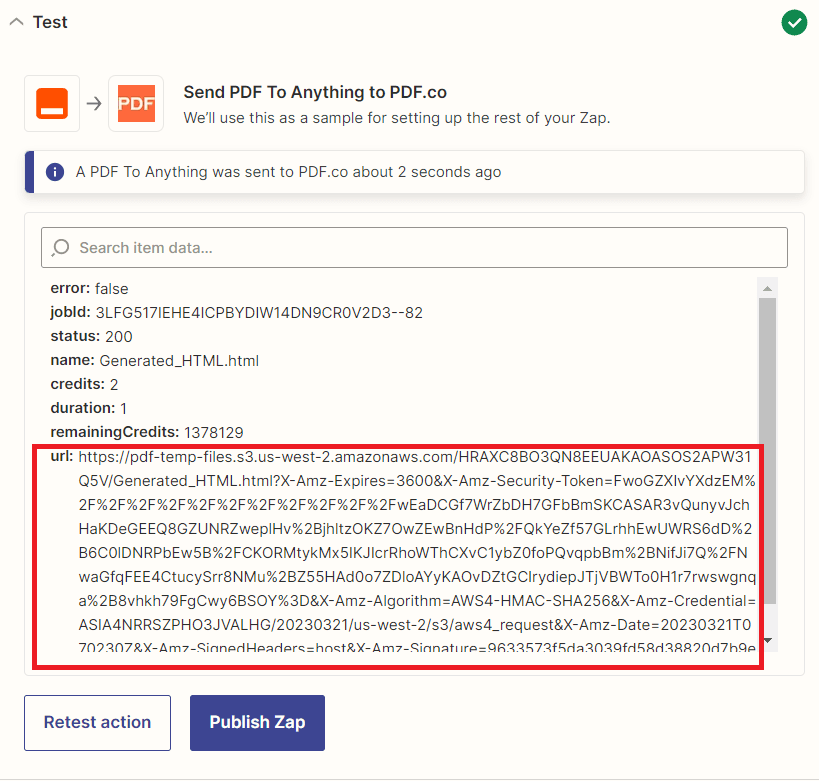
- Awesome! We have successfully converted our PDF document to HTML format using PDF.co and received the generated HTML URL. You can now copy the URL and paste it into your web browser to view the output HTML file.
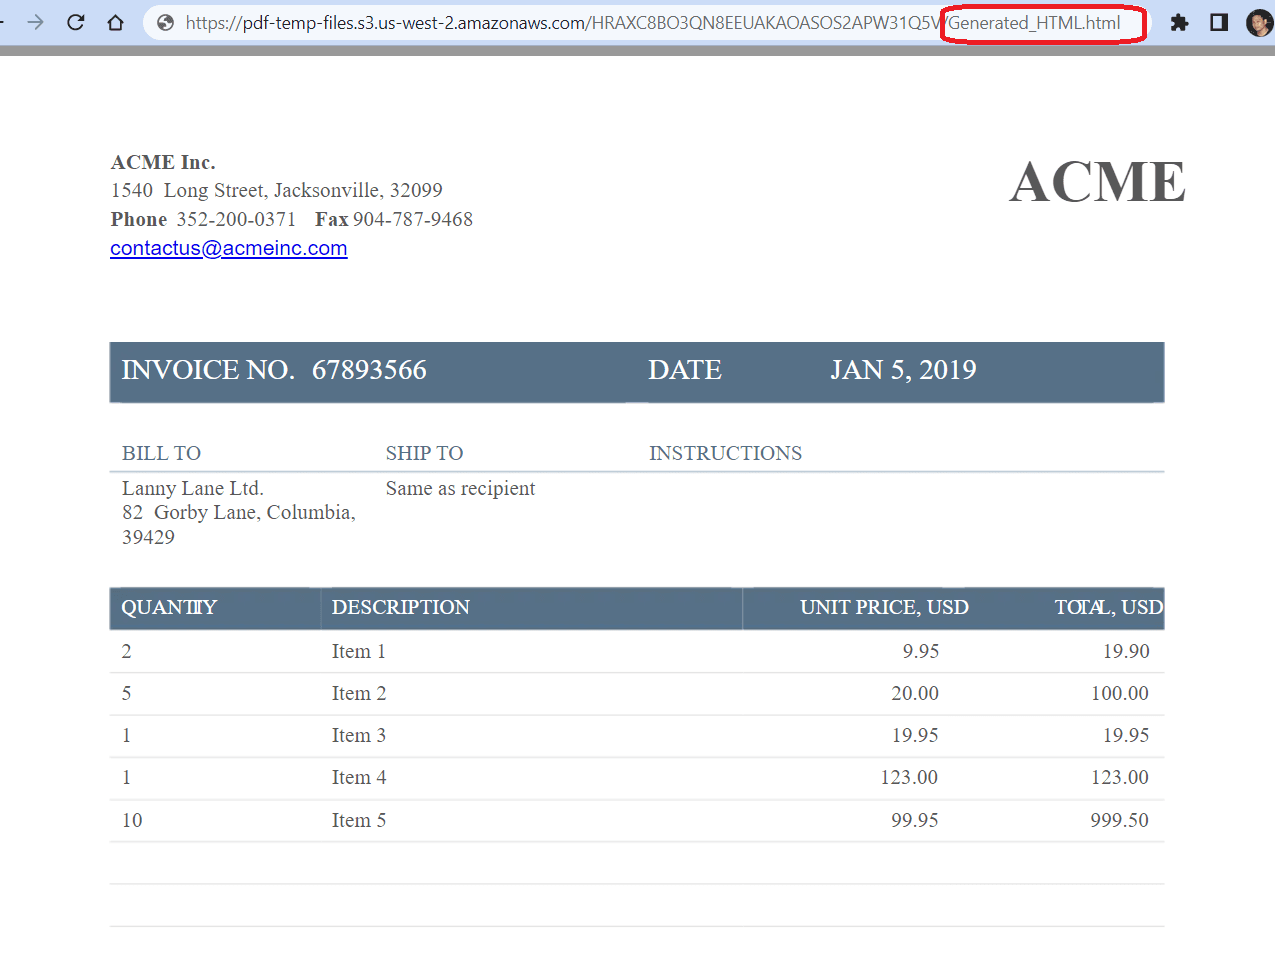
Step 8: Generated HTML Document
- Here’s the generated HTML document that we converted from a PDF file. Now that we have generated the HTML file, we can proceed with publishing it to the website hosted on AWS.
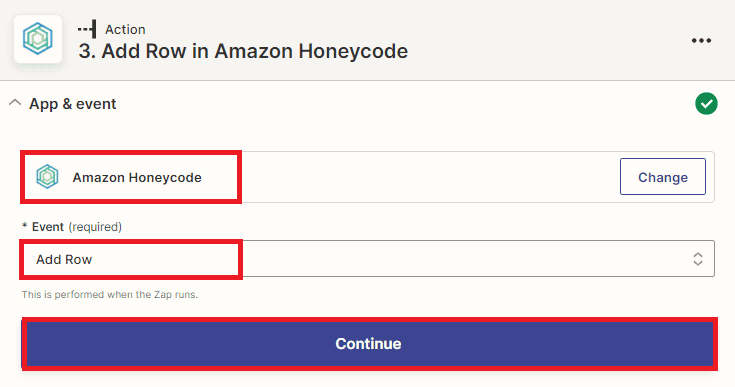
Step 9: Add Honeycode App
- In this next step, we will add the Honeycode app and choose the “Add Row” option to add a new row to a workbook table. By adding a new row to a workbook table, we can specify the details of the file we want to publish, including the file name, URL, and any other relevant information. This will help us to keep our content organized and accessible, making it easier for us to manage and update our website over time.
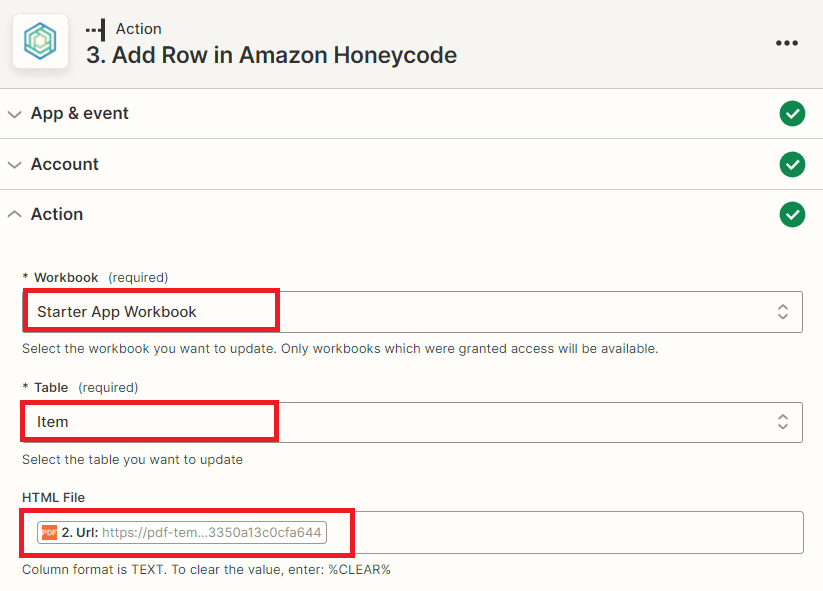
Step 10: Setup Honeycode Action
Let’s set up the Honeycode configuration.
- In the Workbook field, enter the name of the Honeycode workbook that you want to update with the HTML file URL.
- In the Table field, specify the name of the table in the workbook that you want to update. This will ensure that the new row with the HTML file URL is added to the correct table in your Honeycode workbook.
- In order to store the URL of an HTML file in the Workbook table, you should first create the necessary fields within the table. Once the fields are created, you can then fill them out with the corresponding HTML file URL. This will ensure that the URL is stored and easily accessible within the Workbook table for future reference.
Note: To enable the storage of generated HTML files, create a new workbook in Amazon Honeycode and add a new app to the workbook. Within the app, create a table to store generated HTML file URL output.
After configuring the Honeycode, you can click on the “Test Action” button to execute the code and add a new row to a specific workbook table. This new row will contain the necessary fields to store the HTML file, allowing you to easily access it later.
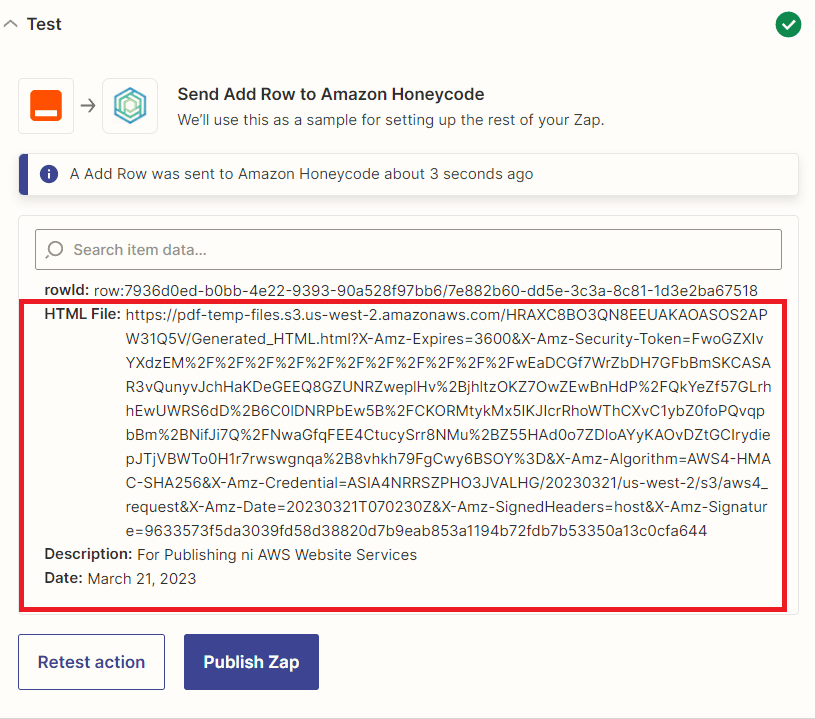
Step 11: Honeycode Test Result
- Excellent! The Honeycode successfully process our request and added a new row to store the HTML file. To publish the HTML file to the website hosted on AWS, let’s add another app to your workflow. This app can be used to retrieve the HTML file from the workbook table and upload it to the website’s hosting service.
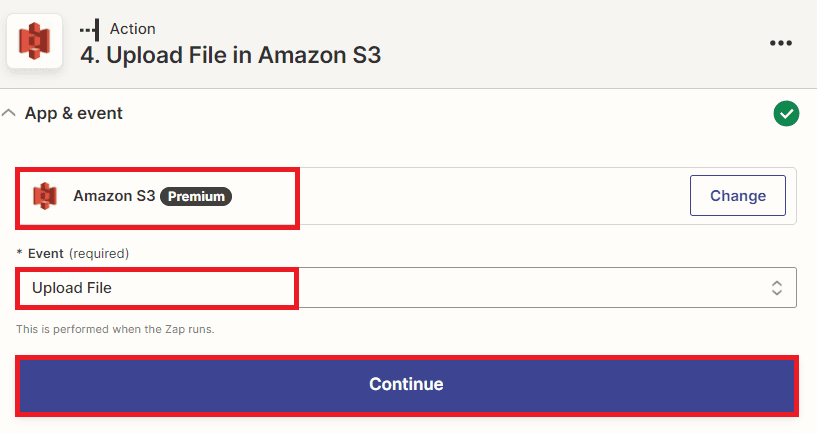
Step 12: Add Amazon S3
- To upload the HTML file to your website hosting service on AWS, you can add the Amazon S3 app to your workflow. Once you’ve added the app, select the “Upload File” option to initiate the file upload process associated with your website hosting service.
Step 13: Setup Amazon S3
To set up the Amazon S3 configuration for uploading your HTML file to the website, follow these steps:
- In the app configuration, in the “Bucket Name” field, select the name of the S3 bucket that you created and configured to function as a static website host.
- In the “Key” field, specify the name that you want to give to the object that will be created in the S3 bucket.
- In the “File” field, input the URL of the converted HTML file that you retrieved from the Honeycode table.
- In the “Mimetype” field, add “text/html” to specify the file type.
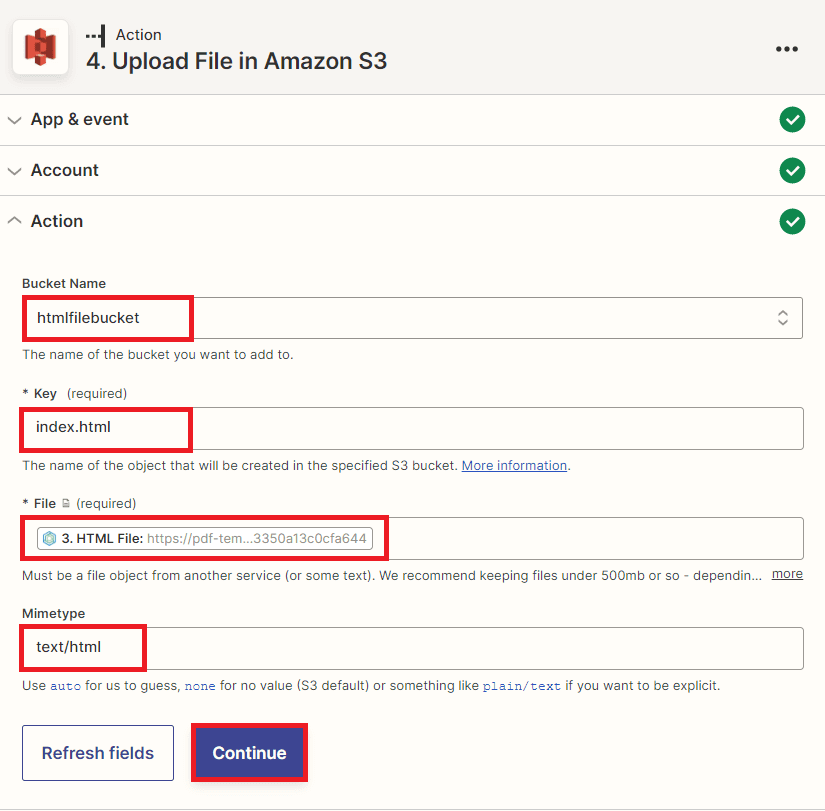
Now, let’s test the action to assess the functionality of publishing the HTML file to the AWS-hosted website.
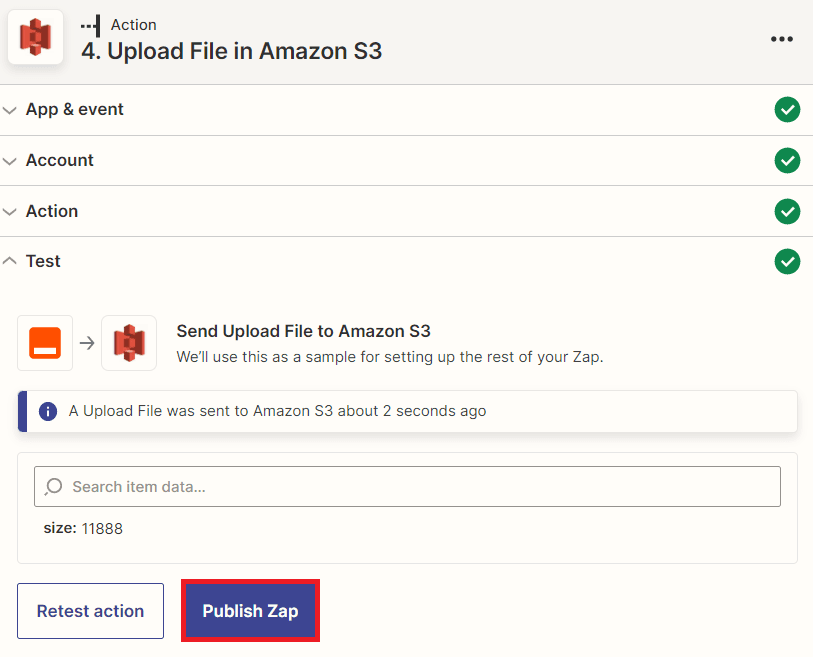
Step 14: S3 Test Result
- Congratulations! The test was a success, and the HTML file was uploaded to the S3 bucket and promptly published on the website. Once the Zap is working correctly, you can upload new PDF documents to your cloud storage service, and Zapier will automatically convert them to HTML format and publish them to your website hosted on AWS using Honeycode.
Step 15: Check S3 Bucket
- To ensure that the HTML file has been published successfully, let’s inspect the S3 bucket. Once confirmed, we can proceed to access the published file by clicking on the Bucket website endpoint.
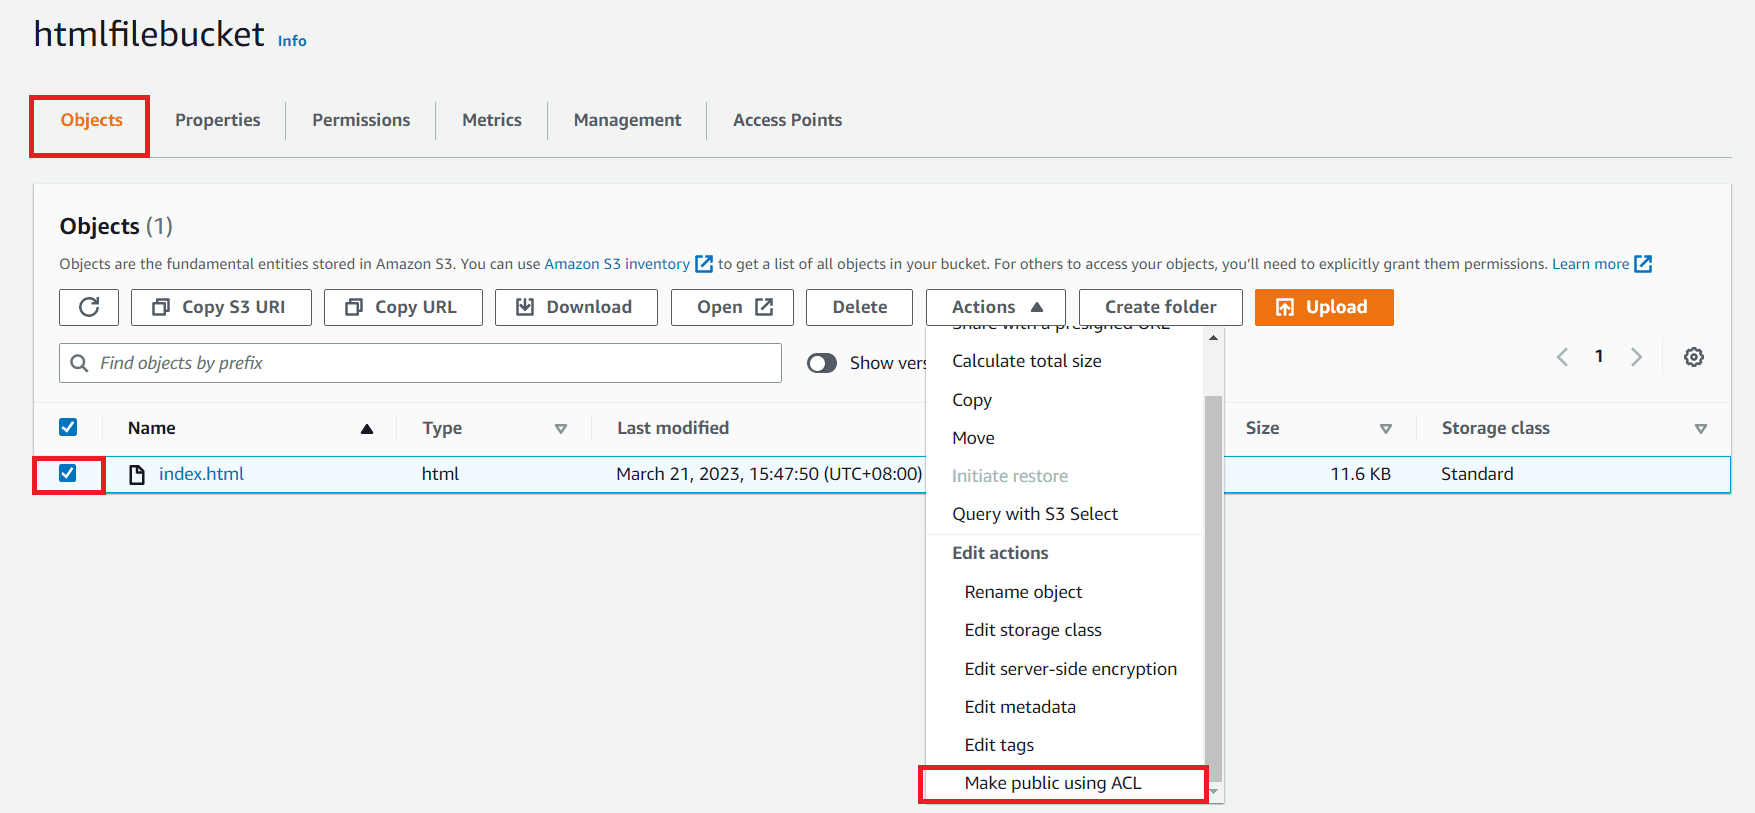
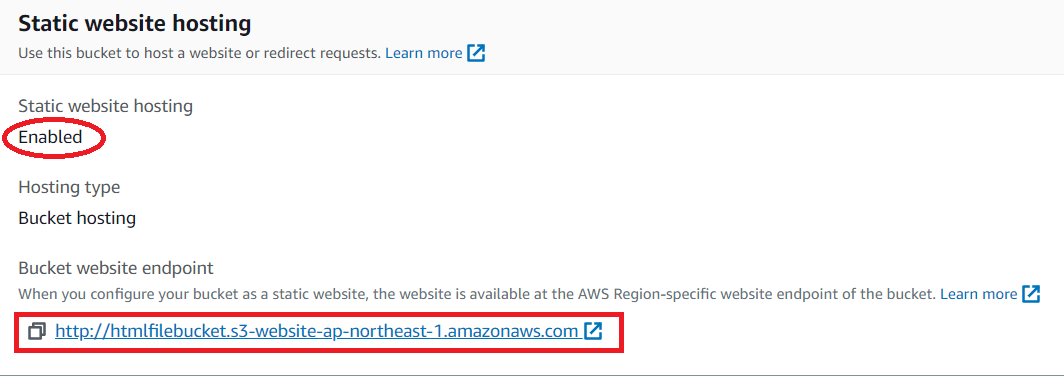
Make sure to enable the Static website hosting of your S3 bucket properties and Make Public the objects key index.
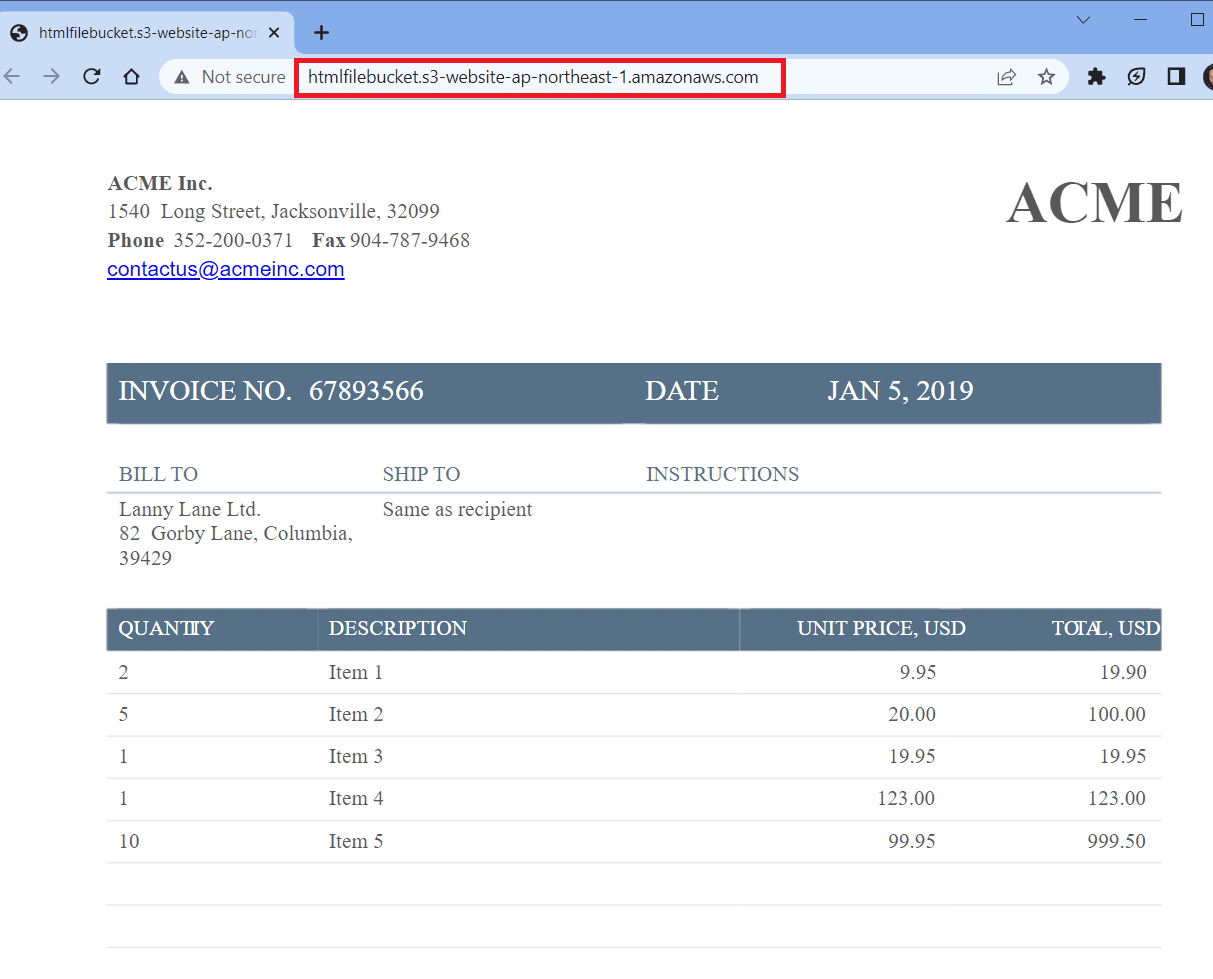
Step 16: File Published on the Website
- This is the HTML file that we successfully published on the website hosted on AWS.
In this tutorial, we discussed the steps to convert a PDF document to HTML format using PDFco and then publish the converted HTML to a website hosted on AWS using Honeycode and Zapier. By following these steps, you can easily automate the process of converting PDF documents to HTML format and publishing them to your website without the need for any manual intervention. This can save you a lot of time and effort, especially if you need to publish a large number of documents regularly. Overall, PDFco, Honeycode, and Zapier are powerful tools that can help you streamline your document management and website publishing workflows.
Related Tutorials
