How Do You Add Attachments to a MailChimp Campaign
Are you looking for automation that can add attachments to a Mailchimp campaign? PDF.co API is a perfect tool that can help with your problem. Adding an attachment to a Mailchimp campaign has a long process to do, PDF.co API has the easiest way by using Zapier. We have a step-by-step guide below that you can follow.
Here’s the step-by-step guide:
Note: First, we will convert the Mailchimp campaign to PDF and send it to Gmail for PDF attachment.
Step 1: Create a Zap
To begin, let’s start by creating a Zap.
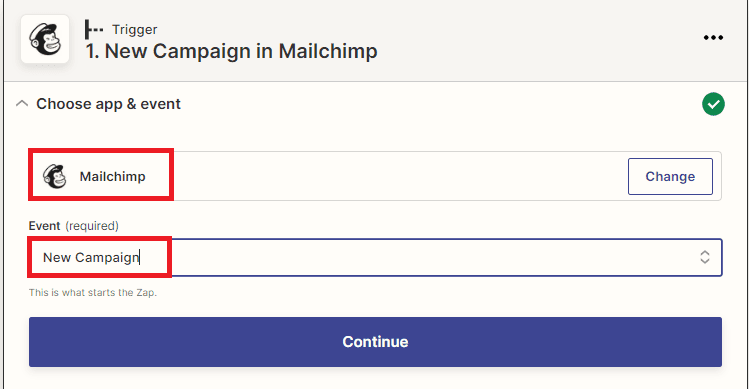
Step 2: Trigger App and Event
Next, select the Mailchimp app and choose the New Campaign for the trigger event.
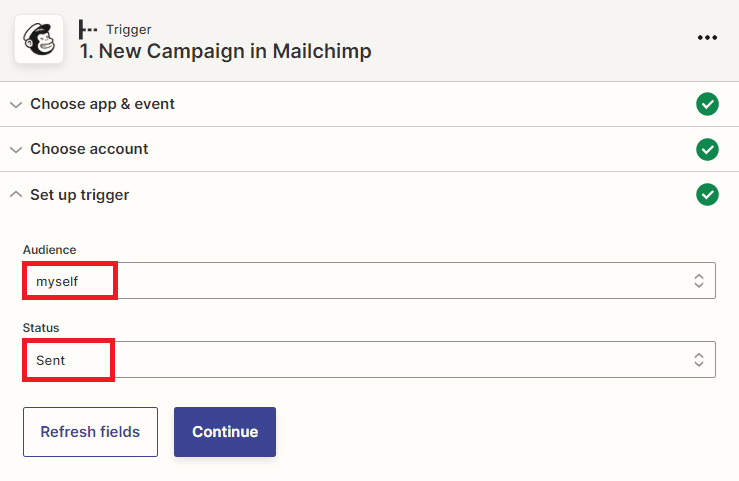
Step 3: Setup Trigger
Let’s set up the trigger
- In the Audience field, select the audience from your Mailchimp campaign.
- In the Status field, select the status of your campaign.
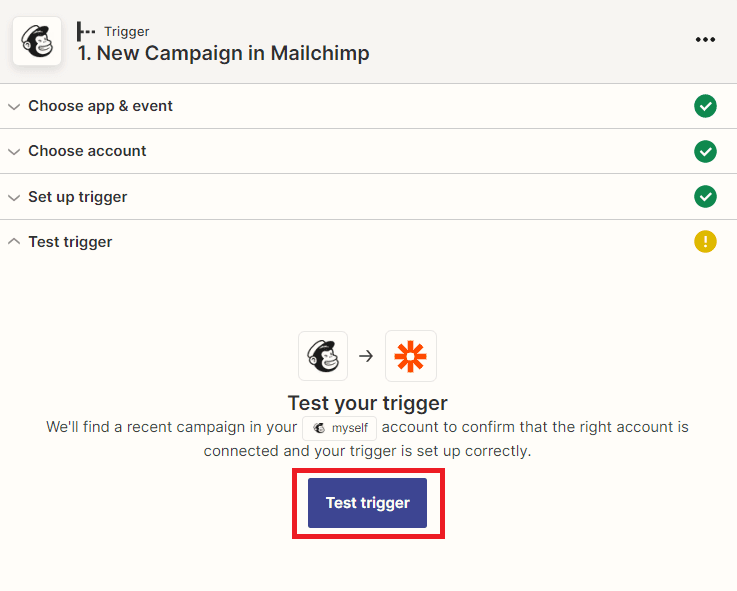
Step 4: Test Trigger
Then, Click on the test trigger button.
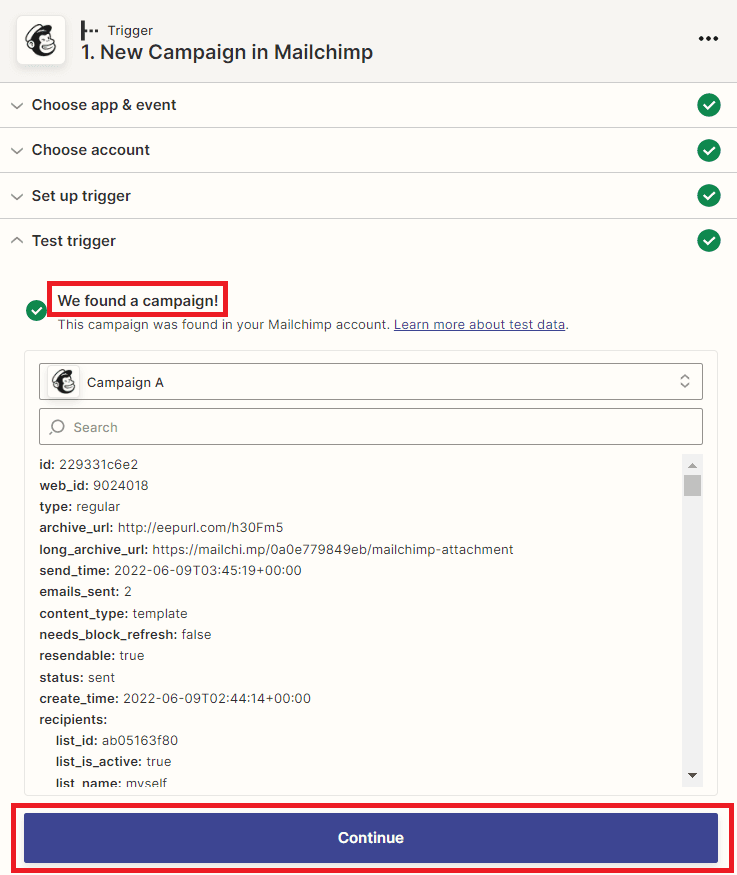
Step 5: Test Trigger Result
Once the test trigger was successful. You may now move on to another app.
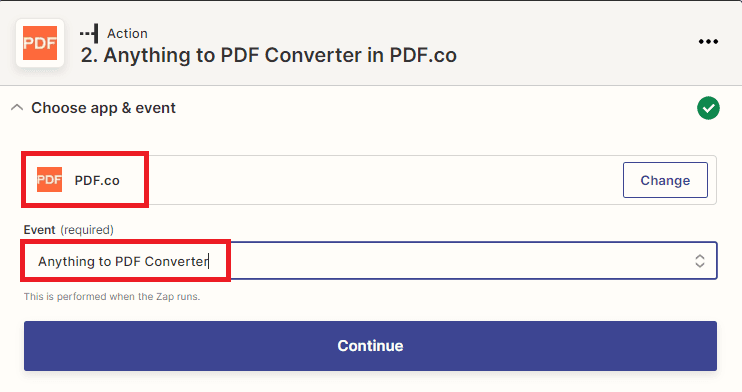
Step 6: Action App and Event
Let’s select the PDF.co app and choose the Anything to PDF Converter for the action event.
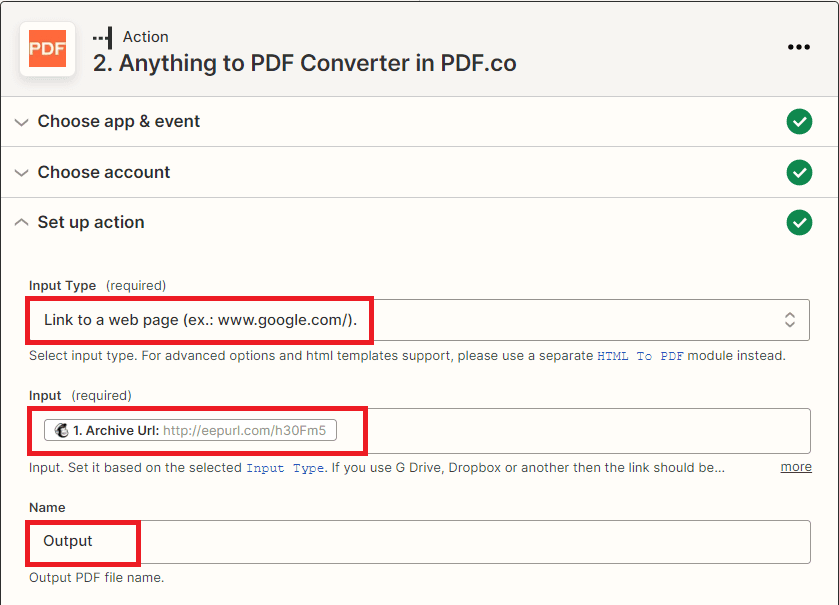
Step 7: Setup Action
Set up the Action.
- In the Input Type field, select the Link to a webpage.
- For the Input field, select the Archive URL from the Mailchimp campaign.
- For the Name field, type in your desired output file name.
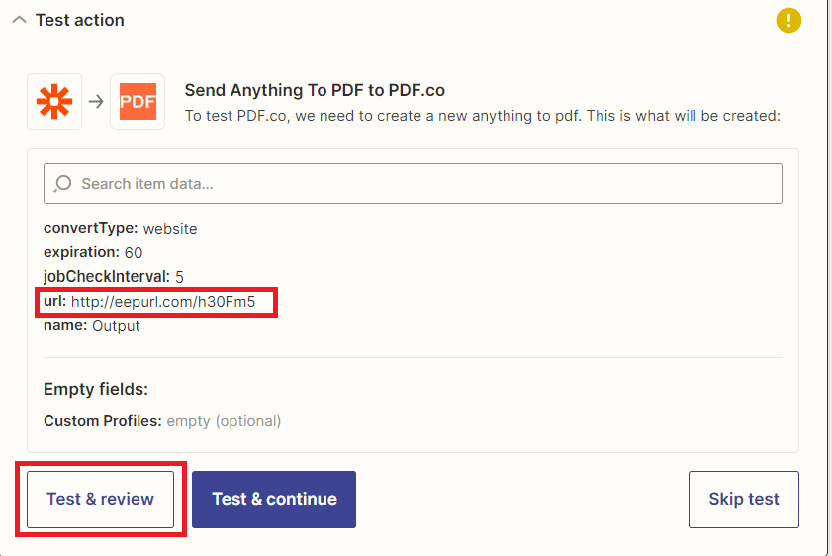
Step 8: Test and Review
Now, click on the test and review button.
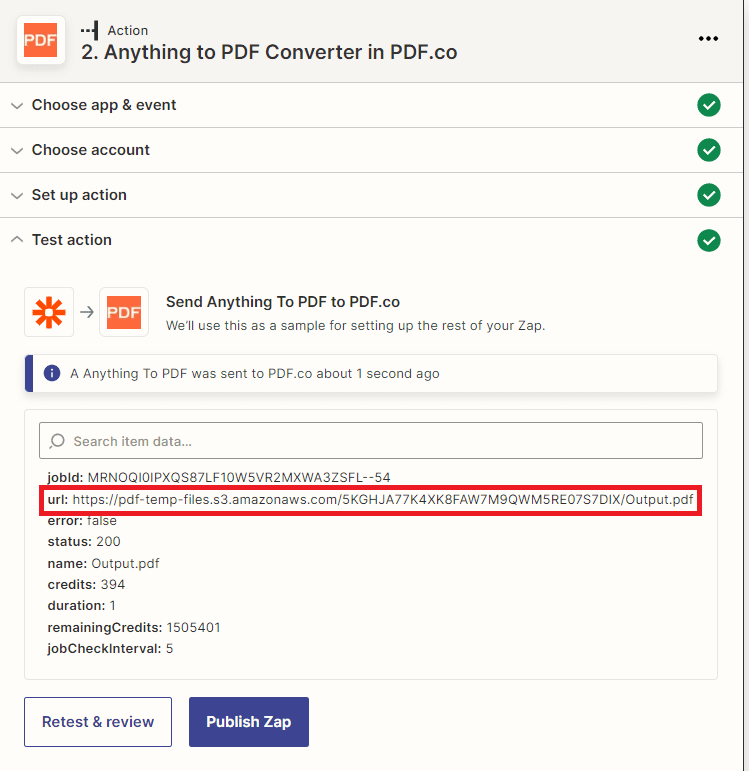
Step 9: Test Review Result
Once the test was successful. PDF.co will return a converted PDF URL.
Now, let’s send this PDF as an attachment. We will add another app.
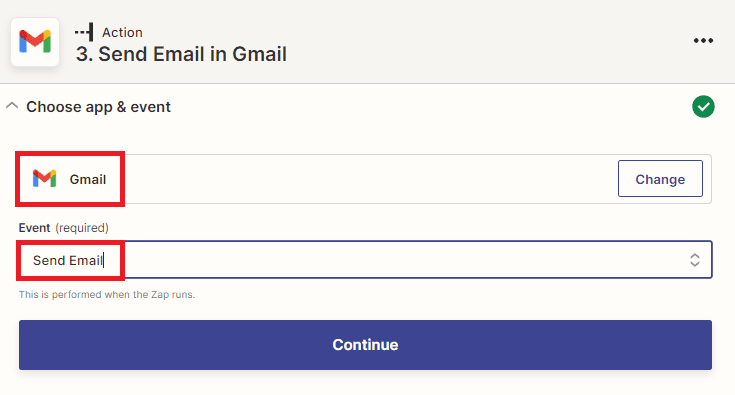
Step 10: Add Another App and Event
Select the Gmail app and choose the Send Email for an action.
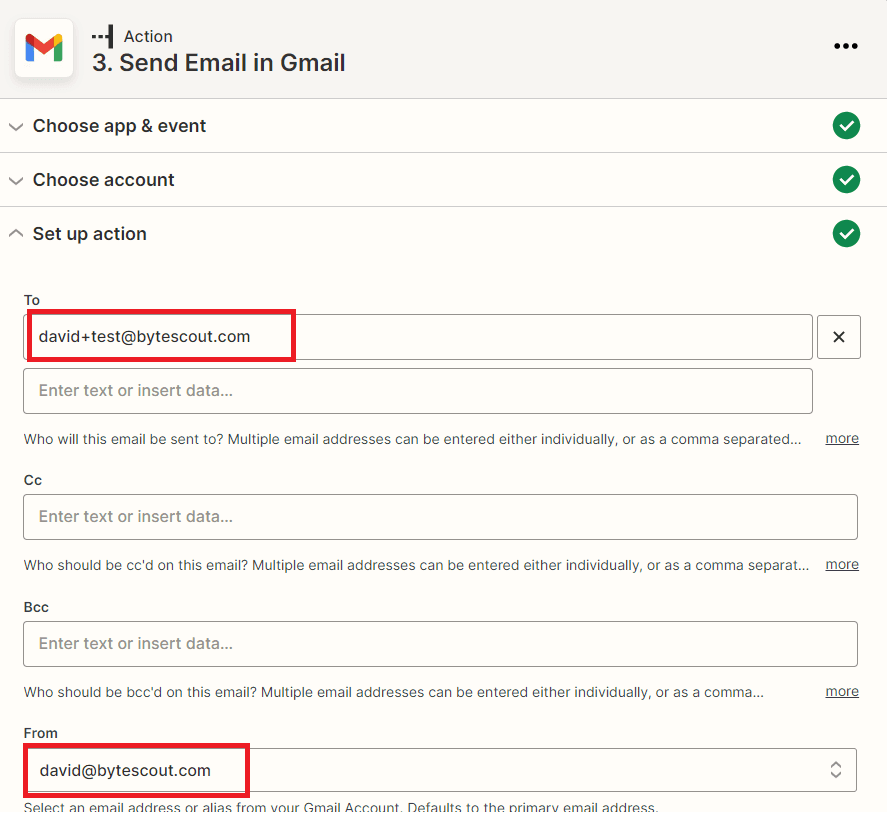
Step 11: Send Email Configuration
Let’s set up the configuration
- In the To field, enter the email address of the recipient.
- In the From field, add your email address.
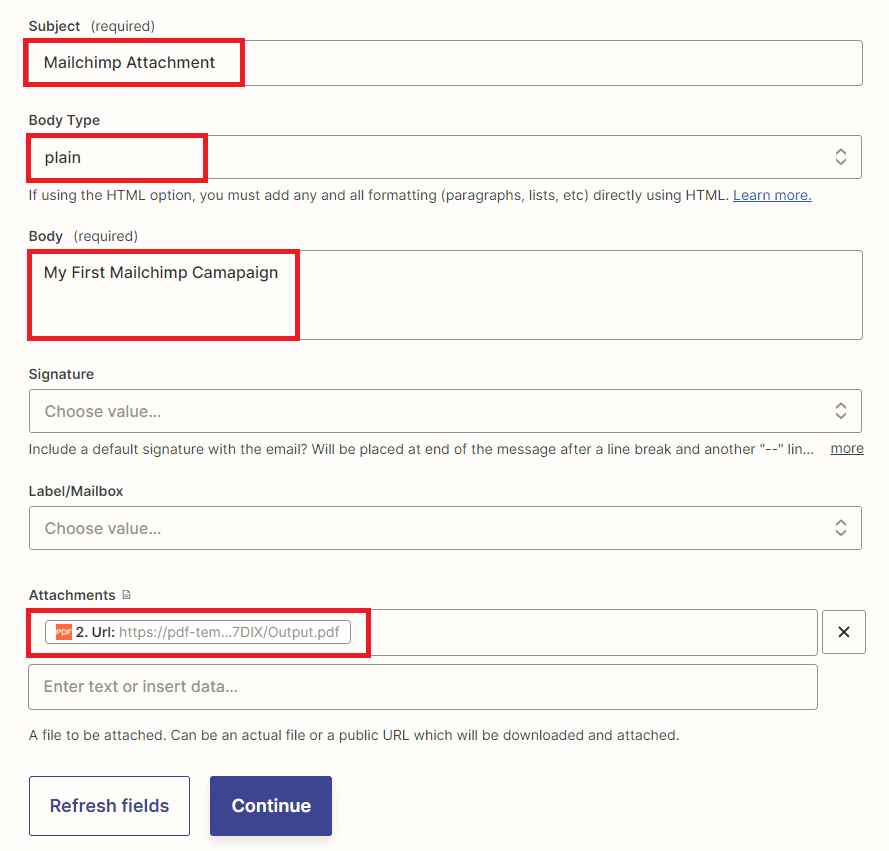
- For the Subject field, add a subject to the email.
- In the Body Type field, select what is the body type of the email.
- For the Body field, type in the message.
- For the Attachment field, select the converted PDF URL from PDF.co.
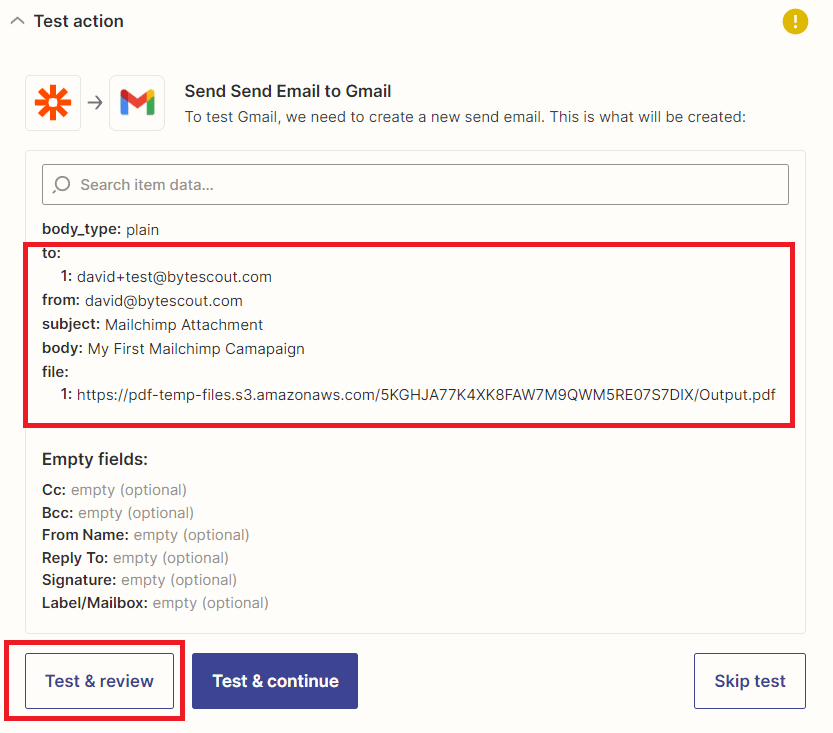
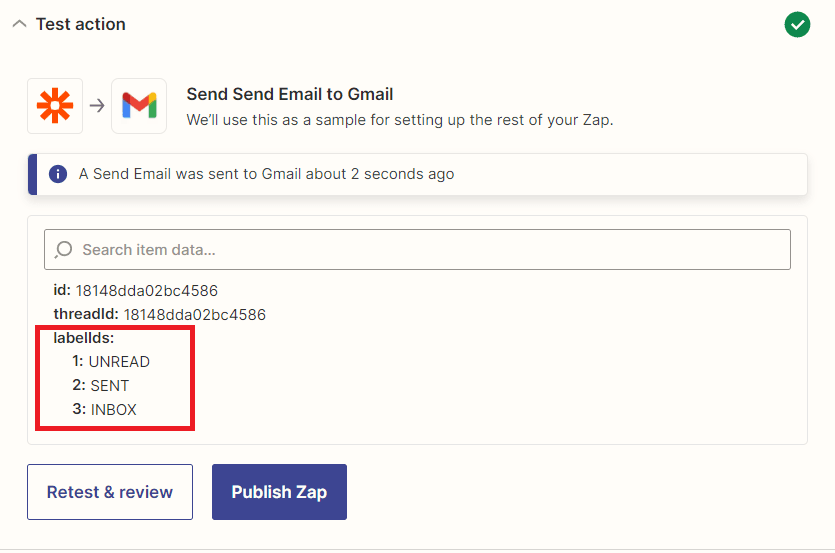
Step 12: Test and Review
After setting up the configuration, click on the test and review button.
Step 13: Test Result
Once the test was successful, the recipient will receive an email.
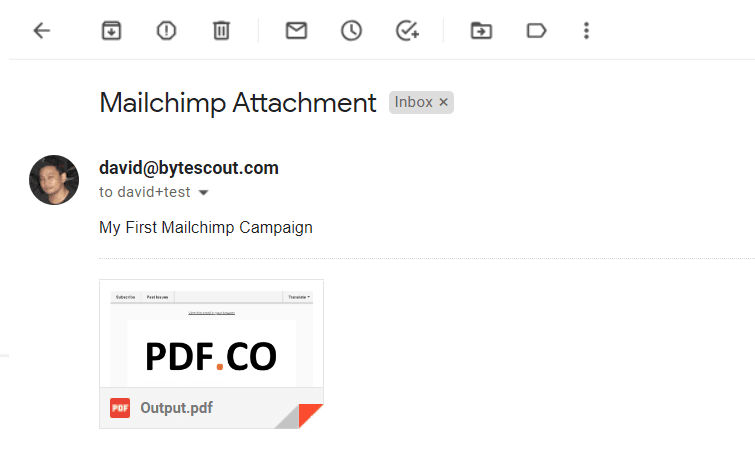
Step 14: Email Attachment Result
Here’s the email with a PDF attachment.
In this tutorial, you learned how to add an attachment to a Mailchimp campaign using Zapier. You learned how to use the PDF.co Web API to convert Anything into PDF. You also learned how to set up the Send Email Gmail to send an email with an attachment.
Related Tutorials
