Upload new Box files to PDF.co using Make – a Step-by-Step Guide.
Step 1: See PDF File Input
In this tutorial, we will show you how to upload new box files to PDF.co using Make.
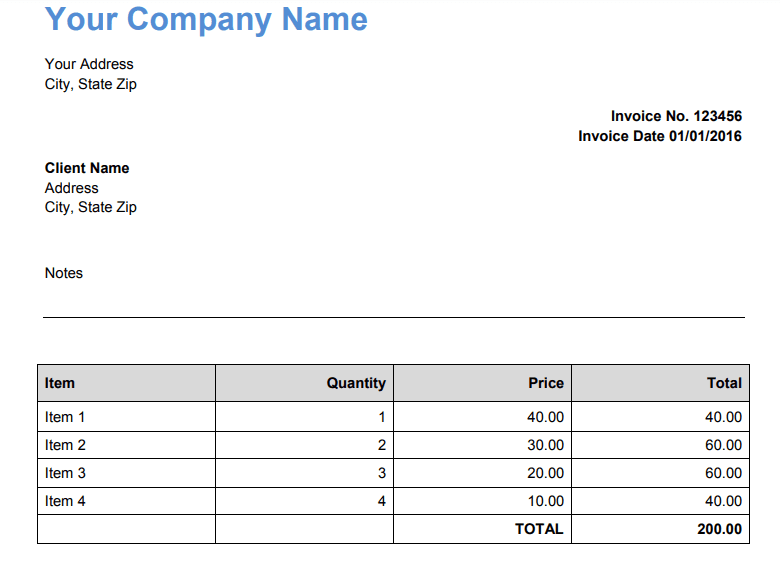
We will use this PDF file that we just uploaded in a folder in Box.
Step 2: Create a Scenario
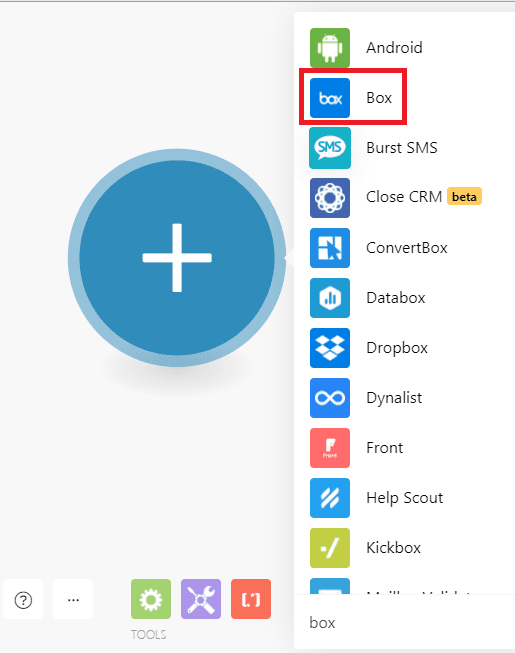
First, we will create a new scenario and select Box.
Step 3: Choose Watch Files
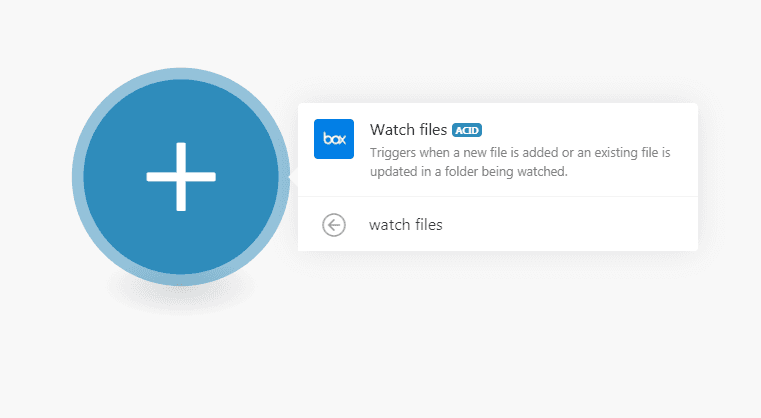
In the Box module, let’s choose the Watch files. This will be triggered every time a new file is added to a folder.
Step 4: Add Connection
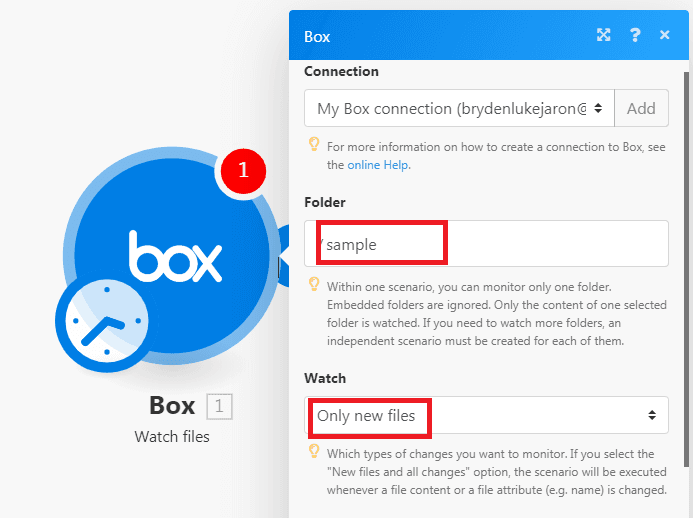
Next, let’s add the connection and choose the Folder name where the new files will be added. Then, in the Watch dropdown box, select the Only new files option. This will instruct the module to only fetch the new files.
Step 5: Add the PDF.co Module
Add a PDF.co module after the Box file step and select Fill a PDF Form.
If the Box trigger provides only file metadata, first add Box – Download a File and map the file ID from Watch Files. This supplies the binary file data required by PDF.co.
Create or select your PDF.co connection.
Step 6: Configure PDF.co
Configure the PDF.co module as follows:
Source PDF
- Import Options: Select Upload a File.
- Data: Map the binary file data returned by Box – Download a File. If Watch Files already returns the file data, map that value directly.
- Output File Name: Enter a name for the modified PDF. You can map the original Box file name or use a name such as
logo-added-document.pdf.
Add the Logo
Under Images, click Add item and configure:
- URL to the source image: Enter a publicly accessible URL for the logo. You can also use a Base64 data URI or a PDF.co
filetoken://link. - X: Enter the horizontal position of the logo.
- Y: Enter the vertical position of the logo.
- Pages or page range: Enter
0for the first page or0-for every page. - Width: Enter the desired image width, or leave empty to use the detected size.
- Height: Enter the desired image height, or leave empty to preserve the detected size.
- Link: Optionally enter a URL that should open when the logo is clicked.
Use the PDF.co PDF Inspector to open a sample PDF and determine the appropriate X and Y coordinates.
Processing Settings
Complete the remaining settings:
- Template Data: Leave empty.
- Execution Mode: Select Async for normal processing. Sync can be used for small files that finish within approximately 10 seconds.
- Profiles: Leave empty unless custom processing options are required.
- Output Links Expiration: Keep the default value unless a different temporary-link duration is needed.
- Export Type: Select Download a File so the resulting binary data can be mapped directly into the following Box Upload a File module.
Click Run once and add a PDF to the monitored Box folder. Confirm that PDF.co returns a successful status, output file data, and a temporary output URL.
Step 7: Upload the Modified File Back (Optional)
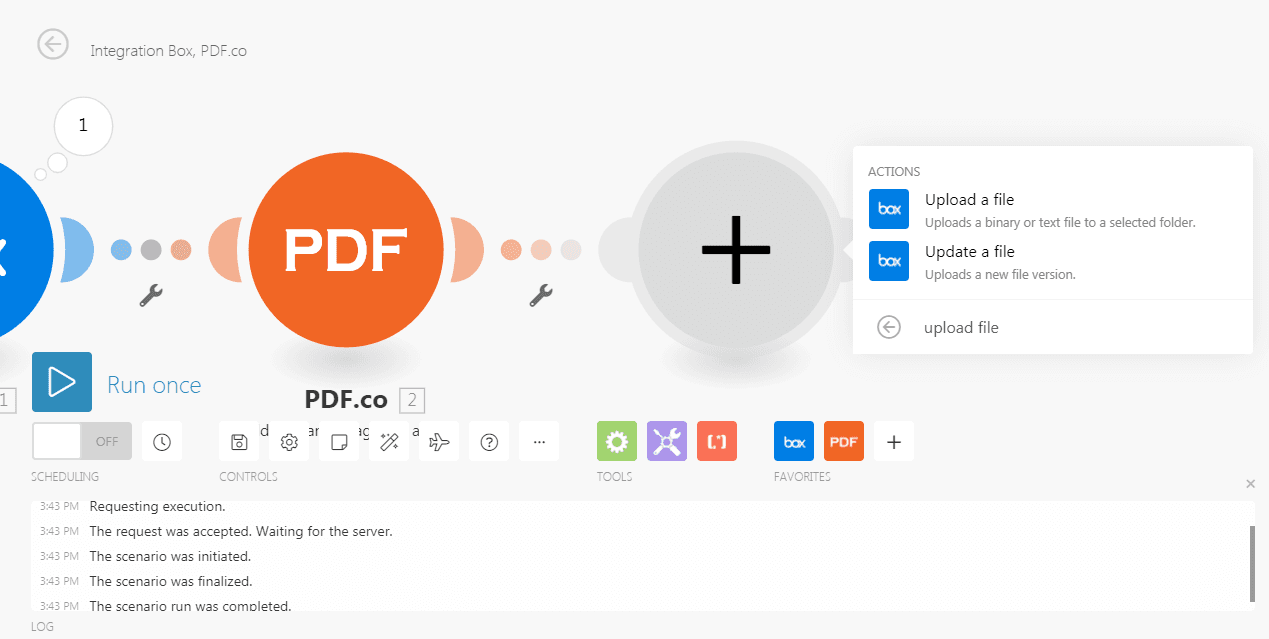
This next module is optional. After you have run your file through the PDF.co API, you can upload the modified file back to Box. To do that, let’s add a Box module and select Upload a File.
Step 8: Setting up the Module
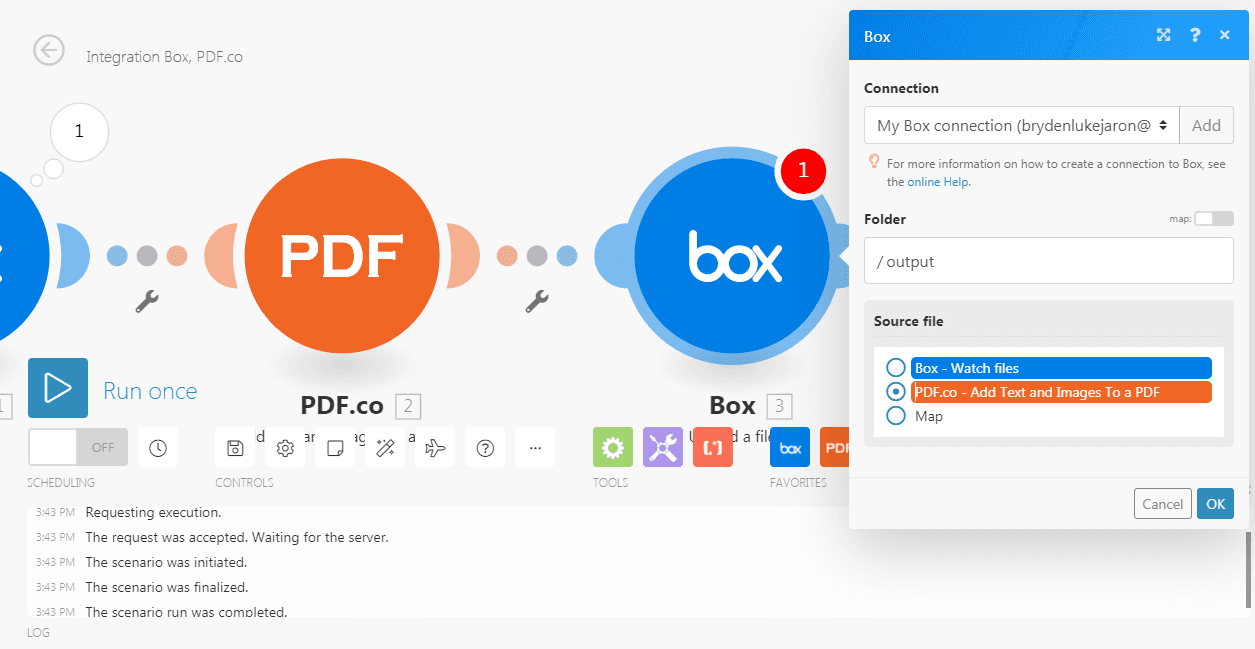
Now let’s set up the module.
- In the Folder field, select the name of the Box folder where you want to upload the file from PDf.co.
- For the Source file, choose PDF.co – Add Text and Images to a PDF.
You can now Run the scenario to see the result.
Step 9: PDF.co Output File Uploaded to Box
Excellent! We have successfully uploaded the PDF.co output file to Box. PDF.co generated files are temporary and if you want to share them with your customers and clients it is you store in recommended that you store in permanent cloud storage such as Box. Here’s the PDF.co file uploaded back in Box.
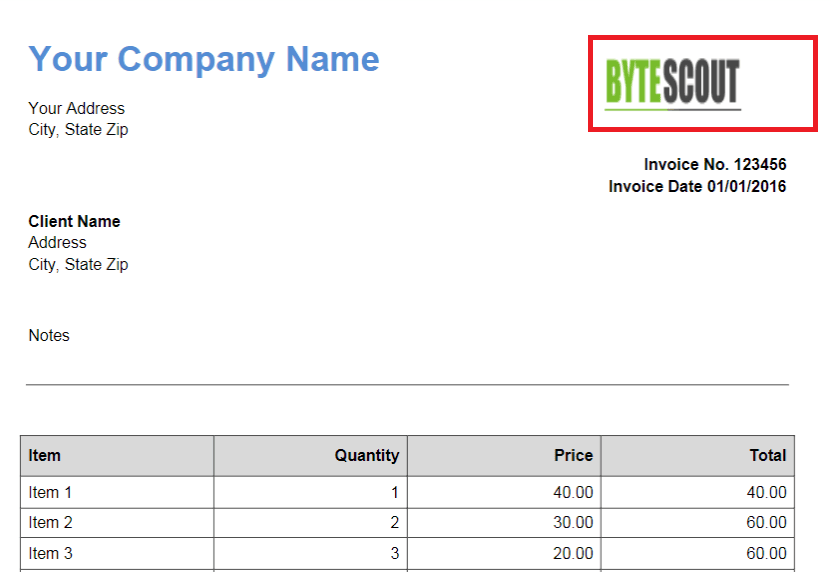
In this tutorial, we learned how to set up the Box to only fetch new files in a folder. We learned how to access these Box files in a PDF.co and we also learned how to store the PDF.co generated file back to Box.
Related Tutorials
