How to Populate PDF Form Fields and Convert to Read-Only with Make
This tutorial will show you how to fill in a PDF form automatically using data from Google Sheets and convert the filled form fields to a read-only format using PDF.co and Make.

Read on for our step-by-step guide on how to automatically populate fields in a PDF form and convert it to a read-only format using PDF Filler.
Step 1: Add Google Sheets Module
To begin, utilize the Google Sheet module to gather the required data that you wish to automatically populate in the PDF form. Alternatively, you may opt for a different module to acquire the data for populating the form field values.
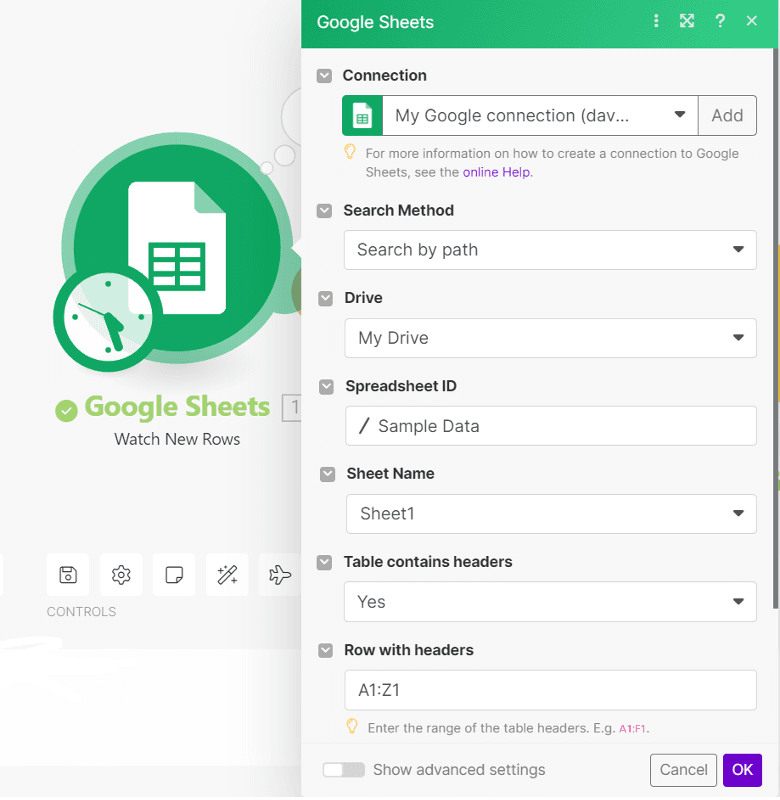
Step 2: Configure Google Sheets Module
Configure the settings for Google Sheets.
- Choose the "Search by path" method and select "My Drive" as the Drive to be used.
- Please specify the “Spreadsheet ID” and “Sheet Name” that correspond to the specific Google Sheet from which you would like to retrieve the data for populating the form fields.
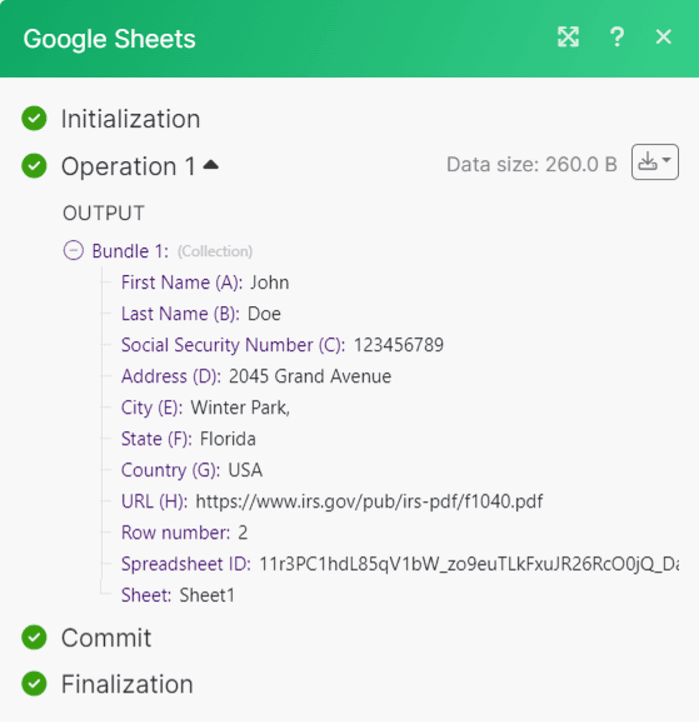
Step 3: Retrieve Data
After completing the setup for Google Sheets, execute the scenario to retrieve the data from the specified Google Sheets spreadsheet.
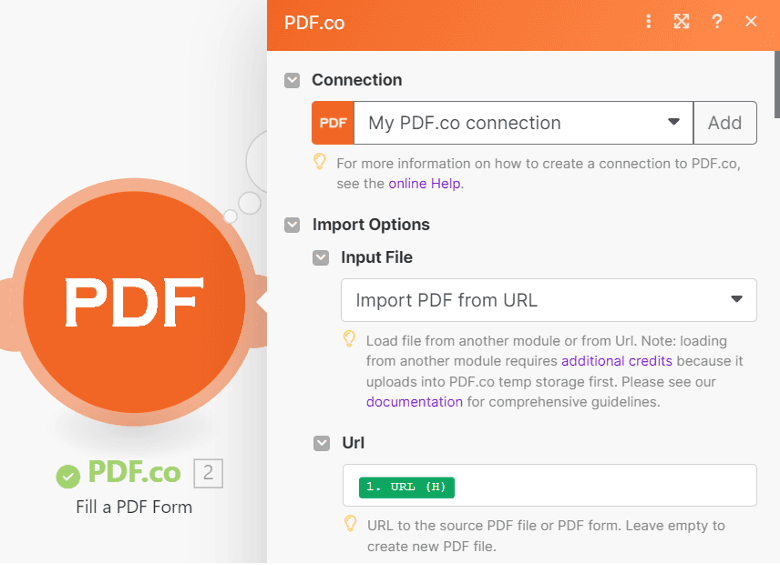
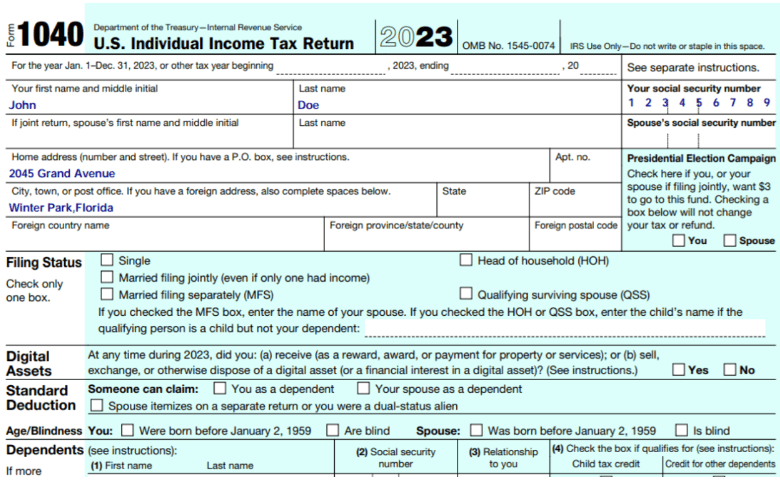
Step 4: Add PDF.co Fill a PDF Form
Now that we have obtained the information from Google Sheets, we can incorporate the PDF.co Fill a PDF Form functionality to automatically populate a form using the data from Google Sheets. To utilize the stored URL from Google Sheets, choose the "Import PDF from URL" option.
Step 5: Obtain Form Field Names
There are two options available to obtain the field names of form fields.
- The first option is to use the PDF Inspector tool, which enables you to directly retrieve the field names.
- Alternatively, you can utilize our Request Tester tool and access the API endpoint
/pdf/info/fieldsto retrieve the field names of the form fields.
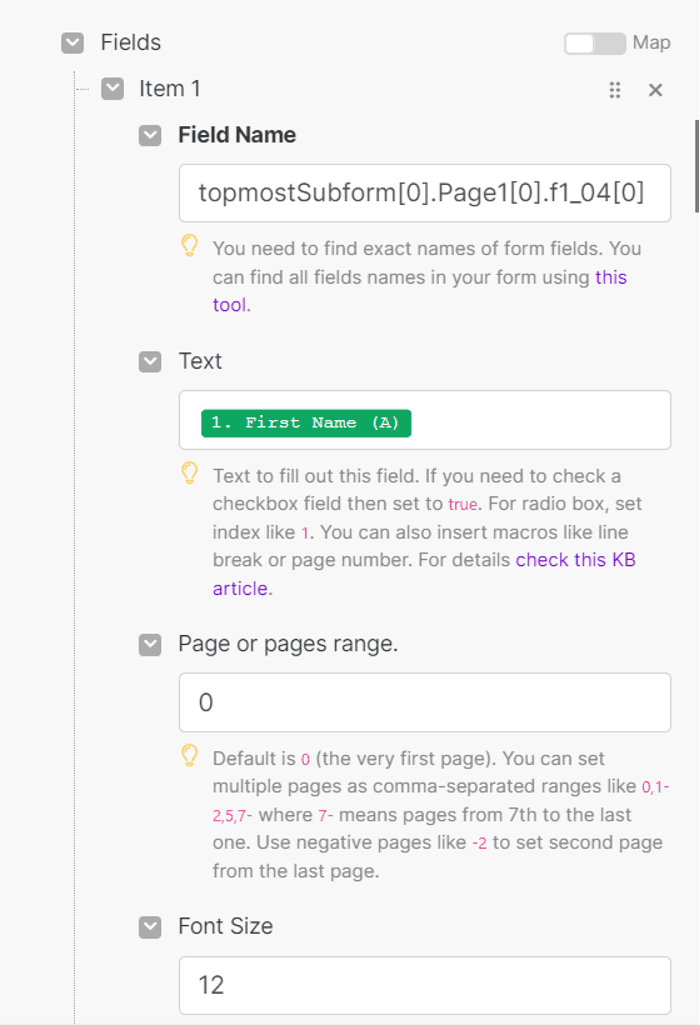
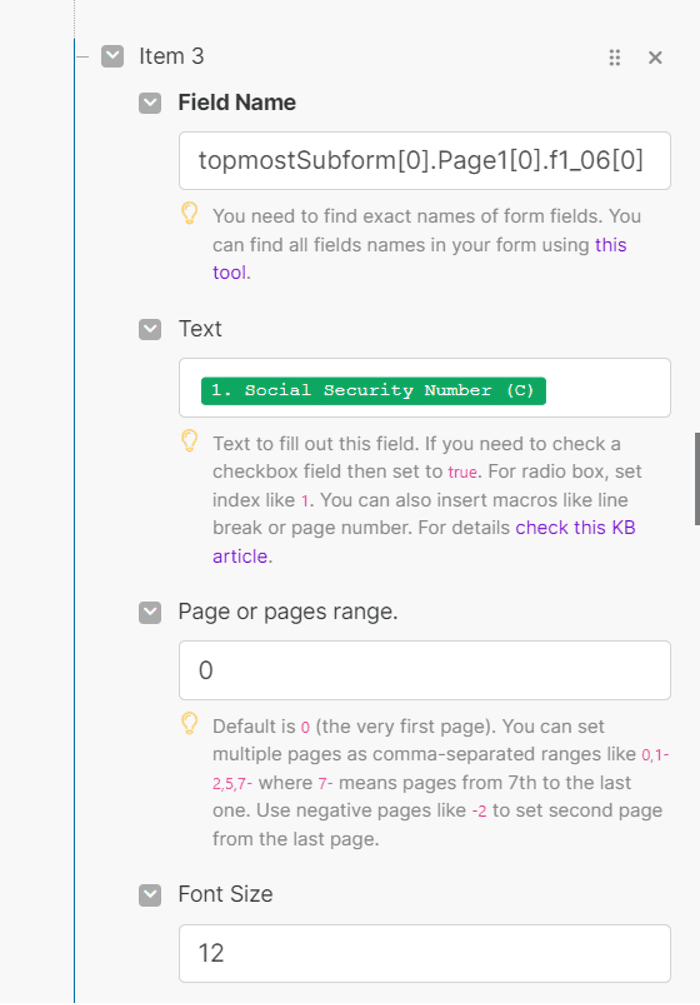
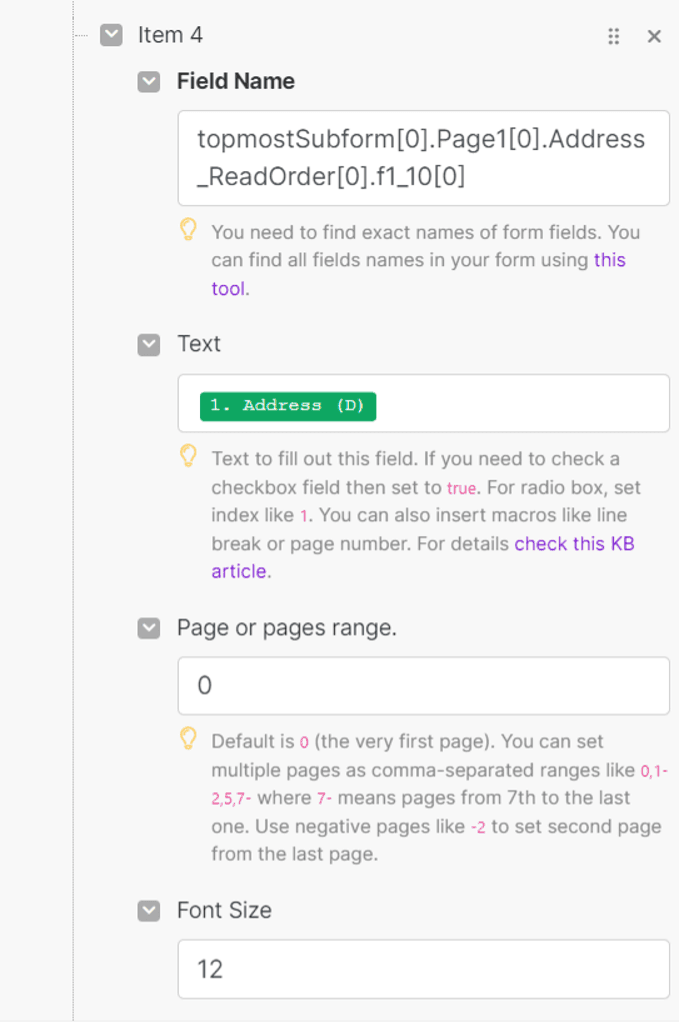
Step 6: Configure Settings
To map the data from Google Sheets to the PDF form, you need to provide the field's Field Name, the corresponding text from Google Sheets, Page Range, Font Size, and other parameters.

Step 7: Add Profile
To convert the form fields into a read-only format, please include the Profile { 'FlattenDocument()': [] }.

Step 8: Output PDF
After configuring the settings, execute the scenario. Once completed, you can copy and paste the generated URL into your web browser to view the output.
To ensure that the resulting file generated by the PDF.co API can be conveniently accessed in the future, we can store it in a cloud storage platform such as Google Drive or any other preferred service of your choice. By doing so, the file will be securely saved, allowing for permanent storage and convenient retrieval whenever you require it.
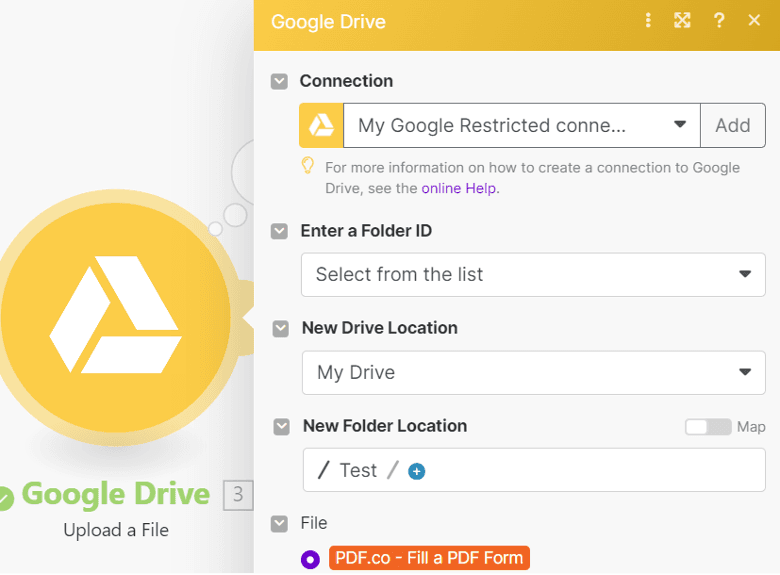
Step 9: Add Google Drive Module
We will now integrate the Google Drive module for uploading the output file and directly saving the generated file to our Google Drive account.
Step 10: Configure Google Drive Module
To configure Google Drive, please follow these steps:
- Provide the Folder ID in the designated field and select the "Select from list" option.
- Choose "My Drive" as the New Drive Location.
- Specify the Folder Name as the New Folder Location.
Step 11: Run Scenario
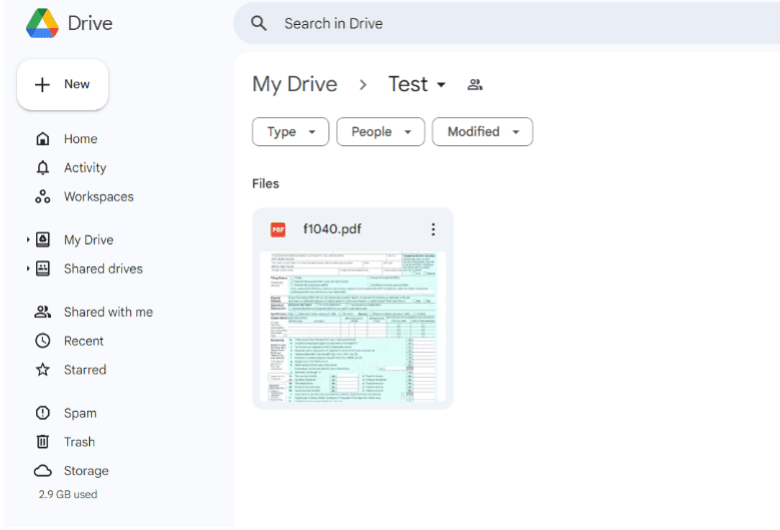
After you have configured the settings, proceed to run the scenario. Then, open your Google Drive account to view the uploaded file.
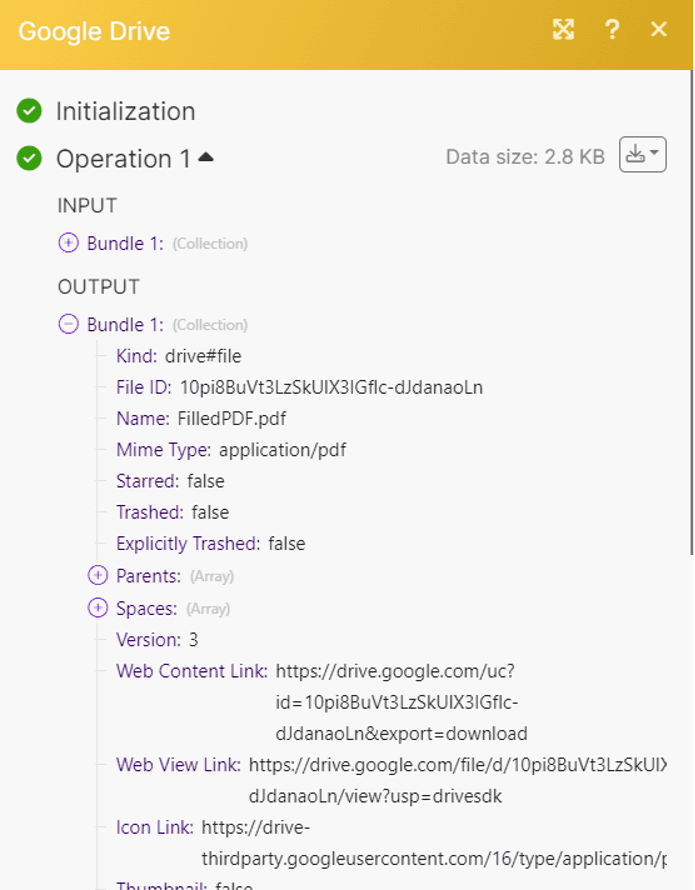
Step 12: File Uploaded to Google Drive
Here is the uploaded file in the Google Drive folder.
In this tutorial, we've explored a workflow to automatically fill PDF forms using data from Google Sheets and secure the information by converting the form fields to a read-only format. By using tools like PDF Filler and Make, you can not only save valuable time but also enhance data accuracy and security!
Related Tutorials
