Convert PDF to PNG Image using Zapier
3 Minutes Read
In this guide, you'll learn how to:
- Fetch a private PDF from Google Drive
- Convert it to PNG using PDF.co
- Save the image back to Google Drive
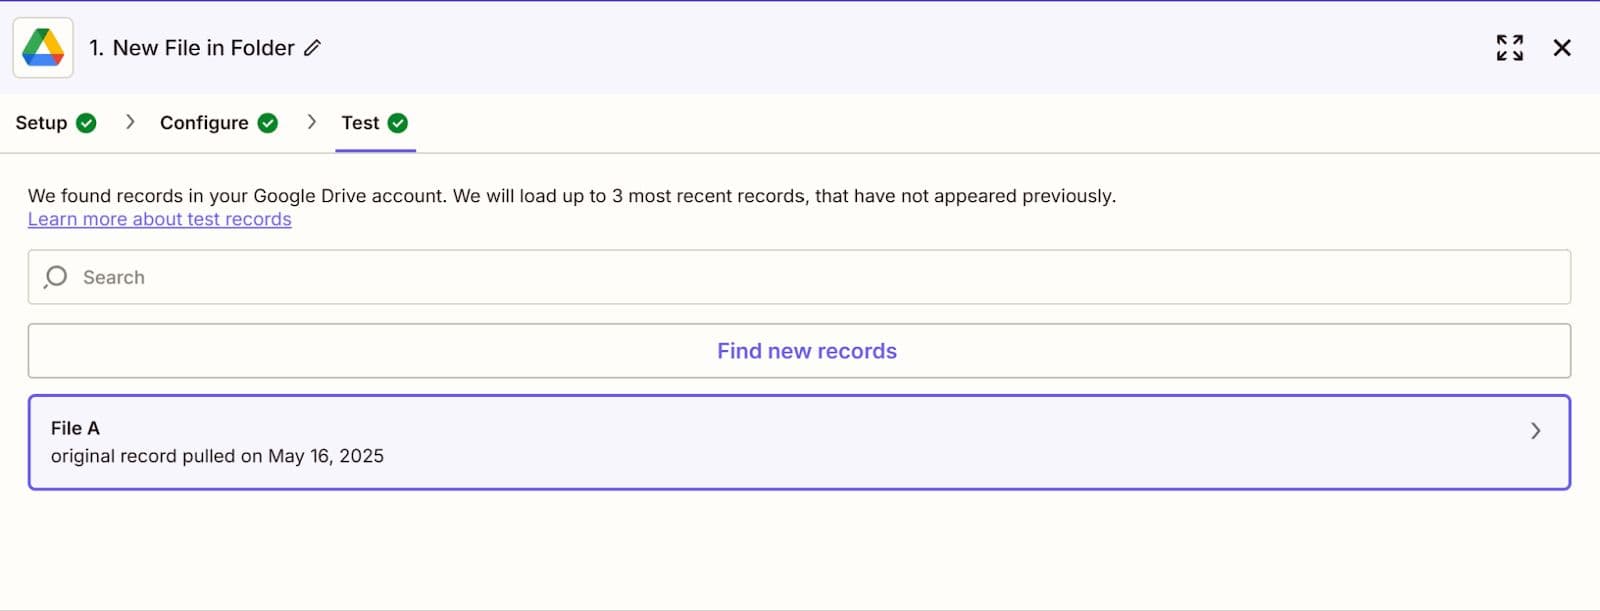
Step 1: Get the PDF from Google Drive
- Add Google Drive – New File in Folder as trigger. This watches for new PDF files in a specific folder.
- Choose the Drive and Folder where the PDF will be added.
- Test this step to make sure Zapier detects a file.
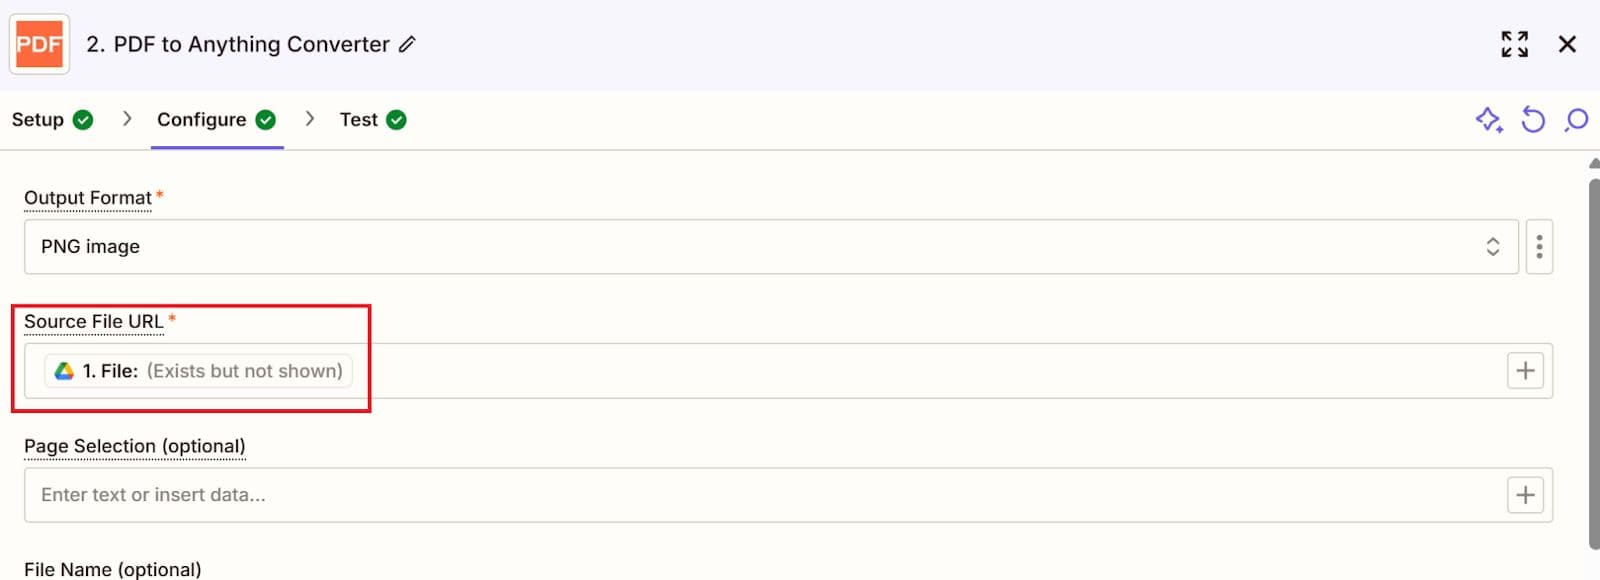
Step 2: Convert PDF to PNG with PDF.co
- Add PDF.co – PDF to Anything Converter
- Connect your PDF.co account
- Get your API Key here: https://app.pdf.co/
- Set it up:
- Output Format: PNG Image
- Source File URL: File: (Exists but not shown) from Step 1
- (Optional) Add output file name or other options if needed
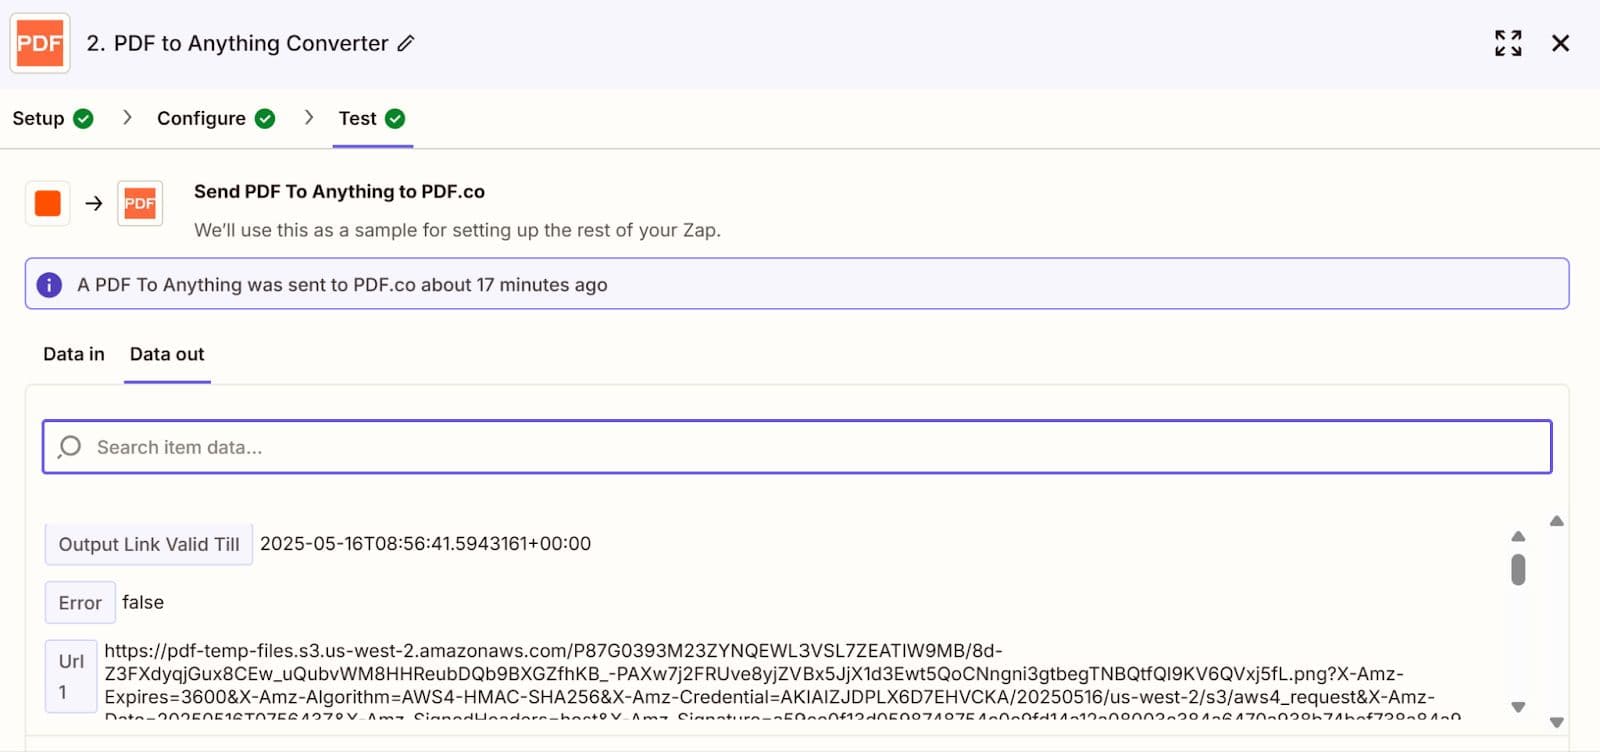
- Test the step
- Make sure the conversion works
- You can copy the result URL to view or download the image
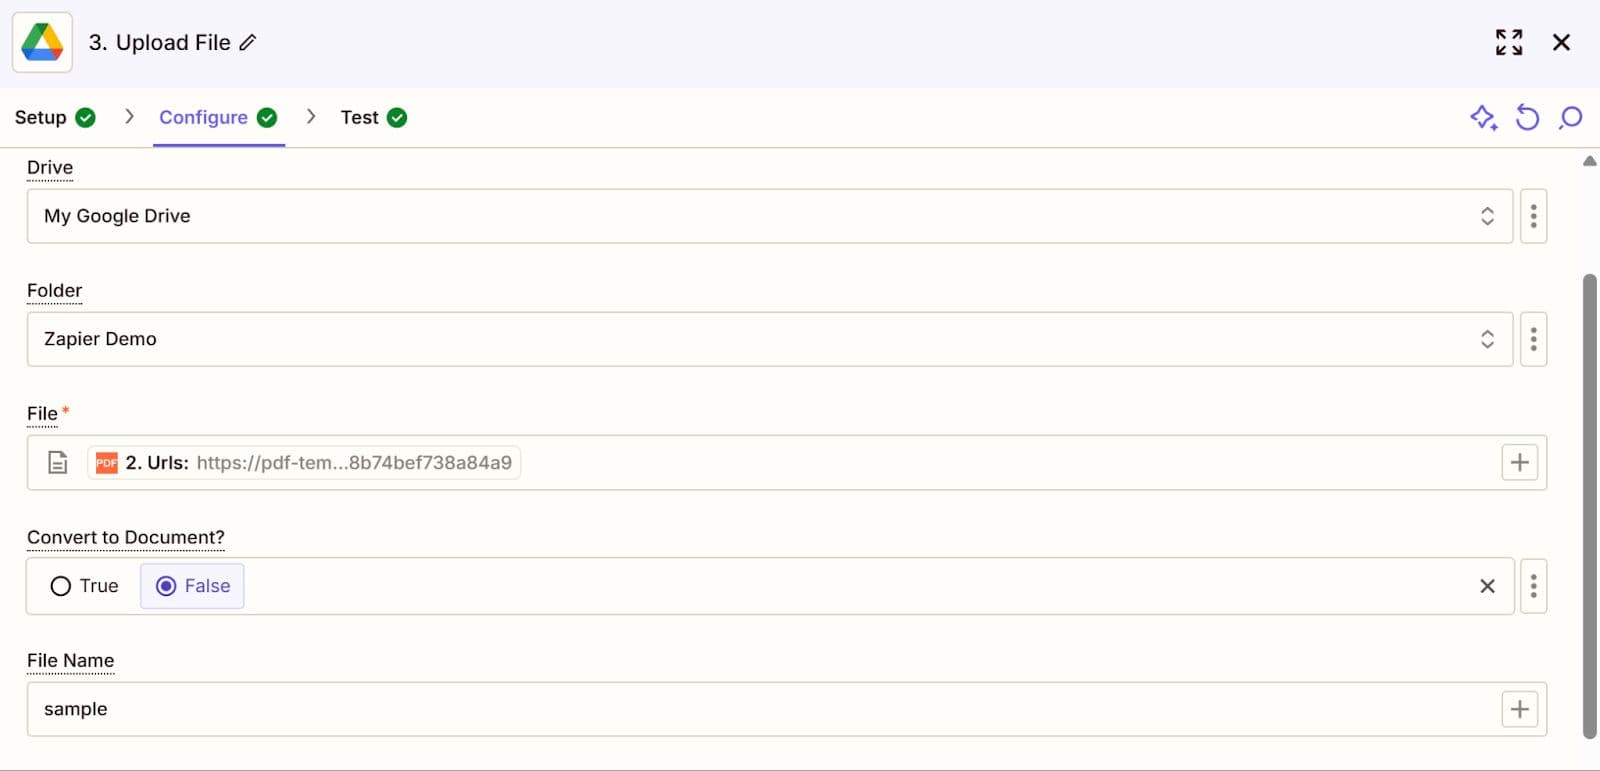
Step 3: Save Image(s) to Google Drive
- Add Google Drive – Upload File
- Select your Drive and Folder to save the image
- For the "File" field, select Urls from Step 2
- Set "Convert to Document" to
False
Important Notes
- If your PDF has only one page, the output will be a single PNG file.
- If your PDF has multiple pages, Zapier will automatically zip the images.
- To avoid a ZIP file and upload individual image files, you’ll need to:
- Split the PDF into separate pages
- Loop through each page
- Convert each page to PNG using the PDF to Anything Converter
This follows a process similar to this tutorial: Automate Invoice Splitting & Data Extraction in Zapier
Finally publish your Zap and you now have a working automation to turn PDFs into images and store them in Google Drive.
Related Tutorials
See Related Tutorials


