Merging Documents from Jotform Submission to PDF and Save to Dropbox using PDF.co and Make
Merging various documents from Jotform submissions to PDF using PDF.co and Make is an easy and efficient process that simplifies data organization and sharing. By utilizing the features of PDF.co, you can easily combine Jotform submissions, whether they are in PDF, PNG, JPG, and more into a single PDF document.
With PDF.co and Make, you can enhance your workflow and improve data management, particularly when dealing with multiple submissions from Jotform or similar online form platforms. Whether you are a business professional, researcher, or any individual dealing with data-intensive tasks, this merging solution simplifies the process and allows you to focus on more important aspects of your work.
In this guide, we will explore how to merge documents and expense report from Jotform submissions to PDF using the powerful tools provided by PDF.co and Make. Merging Jotform submissions into a single PDF document can significantly simplifies your data management process, making it easier to organize and share the information collected from various forms.
Kindly follow along with this simple step-by-step guide below to merge various documents and expense report from Jotform submissions to PDF and save to Dropbox. So let’s get started!
IN THIS TUTORIAL
Step 1: Create a New Scenario
- Let’s start by opening your Make account and create a new scenario.
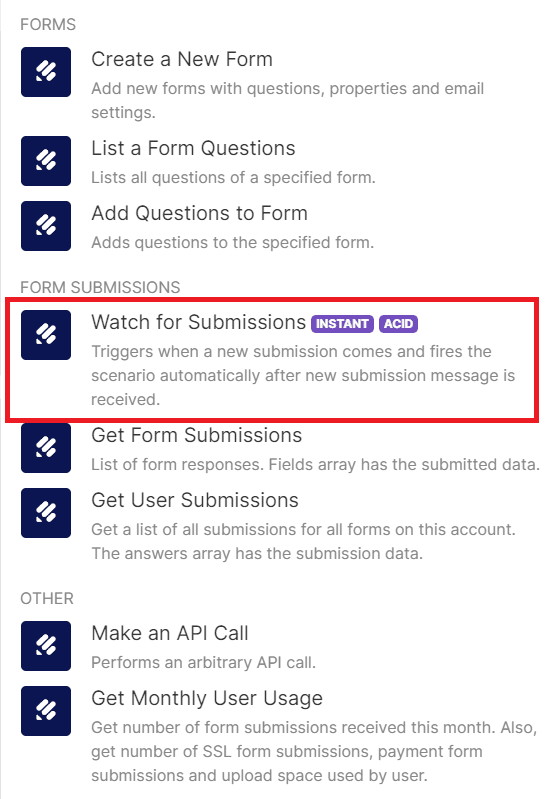
Step 2: Add Jotform and Watch for Submission Module
- Next, search and select the Jotform app. Then, choose the Watch for Submission module to triggers when a new submission comes and fires the scenario automatically after new submission message is received.
Step 3: Create a Webhook
Let’s set up a Webhook for Jotform submissions.
- Start by linking your Jotform account to Make. This will authorize Make to access your Jotform account securely.
- Then, enter the name of the specific form that you want to use for Jotform submissions. This ensures that Make knows which form’s data to capture and process.

Step 4: Add Iterator Tools
- In this step, we will incorporate Iterator tools, which will enable us to access the details of all files and perform operations on each file as a whole.

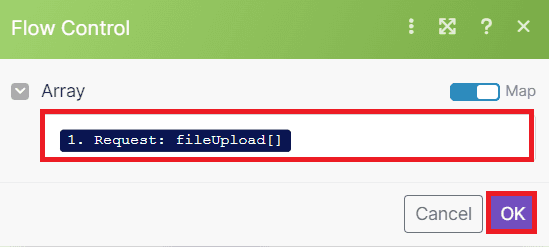
Step 5: Iterator Flow Control
- Within the Array section of Flow Control, look for the Jotform Request File Upload array within the options available. Select the identified array, which contains all the uploaded files from the Jotform submission.
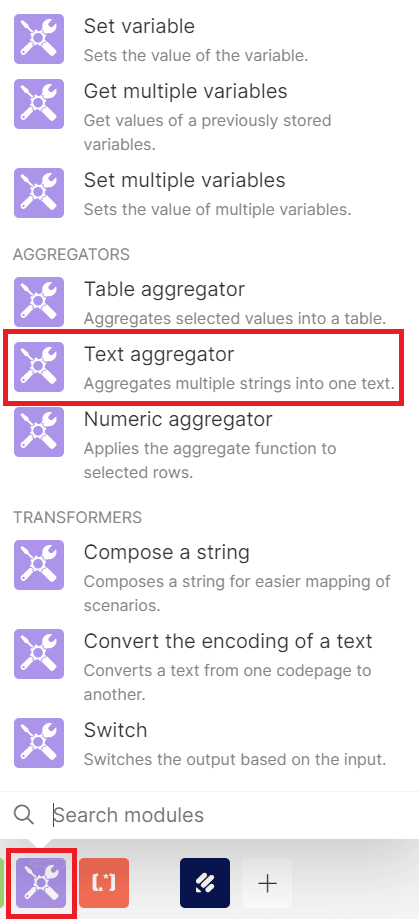
Step 6: Add Text Aggregator Tools
- After adding the Jotform Request File Upload, proceed to add the Tools module and select the Text Aggregator option. This functionality allows you to aggregate multiple strings into a single text output.
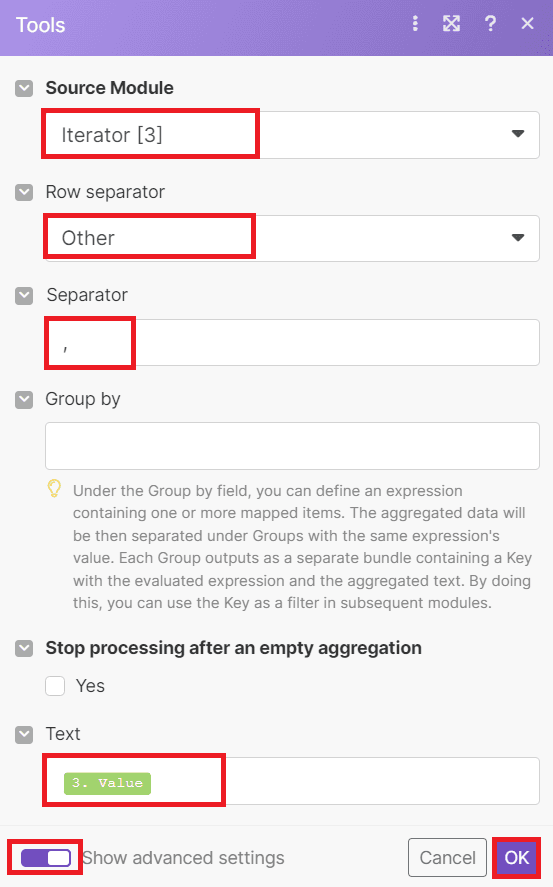
Step 7: Setup Text Aggregator
Setting up the Text Aggregator configuration.
- Start by enabling the Show Advanced settings option.
- In the Source Module field, choose the Iterator option.
- Set the Row Separator field to Other and specify the appropriate separator of your choice.
- In the Separator field, input a comma (,) as the delimiter to separate the URLs in the output.
- Lastly, for the Text field, choose the return value from the Iterator module.
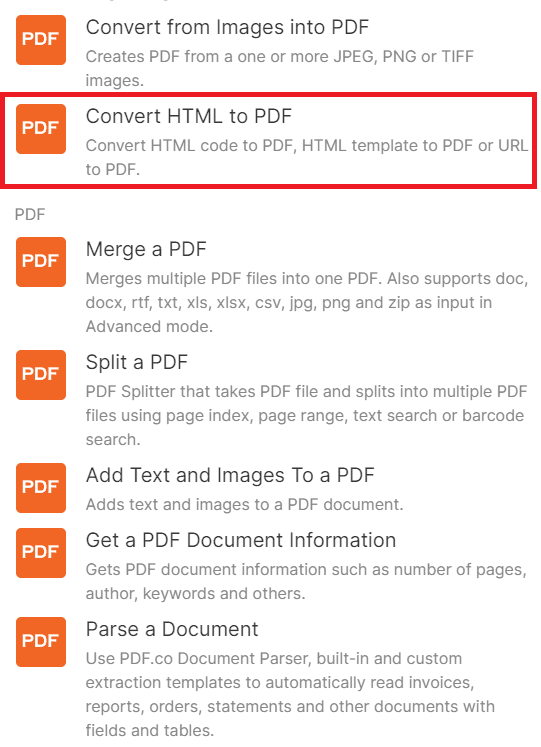
Step 8: Add PDF.co and Convert HTML to PDF Module
- In this step, we will add the PDF.co app and choose the Convert HTML to PDF module.
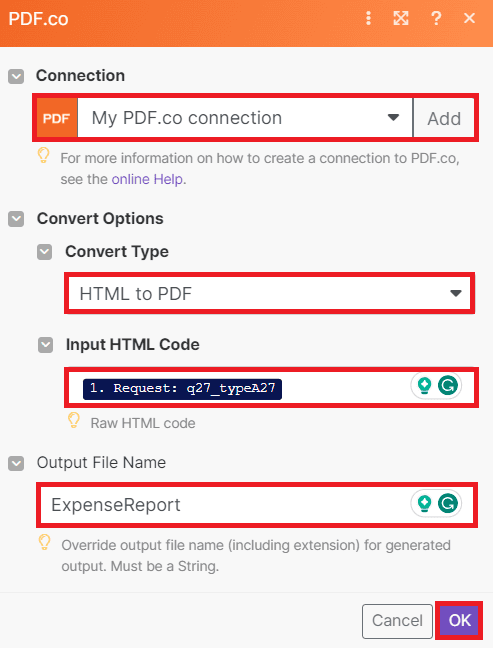
Step 9: Setup Convert HTML to PDF Configuration
Let’s configure the Convert HTML to PDF process.
- Begin by linking your PDF.co account to Make. Add the API key, which you can obtain from your PDF.co dashboard or by signing up through this link.
- Next, choose HTML to PDF as the Convert Type for the operation.
- In the Input HTML Code field, select the Jotform request where you have stored the expense report data. This will be the source from which the conversion will take place.
- Lastly, enter the desired name for your output file in the Output File Name field. This will be the name of the PDF file generated after the conversion.
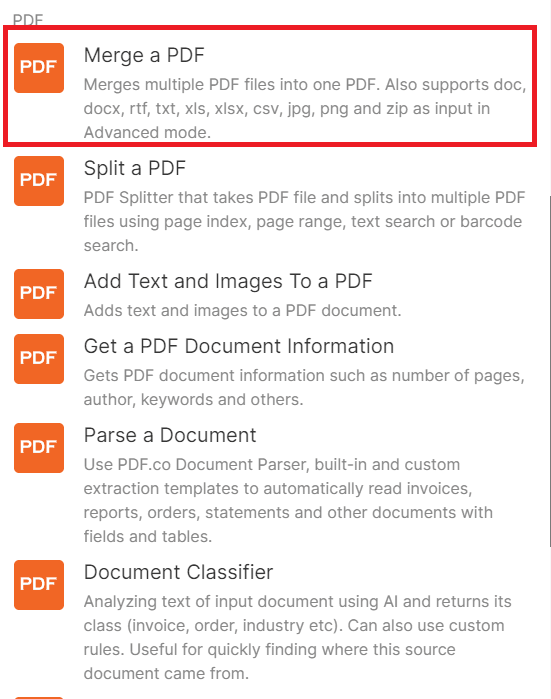
Step 10: Add PDF.co and Merge a PDF Module
- In this step, we will add again the PDF.co app and choose the Merge a PDF module to merge multiple documents into a single PDF file.
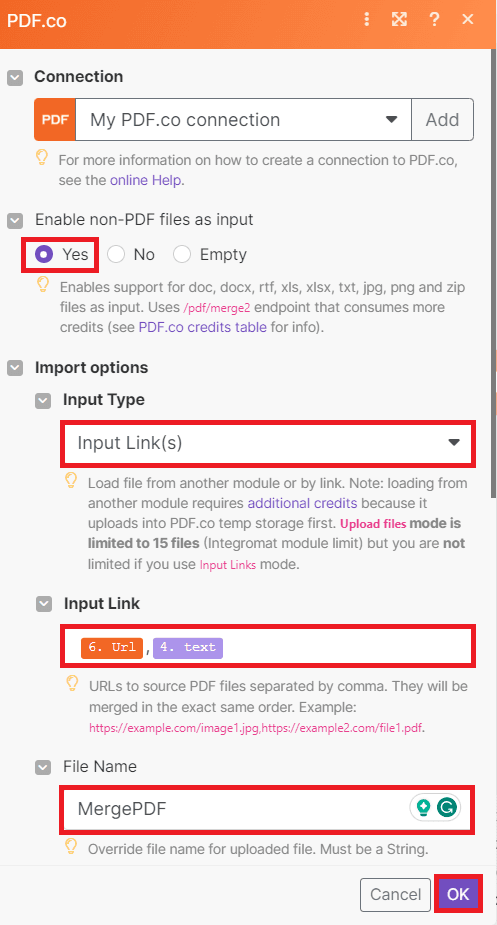
Step 11: Setup Merge a PDF Configuration
Let’s set up the Merge a PDF process.
- In the Enable non-PDF files as input field, select the Yes option. This enables the system to convert non-PDF files into PDF format before merging them.
- For the Input Type field, choose the Input Link(s) option. This allows you to load files by providing their links.
- In the Input Link field, input the resulting URL from the HTML to PDF operation. Additionally, enter the Text which contains the uploaded files from the Text Aggregator.
- Lastly, enter the desired name for your Merge PDF output in the Output File Name field. This will be the name of the final PDF file generated after the merging process.
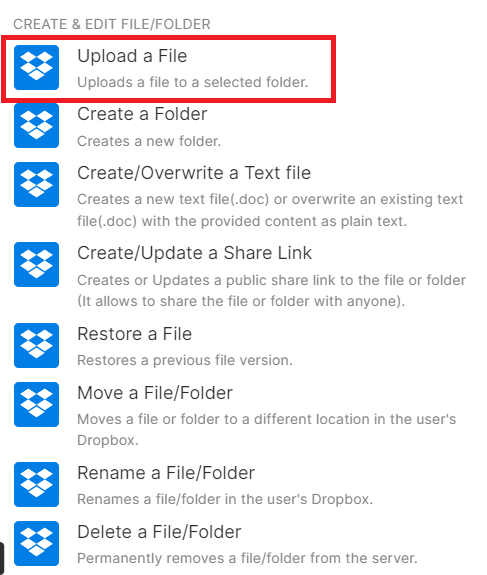
Step 12: Add Dropbox and Upload a File Module
- For the last step, we will add the Dropbox app and select the Upload a File module so we can save the merged PDF output to the Dropbox folder.
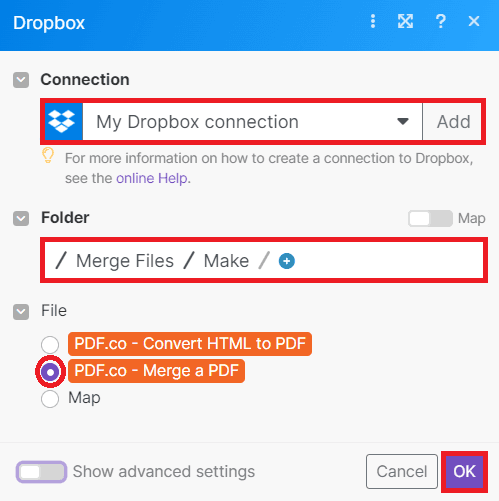
Step 13: Setup Upload a File Configuration
Let’s set up the Upload a File operation.
- Start by connecting your Dropbox account to Make. This step will authorize Make to access and interact with your Dropbox account securely.
- In the Folder field, choose the specific folder in your Dropbox account where you want to upload the Merged PDF file. This is the location where the final PDF document will be stored after the merging process is complete.
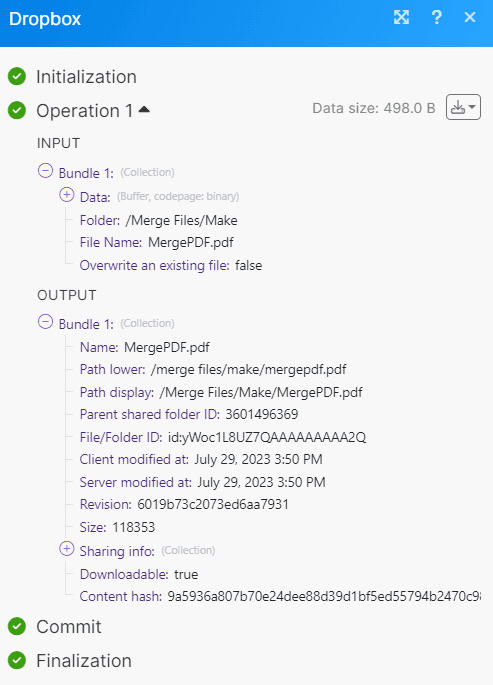
Once you have done setting, run the scenario to execute the workflow and to ensure that it was set up correctly.
Step 14: Run Scenario Result
- Congratulations on successfully configuring the scenario! The files and expense report have been merged into a single PDF document and saved to your designated Dropbox folder. To view the merged PDF output, simply log in to your Dropbox account and navigate to the specified folder.
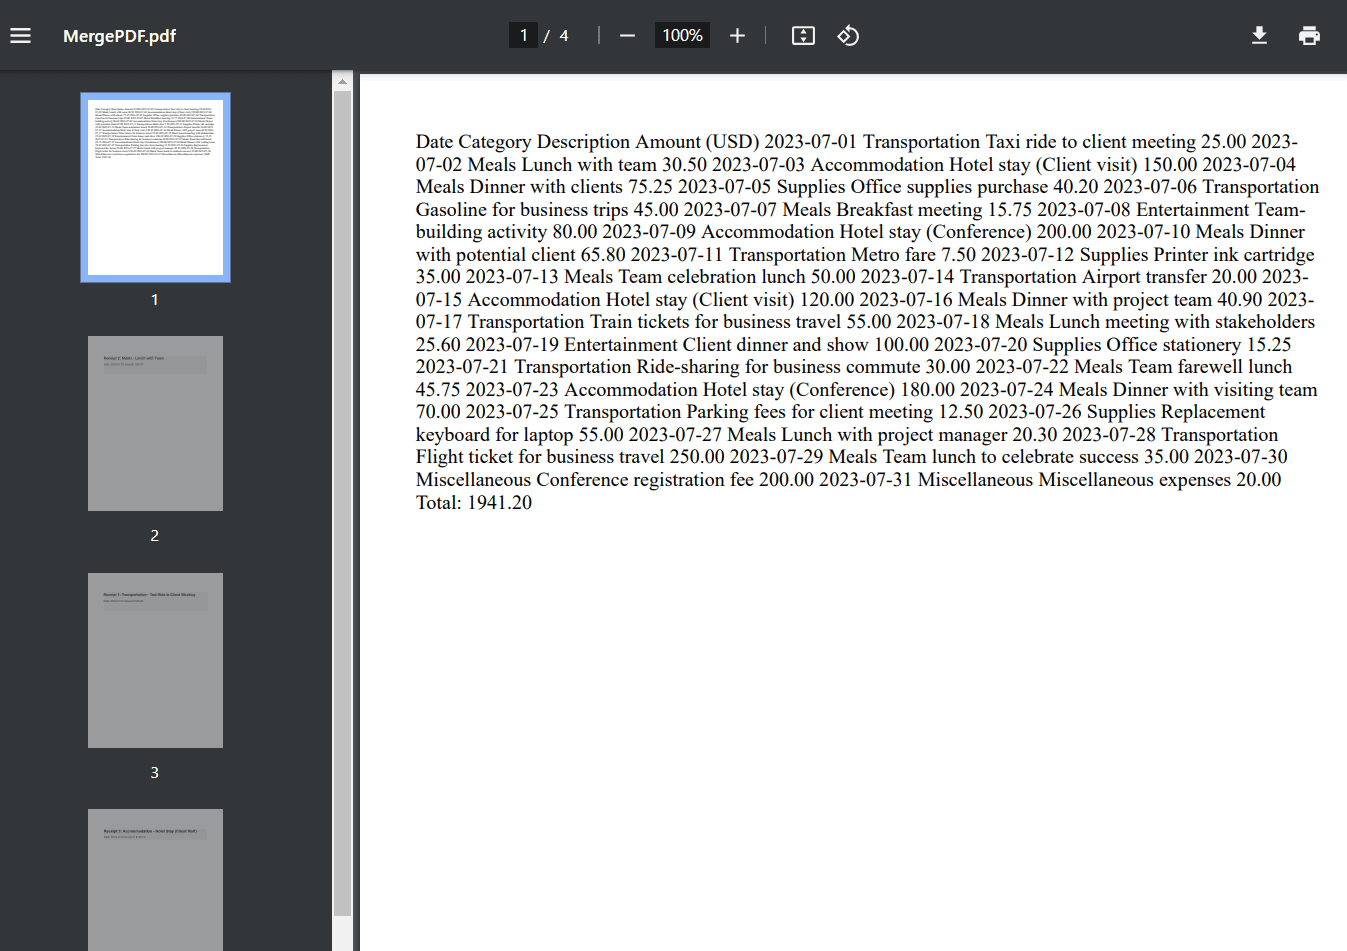
Step 15: Merged PDF Output
Here’s the successful combination of the multiple files and expense report from Jotform submission into a single merged PDF document.
In this tutorial, you learned how to merge multiple documents and expense report from Jotform submission into a single PDF file and save to Dropbox folder using PDF.co and Make. You learned how to use the PDF.co HTML to PDF converter to convert the expense report into a PDF file. You also learned how to use the PDF.co PDF Merger to merge any documents into a single PDF file.


