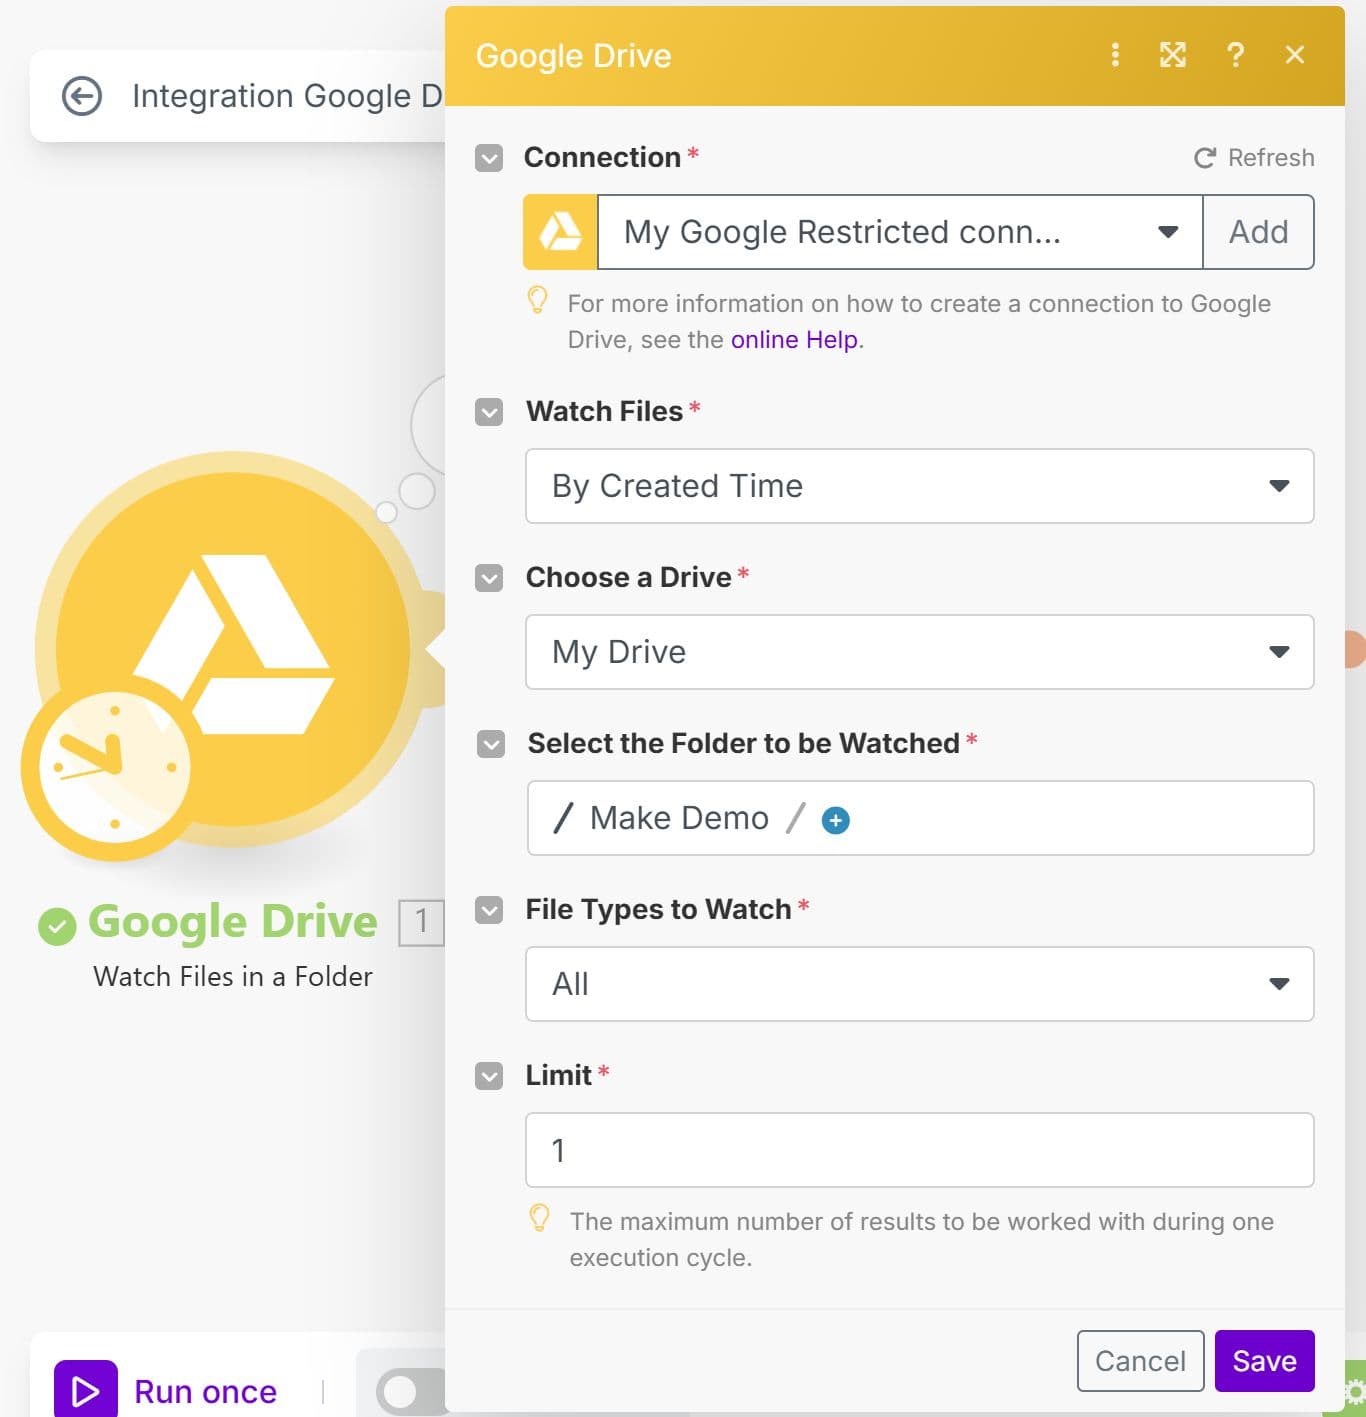
💡 This will trigger the scenario whenever a new file is added to the selected folder, one at a time.
Extract Plain Text from PDF or XPS to Google Sheets Using Make
4 Minutes Read
This tutorial shows how to download a PDF or XPS file from Google Drive, extract its text with PDF.co and save the result to Google Sheets.
The scenario uses PDF to Text (simple, no layout, fast) to extract plain text. The output does not preserve the document’s original layout, fonts or table structure.
What You'll Need
- A PDF.co API key
- A Make.com account
- A PDF or XPS file stored in Google Drive
- A Google Sheet to store plain text
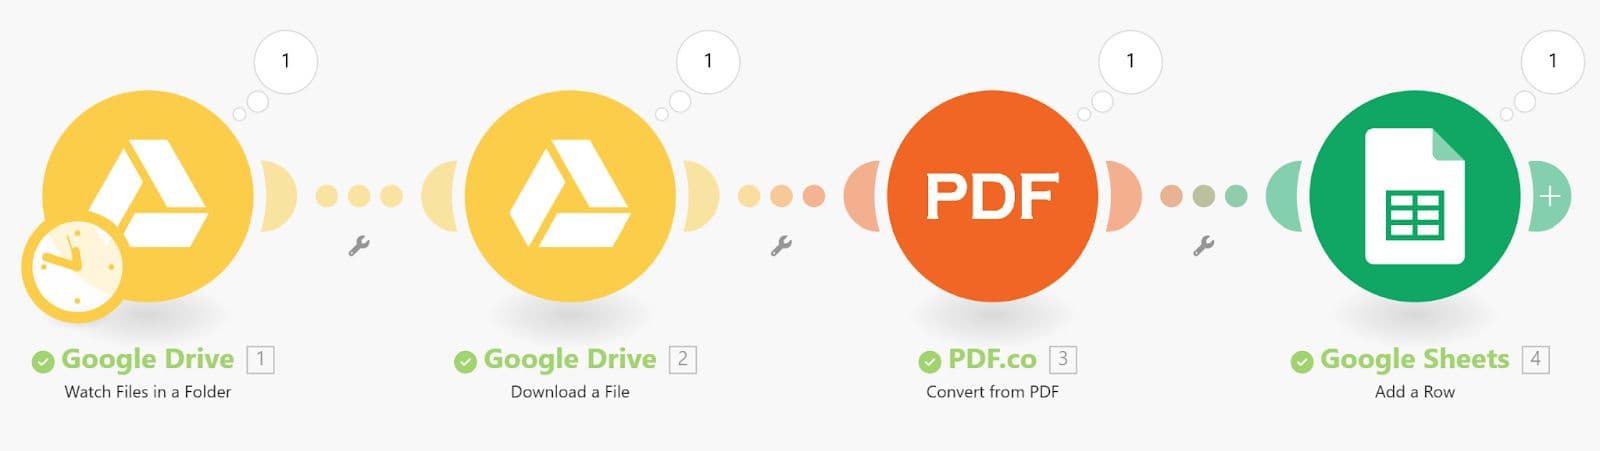
Step-by-Step Tutorial
Step 1: Google Drive → Watch Files in a Folder
- Create a new Scenario in Make.
- Add Google Drive → Watch Files in a Folder as the trigger module.
- Under Select the Folder to be Watched, choose the folder you want to monitor.
- Set Limit →
1(to process one file per run)
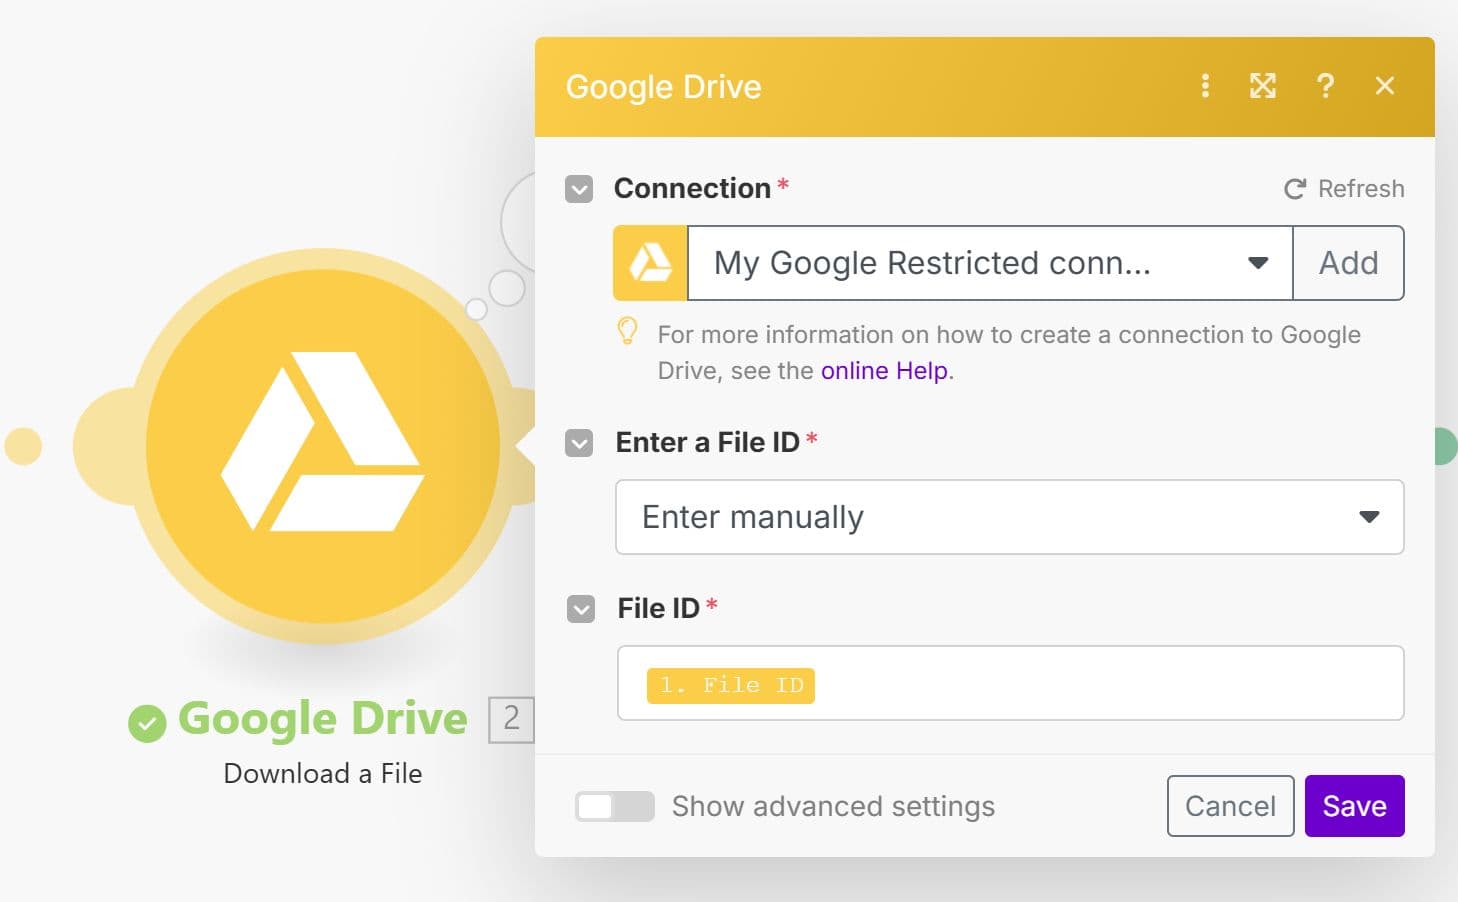
Step 2: Google Drive → Download a File
- Add the Google Drive → Download a File module.
- In the File ID field, select the output from the previous Watch Files in a Folder module.
💡 This step is especially useful if the file is private or has restricted sharing settings on Google Drive.
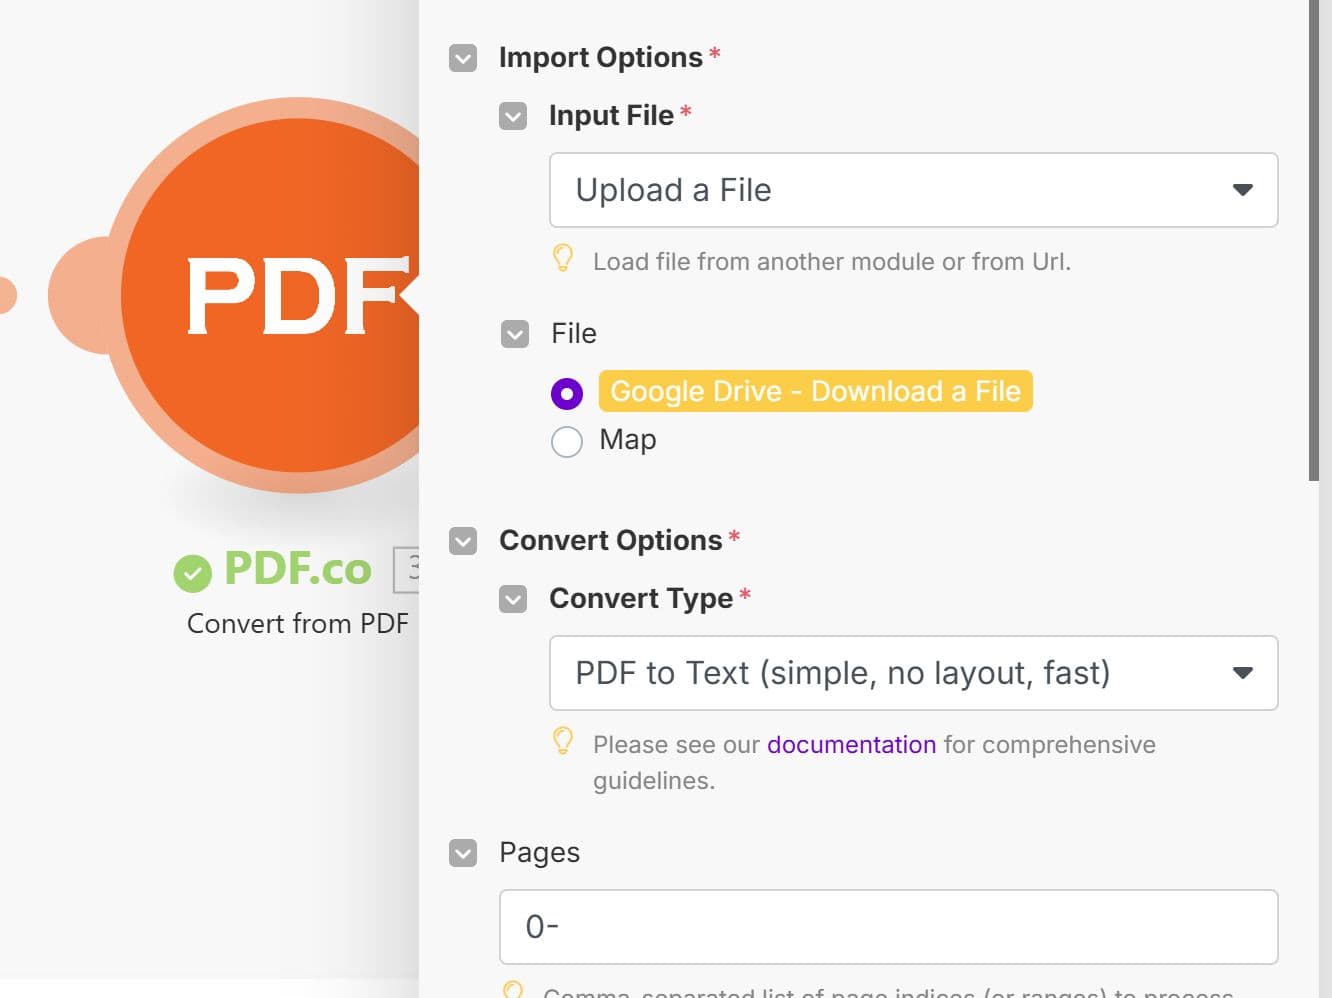
Step 3: PDF.co → Convert from PDF
- Add the PDF.co → Convert from PDF module.
- In the File field, select the output from Google Drive → Download a File.
- Set Convert Type →
PDF to Text (simple, no layout, fast). - Set Pages →
0-(to convert all pages in the document)
💡 PDF.co offers two PDF to Text converter options:
- PDF to Text (simple, no layout, fast): ideal for searchable PDFs with embedded text
- PDF to Text: includes OCR, for scanned or image-based PDFs requiring text recognition
If unsure, start with PDF to Text (simple, no layout, fast) and switch to PDF to Text if the output is incomplete.
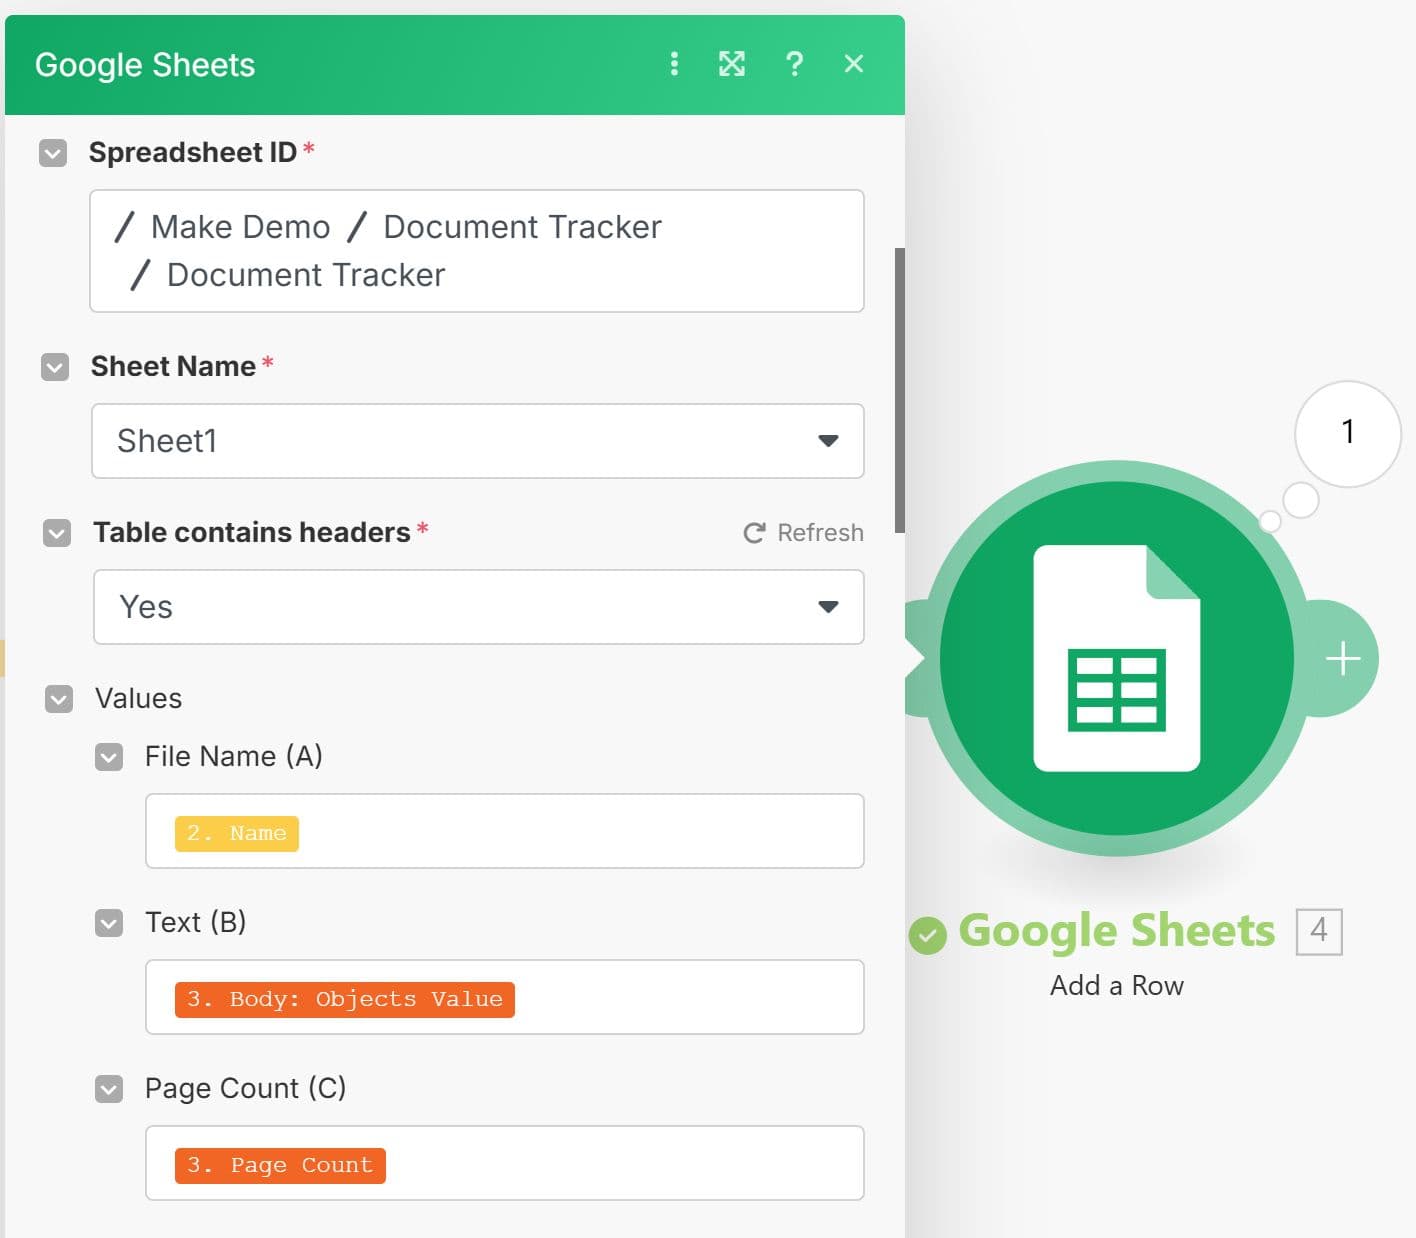
Step 4: Google Sheets → Add a Row
- Add the Google Sheets → Add a Row module.
- In Spreadsheet ID, select your target Google Sheet.
- Choose the Sheet Name (the specific worksheet/tab).
- Map the outputs from PDF.co and Google Drive modules to the corresponding columns in your sheet.
Step 5: Run & Test Your Scenario
- Click Run once in Make to execute your scenario manually.
- Check the logs and output to confirm each step runs without errors.
- Verify that the extracted text appears correctly in your Google Sheet.
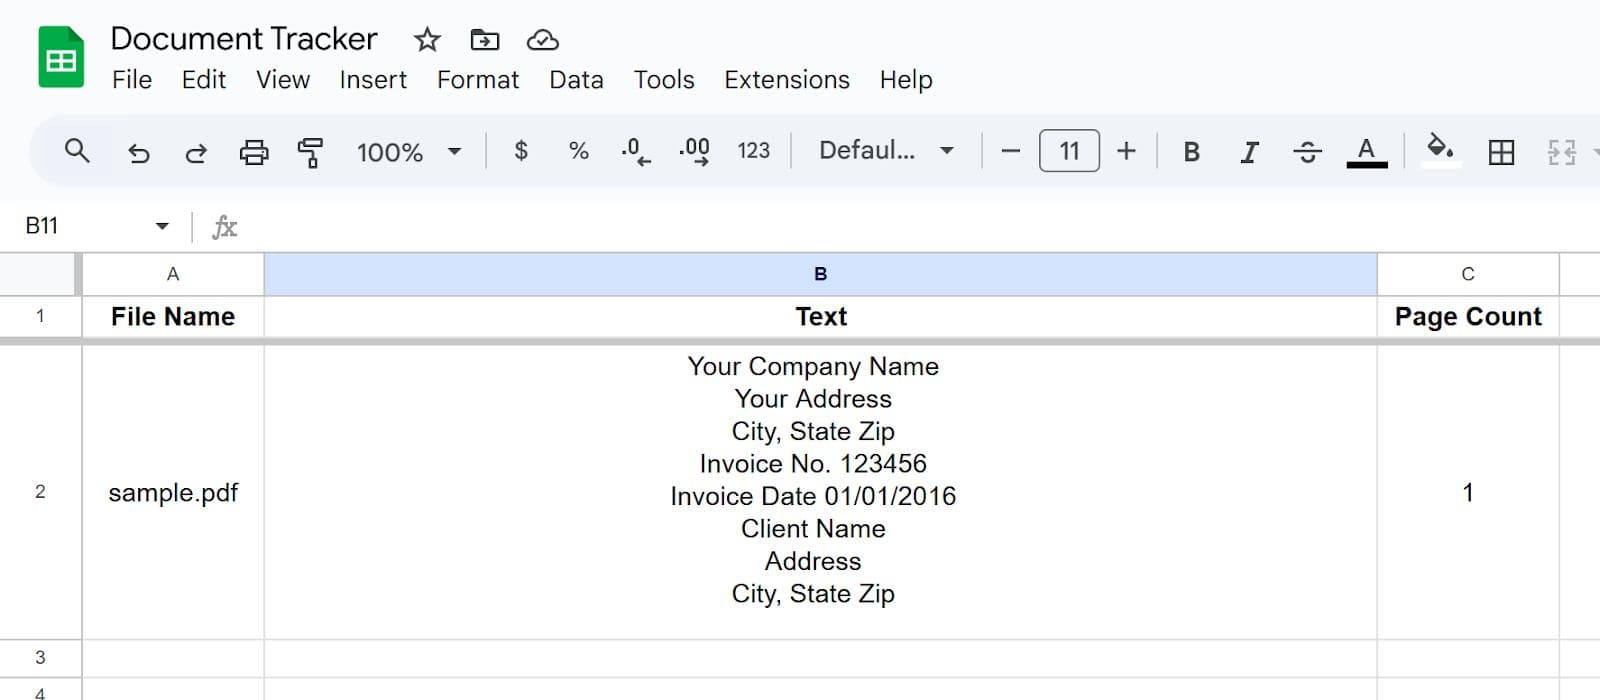
Check the Text Saved to Google Sheets
Run the scenario with a sample document, then compare the text saved to Google Sheets with the source file. Confirm that the required pages and lines are included and that the text is readable.
This workflow extracts plain text, so differences in spacing, columns and visual formatting are expected.
For a scanned PDF, select PDF to Text in the PDF.co Convert from PDF module to use OCR. Review the recognized text, especially names, dates and numbers—a successful conversion does not guarantee that every character was recognized correctly.
Once the sample output meets your needs, enable the scenario’s schedule to process new files automatically.
Related Tutorials