Note: Once configured, you can test this step to confirm it’s working correctly. Simply click the output URL or open it in a browser to view the processed file.
How to Search and Replace Text in a PDF File using PDF.co and Zapier
4 Minutes Read
In this tutorial, you'll learn how to automate the process of searching and replacing text in PDF files using PDF.co and Zapier. The workflow starts when a PDF is added to a Google Drive folder, triggers a text replacement action via PDF.co, and then saves the updated file back to Google Drive — all without manual editing. This is ideal for updating invoices, contracts, or forms efficiently.
Workflow overview :
Google Drive (Trigger) → PDF.co (Search & Replace Text) → Google Drive (Upload File)
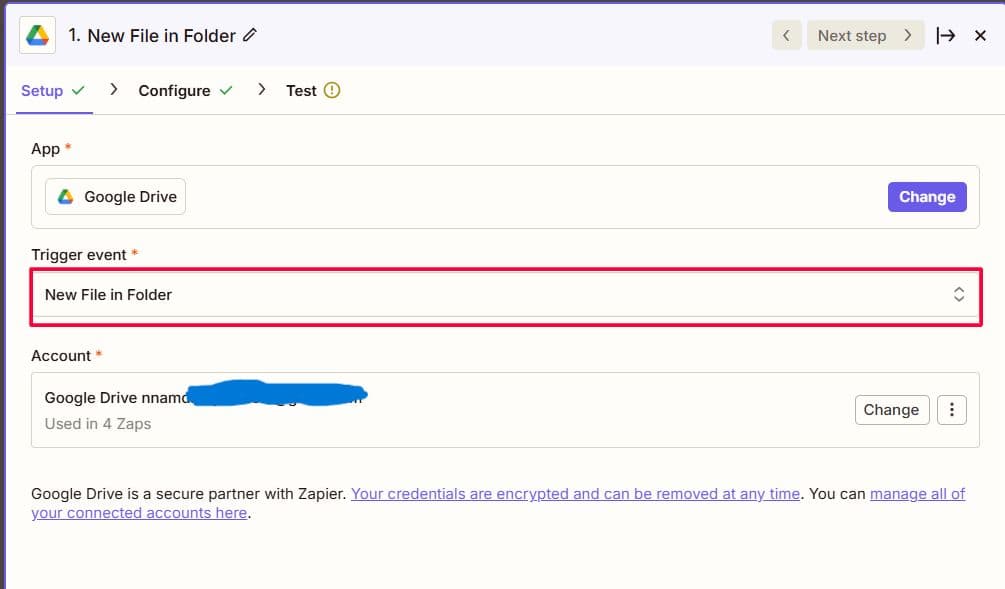
Step 1: Connect Google Drive as the Trigger
To begin, we need to set up Google Drive as the trigger for our automation. This ensures that whenever a new file is added to a specific folder, the workflow is activated.
Follow these steps:
- Connect your Google Drive account in the Zapier workflow.
- Search for and select the “Watch Files in Folder” module.
- Once selected, authorize access to your Google Drive if you haven’t already (ensure the folder is publicly accessible by setting the permission to “Anyone with the link”).
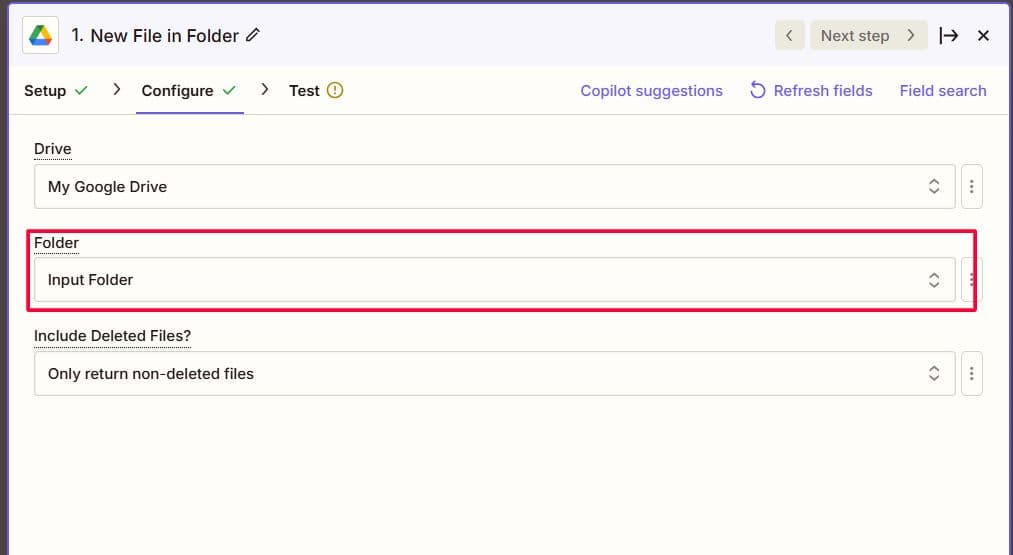
- In the module settings:
- Choose the specific folder where your sample invoices or documents are uploaded.
- This folder will be monitored for new files.
- Each time a new file is added to this folder, the workflow will automatically trigger.
This step sets the foundation for processing documents stored in Google Drive.
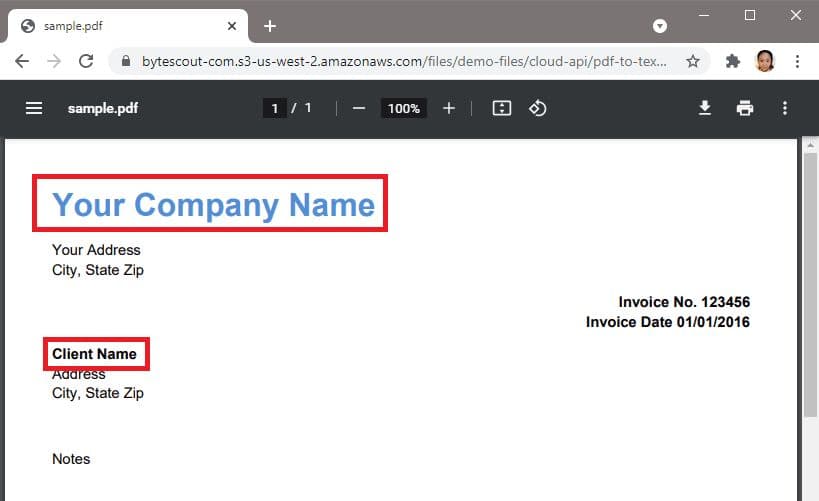
We will use this sample PDF Invoice and replace the highlighted Company Name and Client Name with different text.
Step 2: Connect PDF.co to Zapier
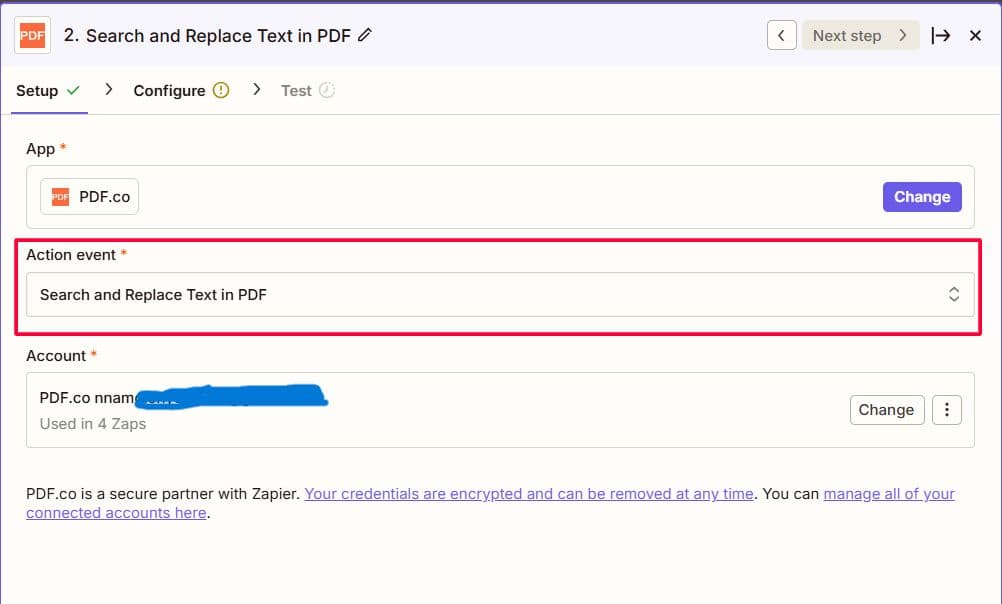
- After setting up your Google Drive trigger, add the PDF.co module to the workflow.
- Select PDF.co as the App in your Zapier workflow.
- Choose “Search and Replace Text in PDF” as the Action Event.
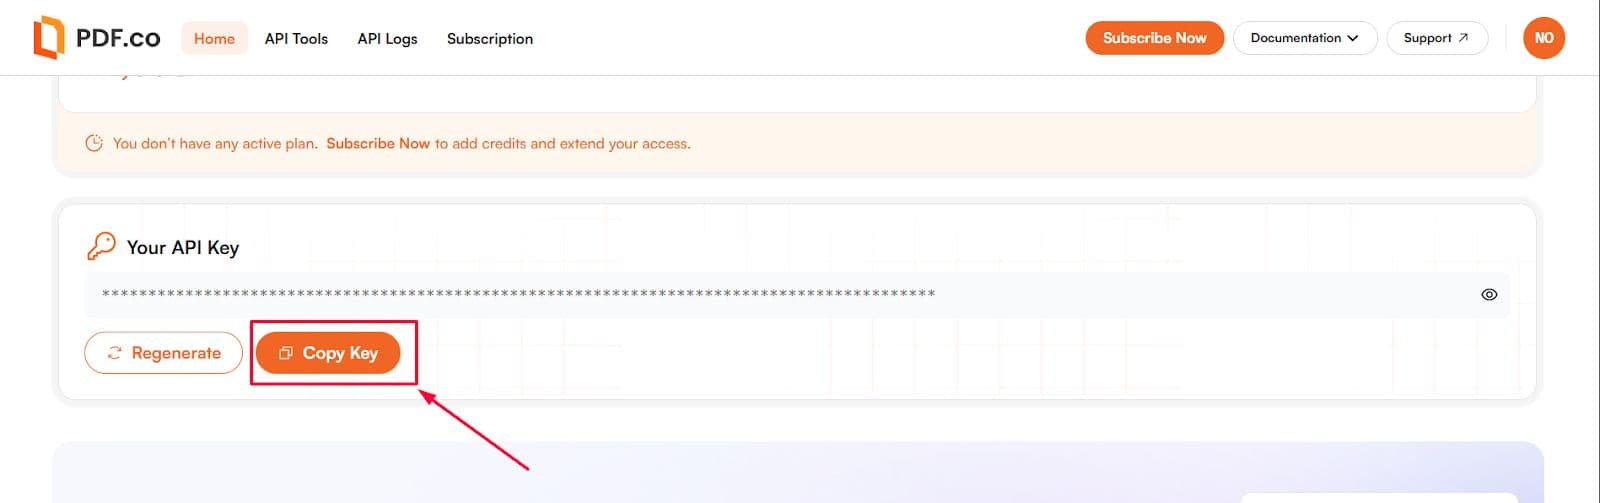
- Connect your PDF.co account using your API Key (from your PDF.co dashboard).

Step 3: Configure the “Search and Replace Text in PDF” Module
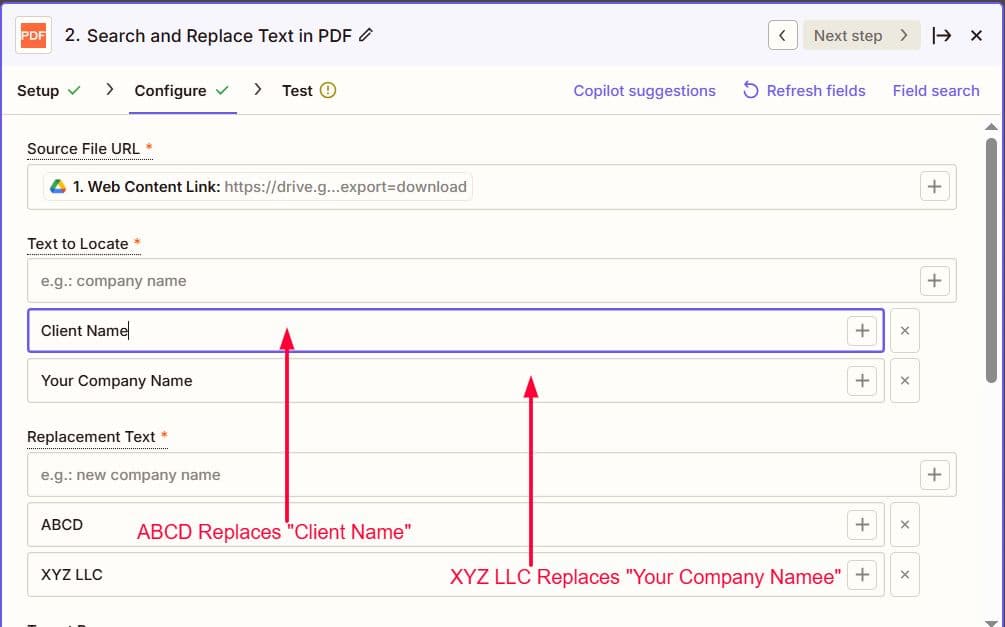
- In the “Source File URL” field, map the Web Content Link from the Google Drive trigger.
- In the “Text to Locate” field, input the text string you want to replace.
- In the “Replacement Text” field, enter the new text to replace the old one.
- For multiple text replacements, add multiple entries for “Text to Locate” and the corresponding “Replacement Text.”
Step 4: Zap Test Result
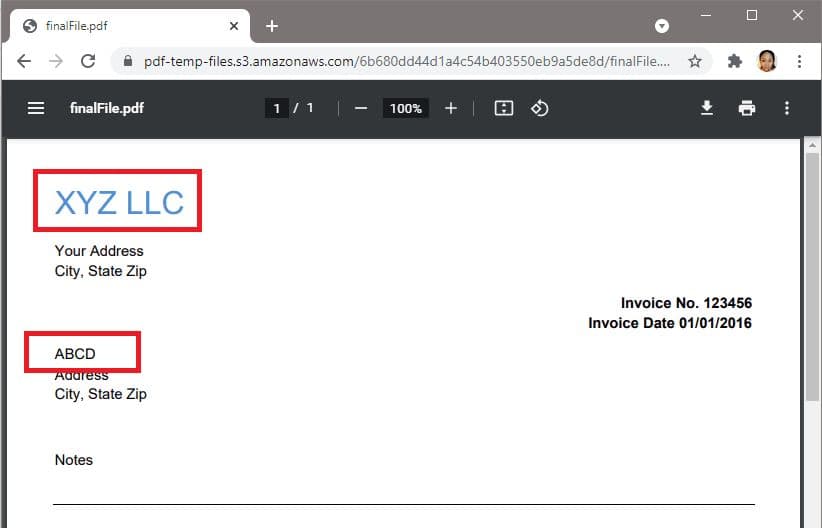
Great! Our PDF.co Zap test was successful. PDF.co generated a URL that we can use to view and download the PDF file. This URL is temporary and is set to expire after an hour by default.
You can use the output URL for:
- Previewing the result (simply open it in a browser)
- Feeding it into the next step in your Zap (e.g., sending by email or storing in Google Drive)
- Saving it permanently via cloud storage apps like Dropbox, Google Drive, etc.
This is now the sample PDF Invoice with a new Company Name and Client Name.
Step 5: Upload Output to Google Drive Folder

- Add a Google Drive module to your workflow.
- Select the “Upload a File” module.
- Choose the destination folder where you want the final output file to be stored.
- Map the output file from the previous step (e.g., the file processed by PDF.co) into the upload field.

This step ensures your final document is permanently saved in your selected Google Drive folder.
Additional Resources
To learn more about PDF.co's Search and Replace features and Zapier integration, check out the following documentation:
Related Tutorials
