Fill PDF Form From Mailhook Data and Send via Email using PDF.co and Make
Filling PDF forms becomes a simple process with PDF.co and Make, utilizing data received from Mailhook. Instead of printing out forms and manually inputting information, the integration allows you to automatically transfer data from Mailhook to the corresponding fields in the PDF document. Once the form is filled, you can save it or send it via email to the intended recipient. This eliminates the need for manual paperwork and ensures that the data is accurately captured and efficiently processed. With this integration, you can simplify your workflow and handle PDF forms easily.
In this tutorial, we will explore how to fill out PDF forms using PDF.co and Make integration, with data coming from Mailhook and sending it via email. This powerful combination simplifies the process of completing forms. So without further ado, let’s get started!
We will utilize a sample PDF form template and populate specific form fields with data sourced from Mailhook. By following the steps outlined, you will learn how to easily fill out the PDF form by automatically transferring the relevant information from Mailhook. This approach simplifies the process, allowing you to efficiently complete the form without the need for manual data entry.

Before we dive into filling out the PDF form, it's essential to first identify the field names of the form elements. These field names allow us to accurately specify which fields we want to populate with our data.
IN THIS TUTORIAL
Step 1: Extract Form Field Names
We'll use the PDF Inspector tool to extract the form field names. You can find the PDF Inspector in your PDF.co dashboard, or simply click the link provided to open it directly.
Step 1: Load PDF Form
Load your PDF form into the PDF Inspector.
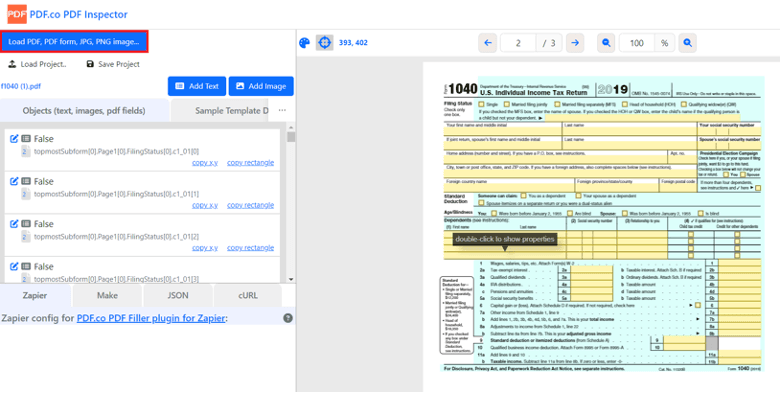
Step 2: Select the Form Field to Identify
Click on the form field you want to identify, and the field name will be highlighted on the left side of the screen. For example, a field name might look like this: topmostSubform[0].Page1[0].FilingStatus[0].c1_01[1].
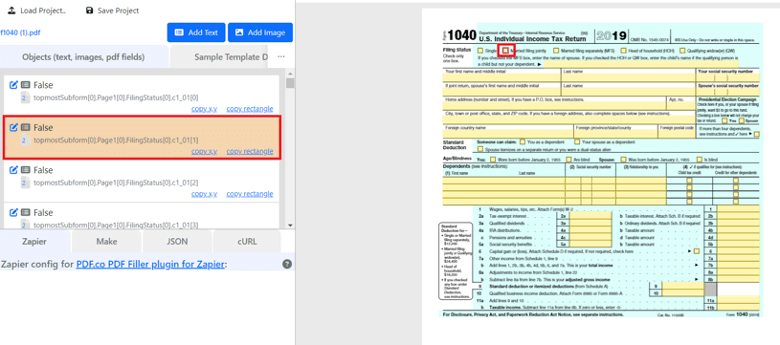
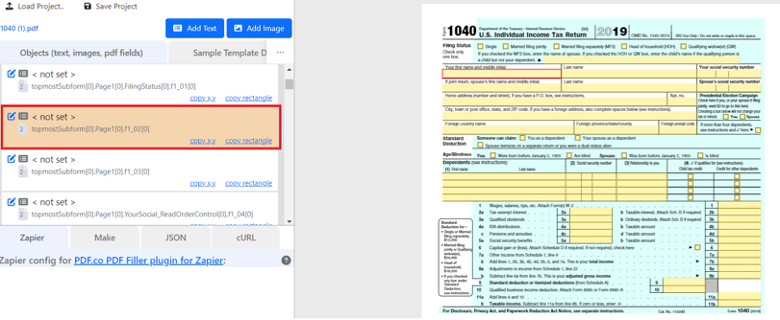
Step 3: Copy Form Field Names
Copy the field names for the fields you want to fill out in your form for later use.
Now that you have the field names, we’ll proceed to a step-by-step tutorial on how to populate the form fields using data from Mailhook in Make.com.
Step 2: Create a New Scenario
- Let’s start by opening your Make account and creating a new scenario.
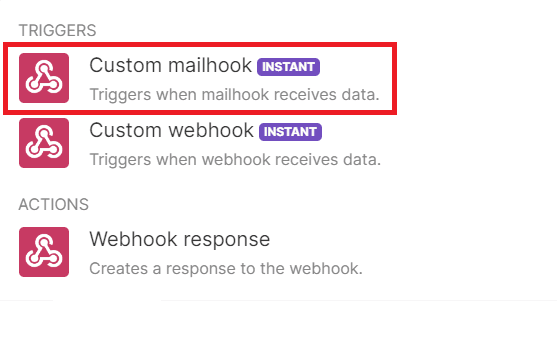
Step 3: Add Webhooks Module
- Next, you will need to locate and access the Webhooks application. Once you have found it, choose the Custom mailhook option, which is specifically designed to initiate actions when Mailhook receives data.
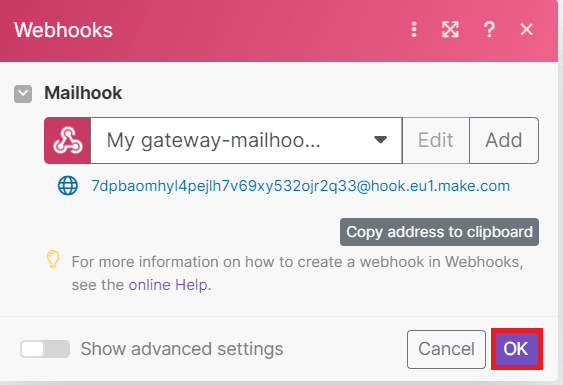
Step 4: Create Webhooks Mailhook
- Then, let’s move forward by creating a Webhooks Mailhook to receive an email.
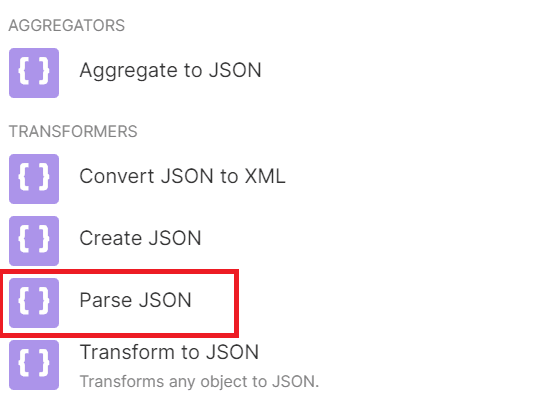
Step 5: Add JSON Module
- In this step, we will include the JSON module and choose the Parse JSON feature. By utilizing this functionality, we will be able to extract data from Mailhook in JSON format and convert it into text for further processing.
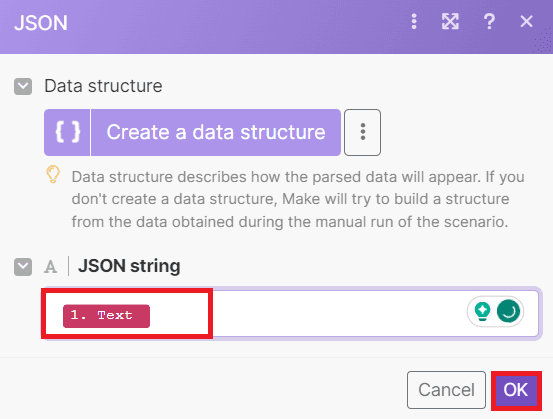
Step 6: Setup JSON
- To configure the JSON settings, select the Text option within Webhooks, which contains the data that was sent from Mailhook.
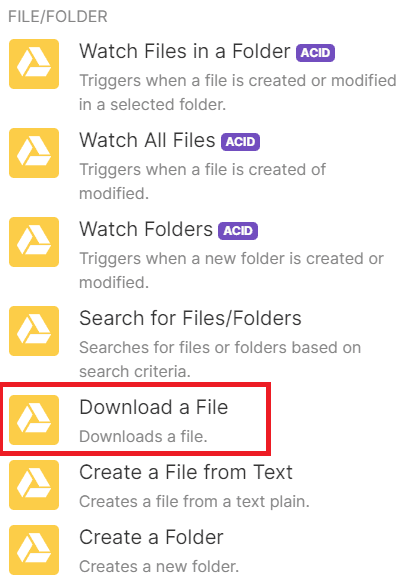
Step 7: Add Google Drive Module
- In this step, we will incorporate the Google Drive module. Alternatively, you can use other file storage services of your choice to access the source PDF file.
- Next, select the Download a File feature. This functionality enables us to retrieve and download the source file from Google Drive.
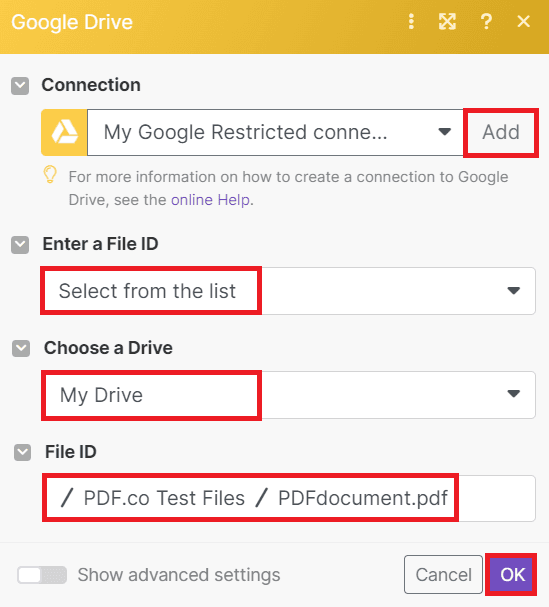
Step 8: Configure Google Drive Settings
Now, let’s configure the Google Drive settings.
- To begin, establish a connection between your Google Drive account and Make. This process grants the necessary permissions to access your Google Drive files.
- Next, select the Select from the List option to view the available folders within your Google Drive.
- Proceed by choosing My Drive as the designated drive to be utilized in this automation.
- Lastly, enter the specific Folder and File ID from your Google Drive that you wish to incorporate into this automation.
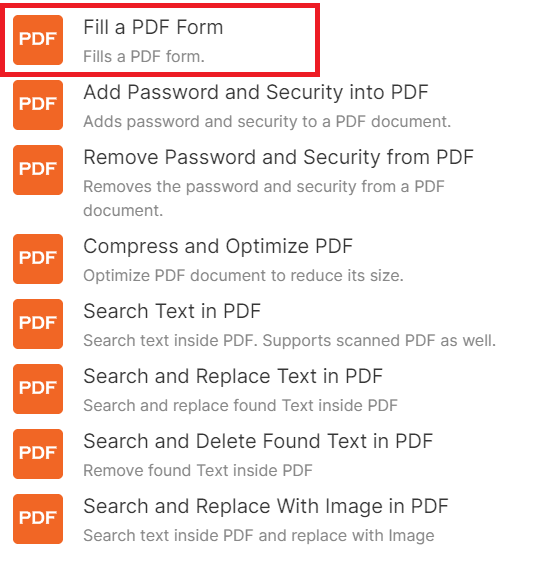
Step 9: Add PDF.co Module
- In this step, we will integrate the PDF.co application and select the Fill a PDF Form feature. This feature enables us to populate PDF form fields with the data obtained from Mailhook.
Step 10: Setup PDF.co Configuration
- To set up the PDF.co settings, begin by linking your PDF.co account with Make by entering your API Key. You can acquire the API Key from your PDF.co dashboard or by registering on the provided link.
- Next, choose the Upload a File option in the Input File section to automatically upload the file you downloaded from Google Drive.
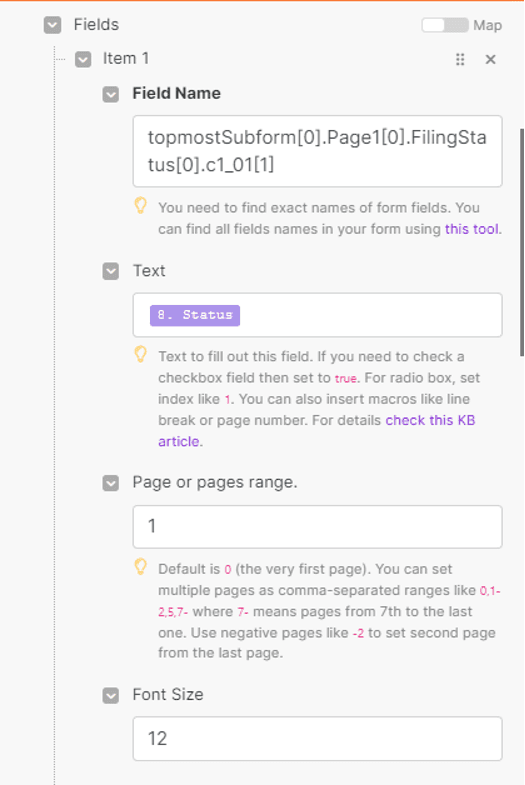
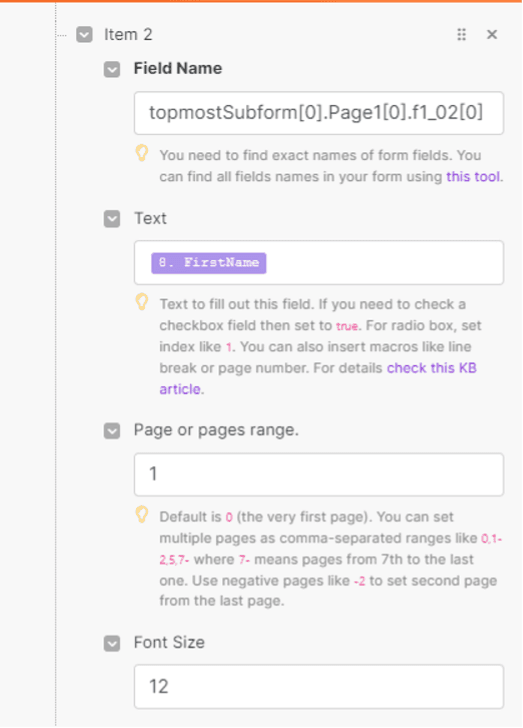
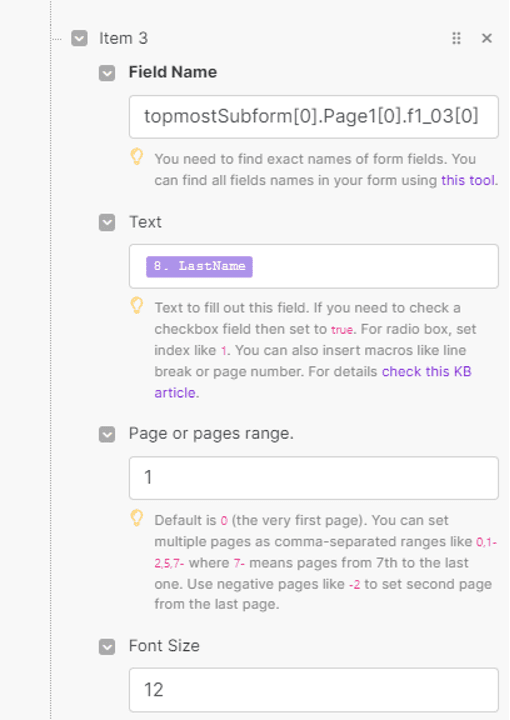
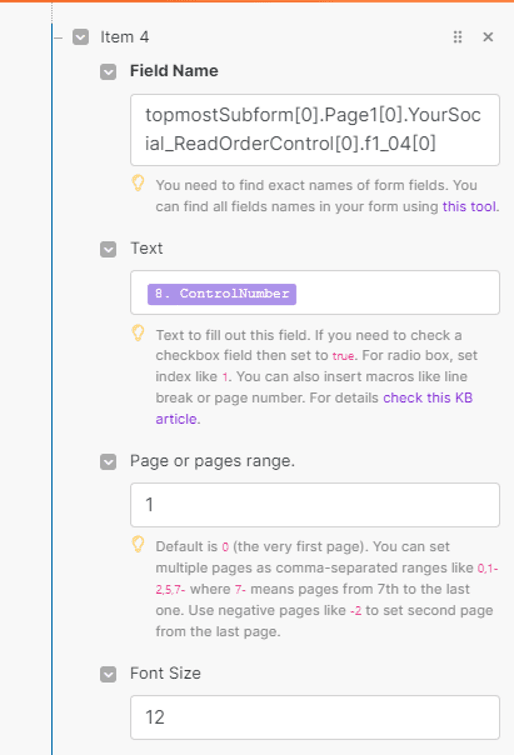
- In the Fields parameters, enter the value for the Field Name, Text, and Pages with the information obtained from Mailhook. Utilize the Parse JSON extracted text to conveniently populate the form fields.
- When referencing pages in your PDF, the page index starts at 0 for the first page, 1 for the second page, and so on.
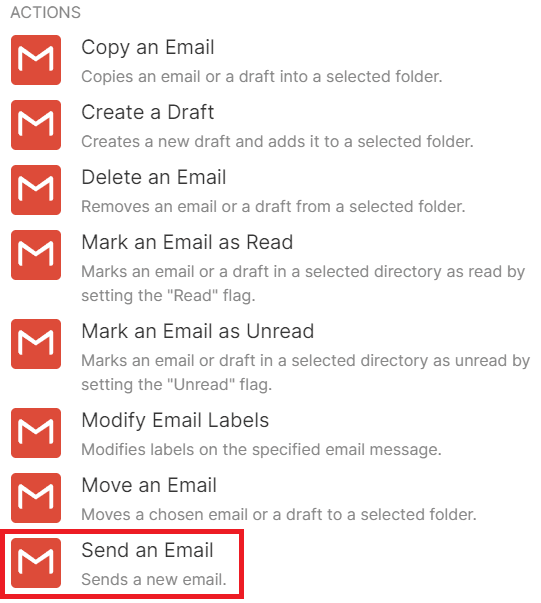
Step 11: Add Gmail Module
- In the final step, we will integrate the Gmail app and select the Send an Email function. This will enable us to send an email with the completed PDF form attached as a file.
Step 12: Configure Send Email
Let’s set up the Send Email configuration.
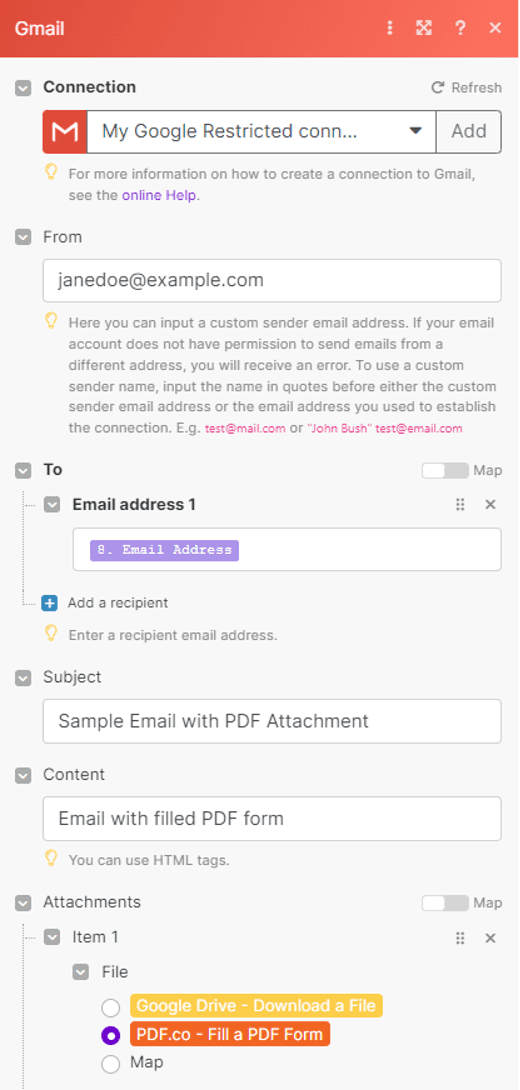
- First, you need to connect your Gmail account to Make to grant access.
- Next, go to the advanced settings and provide your email address in the From field.
- In the To field, enter the recipient’s email address where you want the email to be sent.
- For the Subject field, enter a descriptive subject line that the recipient can easily recognize.
- In the Content field, write the message that you want to include in the body of the email.
- To attach the filled PDF form, select the PDF.co – Fill a PDF Form from the Attachments field. This will ensure that the filled form is included as an attachment in the email.
After completing the setup of your workflow, you can initiate the scenario by running it. This will enable the Mailhook to receive incoming emails and trigger the flow every time an email is received.
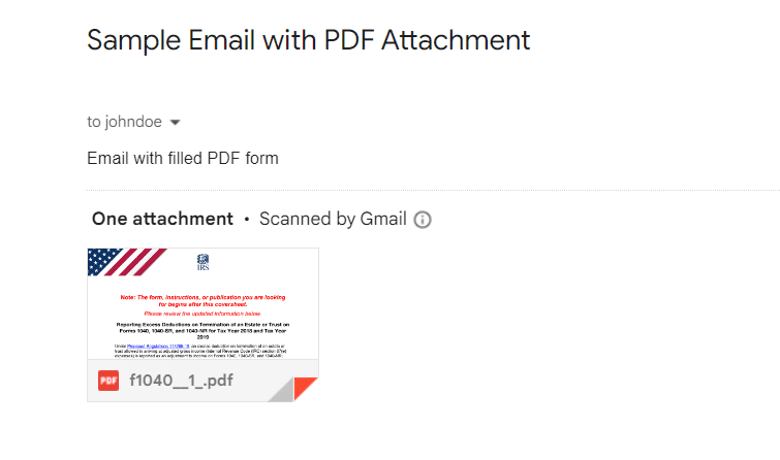
Step 13: Check Email Inbox
- Below is an example email that has been successfully sent using our workflow, including a PDF attachment. Click on the Attachment file to view the filled PDF form output.
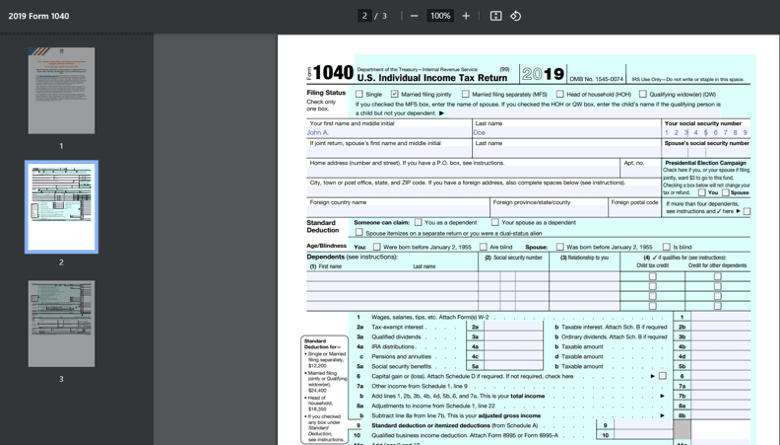
Step 14: Filled PDF Form
- Here is the completed PDF form that has been successfully filled out using the data extracted from the Mailhook.
This tutorial provided step-by-step instructions on populating a PDF form using data from Mailhook and sending it via email using PDF.co and Make. You discovered how to utilize the PDF.co Fill a PDF Form feature and configure the necessary parameters for filling out the form fields. Additionally, you learned how to set up the Gmail application to send the filled PDF form as an attachment via email.
Related Tutorials
