Convert HTML to PDF with Bubble
Here’s our tutorial on how to use the Bubble plugin to convert HTML to PDF. Check out the steps below to understand how it works.
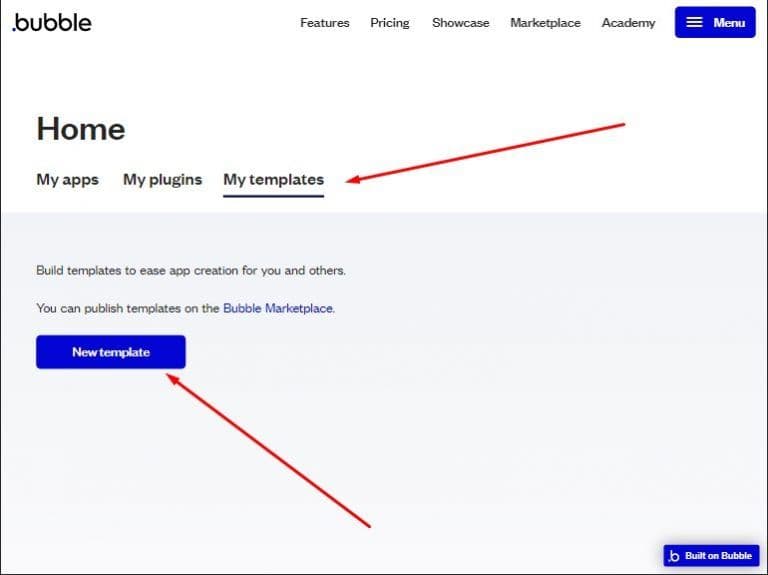
Step 1: Create New Template
Log in to the dashboard on bubble.io. Go to My templates and click the New template button.
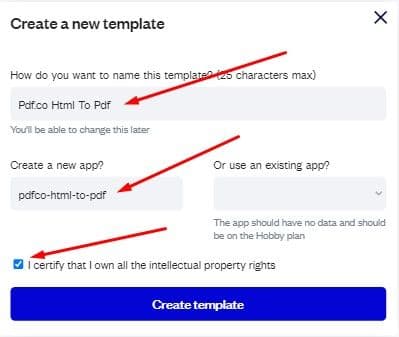
Step 2: Fill in Form
Fill the popup form and click the Create template button.
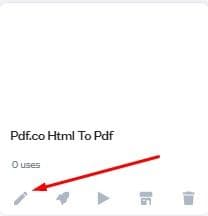
Step 3: Edit Created Template
Click the Edit button in the created temple settings panel.
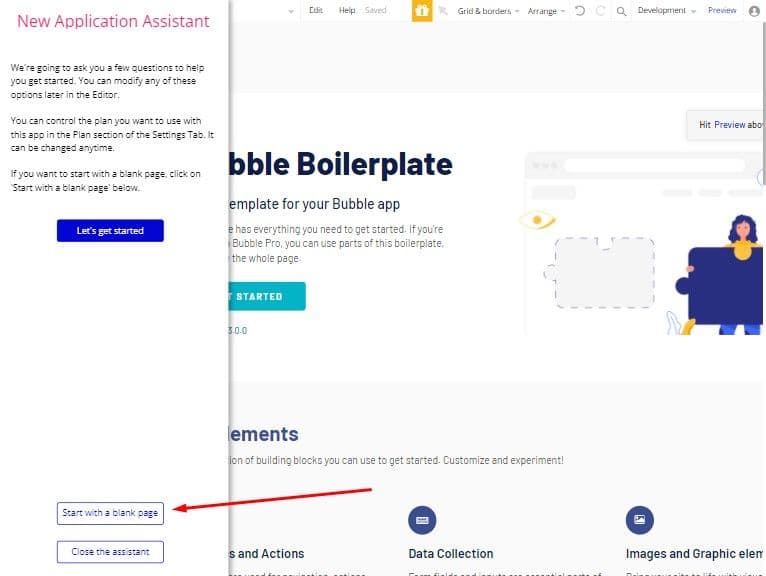
Step 4: Start With a Blank Page
Click the Start with a blank page then the Close assistant button.
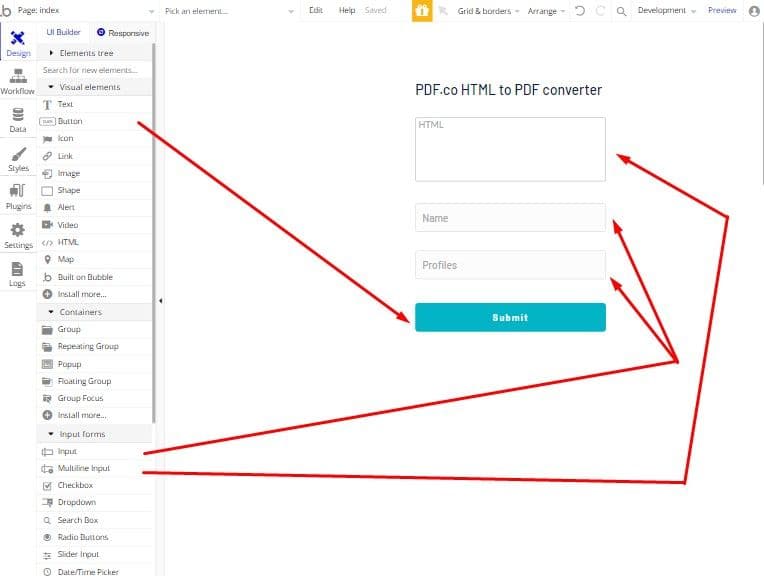
Step 5: Move Elements Into Canvas
Move needed elements into the canvas in the Design tab, set elements as on screenshot.
Step 6: Add Plugin
Go to the Plugin tab and click the Add plugins button.
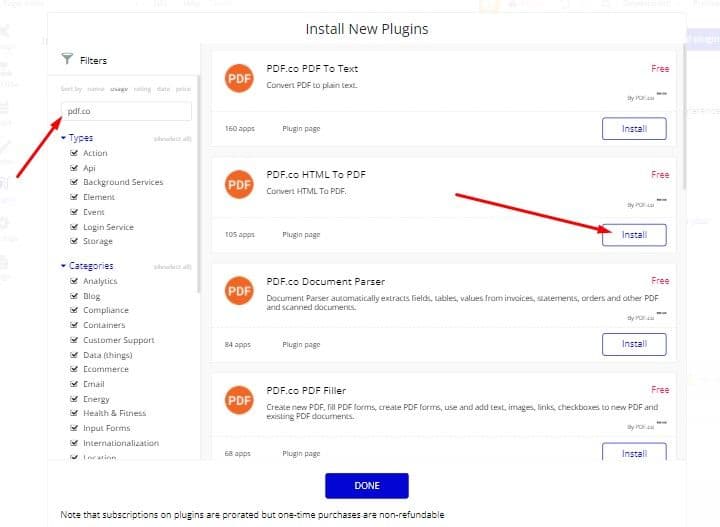
Step 7: Add PDF.co HTML to PDF Plugin
Type PDF.co in the search input of the filter sidebar. Then scroll down to PDF.co HTML To PDF plugin, click the Install button to install this plugin. After the plugin was installed click the Done button.
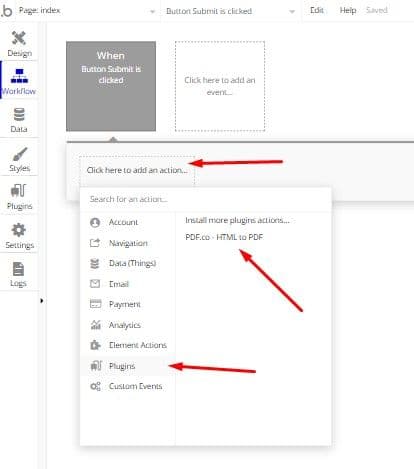
Step 8: Add Submit Button
Go to the Workflow tab and add the submit button click event.

Step 9: Add Action
Add action as PDF.co – HTML to PDF plugin.
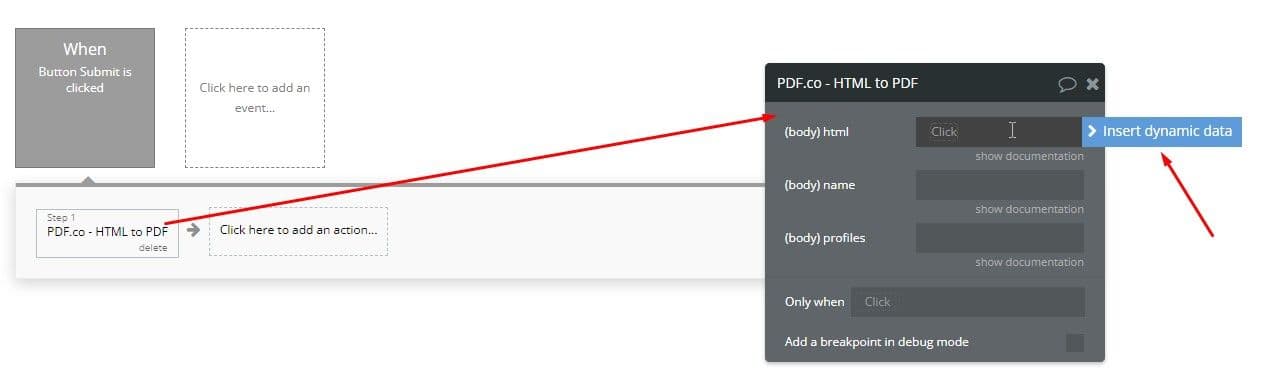
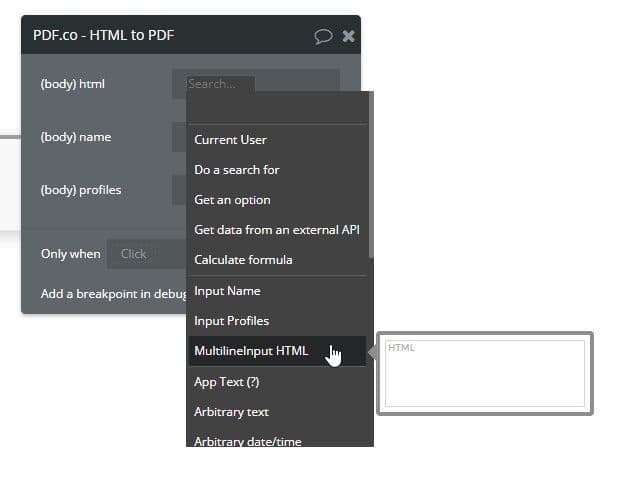
Step 10: Insert Dynamic Data
Fill plugin settings using Insert dynamic data.

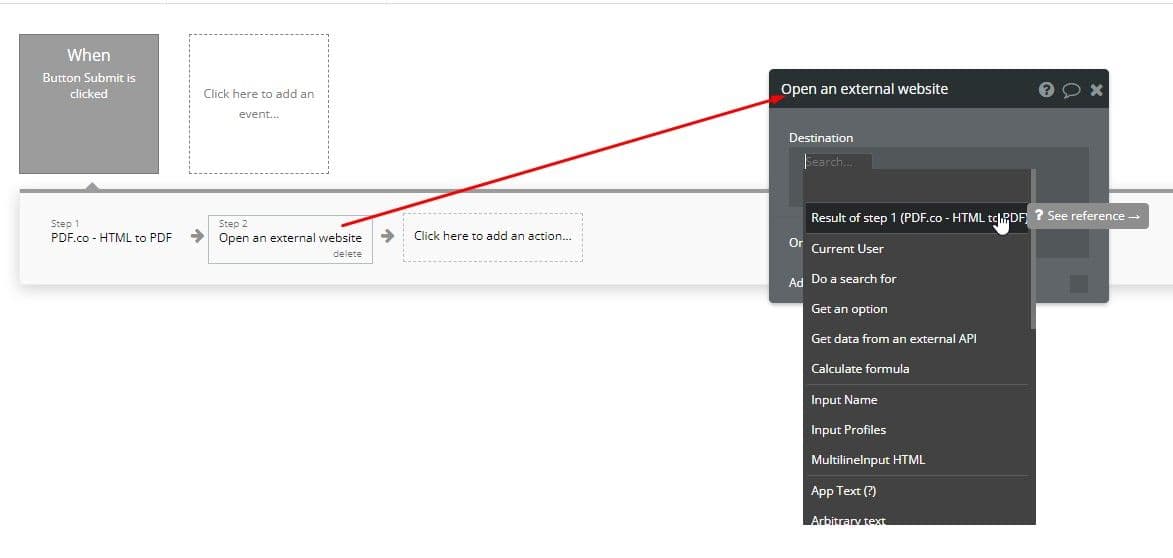
Step 11: Add Next Action
Add the next action as Open an external website and fill the Destination field with the result’s URL from the previous step (PDF.co HTML to PDF plugin output).
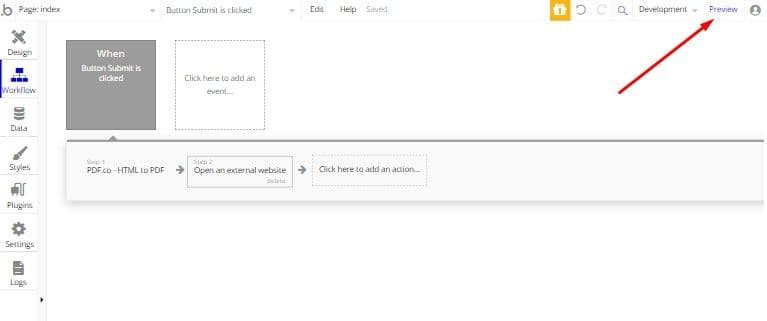
Step 12: Preview Template
Let’s test our template. Click the Preview link for this.
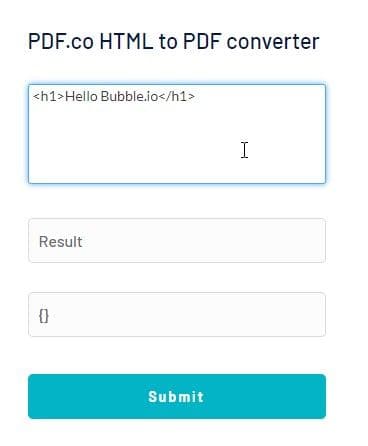
Step 13: Submit Form
Fill the form and click the Submit button.
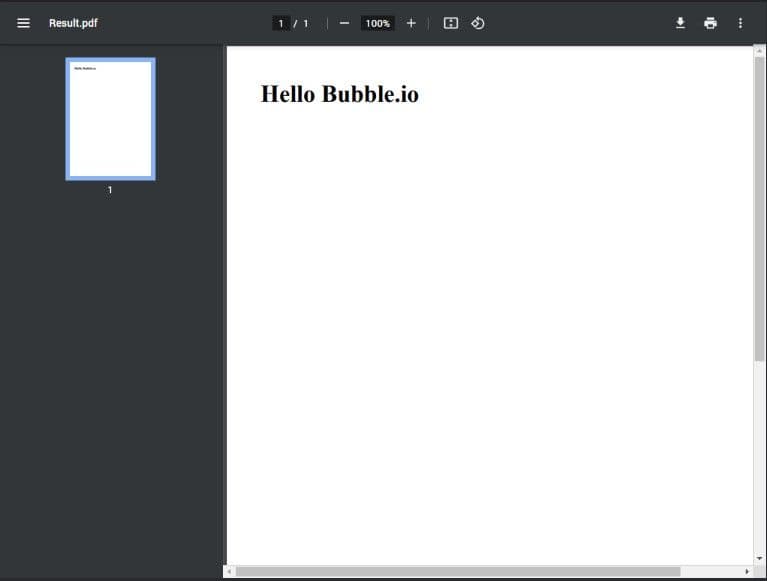
Step 14: Result
See result PDF opening in browser.
In this tutorial, you learned how to convert HTML to PDF using the Bubble plugin and PDF.co together.
Related Tutorials

