How to Add PDF.co Custom Connector For Power Automate Cloud
In this step-by-step guide, we’ll observe how to import PDF.co Custom Connector for Power Automate Cloud. Without any delay, let’s jump to steps.
Step 1: Download Connector JSON
Go to the PDF.co Page for Power Automate Cloud and download connector JSON.
Step 2: Go to Power Automate Cloud
Go to Power Automate Cloud. Next, Go to the menu “Data => Custom Connector”. Please note, This functionality is only available for users logged in via organization accounts.

Step 3: “Custom Connectors” Menu
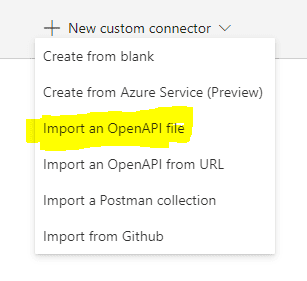
Upon clicking on the “Custom Connectors” menu, it’ll open the custom connectors page. There we need to click on the “New Custom Connector” link located in the top right corner.

It’ll open the sub-menu with more options. Click on the “Import an OpenAPI file” link.

Step 4: Import OpenAPI File
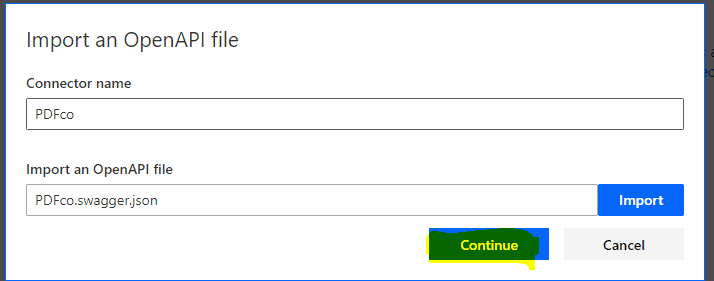
This will open a popup for Importing OpenAPI File.

Add connector name as “PDFco” as well choose downloaded JSON file and press the “Continue” button.
Step 5: Create Connector
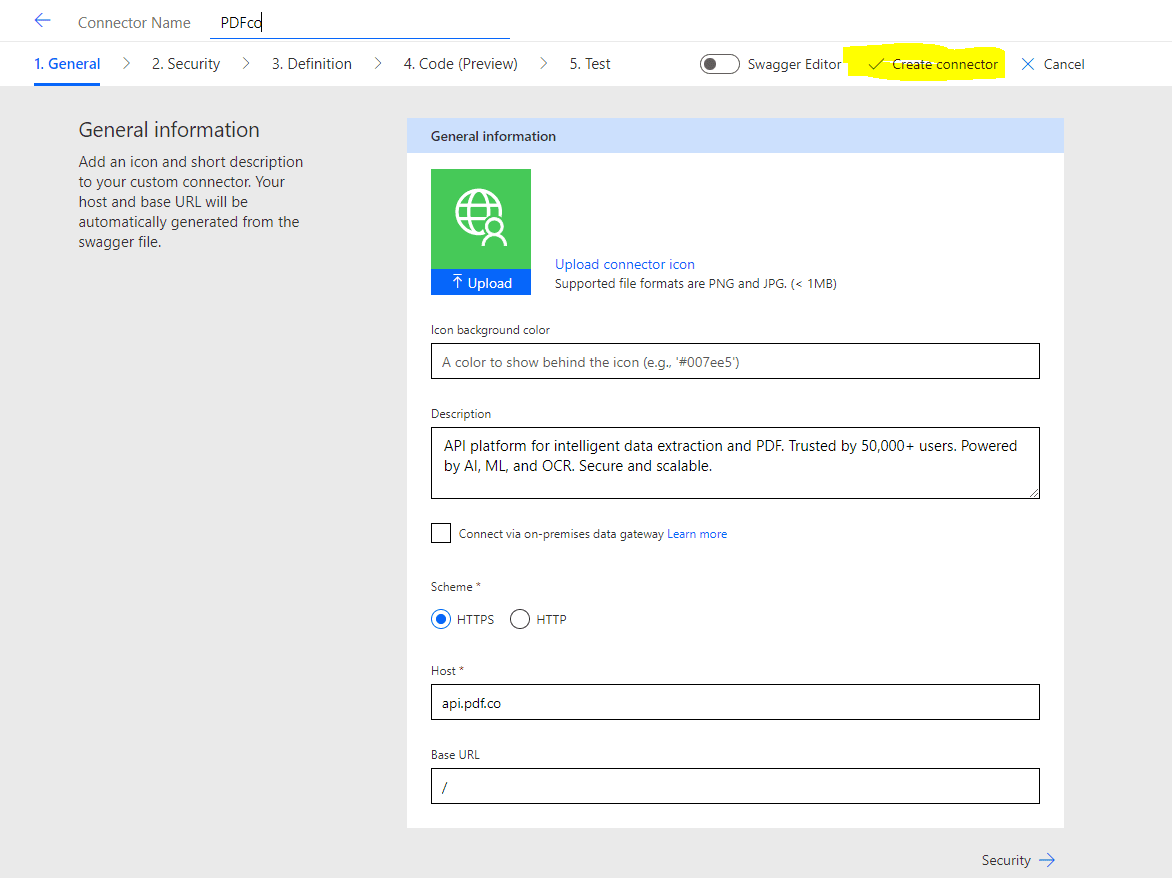
It’ll open a connector page showing all details for the connector. Click on the “Create Connector” button from the top right. By doing so, it’ll add the PDFco connector to the Custom Connectors list.


That’s all! Now, we can use this connector in Power Automation steps.
Related Tutorials


