How to Add Image to PDF using Google Apps Script and PDF.co
In this step-by-step guide, we’ll be reviewing how to add Images to existing PDF inside Google spreadsheets. The technology we’ll be using is native Google Apps Script and PDF.co.
Before we jump into implementations, let’s review what we’ll be going to achieve as output.
We have a sample excel containing two input columns for input PDF and image URL. In the third column, we expect the URL of the resulting processed PDF to contain a specified image inside.
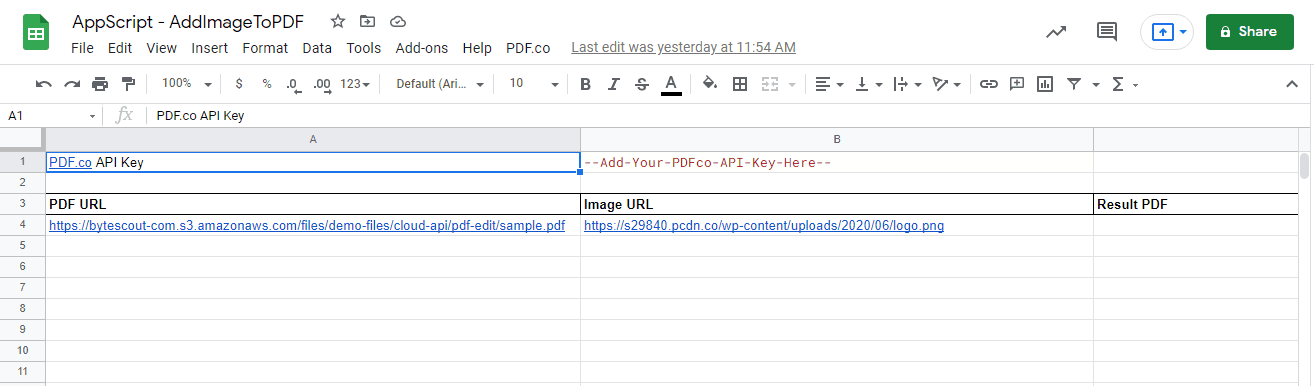
As you might have observed, we’ve added a custom menu named “PDF.co” which starts the operation.

PDF.co API endpoints expect API-Key for authentication of request. This API Key is passed in cell value in the first row itself. You can get your PDF.co API Key by signing up on this site.
Add Scripts to Google Spreadsheet
In order to add code scripts to our spreadsheet, follow these simple steps.
Go to Script Editor and write Source Code
Navigate to “Script Editor” from Tools > Script Editor, and add your source code there.
Enable Code Execution Permissions
Once you have added source code and saved Apps script projects, make sure you have enabled script execution permission. In order to do that please execute the script from the “Run” button.
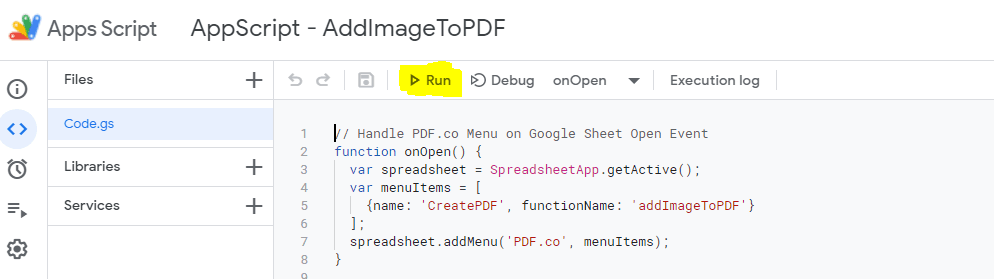
After the script is executed, you will see the “PDF.co” menu in the spreadsheet. If the menu is not appearing to you then please refresh the page.
Source Code
Following is the source code we’ve used for this sample.
// Handle PDF.co Menu on Google Sheet Open Event
function onOpen() {
  var spreadsheet = SpreadsheetApp.getActive();
  var menuItems = [
    {name: 'CreatePDF', functionName: 'addImageToPDF'}
  ];
  spreadsheet.addMenu('PDF.co', menuItems);
}

/**
 * A function that adds headers and some initial data to the spreadsheet.
 */
function addImageToPDF() {
  var spreadsheet = SpreadsheetApp.getActive();

  // Get PDF.co API Key Cell
  let pdfCoAPIKeyCell = spreadsheet.getRange("B1");

  // Get Cells for Input/Output
  let pdfUrlCell = spreadsheet.getRange("A4");
  let imageUrlCell = spreadsheet.getRange("B4");
  let resultUrlCell =  spreadsheet.getRange("C4");

  let pdfCoAPIKey = pdfCoAPIKeyCell.getValue();
  let pdfUrl = pdfUrlCell.getValue();
  let imageUrl = imageUrlCell.getValue();

  // Prepare Payload
  var data = {
    "async": false,
    "encrypt": false,
    "inline": true,
    "name": "sample_result",
    "url": pdfUrl,
    "imagesString": `260;350;0-;${imageUrl}`
  };

  // Prepare Request Options
  var options = {
    'method' : 'post',
    'contentType': 'application/json',
    'headers': {
      "x-api-key": pdfCoAPIKey
    },
    // Convert the JavaScript object to a JSON string.
    'payload' : JSON.stringify(data)
  };

  // Get Response
  // https://developers.google.com/apps-script/reference/url-fetch
  var pdfCoResponse = UrlFetchApp.fetch('https://api.pdf.co/v1/pdf/edit/add', options);

  var pdfCoRespContent = pdfCoResponse.getContentText();
  var pdfCoRespJson = JSON.parse(pdfCoRespContent);

  // Display Result
  if(!pdfCoRespJson.error){
    resultUrlCell.setValue(pdfCoRespJson.url);
  }
  else{
    resultUrlCell.setValue(pdfCoRespJson.message);
  }
}
Let’s walk through important pieces in this source code.
Creating a menu
Whenever google spreadsheet is loaded/reloaded, “onOpen” method is called. Hence this method is the perfect placeholder for code that we want to execute at the start of spreadsheet load.
There, We’ve added logic to create a menu named “PDF.co” and inside a submenu named “CreatePDF”. Please note that on clicking the “CreatePDF” sub-menu item, we’re calling the function “addImageToPDF”.
// Handle PDF.co Menu on Google Sheet Open Event
function onOpen() {
  var spreadsheet = SpreadsheetApp.getActive();
  var menuItems = [
    {name: 'CreatePDF', functionName: 'addImageToPDF'}
  ];
  spreadsheet.addMenu('PDF.co', menuItems);
}
Referencing Cells
We’re referencing cells that hold information for API Key, PDF URL, Image URL, and Output URL. These variables referencing spreadsheet cells are useful for reading and writing information to them.
  // Get PDF.co API Key Cell
  let pdfCoAPIKeyCell = spreadsheet.getRange("B1");

  // Get Cells for Input/Output
  let pdfUrlCell = spreadsheet.getRange("A4");
  let imageUrlCell = spreadsheet.getRange("B4");
  let resultUrlCell =  spreadsheet.getRange("C4");

  let pdfCoAPIKey = pdfCoAPIKeyCell.getValue();
  let pdfUrl = pdfUrlCell.getValue();
  let imageUrl = imageUrlCell.getValue();
Preparing request
We are preparing a request payload for PDF.co as per API specifications. To get more details on this please refer to API endpoint documentation at this link. Please note that we’re passing a PDF.co API key named “x-api-key” in the header for authentication of request.
  // Prepare Payload
  var data = {
    "async": false,
    "encrypt": false,
    "inline": true,
    "name": "sample_result",
    "url": pdfUrl,
    "imagesString": `260;350;0-;${imageUrl}`
  };

  // Prepare Request Options
  var options = {
    'method' : 'post',
    'contentType': 'application/json',
    'headers': {
      "x-api-key": pdfCoAPIKey
    },
    // Convert the JavaScript object to a JSON string.
    'payload' : JSON.stringify(data)
  };
Consuming response
We’re making a call to the PDF.co API endpoint, and upon receiving the response we’re getting the resulting output URL and updating the spreadsheet cell.
  var pdfCoResponse = UrlFetchApp.fetch('https://api.pdf.co/v1/pdf/edit/add', options);

  var pdfCoRespContent = pdfCoResponse.getContentText();
  var pdfCoRespJson = JSON.parse(pdfCoRespContent);

  // Display Result
  if(!pdfCoRespJson.error){
    resultUrlCell.setValue(pdfCoRespJson.url);
  }
  else{
    resultUrlCell.setValue(pdfCoRespJson.message);
  }
That’s all! I hope this article is helpful to get started with consuming PDF.co in Google Apps Script.
Thank you!
Video Guide
Related Tutorials
