Search Text in PDF using Power Automate Cloud
In this step-by-step guide, we will learn how to configure Power Automate Flow with PDF.co connector to search text within a PDF document. Let’s get started!
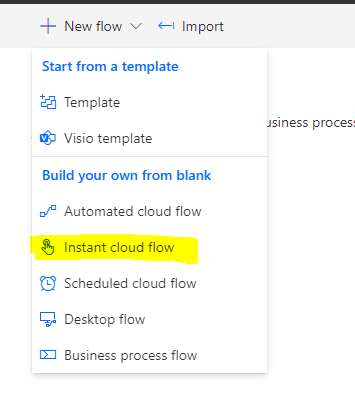
Create a New Flow
The first step is to create a New flow. Select “Instant Cloud Flow”.
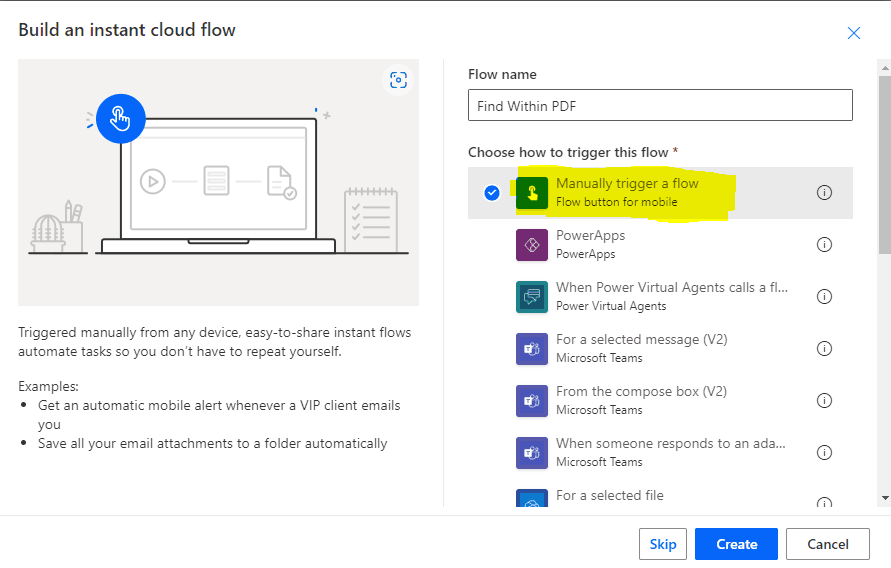
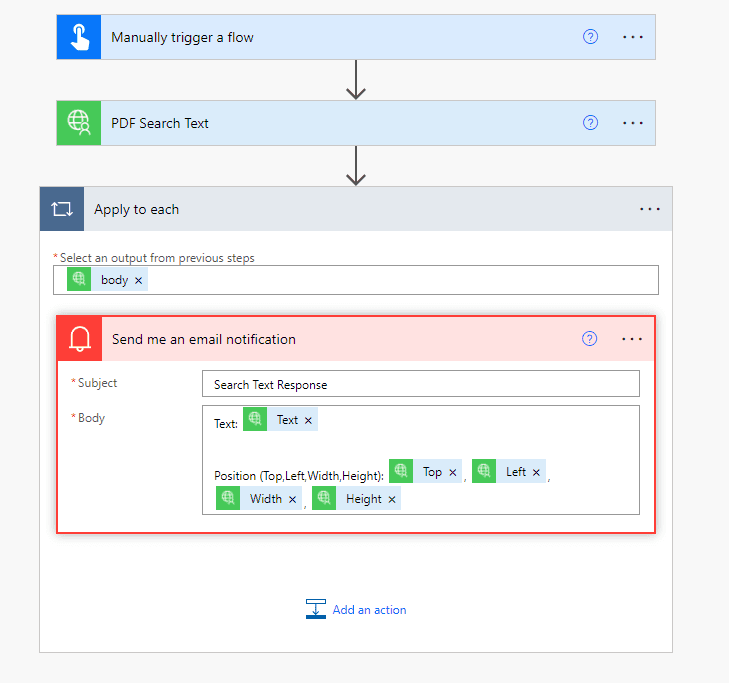
Manually Trigger Flow
We’ll give a name to this flow and have it manually triggered.
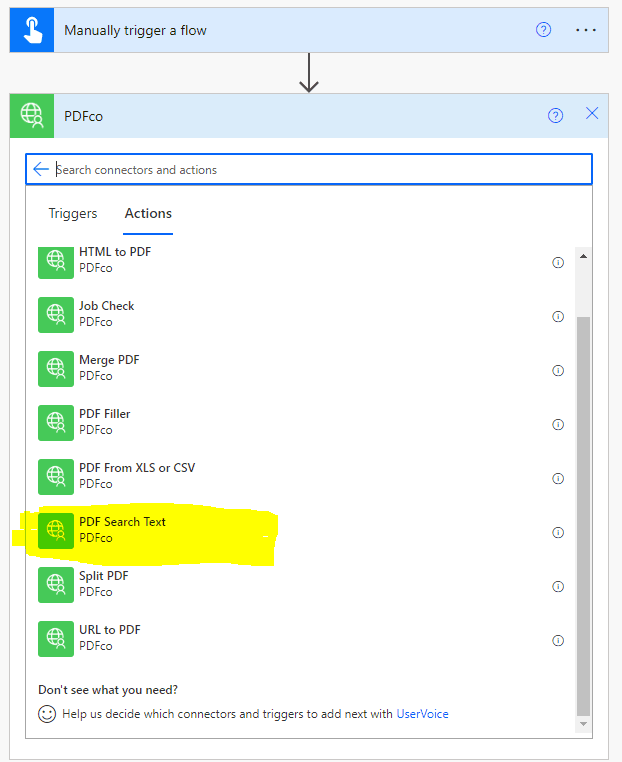
Connect PDF.co
Next, we’ll create a new step. Here, search for PDFco connector and select it. It will list various actions supported by the PDFco connector. Choose the “PDF Search Text” action.
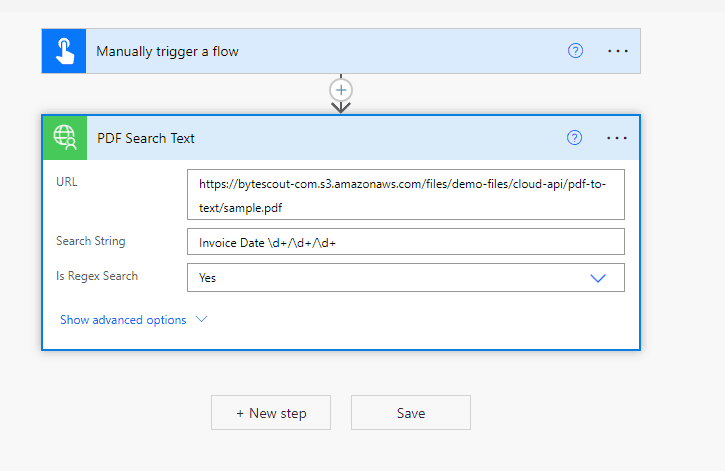
Configure "PDF Search Text" Action
Now, it’s time to configure the “PDF Search Text” action. The following list briefly describes the main parameters of this action.
- URL - URL to the source PDF document.
- Search String - Text to Search. Can contain regular expressions if the “Is Regular Search” parameter is true.
- Is Regex Search - Indicates whether the search string is regex format or not.
- Pages - Comma-separated list of page indices (or ranges) to perform search within.
After filling all parameters, let’s add an email notification containing the result.
Add Email Notification
The output consists of information such as found text, its position (left, right, width, height), page index, etc. This information is in array format, hence we’re sending all notifications for each found result.
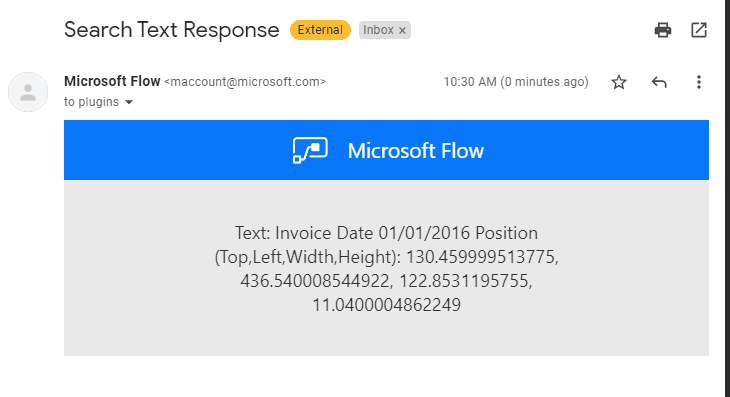
At this stage, we’re done configuring flow and it’s time to test it. Save all the steps, and invoke this flow.
Results
As soon as the flow is executed, we’ll receive an email notification containing the found results.
That’s all! It’s that easy to search text within a PDF document with the help of the PDF.co connector for Power Automate.
Try it out yourself for a better experience!
Related Tutorials
