How to Add Hyperlinks to PDF using PDF.co and Zapier
Have you ever wanted to make your PDF documents more interactive and easy to use? Well, you can do that by adding hyperlinks to your PDFs.
In this tutorial, we’ll walk you through the process of adding hyperlinks to a PDF document using two powerful tools: PDF.co and Zapier. This step-by-step guide will make it easy for you to enhance your PDFs with hyperlinks, making them more interactive and user-friendly.
Setup Zapier & PDF.co
If you haven't already then first create a free account with PDF.co and Zapier. Once you have your accounts ready, start with making a Zap (top-right corner button in Zapier dashboard).
Sign Up to PDF.coSign Up to ZapierConnect Google Drive
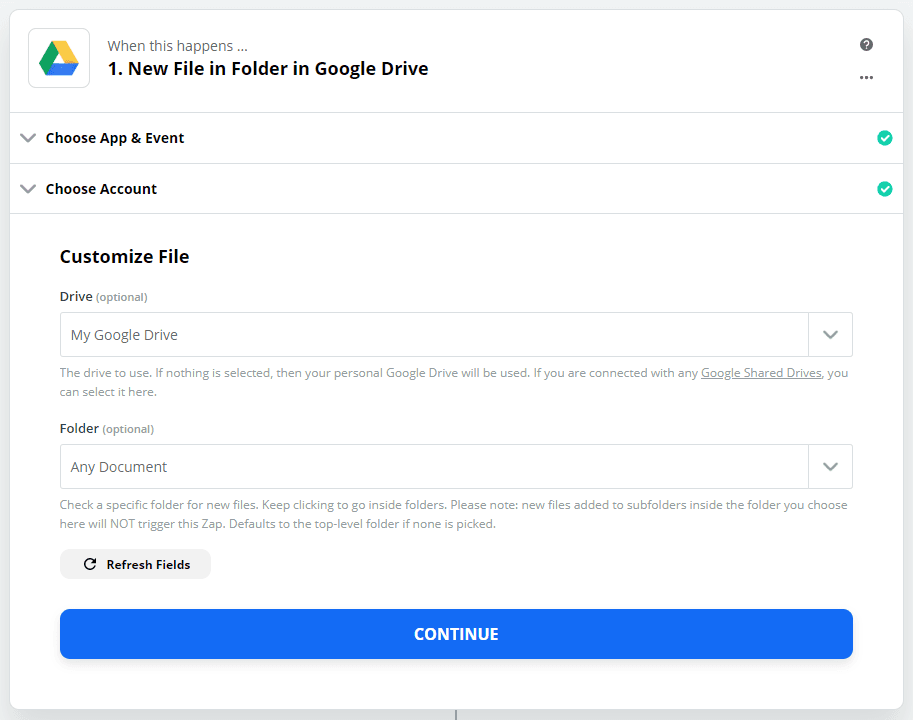
You will need to connect your Google Drive account to Zapier and select a folder for your input files. Check the screenshot below and fill in your next step in making a Zap with the same data:
Create PDF.co Filler Step
Next add a step for PDF.co and choose the PDF Filler step.
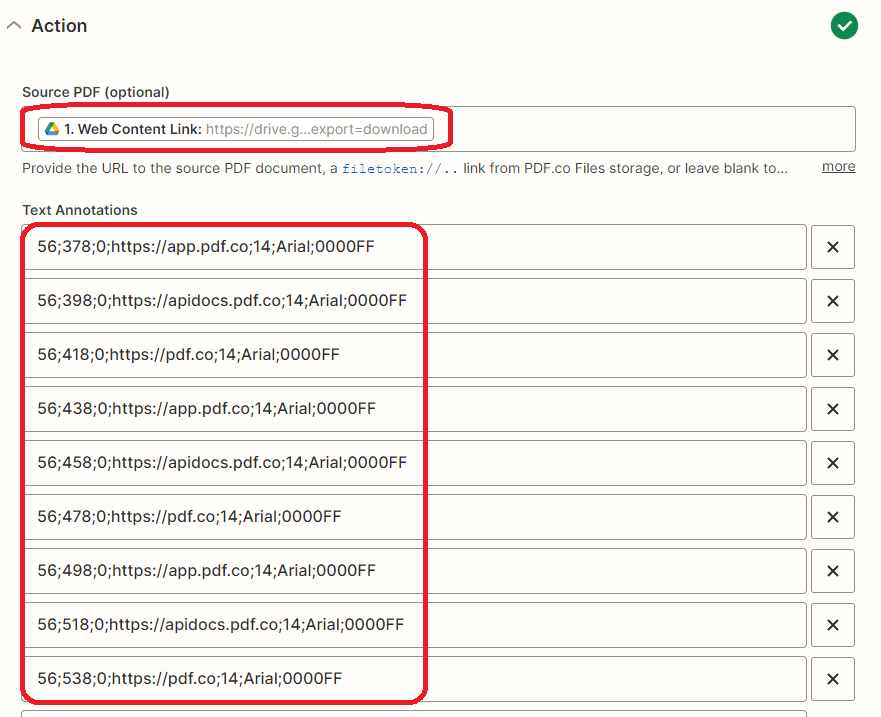
- In the Source PDF field, select the Web Content Link from Google Drive. This ensures that the PDF file from the specified Google Drive folder will be used as the source for adding hyperlinks.
- For the Text Annotations field, input the X and Y coordinates of the PDF document where you want to add the hyperlinks. Additionally, provide the page range of the PDF where the hyperlinks will be placed. You can easily obtain these coordinates and page ranges using the PDF.co PDF Edit Add Helper tool. This tool will assist you in identifying the exact position and pages within the PDF for adding hyperlinks.
- Next, add the value of the font size you wish to use for the hyperlinks, as well as the type of font name. This way, you can customize the appearance of the hyperlinks to match your preference.
- Lastly, specify the font color for the hyperlinks that will be added to the PDF document. This allows you to choose the color that best suits your design or branding.
Test the Action & get Result
- Once you have completed the configuration by providing all the necessary details, it’s time to test the action. This test will send a request to PDF.co, and the integration will add hyperlinks to the PDF document based on the specific coordinates.
- If he test was successful then the result will show that it has added the hyperlinks to the PDF document. To view the output, copy the resulting URL and paste it into your browser.

In this tutorial, you’ve gained valuable knowledge on how to add hyperlinks to a PDF document using the powerful combination of PDF.co and Zapier. You learned how to utilize the PDF.co PDF Edit Add Helper tool to easily obtain the precise coordinates of the PDF document where you want to add hyperlinks. This enables you to customize and enhance your PDF to create an interactive and user-friendly experience for your readers.
Related Tutorials
