Google Drive is used for demonstration, but you can use any trigger or file storage of your choice.
In this guide, you'll set up an automated workflow in n8n to compress PDF files when added to a specific folder in Google Drive. PDF.co will handle the compression.
Full Workflow Overview
Here’s what the complete workflow looks like in n8n:
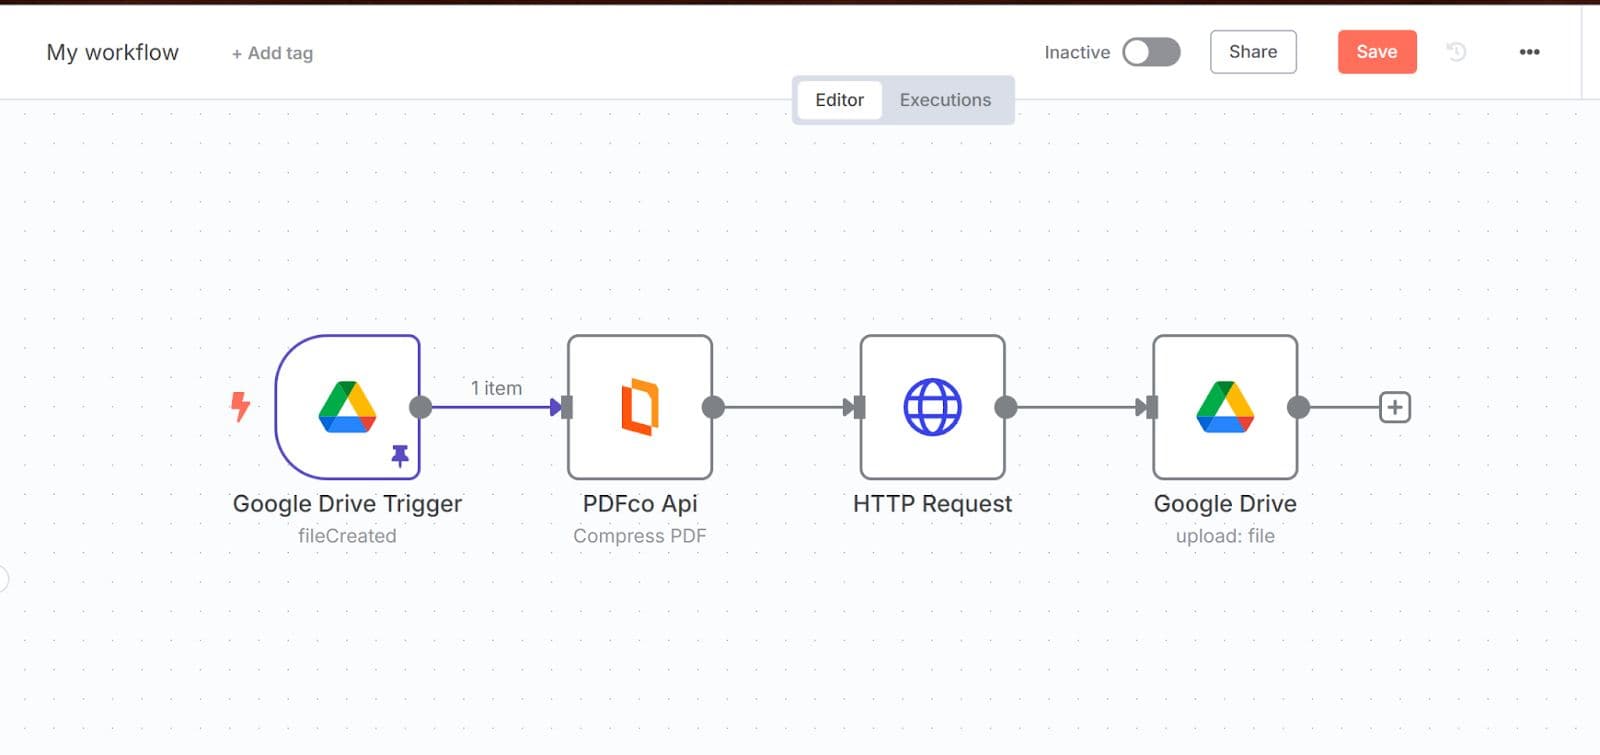
What each step does:
- Google Drive Trigger – Detects when a new file is added to a folder
- PDF.co Compress PDF – Compresses the uploaded PDF
- HTTP Request – Downloads the compressed file in binary format
- Google Drive Upload – Uploads the compressed file back to Drive
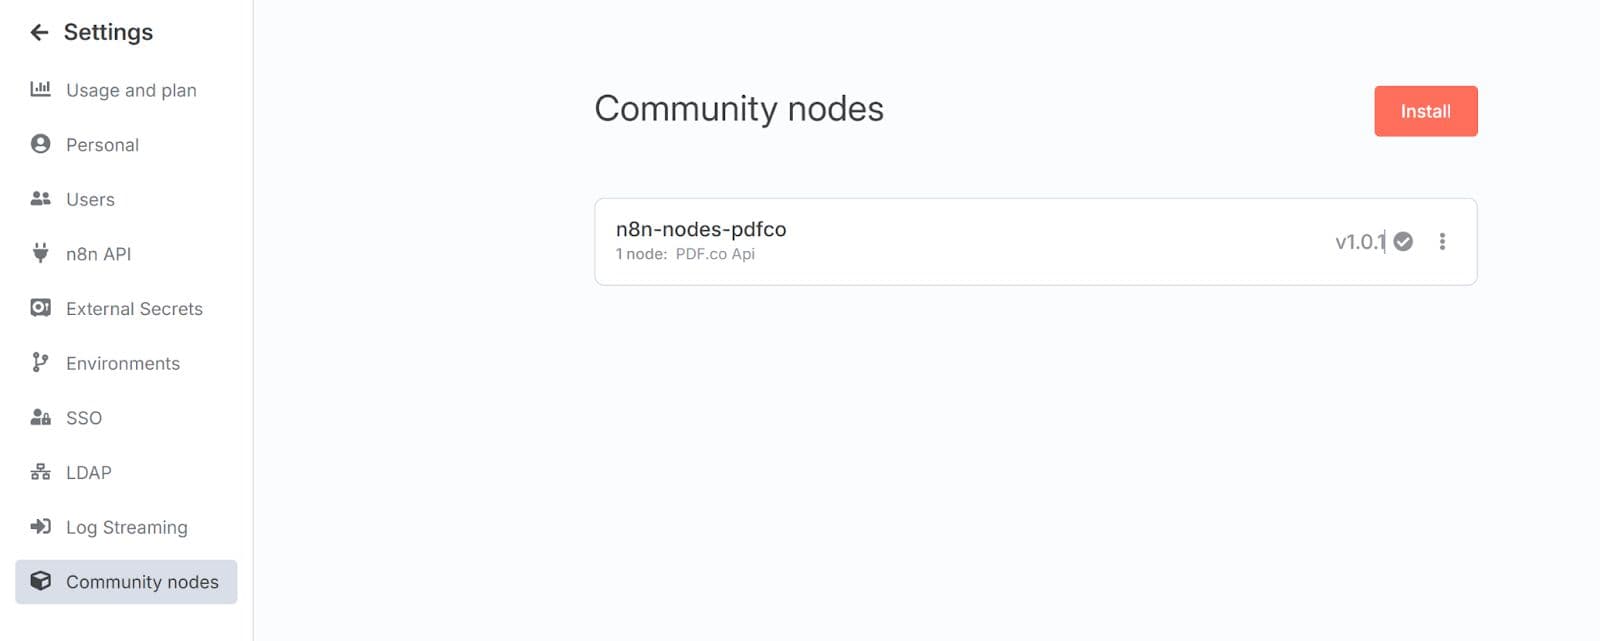
Install PDF.co Node (For Self-hosted Users)
If you're using self-hosted n8n, you can install the official PDF.co node from the Community Nodes registry for easier integration.
- Open your n8n editor
- Go to Settings → Community Nodes
- Search for:
n8n-nodes-pdfco - Click Install
For more information, visit the n8n-nodes-pdfco on npm
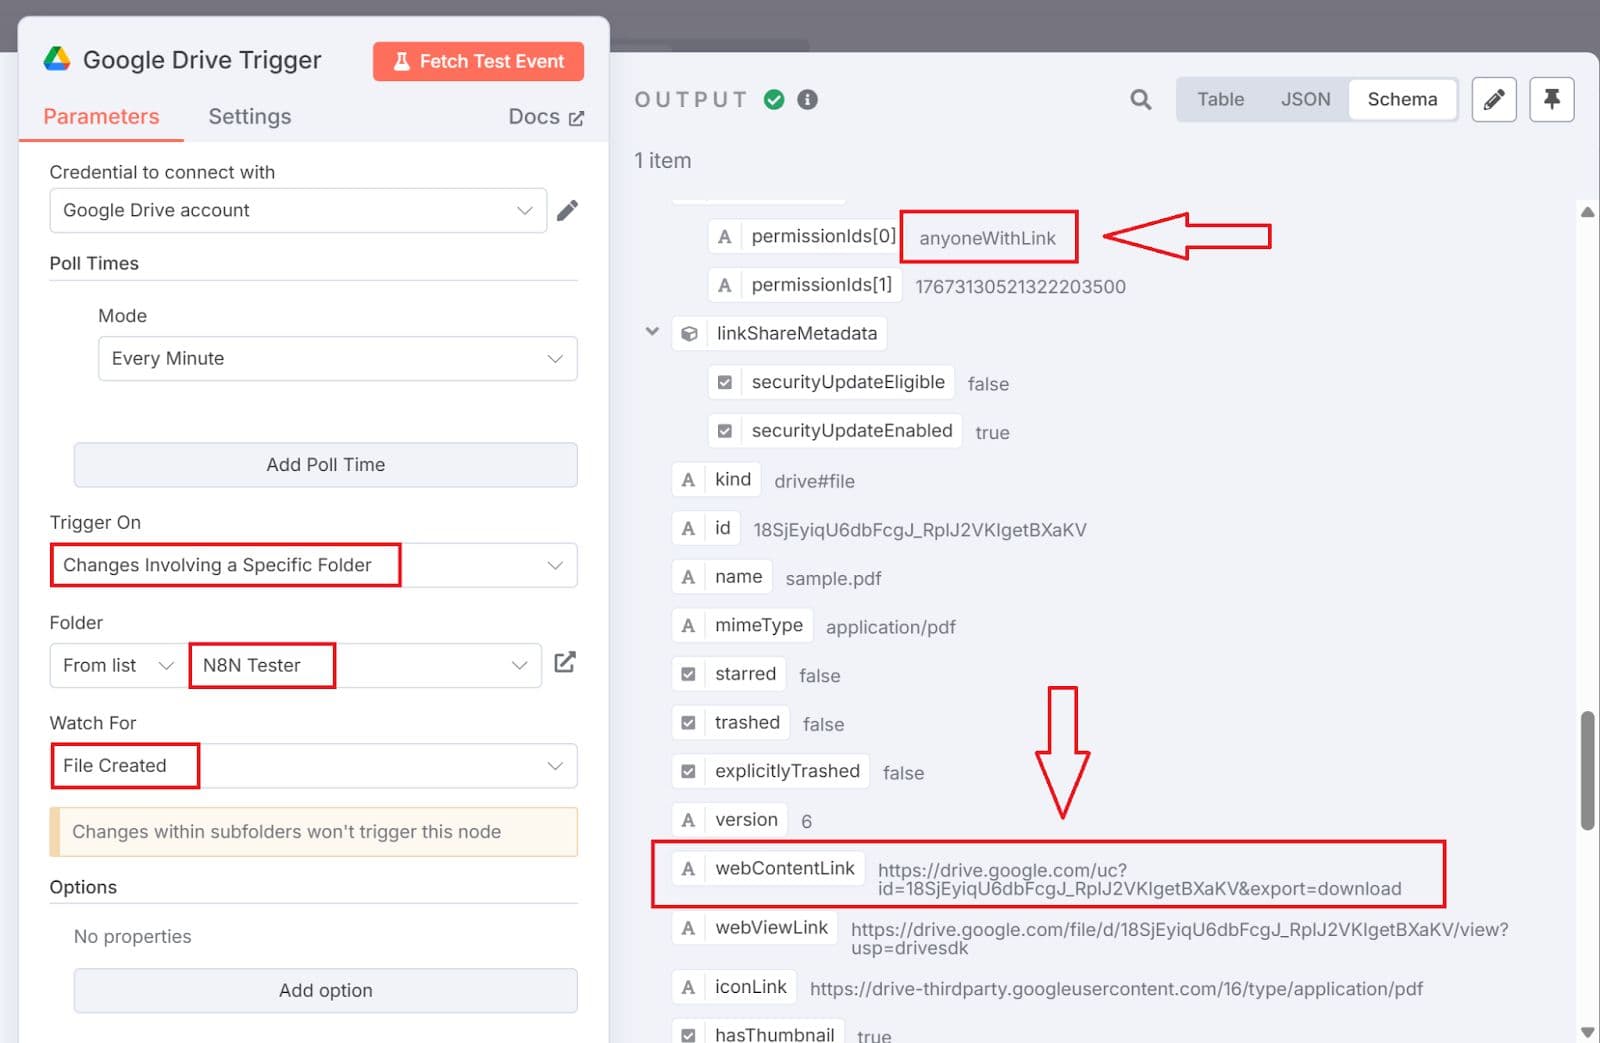
Step 1: Trigger on New File in Google Drive
- Add Node: Google Drive → Changes Involving a Specific Folder
- Set Up:
- Watch For: File Created
- Folder: Select the folder to watch for new files
- Important: Ensure file sharing is set to "Anyone with the link" so PDF.co can access it.
- Click Fetch Test Event to verify the trigger works.
Step 2: Compress File with PDF.co
- Add Node: PDF.co → Compress PDF
- Connect Account:
- Click Create New Credential
- Paste your PDF.co API Key (from PDF.co dashboard)
- Input:
- Drag
webContentLinkfrom the Google Drive trigger into the URL field
- Drag
- Test the step to confirm it returns a valid compressed PDF URL.
- (Optional) Click Add Option to customize:
- Output file name
Compression config (see PDF.co API docs).

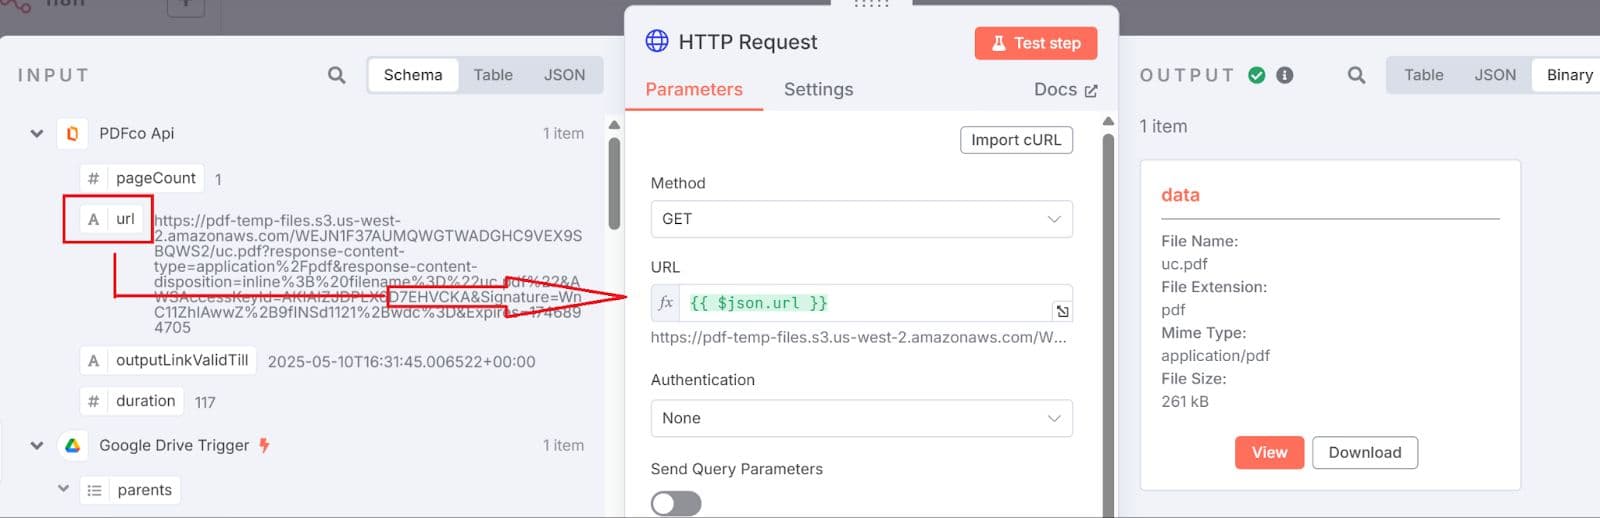
Step 3: Convert URL to Binary (HTTP Request)
Google Drive requires a binary file, so we must download the compressed PDF first.
- Add Node: HTTP Request
- Settings:
- Method: GET (default)
- URL: Drag in the
urloutput from PDF.co - Authentication: None (default)
- Test to confirm it returns a binary file.
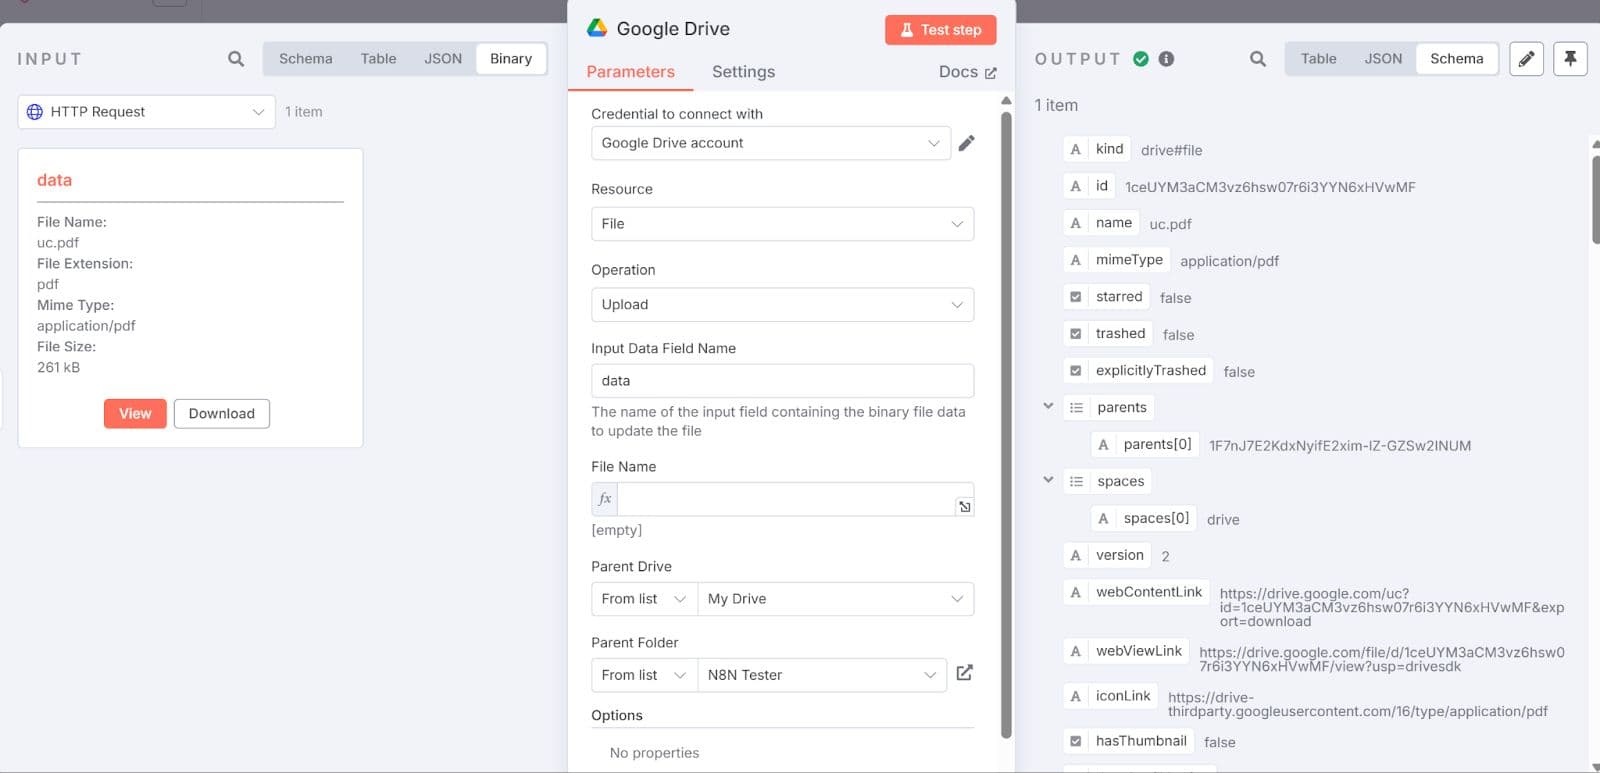
Step 4: Upload to Google Drive
- Add Node: Google Drive → Upload File
- Set Up:
- Input Data Field Name: Leave as
data(default) - Parent Folder: Choose the folder to upload to
- Input Data Field Name: Leave as
- Test Step and verify in Google Drive.
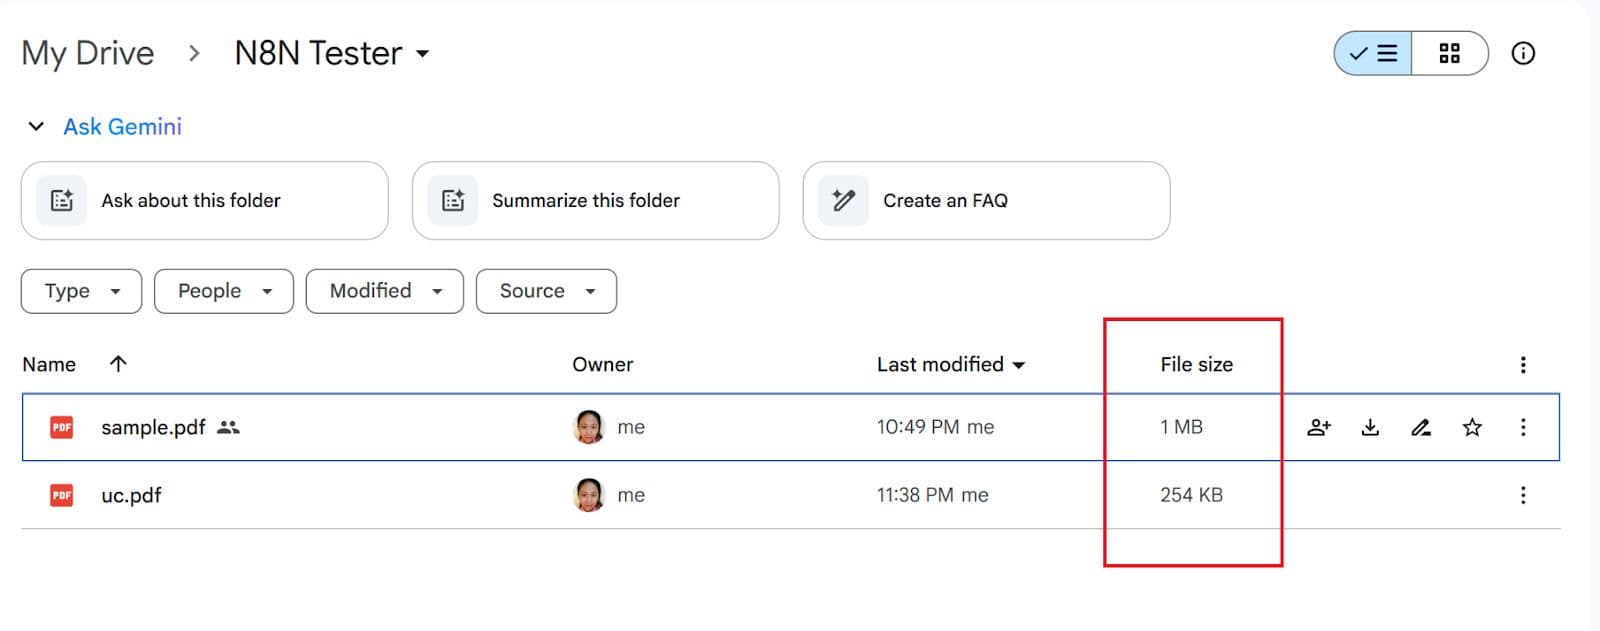
Step 5: Final Check: Verify File Sizes
Once the workflow runs, go to your Google Drive folder and check the file sizes. The compressed PDF should be significantly smaller than the original file.
Troubleshooting Tips
- PDF.co File Permission Issues → Make sure the file is publicly accessible and not restricted. For binary files, upload them to the cloud using the PDF.co Upload API.
- Missing/Invalid API Key → Double-check your PDF.co API key in the credentials setup.
- Not Enough Credits → Verify your PDF.co credits and ensure you’re using the correct account if you have multiple.
- Input Document is Damaged or of Incorrect Type → First, check the PDF.co File Permission Issue above. If the issue persists, verify that the file is a PDF and not another file type.
Related Tutorials
