PDF.co has built-in file storage where you can upload files and store files permanently. The files are private and secure. Only you will be allowed to use the private URL to access the file.
How to Edit a Scanned PDF File using PDF.co and Postman
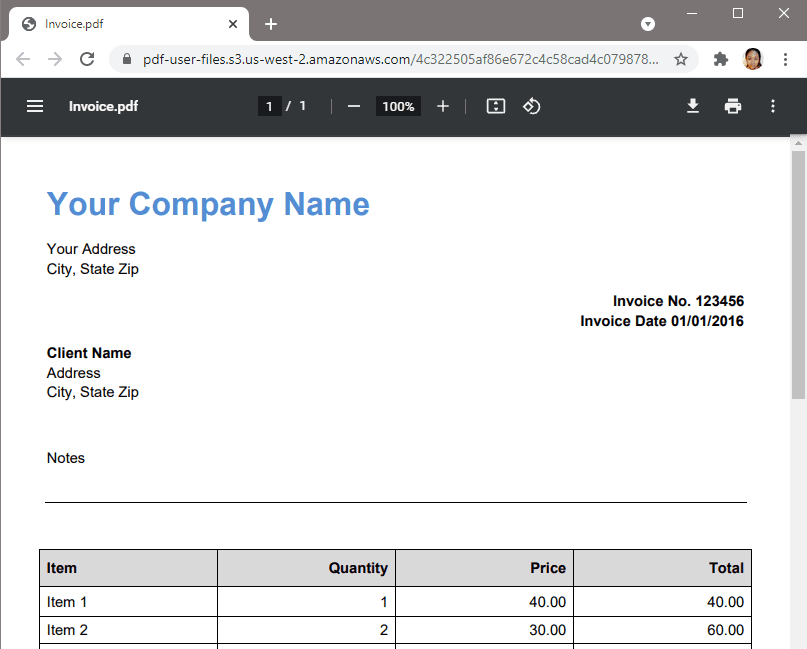
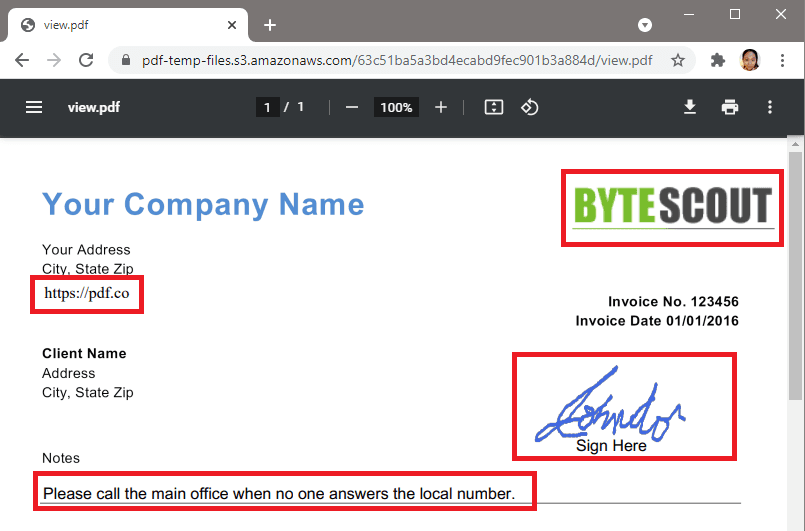
In this tutorial, we will show you how you can edit a scanned PDF file using Postman and PDF.co. We will add a company logo, a signature, a clickable website URL and a note to a sample scanned PDF.
Step 1: Sample Scanned PDF
Step 2: Open Postman Collection
We assume that you already set up the PDF.co Postman collection. If you haven’t yet, you can check out this step-by-step guide.
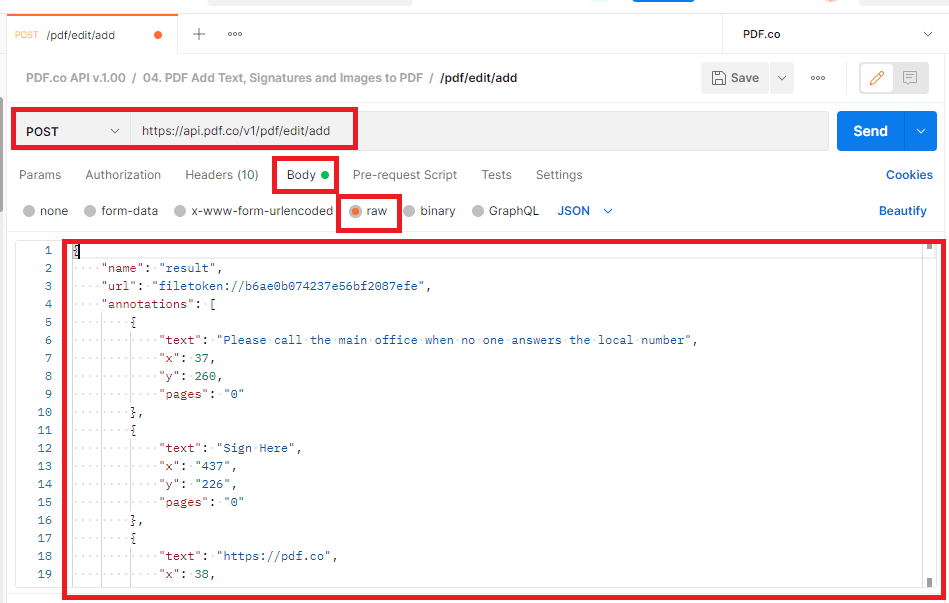
Open the PDF.co API v.1.00 collection and click on /pdf/edit/add under the PDF Add Text, Signature and Images to PDF folder. This will open a tab of a template with ready-to-run JSON.
Step 3: Fill Parameter Values
The pdf/edit/add endpoint parameters are already provided for and you can edit the values with your own. Let’s change the name to result, add the scanned PDF file URL, add the text objects in the annotations[] parameter, and the company logo and signature in the images[] parameter. Once all the values are added, click on the Send button so PDF.co can process the request.

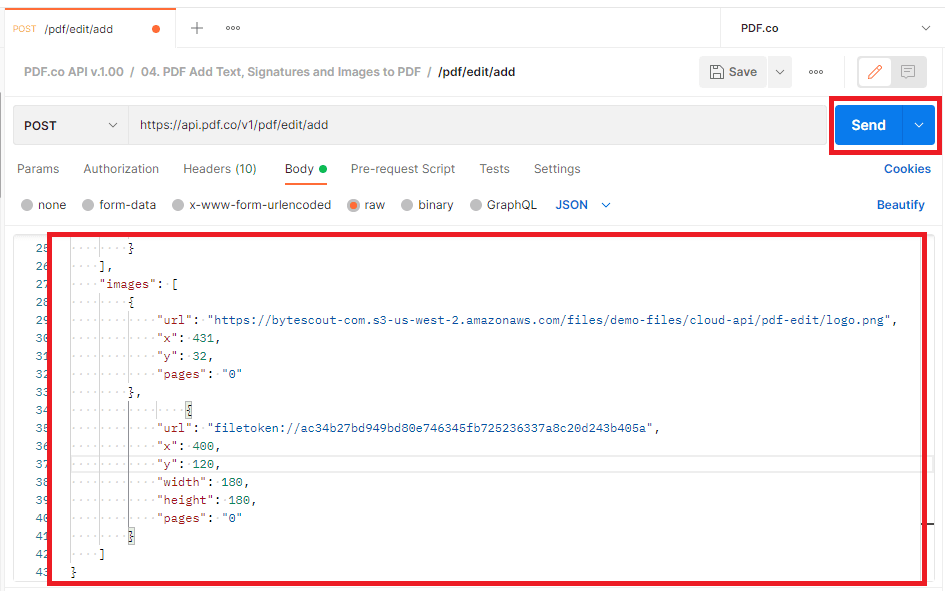
Here’s the cURL code version of the sample above:
curl --location --request POST 'https://api.pdf.co/v1/pdf/edit/add' \
--header 'Content-Type: application/json' \
--header 'x-api-key: YOUR_API_KEY' \
--data-raw '{
    "name": "result",
    "url": "filetoken://b6ae0b074237e56bf2087efe",
    "annotations": [
        {
            "text": "Please call the main office when no one answers the local number",
            "x": 37,
            "y": 260,
            "pages": "0"
        },
        {
            "text": "Sign Here",
            "x": "437",
            "y": "226",
            "pages": "0"
        },
        {
            "text": "https://pdf.co",
            "x": 38,
            "y": 109,
            "size": 12,
            "pages": "0",
            "link": "https://pdf.co",
            "fontName": "Times"
        }
    ],
    "images": [
        {
            "url": "https://bytescout-com.s3-us-west-2.amazonaws.com/files/demo-files/cloud-api/pdf-edit/logo.png",
            "x": 431,
            "y": 32,
            "pages": "0"
        },
                {
            "url": "filetoken://ac34b27bd949bd80e746345fb725236337a8c20d243b405a",
            "x": 400,
            "y": 120,
            "width": 180,
            "height": 180,
            "pages": "0"
        }
    ]
}'You can use the Make a Signature tool to draw your signature. The signature can be downloaded in PNG or you can use the Datauri as an image URL.
The Simple PDF Viewer is a very handy tool to get an object’s coordinate in a document. You can easily set and get the text and the coordinates of the image.
Step 4: PDF.co Call Result
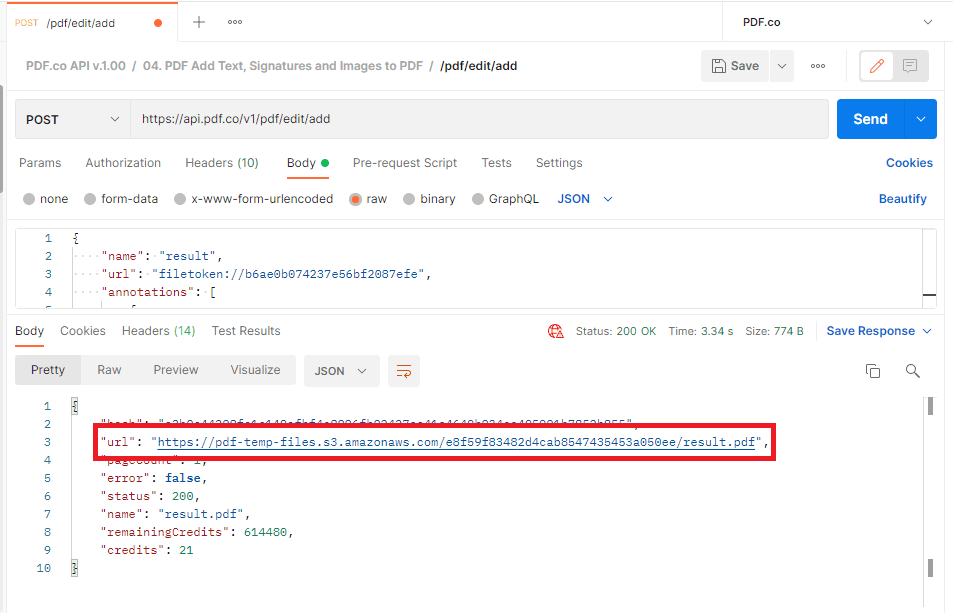
Great! PDF.co successfully processed the call. Kindly copy and paste the URL in your browser to see the result. The URL is temporary and will expire after an hour by default. You have the option to increase the output link expiration in the Business plan and higher.
Step 5: Scanned PDF Output
After we have added the company logo, affixed our signature, added a clickable company link and a note, our scanned PDF now looks like this. The document can be downloaded to your computer and/or printed right there.
In this tutorial, you learned how to add regular text, clickable links, company logos, and affix your signature in a scanned PDF file using PDF.co and Postman. You familiarized yourself with the PDF.co free tools to draw your signature and get the object coordinates in a PDF. You also learned about the PDF.co built-in file storage and how to set up the Postman collection.
