Extract Selected Fields from a Scanned Receipt with PDF.co and Make
This example uses PDF.co and Make to retrieve one scanned receipt from Google Drive and extract the fields defined in its Document Parser template. The template is tailored to the sample receipt’s layout.
IN THIS TUTORIAL
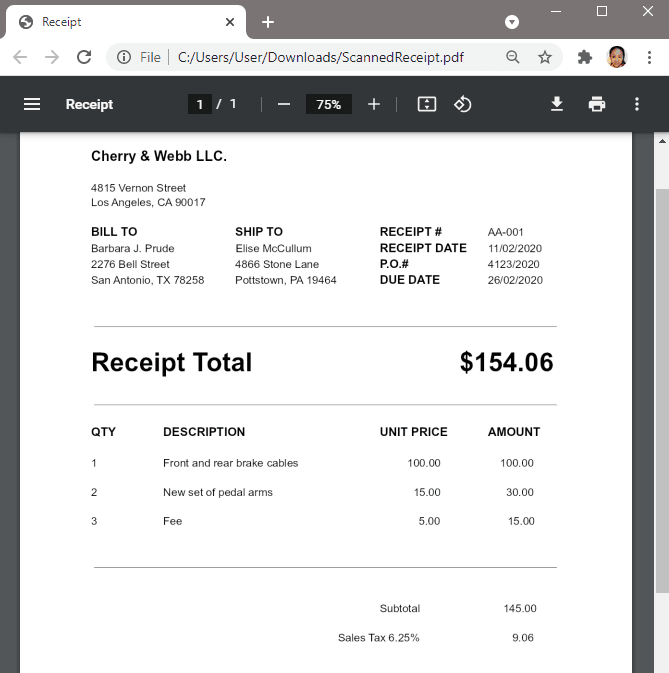
Step 1: Sample Scanned PDF Receipt
The template selects the company name, receipt number, Bill To name, Ship To name, and receipt line items.
The Bill To and Ship To names are separate from their full postal addresses. This is selected-field extraction, not an export of every word on the receipt.
Step 2: Create Scenario
First, let’s create a Scenario and access our scanned PDF receipt inside Google Drive.
Step 3: Select Download A File
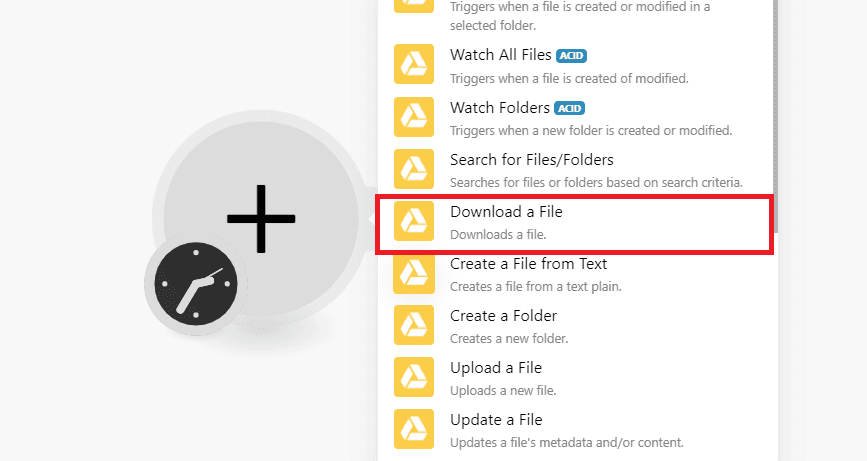
Next, select the Download a File module.
Step 4: Configure Google Drive Module
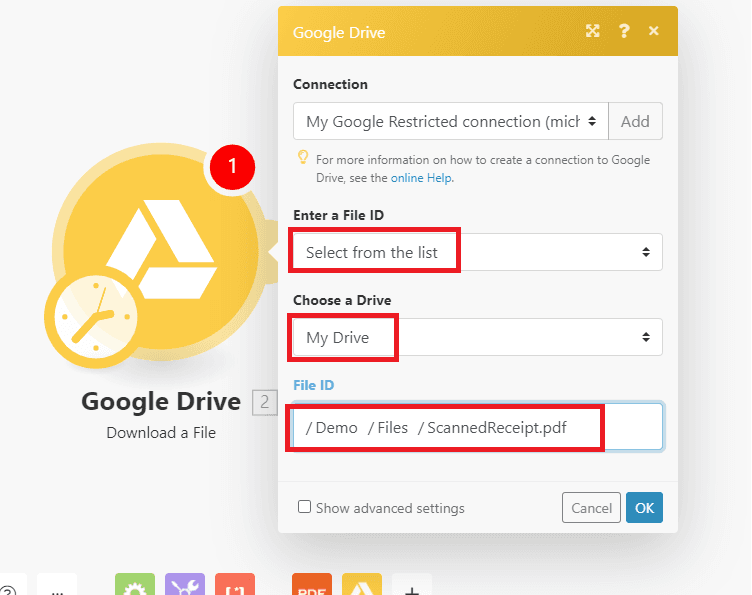
Then, let’s configure the Download a File module.
- In the Connection field, select the Google Drive you want to connect to Make.
- In the Enter a File ID field, choose the Select from the list option.
- In the Choose a Drive field, select the My Drive or Google Drive where the file is stored.
- In the File ID field, choose the scanned PDF receipt’s file name.
Step 5: Run Google Drive Module
Let’s run the module to make sure that it’s set up correctly.
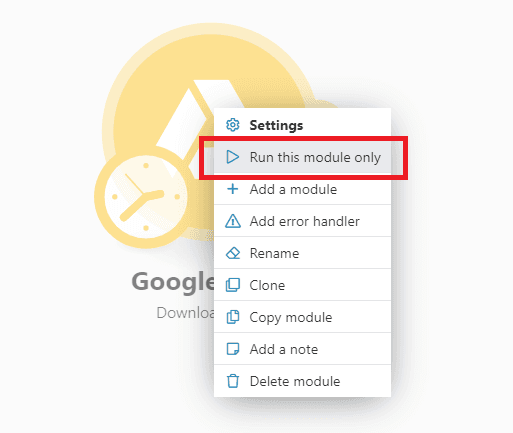
Step 6: Add PDF.co Module
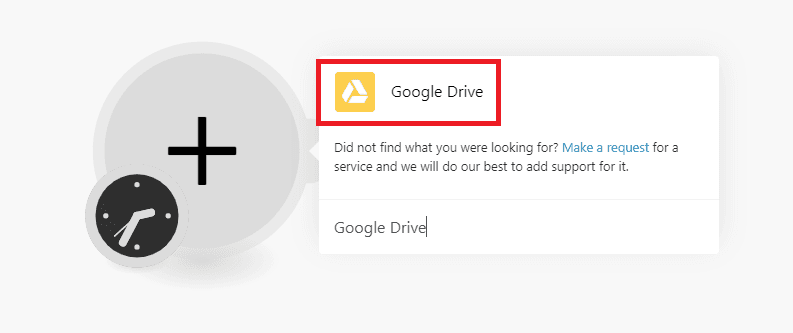
Let’s add another module and choose PDF.co.
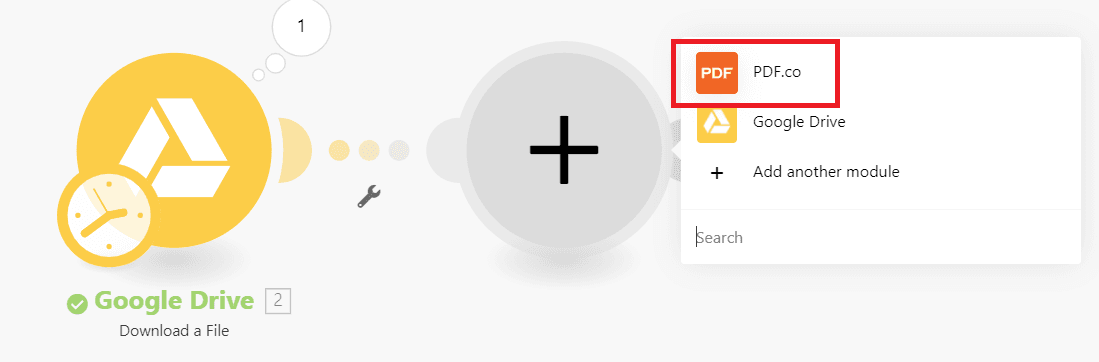
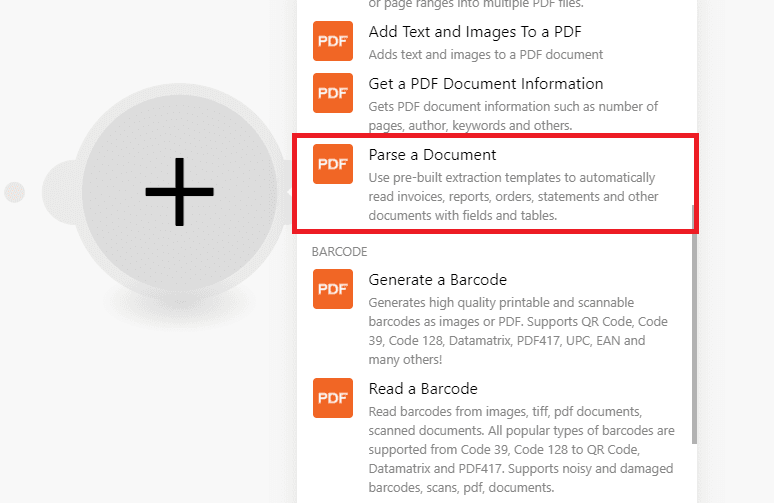
Step 7: Select Parse A Document
Then, select the Parse a Document module to extract text from the scanned PDF receipt.
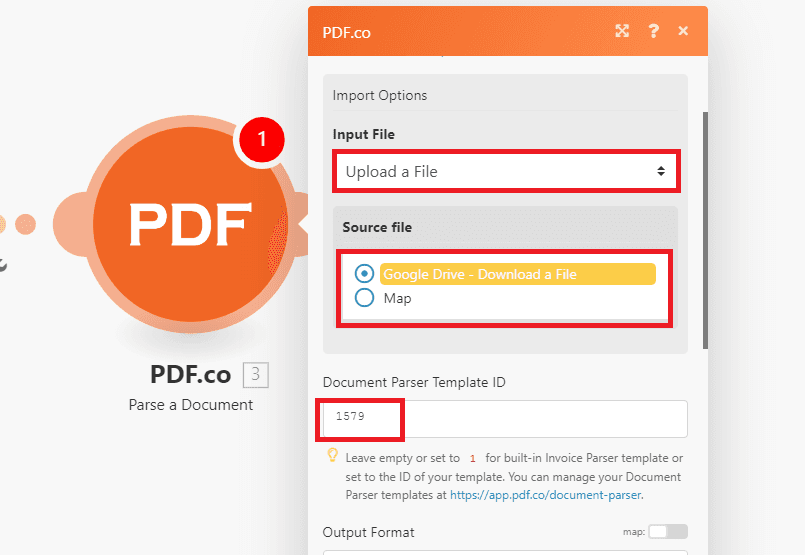
Step 8: Setup PDF.co Module
Let’s set up the Parse a Document module.
- In the Input File field, select the Upload a File option.
- In the Source File field, choose the Google Drive – Download a File.
- In the Document Parser Template ID field, enter the template’s ID. We show how we created the template for this document in Step 10.
Step 9: Parse A Document Result
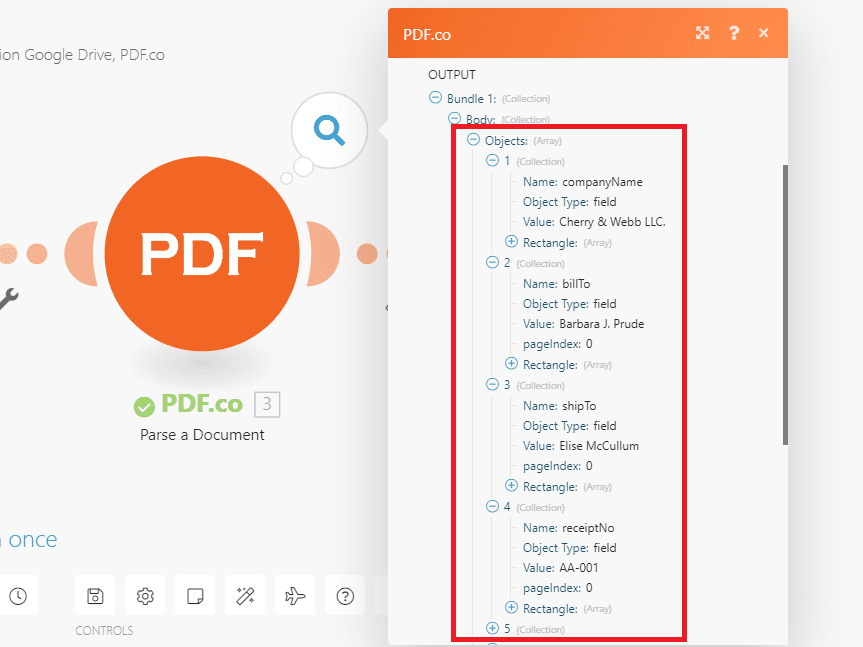
Run the scenario and inspect the returned Body → Objects entries. Review the header fields companyName, billTo, shipTo, and receiptNo, comparing each object’s Value with the corresponding information on the source receipt.
The line-item configuration later in this tutorial defines qty, description, unitPrice, and amount. Inspect that table separately and compare every returned row with the receipt. Correct header values alone do not confirm that all line items were extracted.
Step 10: Template Creation Guide
In this step, we will show how you can create a template for a scanned PDF receipt.
Step 1: Access PDF.co Document Parser
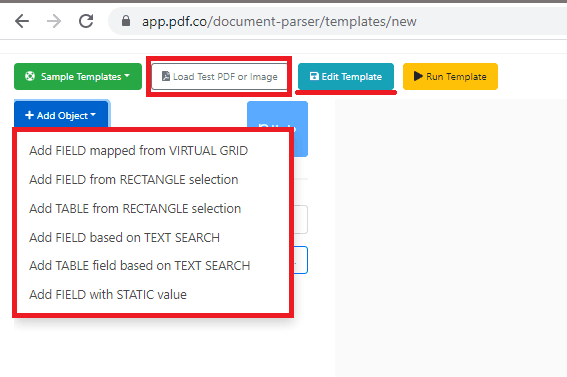
First, open the Document Parser in your PDF.co account. Click on the New Template link to open the Online Template Editor. Here’s a direct link: https://app.pdf.co/document-parser/templates/new
Next, click on the Load Test PDF or Image button to open your document.
Step 2: Get Company Name
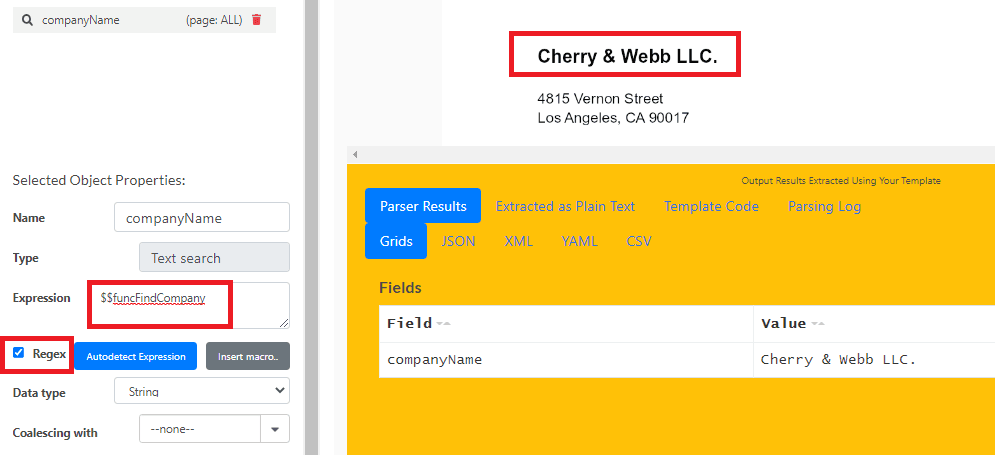
Then, click on the +Add Object button and select the Add FIELD based on TEXT SEARCH. This is the object that we will use to parse all the non-table text such as the Company Name.
To get the Company Name, we can use the $$funcFindCompany special function. This will return the first company name that it finds in the document. You can add it in the Expression field. Make sure to check the Regex box every time you use the special functions, macros, and regular expressions.
Step 3: Get Receipt Number
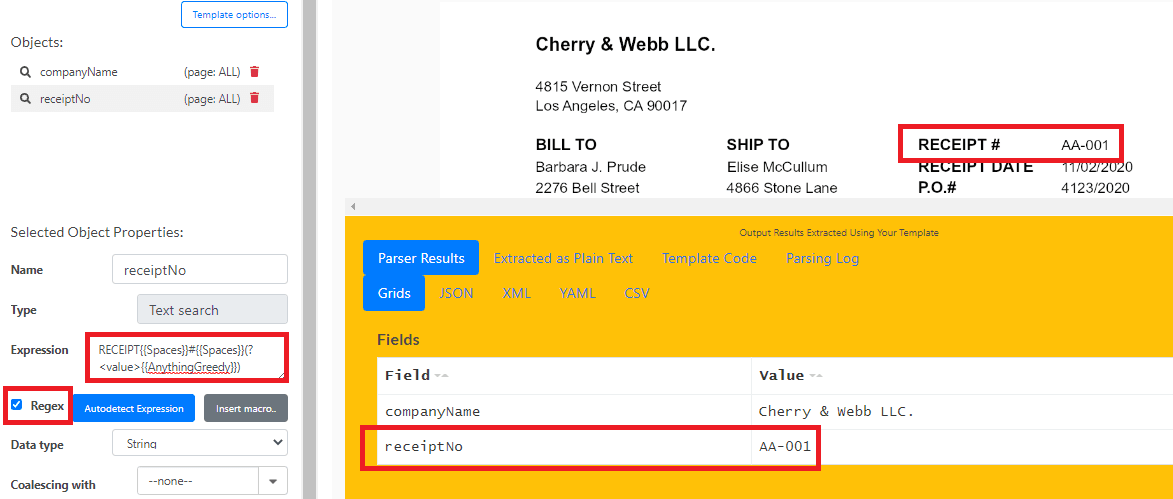
To get the Receipt #, add RECEIPT{{Spaces}}#{{Spaces}}(?<value>{{AnythingGreedy}}) in the Expression field and check the Regex check box.
Step 4: Get Bill To and Ship To
Getting the Bill To name and Ship To name is a bit complex. You can use {{LineStart}}{{Spaces}}(?<value>{{SentenceWithSingleSpaces}}){{Spaces}}{{SentenceWithSingleSpaces}}{{Spaces}}RECEIPT DATE to get the Bill To name and {{LineStart}}{{Spaces}}{{SentenceWithSingleSpaces}}{{Spaces}}(?<value>{{SentenceWithSingleSpaces}}){{Spaces}}RECEIPT DATE to get the Ship To name.
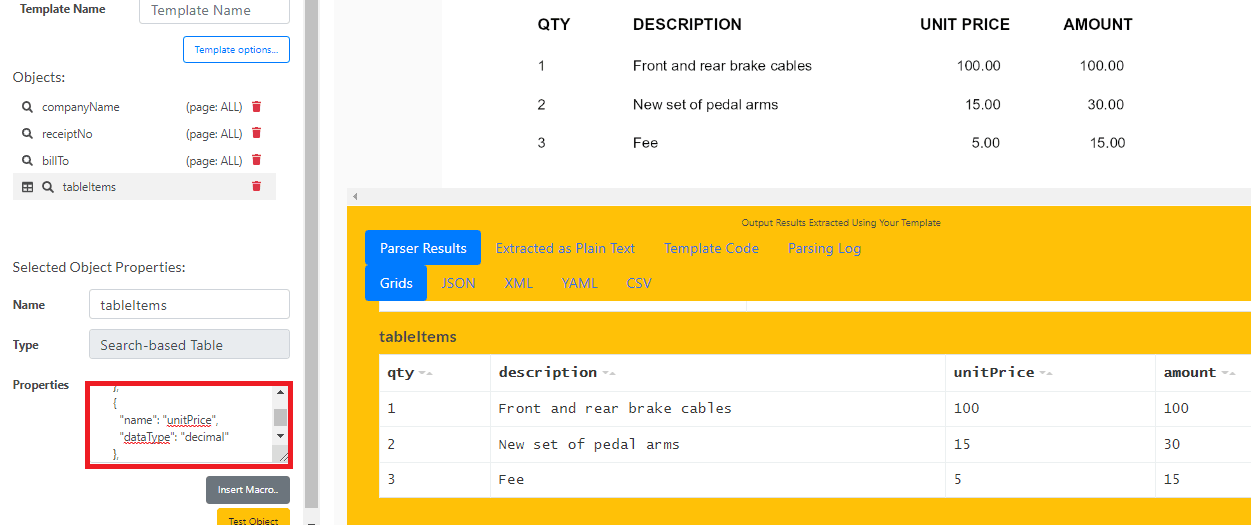
To get the table items, we will use the ADD TABLE field based on TEXT SEARCH object. Add the following code to the Expression field to get all the items and click the Run Template button to see the result.
{
  "start": {
    "expression": "QTY{{Spaces}}DESCRIPTION",
    "regex": true
  },
  "end": {
    "expression": "Subtotal{{Spaces}}{{Number}}",
    "regex": true
  },
  "row": {
    "expression": "{{LineStart}}{{Spaces}}(?{{Digits}}){{Spaces}}(?{{SentenceWithSingleSpaces}}){{Spaces}}(?{{Number}}){{Spaces}}(?{{Number}})",
    "regex": true
  },
  "columns": [
    {
      "name": "qty",
      "dataType": "integer"
    },
    {
      "name": "description",
      "dataType": "string"
    },
    {
      "name": "unitPrice",
      "dataType": "decimal"
    },
    {
      "name": "amount",
      "dataType": "decimal"
    }
  ]
}
You can save the template and get the Template ID by clicking on the Save Template and Return button.
Conclusion
This example connects a downloaded receipt to a Document Parser template and checks the selected field output. The extraction rules are specific to the receipt layout shown.
Before reusing the template with other receipts, compare the returned header values and line items with those documents. A different layout may require different extraction rules.
Related Tutorials