Automate Text Extraction from Image or Scanned PDF Receipts using PDF.co and Zapier
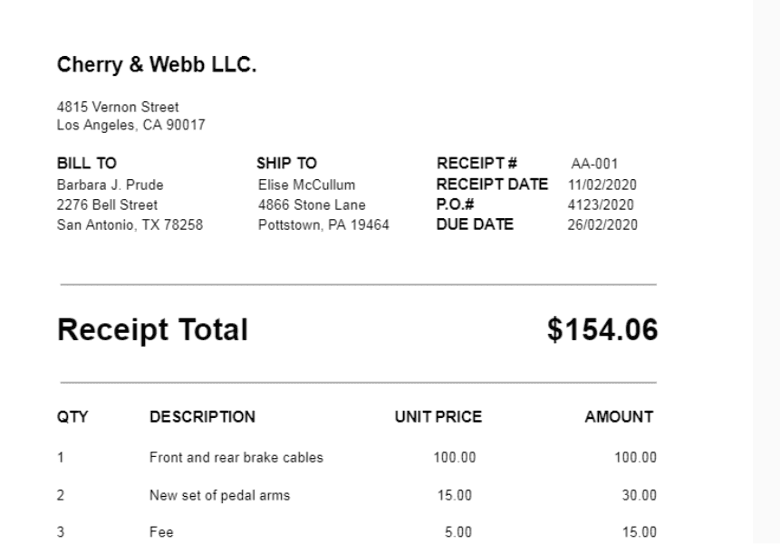
In this tutorial, we’ll demonstrate how to automate data extraction from scanned PDF receipts using PDF.co and Zapier. Below is an example of the PDF receipt we’ll be using in this demo.
IN THIS TUTORIAL
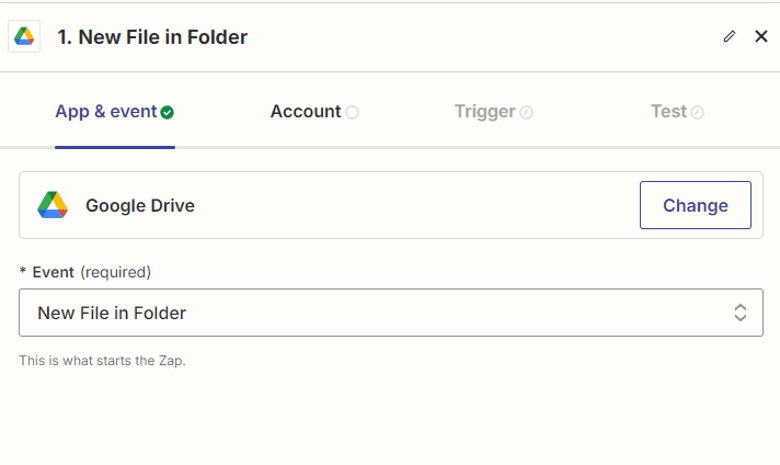
Step 1: Google Drive New File in Folder
Use the Google Drive "New File in Folder" trigger to obtain the specific scanned PDF receipt.
Step 2: Setup Google Drive Configuration
- Select "My Google Drive" as the drive for this automation.
- Next, choose the specific folder within your Google Drive where the PDF file is stored.

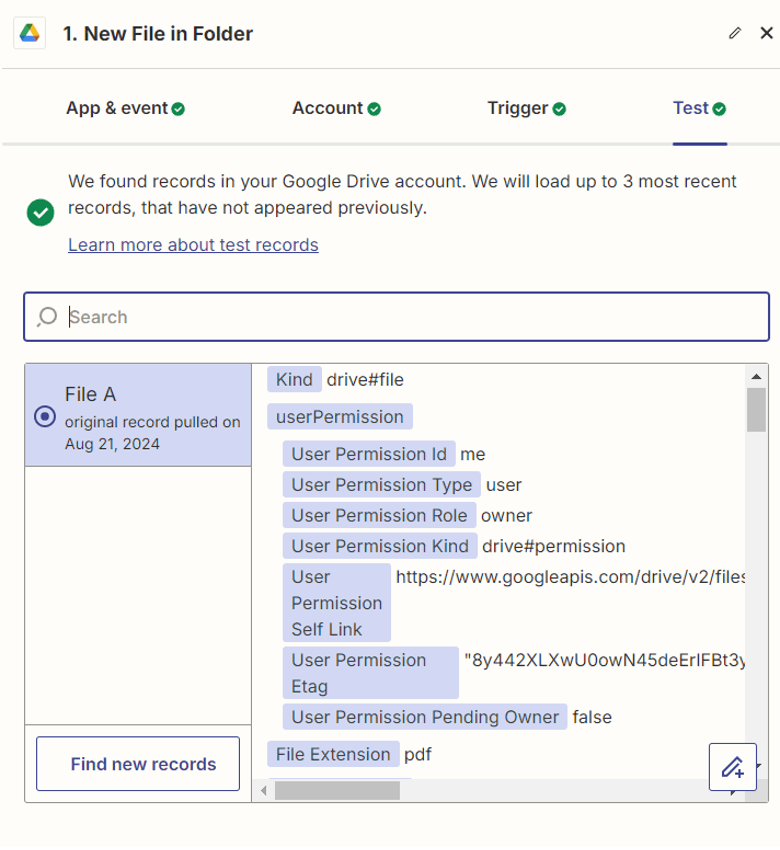
Step 3: Test Trigger
Test the trigger to ensure it correctly obtained the specific file in your Google Drive folder.
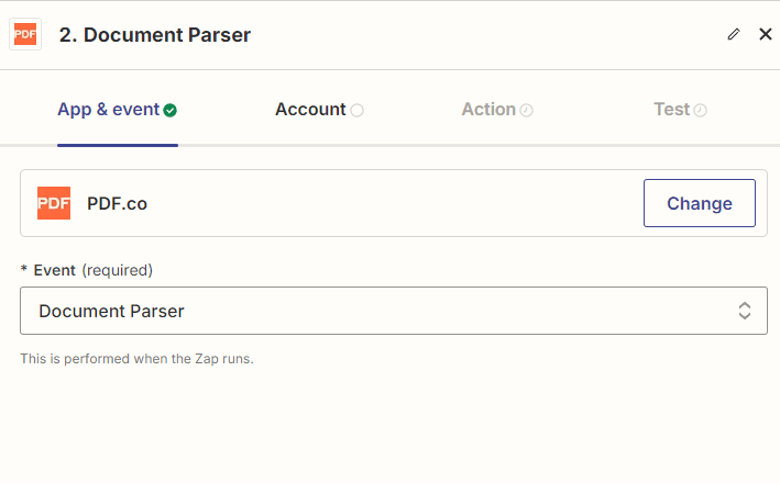
Step 4: Add PDF.co App
Next, let's add the PDF.co app and utilize the Document Parser feature to extract data from the scanned PDF receipt.
Step 5: Setup PDF.co Configuration
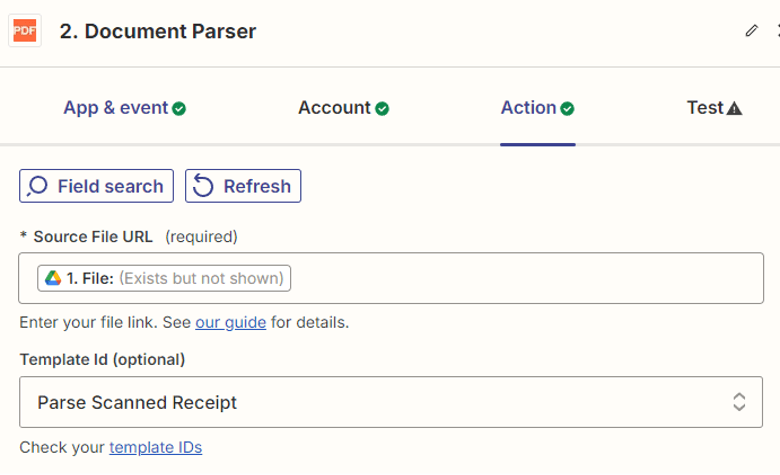
- In the Source File URL field, select the
Fileproperty to retrieve files, allowing PDF.co to access the necessary file for processing. - For the Template Id, enter the Id associated with the receipt’s template. You can find a guide on how we created the template for this document below.
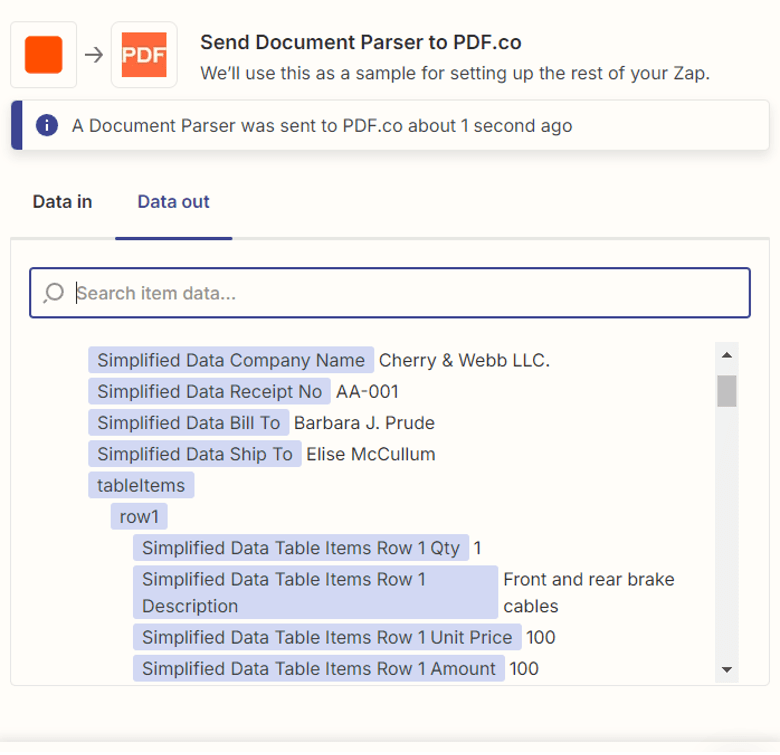
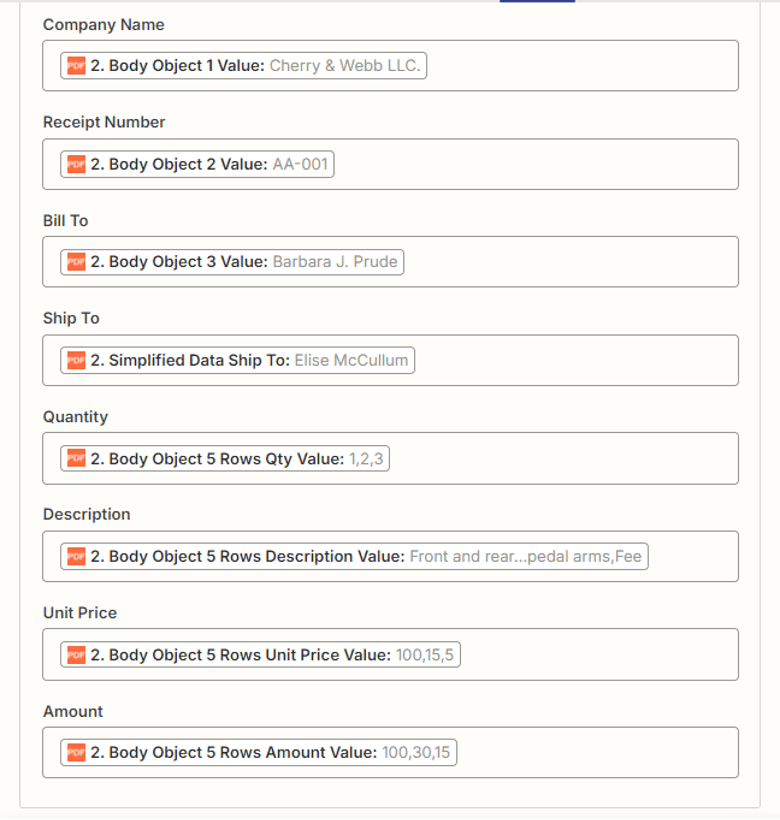
Step 6: Test PDF.co Action
Now, let’s move on to testing the action to extract data from the scanned PDF receipt.
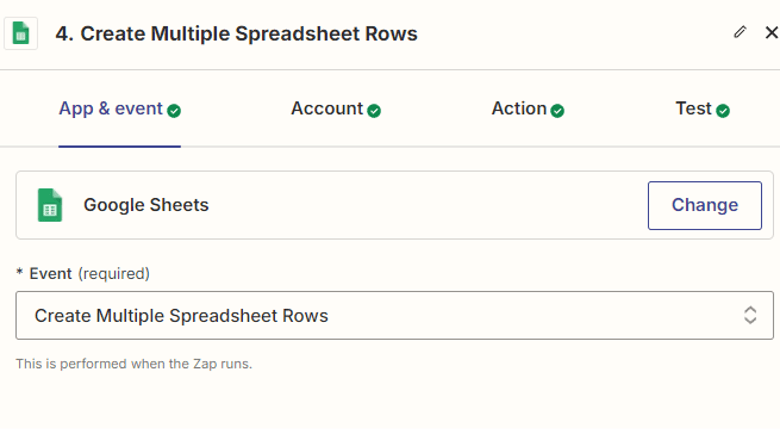
Step 7: Add Google Sheets
Now, let's add the Google Sheets module and select the Create Multiple Spreadsheet Row action to save all the extracted information to Google Sheets.
Step 8: Configure Create Multiple Spreadsheet Row
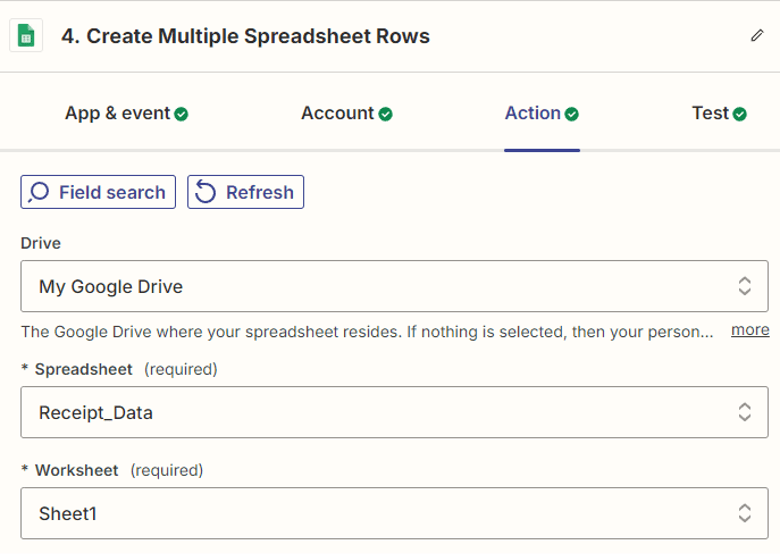
- Select "My Google Drive" as the designated drive.
- Specify the name of the Spreadsheet and Worksheet where you want to save the extracted information.
- Then, map all the extracted data to the appropriate columns in the spreadsheet.
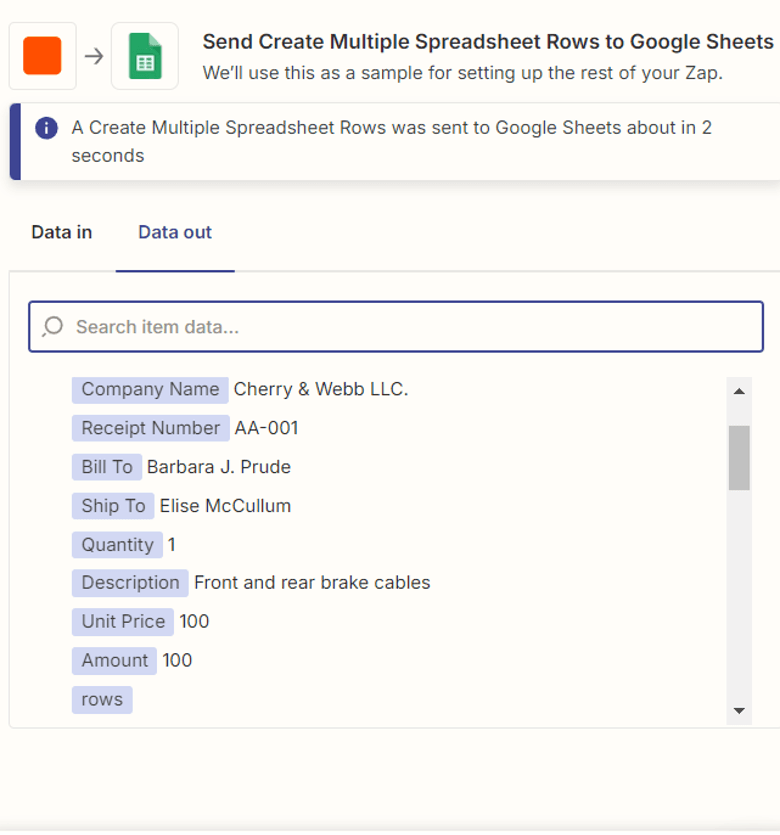
Step 9: Test File Upload
Test the Create Spreadsheet Row action by sending a request to Google Sheets to ensure the data is correctly added to the spreadsheet.
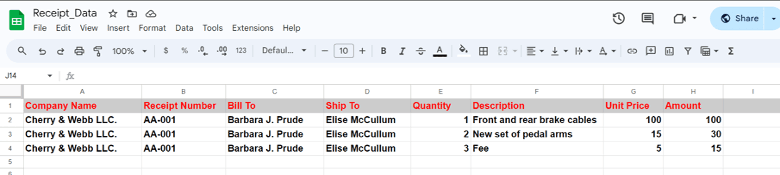
Step 10: Open Google Sheets Spreadsheet
After a successful test, open the Google Sheets spreadsheet to review the extracted information that has been added.
Step 11: Template Creation Guide
In this step, we will teach you how to create the template for this specific scanned PDF receipt.
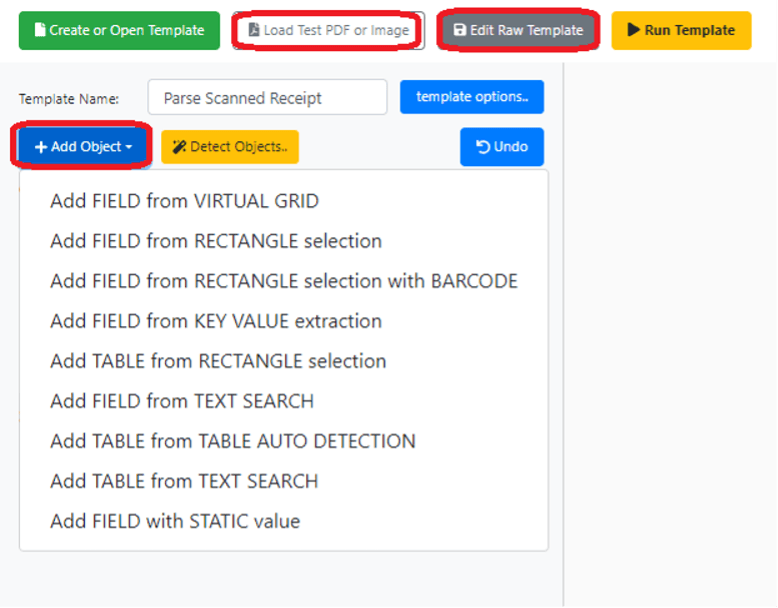
Step 1: Open PDF.co Account
First, go to your PDF.co account and click on the Document Parser Manager. On the top right, click on the Create New Template to open the Online Template Editor. Here’s a direct link: https://app.pdf.co/document-parser/templates/new
Step 2: Template Editor
Next, click on the Load Test PDF or Image button to open the scanned PDF receipt. You can either copy and paste the sample template in the Edit Template to run the template right away or start from scratch.
To start from scratch, click on the +Add Object button and select the Add FIELD based on TEXT SEARCH. This is the object that we will use to parse all the non-table text such as Company Name, Receipt #, etc.
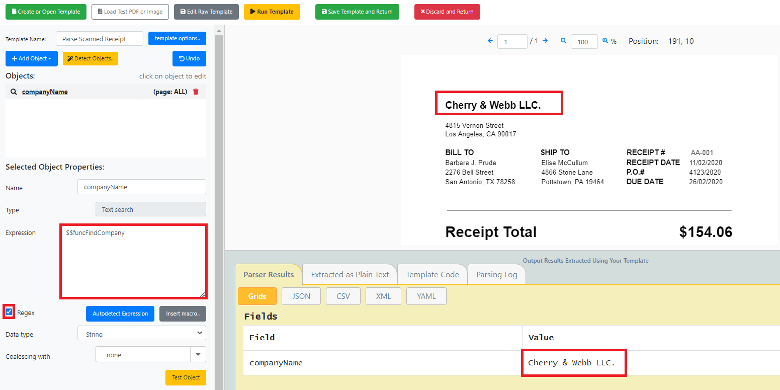
Step 3: Parse Company Name
To get the Company Name, we can use the $$funcFindCompany special function. This will find the first company name that it encounters in the document. You can add it in the Expression field. Make sure to check the Regex box every time you use the special functions, macros, and regular expressions.
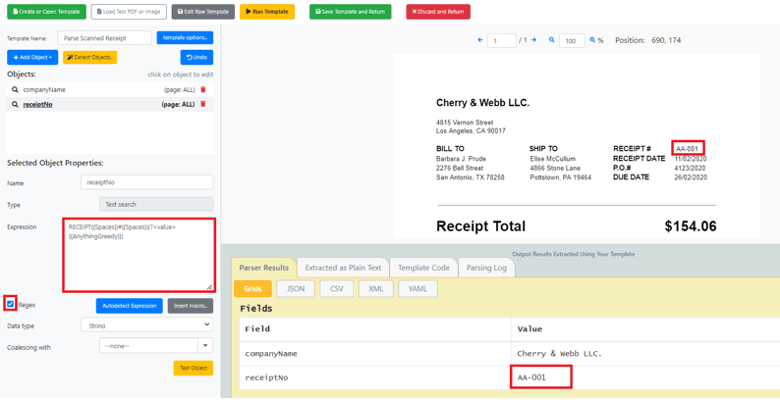
Step 4: Parse Receipt Number
To extract the Receipt #, enter RECEIPT{{Spaces}}#{{Spaces}}(?<value>{{AnythingGreedy}}) in the Expression field and check the "Regex" box.
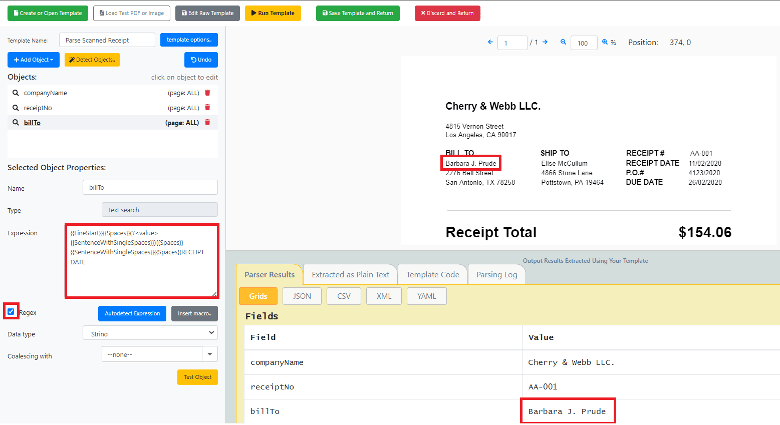
Step 5: Parse Bill To Value
To extract the "Bill To" value, use {{LineStart}}{{Spaces}}(?<value>{{SentenceWithSingleSpaces}}){{Spaces}}{{SentenceWithSingleSpaces}}{{Spaces}}RECEIPT DATE in the Expression field.
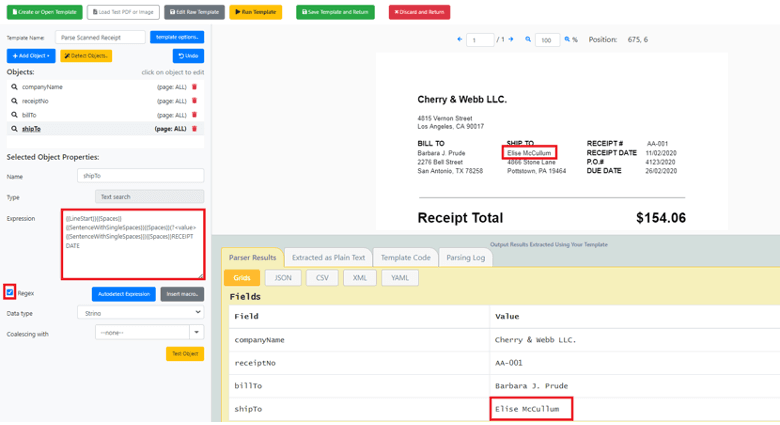
Step 6: Parse Ship To Value
To extract the "Ship To" value, use {{LineStart}}{{Spaces}}{{SentenceWithSingleSpaces}}{{Spaces}}(?<value>{{SentenceWithSingleSpaces}}){{Spaces}}RECEIPT DATE in the Expression field.
Step 7: Extract Table Items
To extract the table items, we'll use the ADD TABLE field based on the TEXT SEARCH object. Enter the below Expression to capture all the items, then click the "Run Template" button to view the results.
{
  "start": {
    "expression": "QTY{{Spaces}}DESCRIPTION",
    "regex": true
  },
  "end": {
    "expression": "Subtotal{{Spaces}}{{Number}}",
    "regex": true
  },
  "row": {
    "expression": "{{LineStart}}{{Spaces}}(?{{Digits}}){{Spaces}}(?{{SentenceWithSingleSpaces}}){{Spaces}}(?{{Number}}){{Spaces}}(?{{Number}})",
    "regex": true
  },
  "columns": [
    {
      "name": "qty",
      "dataType": "integer"
    },
    {
      "name": "description",
      "dataType": "string"
    },
    {
      "name": "unitPrice",
      "dataType": "decimal"
    },
    {
      "name": "amount",
      "dataType": "decimal"
    }
  ]
}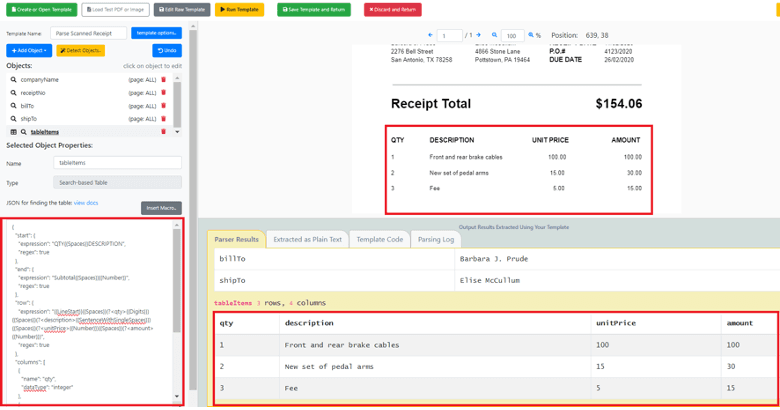
After completing the extraction process, save the template by clicking on the "Save Template and Return" button. Then, retrieve the Template Id to use in your automation workflow.
In this tutorial, you learned how to automate the text extraction in a scanned PDF receipt using PDF.co and Zapier. You also learned how to use the different Document Parser objects, special function and macros to extract specific text and table items.
