AppGyver + PDF.co
AppGyver is a powerful no-code platform for creating apps across mobile, desktop, web, TV, and more. With Composer Pro, you can visually build high-performance React Native apps that tap into full native device capabilities—giving you unlimited creative control without writing code.
How to Convert PDF to XLS
Step 1: Create a New Project
- First, log into your AppGyver account and click on the Create New button.
Step 2: Click Data Menu
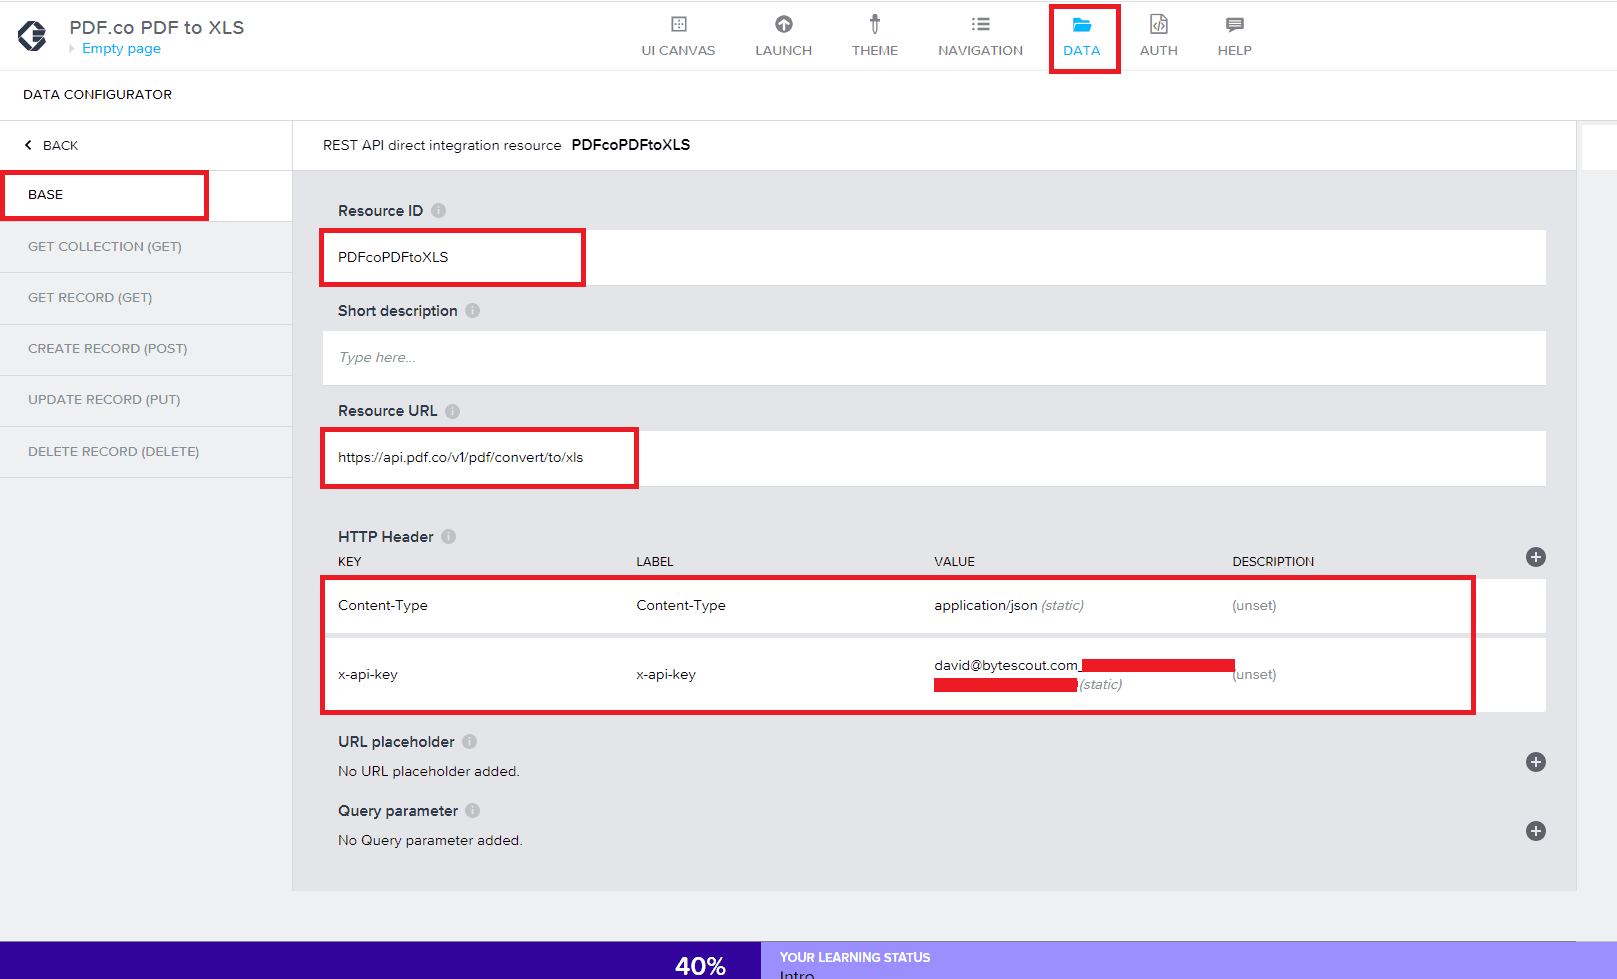
- Next, click on the Data menu and add data resource. Then, fill out the highlighted fields.
- Then, type in your desired Resource ID name and add the Resource URL.
- Under the HTTP Header, enter
Content-Typefor the first Key andapplication/jsonas the Value. - For the second Key, type
x-api-keyand addPDF.co API Keyfor the Value. You can get the API Key in your PDF.co dashboard.
Step 3: Create Record and Schema
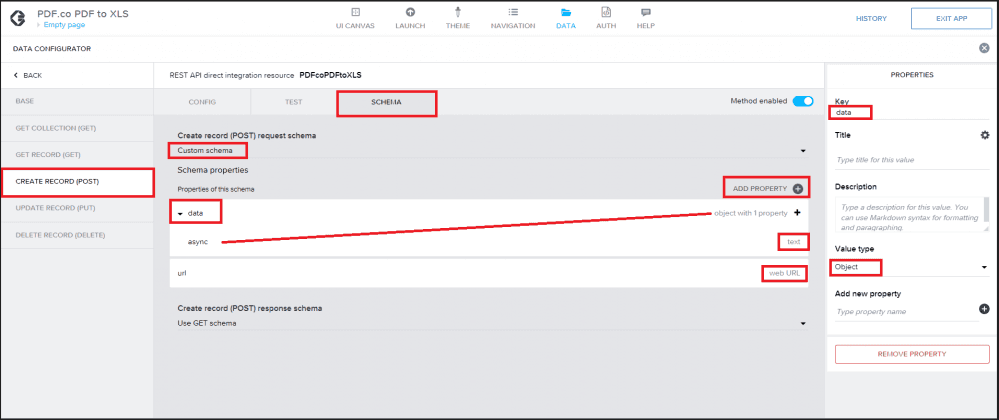
- Click on the Create Record tab and open the Schema menu.
- Kindly select the Custom schema for Create record (POST) request schema and add the PDF to XLS API parameters as properties.
Step 4: Test Menu and Custom Object
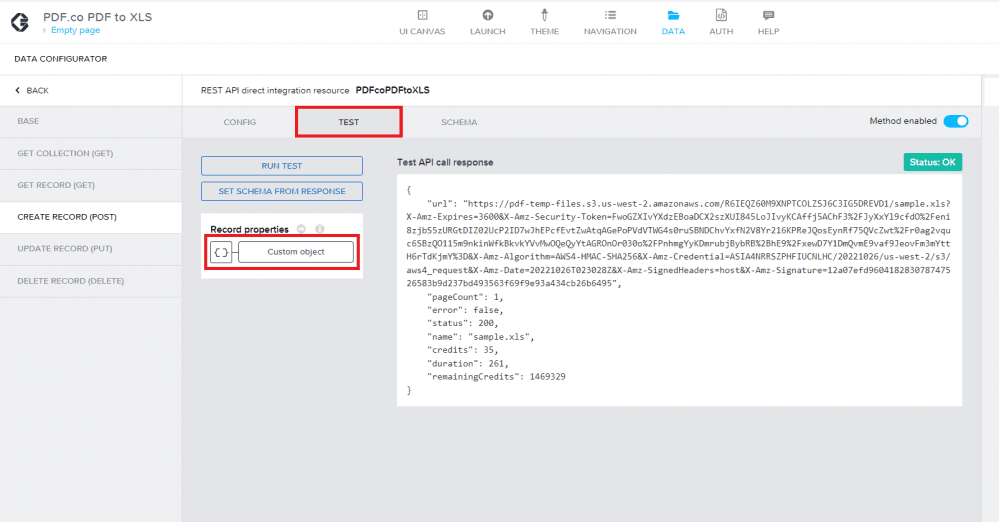
- Now, click on the Test menu and the Custom Object properties.
Step 5: Add Sample Values
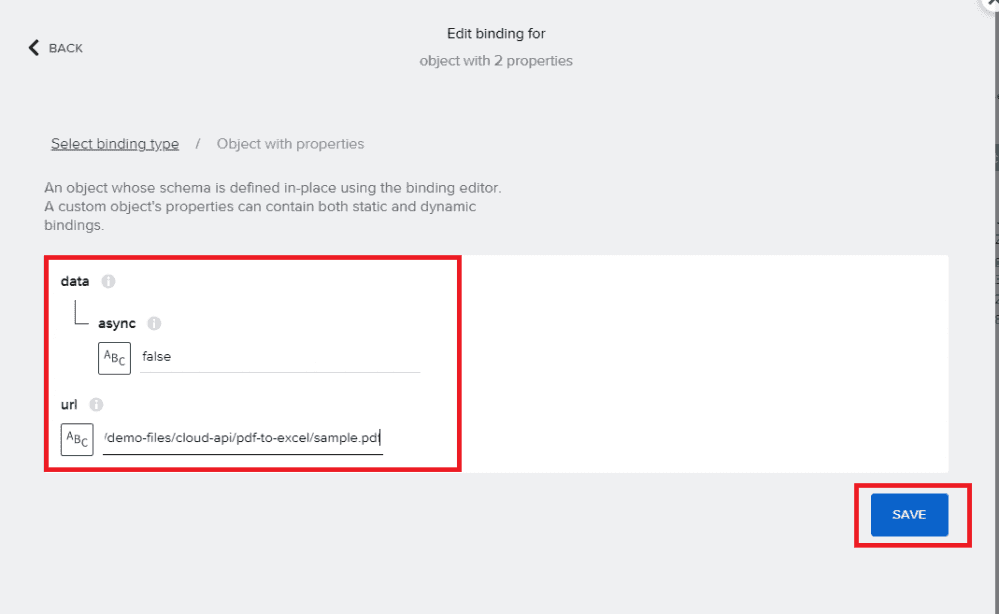
Let’s add the sample values.
- For the Async field, set it to
false. If you want to run processing asynchronously, set it totrue. - For the URL field, input the direct URL of the source file.
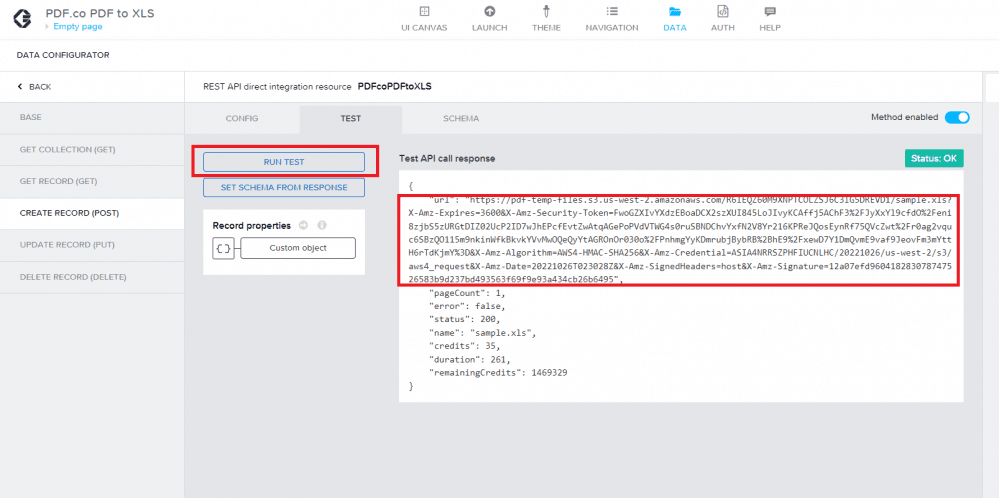
Step 6: Click on Run Test Button
- After adding the sample values, click on the Run Test button to see the result. Then, copy the URL and paste it into your browser to view the output.
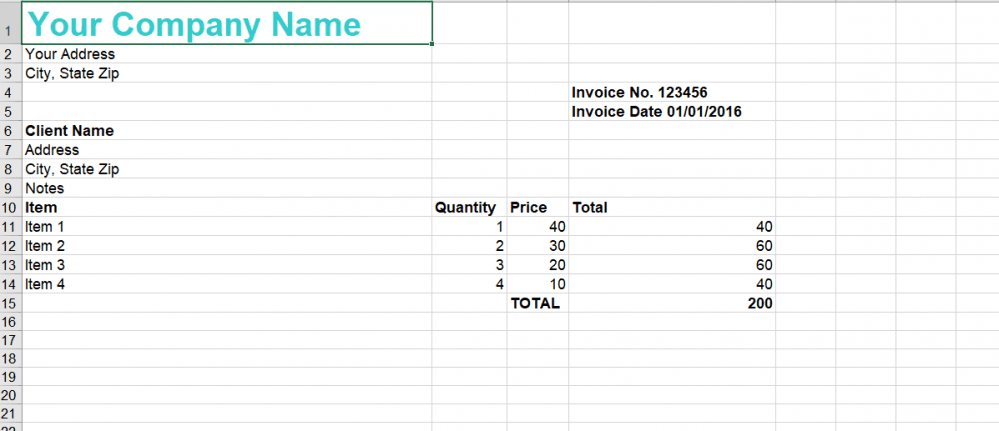
Step 7: PDF to XLS Output
- Here’s the converted XLS output.
In this tutorial, you learned how to integrate PDF.co and Appgyver. You learned how to use the PDF.co Web API to convert PDF to XLS. You also learned how to set up AppGyver and convert PDF documents to XLS files.