Albato + PDF.co
AI-Powered Insights for Smarter Customer Experiences. Albato is a customer experience analytics platform that uses AI to analyze interactions across channels, uncover behavior and sentiment trends, and deliver actionable insights. Optimize your service, marketing, and decision-making with data that drives results.
How to use PDF Edit Add API
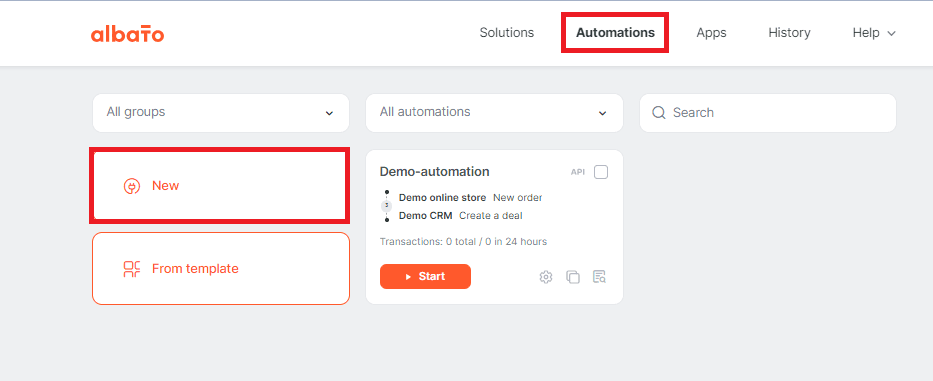
1. Create an Automation
- To begin, access your Albato account and navigate to the Automations menu. From there, click on the New button to initiate the creation of a new automation builder.
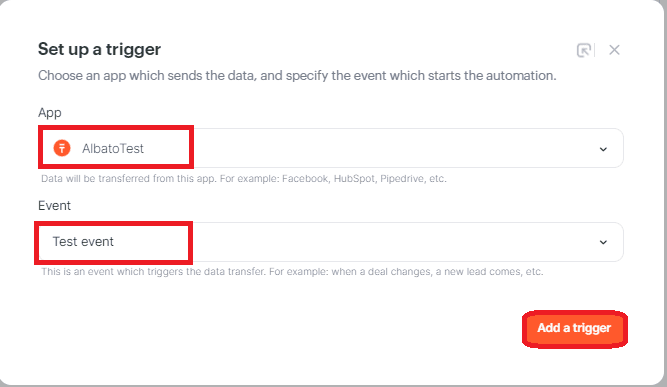
2. Setup a Trigger
- To configure the trigger for this tutorial, we will use the AlbatoTest and Test Event. However, it’s important to note that the choice of trigger depends on your specific preferences and requirements. Feel free to select a different trigger that aligns better with your needs.
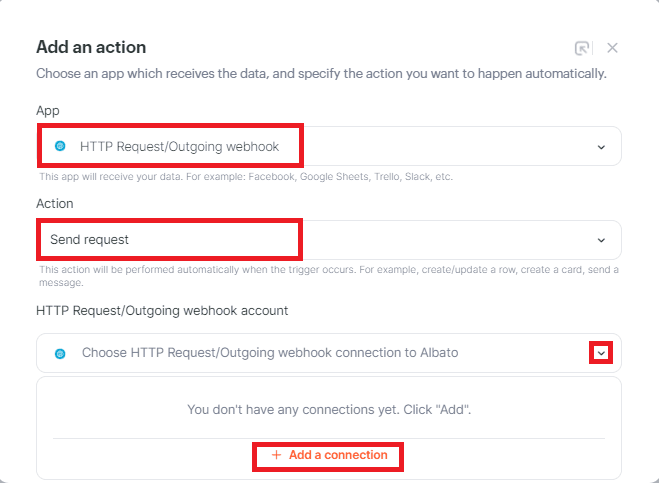
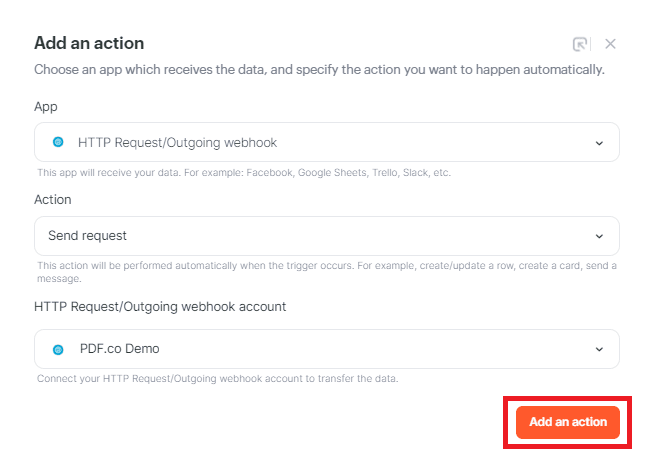
3. Add an Action
- First, locate and choose the HTTP Request/Outgoing webhook app. This application enables us to send data from one application to another using the HTTP protocol, serving as a communication mechanism between different systems or services.
- Next, select the Send Request option to initiate the process of sending an HTTP request from one system to another. This action allows us to establish communication and facilitate data exchange between the systems involved.
- Then, click the Add a connection button.
4. Connection to HTTP Request/Outgoing webhook
To establish a connection with the HTTP Request/Outgoing webhook, follow these steps:
- In the Title field, provide a name for your connection that describes its purpose or functionality.
- In the URL field, enter the following URL:
https://api.pdf.co/v1/pdf/edit/add. - In the Content-Type field, choose Json from the available options.
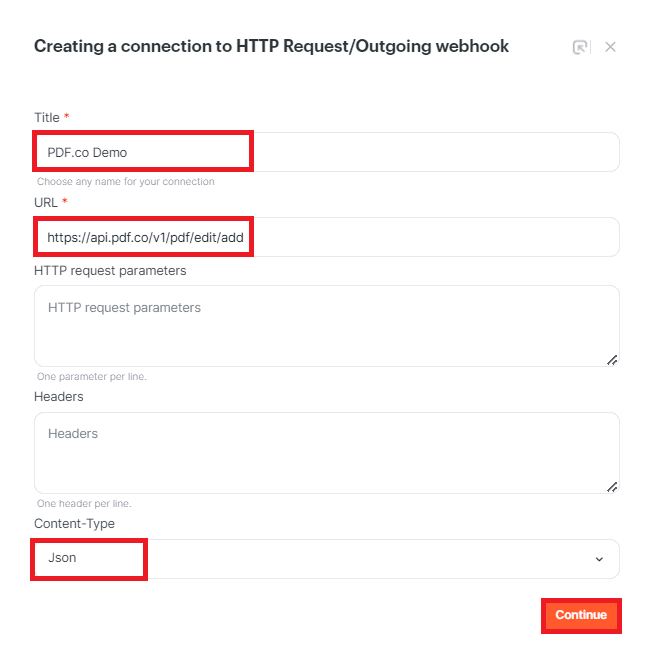
- Then, click the Add an action button.
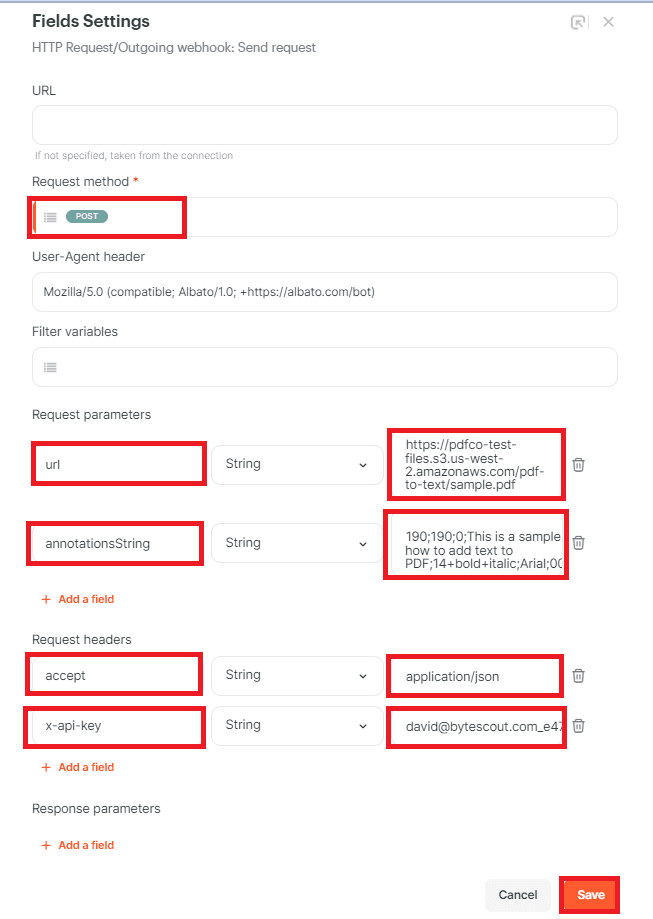
5. Setup HTTP Request/Outgoing webhook
Let’s configure the HTTP Request/Outgoing webhook with the following steps:
- In the Request method field, choose POST. This method is used to send data to a server or create a new resource on the server.
- In the Request parameters field:
- First, type the URL parameter and input the source file url.
- Next, specify the annotationsString parameter along with the x and y coordinates where you want to add the text. You can easily obtain the coordinates using the PDF.co PDF Edit Add Helper tool.
- Additionally, include the list of pages, font size, font name, and font color for the annotations. Refer to the PDF.co API Docs for the proper format for adding annotations.
- In the Request headers field:
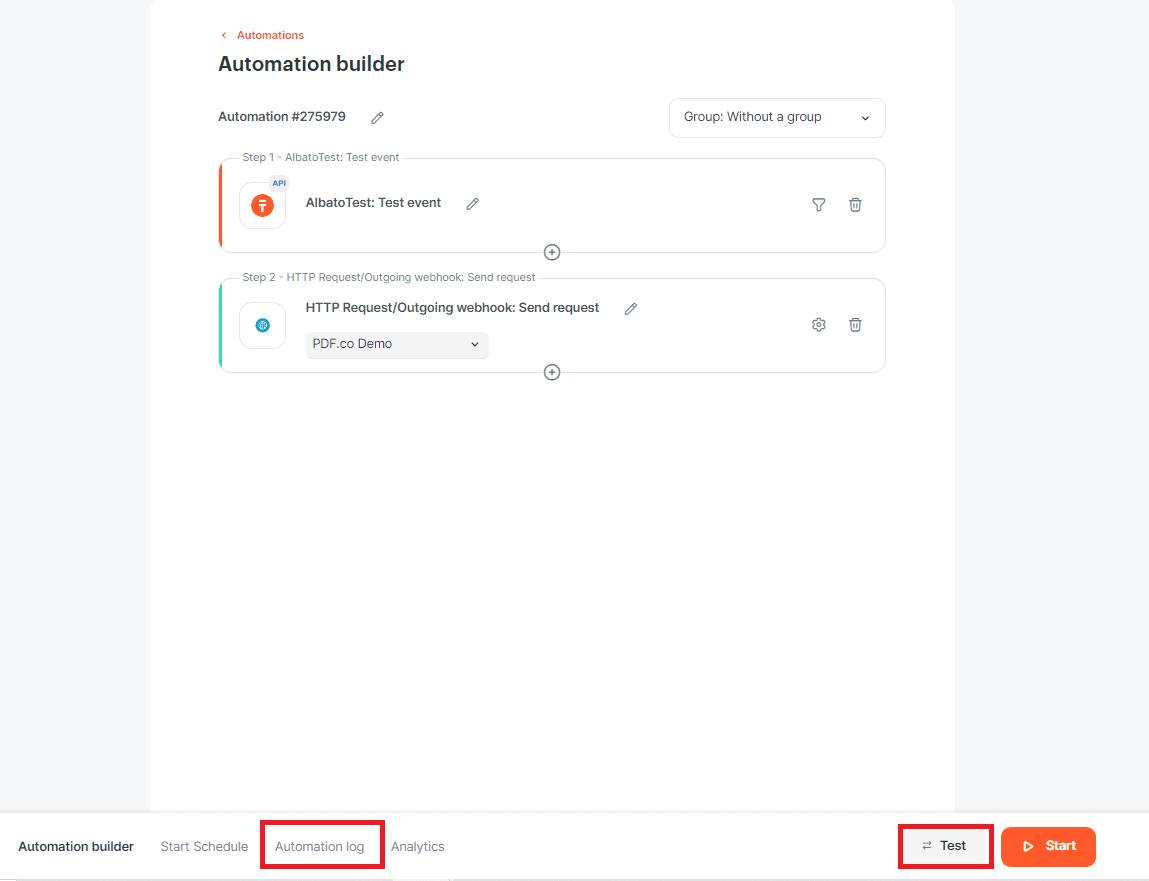
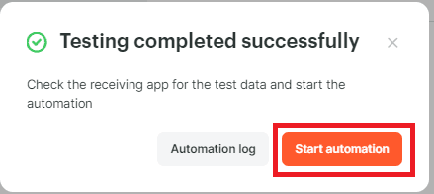
6. Test Automation Builder
- Let’s proceed with testing the automation builder. After the successful testing, initiate the automation and click on the Automation log to access the outcome.
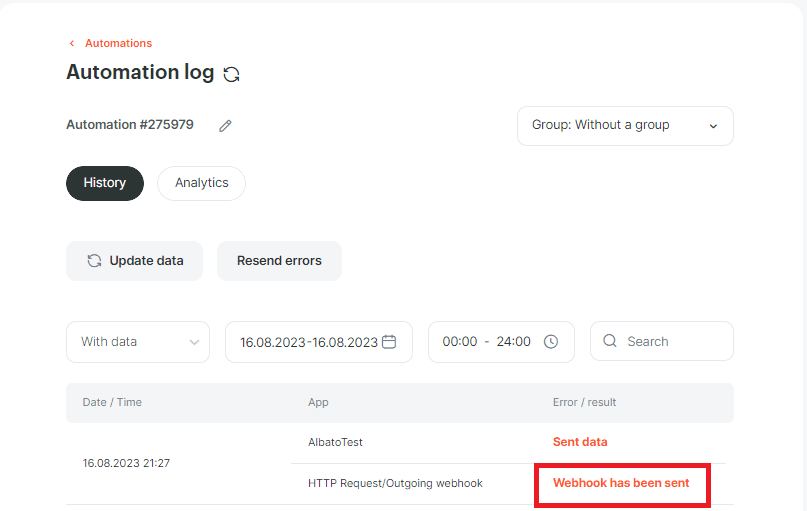
7. Automation Log
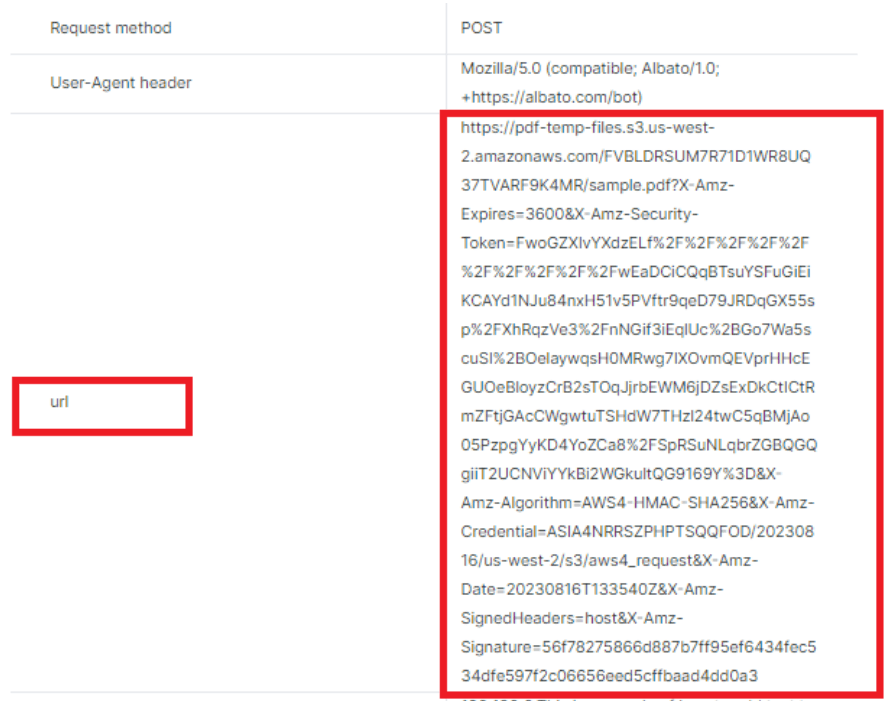
- Within the Automation Log, select the entry labeled Webhook has been sent and proceed to copy the response URL. This URL can then be used to access and view the output of the process.
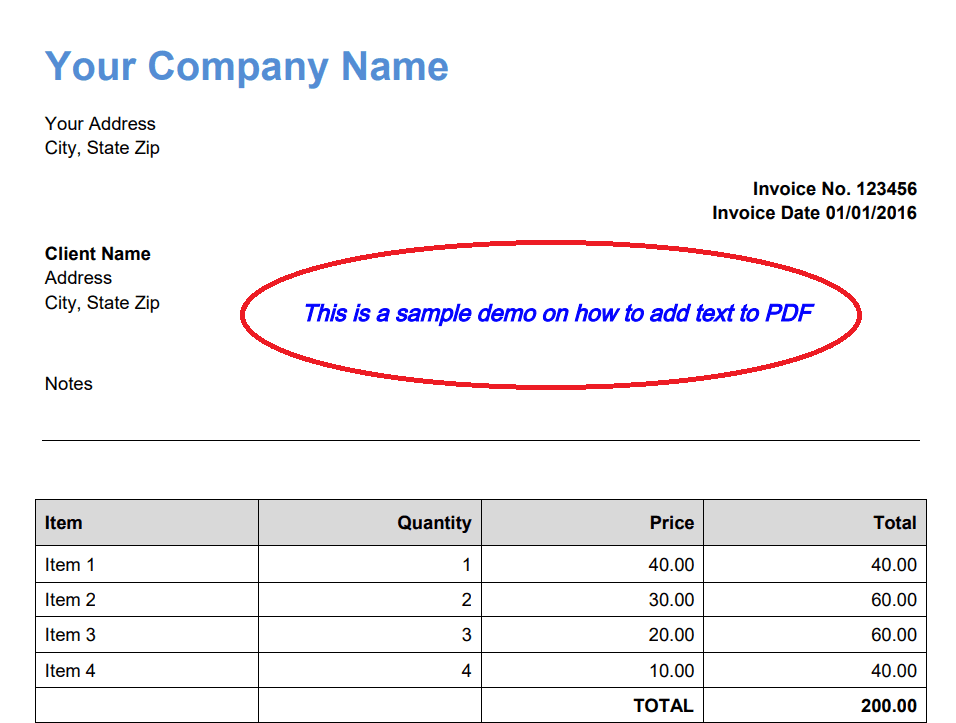
8. PDF Edit Add Output
- Here’s the PDF document in which we successfully added text using PDF.co PDF Edit Add API.
Throughout this tutorial, you gained knowledge on integrating Albato and PDF.co. You also acquired the skills to incorporate text into PDF documents using PDF.co PDF Edit Add API. This API enables you to include text, images, and signatures within PDF files. Additionally, you can utilize the API to add watermarks and fill out PDF forms efficiently.