How to Fill PDF Forms Using PDF.co PDF Filler in Zapier
Learn how to fill PDF forms using Zapier and PDF.co integration. Fill in PDF forms just with a few simple steps.
Useful resources
- Official IRS Form 1040 link https://www.irs.gov/forms-pubs/about-form-1040.
- Related tutorial: How to Get Form Field Names using PDF.co and Zapier.
Due to great variations of input sources, this tutorial will assume you have already set up the trigger phase before the “Do this” part, where PDF.co comes into play.
For the input PDF form, we will use IRS form 1040 (also known as Form 1040, Form 1040-SR, and 1040-NR).
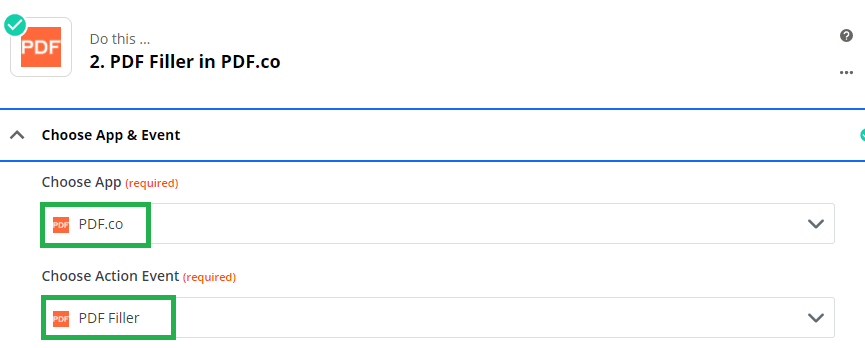
Step 1: Set Up PDF.co for Zapier then Choose App & Event
- Set up your PDF.co for Zapier.
- Under “Do this …” Choose App & Event search and select PDF.co from the list of apps.
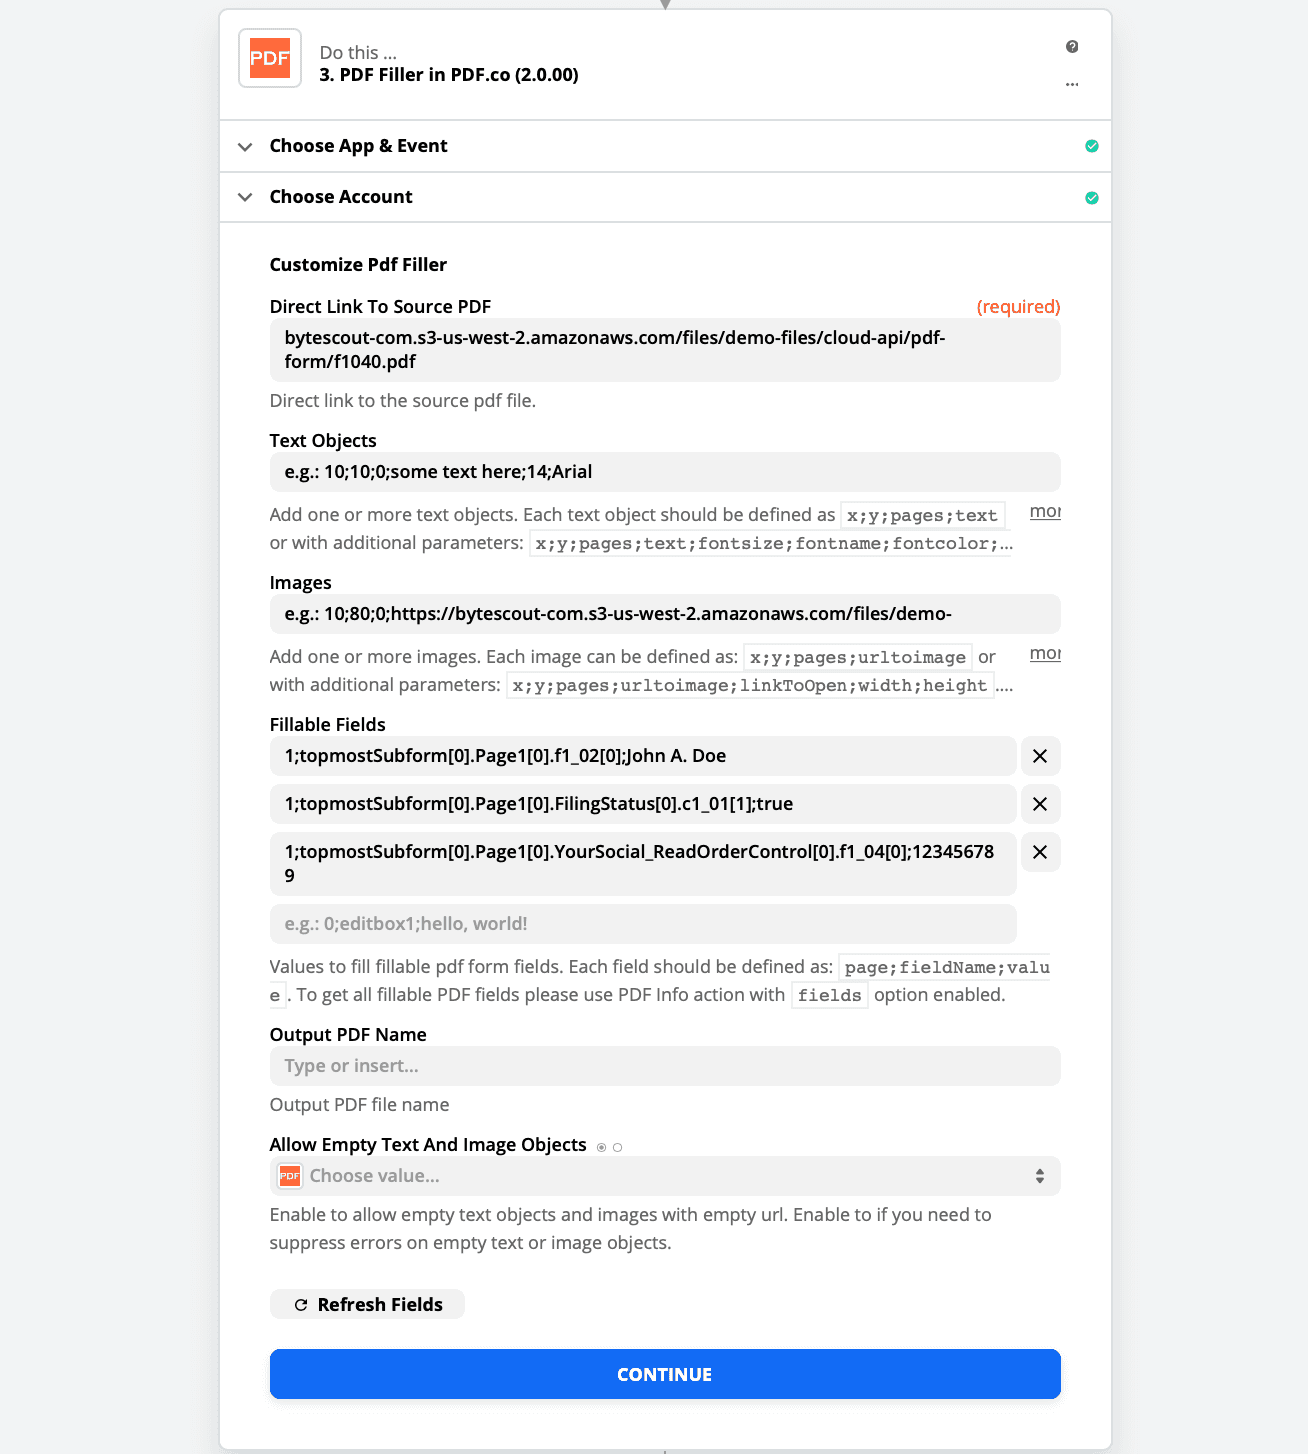
Step 2: Use the PDF Filler Function and Set the Direct Link to the File
- Under Choose Action Event select PDF Filler.
- Under Customize PDF Filler set the Direct link to the source PDF and paste your source file link.

Step 3: Set Up Values to Enter in Fillable Fields
- First of all, we need to find which exact field names are used inside this PDF form. To get field names we should:
upload the PDF file form into PDF Information and Fields online tool on PDF.co. - It will display the following list and you will see all fields under
FieldsInfothe section:
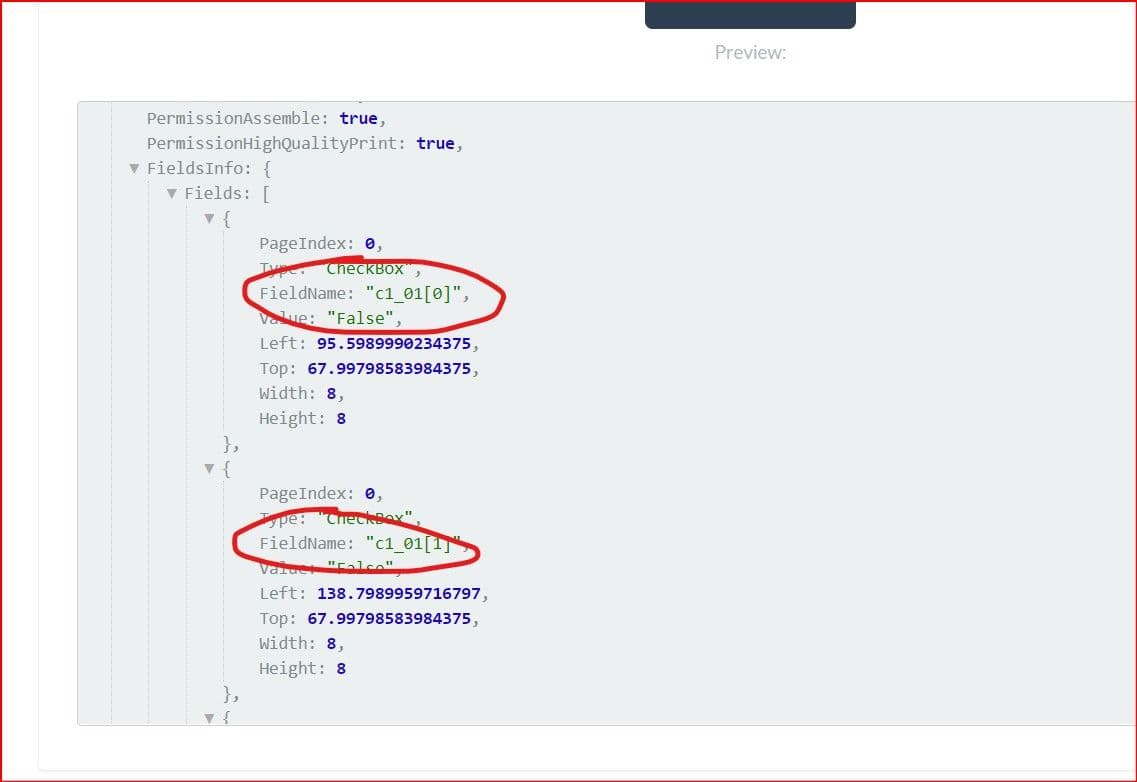
FieldName indicates a name of control we can fill out. It can be a text edit box, checkbox, or another control. For the text edit box field, we just need to set its text. For checkbox controls, we can use true or false to enable or disable a check inside this checkbox.
Do not see any form field names inside your PDF form? This tutorial applies only to PDF forms with fillable input fields. But you can always just add text, images, and links to any PDF using PDF.co and its PDF Filler by following this tutorial.
Check out the How to get Form Field Names tutorial to get PDF Form Field Names using PDF.co and Zapier.
Step 4: Use the Strings Provided Below to Fill Fields
Important: Page indexes start at 0 (zero). So, page 0 (zero) is the very first page, page 1 (one) is the second page, and so on.
In Zapier we should add the following strings which are telling PDF.co to fill the field by its name on a given page on page with a given value.
The format is pageIndex;fieldName;value.
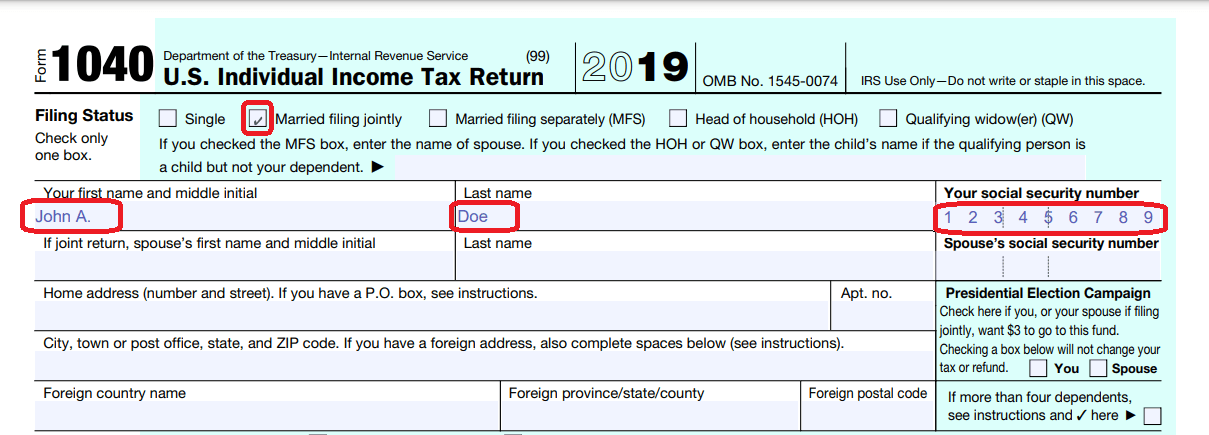
- For example, to fill the edit field on the 2nd page (page index is
1) with John A. Doe:1;topmostSubform[0].Page1[0].f1_02[0];John A. Doe. - And to select and check the checkbox named Married / Filling jointly on the 2nd page (page index
1):1;topmostSubform[0].Page1[0].FilingStatus[0].c1_01[1];true. - And also to put the value
123456789into the SSN form field on the same 2nd page (page index1):1;topmostSubform[0].Page1[0].YourSocial_ReadOrderControl[0].f1_04[0];123456789.
You should see something similar in this screenshot:
Step 5: Test & Review
On the Send Data step click TEST & REVIEW.

The returned URL is a direct link to the new PDF file with the forms filled.
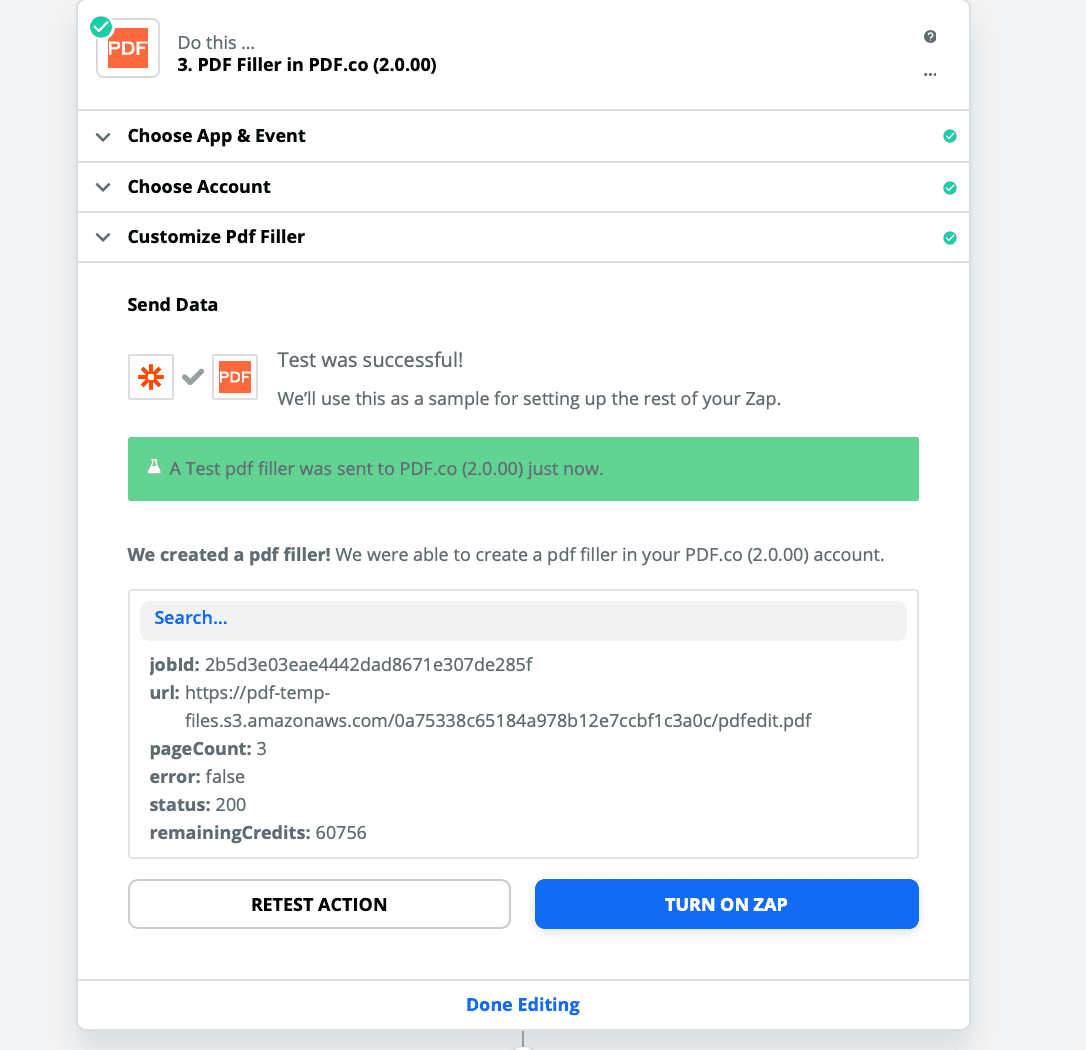
Step 6: Get the Output from PDF Filler for Zapier
You will get the output PDF with the name, checkbox, and SSN box filled with PDF.co PDF Filler for Zapier.
Step 7: Check, Continue, & Wrap Up
- Check if everything works correctly and without errors then hit RETEST & CONTINUE.
- Give a name to your Zap at the top-left corner, then hit Done Editing, you can then TURN ZAP ON.
- You can set up the next step to save the generated file in Google Drive or Dropbox depending on your requirement.
Note: Use PDF File Info Reader in Zapier with Extract Information About Fillable Fields From PDF Form set to true to get the names of all fields OR use PDF To Anything with JSON as the output.
You’ve learned how to fill PDF forms using Zapier and PDF.co integration. Now you know how to fill in fillable PDF forms just with a few simple steps.